Search the Community
Showing results for tags 'revell'.
-
I like desert colors, I like to build models in 1:72 scale. The model was built from two sets of Legato and Revell, I added a few more details, such as a rearview mirror.
- 11 replies
-
- 38
-

-
- Hurricane Legato
- Rafhart
- (and 1 more)
-
My next effort. This has also been sitting in the loft for a while. I think this is the Hasegawa kit in a Revell box. Lovely kit, goes together really well. The option I chose has the larger Ta152 tail assembly. I chose to finish the kit in the colours of "brown 4" of JG26 and example found in April 1945. This particular machine has the subject of many discussions about its colour scheme, all based on a couple of black and white photos. I've chosen what seems to be considered to be the most likely colours. Eventually I used 7 colours. It has RLM 75 and RLM 71 on the wings, RLM 81 and 82 on the fuselage, the made-up RLM 84 on the centre fuselage and RLM 76 on the nose and tail undersides. The underside also a natural metal section as well. All were sprayed on Vallejo colours except the RLM 76 whcih an Xtracolour shade. I didn't like the Vallejo colour. I had a problem with decal silvering, something I haven't had for years. Being used to Xtracrylic colours all being gloss, silvering has never been an issue. I struggled with the Vallejo gloss varnish to get smooth even finish. The flat coat was fine.I'll try another gloss coat n the next kit. Anyway, here it is. Thanks for looking.
-
 I have come to the conclusion that I have to start reducing the stash of model kits I have, starting with one that has been lurking in the bottom of the draw for the last 15 years. This is a model kit of the Deutsche Marine Type 143 Fast Attack Craft produced by Revell. Along the way I have lost the original packaging and there has been some minor damage to the mouldings on the sprue but nothing to prevent me building the model. I cannot remember why I bought the model in the first place, it was probably one of those spur of the moment things or I wanted to use it for bits, which was my want back in the distant past. However for whatever reason it was never cannibalised or built and has lain unloved until I saw a marketing picture of a completed model on the internet for the recently re-released kit. Having seen the picture my interest was rekindled and step one in stash reduction has been achieved. As I previously said, the box was lost along the way and some of the items have come off the sprue so I can’t start with the usual box and contents photograph so a picture of the new box art on the Revell website will have to do: I have to say that the new instructions with the re-released kit on the website are far better than the ones I have and so I have down loaded them to help me with the project. The German Navy has had a long association with S-Boats and the Type 143 was introduced into service in the late 1970s with a follow on sub class of Type 143A (which was also subject of a Revell kit). The Type 143 went out of service in 2005 with some being sold onto other navies. The Type 143 S-Boats were all named after birds with the lead ship in the class of 10 being named Albatross. These in common with all Fast Attack Craft were heavily armed and suited for operations in coastal waters, in the case of the Type 143, the Baltic, although they did operate as far afield as the Mediterranean. Armament consisted of two Oto Melara 76mm Guns, four MM38 Exocet Surface to Surface Missiles and two 21 inch Torpedo tubes facing aft. The ships were constructed with a composite hull (wood, grp and aluminium) and had four MTU propulsion engines developing a maximum speed of 40 knots. I am not sure what they were like to serve on but I suspect the shallow draught and narrow beam made them quite uncomfortable in a decent sea way. I am going to have to rely heavily on the internet for modelling reference and found a couple of useful web sites to help me although I am hoping not to deviate too far from the original kit: www.schnellboot.net/ http://s-boot.net/sboats-german navy.html The kit is at 1:144 Scale which is quite a nice size for adding detail. However I have decided that I will try and keep to the script and not deviate too far from an out of the box build. Although that said I have already decided I am going to replace the moulded railings, there may be one or two other minor adjustments but this should be a relatively straight forward build. As for the model kit itself the mouldings appear to be of good quality and I am hoping will fit together with little or no problems. I think replacing the kit railings with PE would make a massive difference and that is my starting point. So that is the introduction out of the way. I will be posting updates of progress of the build very shortly. Thanks for looking. Paul
 -
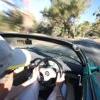
 Hello folks! Those who have seen my posts before may or may not remember that as a tropical forest ecology student I spend four months or so every year in Borneo. Following on from my successful Vampire built there last year, and motivated by the need to keep reducing my stash when when not in the UK, I shoe-horned the Revell Hunter and Airfix Swift into my rucksack this year - and managed to complete the Hunter and get the Swift 75% done! Not too bad considering the heat, discomfort and the fact I work six day weeks for fthe whole period. Anyway, here's the Hunter: it's actually the FGA9 which I bought for silly money at Telford a few years back - but I've back-converted to an early F6 by hacking an F6 tailpipe off the first Revell Hunter I built a good decade back, when you could actually buy the kit without selling major body parts. It represents XF526 of 63 Squadron, which flew Hunters briefly in the late 1950s before reforming later as a "Shadow" unit as part of the Central Flying School with FGA9s in the 1970s. I added some scratchbuilt sidewall detail, a bit of representative wiring in the undercarriage bays, a resin ejector seat and mainwheels from Quickboost, and the decals are Xtradecal. Hope you like! As well as being a pleasingly unusual squadron, it has a local connection as 63 were based at Waterbeach not a million miles away from Ms.Vulcanicity's folks in Ely. Lastly, here's the view from my modelling desk over the jungle! The sharp-eyed might spot the Hunter in this view.
- 17 replies
-
- 38
-
-
Hi guys! I'm Rodolfo Angeles from the Philippines. Been a lurker for a longtime. I decided to become more active by sharing my current build. It's the new revell 1/72 T-55. Real nice molding.
-
Hello Finally I had some time to continue the work on my Ost-Front scene. I've finished the models some time ago: Ju 87G-2 Stuka 'Kanonen Vogel' and Heinkel He 111 H-6. Both in 1:72 scale. Now it's the time to build the diorama for them. The plan is something like that: So, here is what I've done so far: Ju 87G-2 Stuka 'Kanonen Vogel' from Academy Heinkel He 111 H-6 from Revell Perspex box base with both of them arranged: Some SC250 bombs from Czech Masters (6) and one left from Messerschmitt Bf-109 kit: Some SC1000 bombs. Four again from Czech Masters and two from the Heinkel kit. They are a little bit bigger. Not sure which are in correct scale but I've decided to use all of them. The sledges to transport the bombs I've made from matches. Cut, glued, filed, airbrushed, drybrushed and finally weathered with washes. Here is how they look with the bombs: And finally Kettenkrad to tow the sledges and Kubelwagen for pilots (who are not ready yet). Both from Academy kit. The diorama will have some boxes, barrels etc. plus of course ground crew servicing the planes and the pilots resting and waiting for the mission. Thanks for watching.
- 33 replies
-
- 17
-
-
- kubelwagen
- heinkel
- (and 8 more)
-
I fancy building a Heinkel 111 I said to my eldest yesterday,"I,ve got the big scale one going nowhere" he replied, next day the behemoth is dwarfing my work table.Now big projects usually are my downfall(USS Fletcher and Bonne Homme Richard to name two) so hopefully it's third time lucky,he got the kit for £19:99 when Modelzone closed which was more than a bargain,reviews of the kit are generally favourable the main gripe being the beautiful rivet detail on the wing's are absent from the fuselage there is more than enough detail in the box and that's fine by me.I know my WIPS are usually five pictures and finished so I will try and make it a bit more detailed than usual. Here's the box and contents. And as a size guide here are the main component's with a 1/48 Spitfire for comparison. This as far as I remember the second 111 I,ve built the other was Matchbox's many moons ago.see you soon!
-
My entry for the Bf 109 GB will be the Revell/ICM Bf 109F-4. I haven,t participated in a GB for a while but have been looking forward to this one. The kit comes with decent engine detail with the option to display the engine but i recon i'll be closing it up as it spoils the outline of one of the best looking variants of the 109 family. Heres some spue shots etc, i lost damaged the box so no box art i'm afraid. Ooops last one went a bit pear shaped, sorry!!! You get the general idea i'm sure. Cheers, Greg
-
I have a Revell DH-2 in stash and this GB gives me an excuse to finally start it. Greg in Oklahoma
- 33 replies
-
- 4
-
-
- De Havilland
- Revell
- (and 1 more)
-
 My 14 year old daughter joined the air cadets last year & it appears that she has become mad keen on airplanes (swmbo is not impressed). Her favourite at the airshows we go to is the Eurofighter, despite my fondness for Lysanders, Hurricanes and the Miles Messenger. As it happens my step daughter gave me this kit for Christmas, so it seems it's time to build a kit that requires no ez-line. As with most of the planes I build, this one will end up hanging from the ceiling, so I shan't be bothering with any aftermarket bits & bobs. However, before it gets hung up & gets its' full load of weapons fitted, I'm going to try and photoshop it into this picture: Typhoon by Andy Moore, on Flickr It worked quite well with Sally-B, so I thought I'd give it another go. I can't remember the last time I built a Jet, so this could be a disaster. My paints of choice are Vallejo model-air, so if anyone has any thoughts on the shades of grey that I should use I'd be most grateful if you could share those thoughts. Here are some pics I took that are fairly self explanatory, initial progress should be posted tomorrow. Revell 1/48 Eurofighter by Andy Moore, on Flickr Revell 1/48 Eurofighter by Andy Moore, on Flickr Revell 1/48 Eurofighter by Andy Moore, on Flickr
 -
 First of all thank you for your feedback. I did some changes to model thanks to your suggestion. 1.) removed some decals 2.) added some details, repainted some areas, fixed wrong color on some parts Thenk you for your suggestions and helping me to get better modeler ! Finaly i have some spare Money. I was so close to buy an air-brush, but i think i will stick to brush painting and see how far i can go with it ! New pictures at the bottom of post ! Greating As a kid i had a revell tomcat as a toy and i really wanted to build one now. The kit is not new , just reboxing from an old set with new deaclas. The set is not so hard to build, there are few gaps that needed some filling, but over all it was straight build. The kit has deep and wide pannel lines so it is kinda good for brush painters, since you can apply much more layers of thined paint and still you won't loose those lines. When it comes to painting, i am a huge fan of ''what if'' models. The paints i used are mix of revell acrylic and vallejo acrylic paints. Model is whole brush painted without using any masking type since i have a problems with it. When i use a type i always get some paint beneth it :/ . You can see whole proces of Building this model here : Build is straight from a box with no aftermarket parts. Only thing i didn't like was lack of missiles decals. Story behind this model would be that deep done in South Korea jungle, the kitty is waiting for her pray. Ready to intercept any threat coming to Unated States. I done some heavy wathering that i normaly don't do, since it is tomcat, tomcat in a jungle . Hope you will like this build, it is wird and missiles got me almost crazy, but i am pleased. Any feedback and comments are welcome. Have a nice day ! Second photo set with changes ! Thanks for watching
- 17 replies
-
- 13
-
-
Hi, I have been a bit quite on this forum for a while, have been modelling and moving houses etc, so have not had time to post. So I thought it being a new year I would post a work in progress. I have always wanted to build this kit, but the price has put me off, so when I saw the kit for £15 at Telford last year I could not resist any longer. I have already started, could not wait, so will post images of the work done so far later. The scenario is a derelict bus being taken apart, so I have had to build a new front end, thankfully there are photos online for reference. Cheers Richard
-
As my last build, a Fokker Dr.1, drew to a close I found myself really looking forward to finally getting stuck into this one. (I'll post an RFI for the Fokker over the weekend when I can take some pics in natural light) I'll be doing a tandem build of two 1/72 SPAD XIII. Namely the Revell XIII C-1 and the Eduard Profipack XIII late version. Both will be finished in French markings. Spad-Double-Build by Martin Fay, on Flickr Here's the Revell - (the original tooling was 1963 apparently - it's older than I am!!!) pretty low part count, lots of flash, cheap as chips. There's not much in the line of detail so I think it'll need a little help in that regard. Revell-Spad by Martin Fay, on Flickr And here's the Eduard - (2003 but updated with new parts in 2009) Lovely clean sprues, nicely detailed for 1/72, clear parts and photoetch details for the radiators etc... Yummy! Eduard-Spad by Martin Fay, on Flickr Both are eye wateringly tiny so I'll be making use of the magnifier again. Oh, and this will be my first attempt at using Photoetch; what could possibly go wrong?
-

1/32nd scale MiG-29G 'Polish Air Force'
tomprobert posted a topic in Ready for Inspection - Aircraft
I picked up this long out of production single-seat 1/32nd MiG-29A cheap recently, and fancied doing a Polish version so also ordered a set of Decals from Techmod. I built this more or less out of the box, but did close the upper air intakes with plastic card, made some FOD guards for the exhausts and intakes, and added a seat belt set from Eduard, but kept the cockpit closed as it's fairly basic for this scale. Paints were from Xtracolour with varnish coming from Humbrol. I thought about coating it in gloss, as the Polish MiG-29s are very shiny and clean, but decided to do more of a satin coat for a better scale effect. The Revell kit is actually a MiG-29A version, but after doing a little research the differences between that and the G version very mainly internal so I could get away with it without too many problems. MiG-29G, Polish Air Force, 41st Tactical Fighter Squadron, Baltic Air Policing, 2012. With the new Trumpeter kit hitting the shelves, no doubt a few more of these will be sold off - hopefully I can snap another one up at some point. Tom -
I doubt this one will turn out as nicely as Shaun's, but here goes anyway. I wanted a nice bright colour, and really like Volcano Orange, but also wanted to try out a Kawasaki candy green. I did a few plastic spoon tests with Tamiya spray paints. I know that Gravity Colors make a 2-part orange but postage to Aus is as much as the two bottles of paint, so I wanted to see if I could get the same effect with rattle cans. First, pics of the body and a comparison with the 917 that is still not finished. And now, the spoons. From left to right - I tried two different base coats under TS73 clear orange: TS84 metallic gold (over TS14 black) and then TS76 mica silver, next TS52 candy lime green, and then clear orange over white primer and with the TS65 pearl clear over that. The green is nice but doesn't "pop" as much as expected. The pearl clear is interesting with its mica chips but they only show under very bright light. Of the two oranges, I like how the particles in the mica silver catch the light, but prefer the "glow" that the gold produces. Here's another test test with a better coat of gold over the base black and two coats of clear orange. This is the colour I'm going to use. It would look better in our bright Western Australian sunshine but it's dark outside now, so electric light will do. I hope to get the 917 finished first, (and ideally the Lotus 88) but enjoyed messing around with the colours.
-
R.M.S Olympic 1:700 Revell The Royal Mail Ship (RMS) Olympic was designed and built by Belfast Shipbuilders Harland and Wolff. She was the lead ship of three ships, the others being The RMS Titanic; and HMHS (His Majesties Hospital Ship) Britannic. The Olympic in a rather sad way has always been eclipsed by her sisters' tragic careers. Perhaps the most famous was the sinking of the Titanic with the loss of 1502 people when she hit an Iceberg and sank on her maiden voyage. The Britannic was also to suffer being sunk when she hit a mine off the Greek island of Kea in WWI, thankfully with a loss of only 30 lives, as she had 1066 people embarked at the time. The Olympic was launched for The White Star line in 1910 and commenced her first voyage on 31st May 1911 in a publicity stunt timed to coincide with the launch of The Titanic. Olympic continued with her service on the North Atlantic route until WWI. In may 1915 she was requisitioned by the British Admiralty to be used as a troop ship. She was striped of her peacetime fittings and armed with a mix of 12 Pounder and 4.7" guns. She had the capacity to transport 6000 troops, no doubt in no where near the luxury afforded her previous paying guests! She made various trooping voyages, initially to Greece for the Gallipoli campaign. Then later on charter to the Canadian Govt she transported troops from Canada to the UK. It was thought that she would be able to transport troops to India via the Cape, however the ship did not have enough coal capacity being designed for the trans Atlantic route. Late on in WWI she was fitted with larger 6" guns and gained a dazzle camouflage which must have looked quite something on a vessel her size. In 1918 in the only know incident in WWI (of a merchant ship sinking a U Boat) the Olympic rammed and sank U-103. It is estimated the over 200,000 troops were moved by the Olympic in WWI. Following WWI the vessel was returned to civilian service and she was modernised. 38,000 passengers were transported in 1921 which would to prove the pinnacle of her career. Following changes to US immigration laws, and the great depression trans Atlantic passenger trade began to dwindle. In 1934 at the instigation of the UK government, Cunard merged with The White Star line to form Cunard White Star. This lead to the new company being able to build two new ships RMS Queen Mary and RMS Queen Elizabeth. The Olympic was then laid up in 1935 and subsequently scrapped by 1937. In addition to the 200,00 troops of WWI the Olympic made 257 round trip crossing of the Atlantic carrying 430,00 passengers whilst travelling an estimated 1.8 million miles. In spite of these facts it is still sad her main claim to fame still seems to be as the Sister to the ill fated Titanic. The Kit The R.M.S Olympic arrives in one of Revells standard opened ended boxes. Inside we find two hull halfs, 6 sprues of white plastic, one small clear sprue and one feel of rigging thread. The parts all look well moulded with no flash or any other problems evident. The details are mainly raised and probably a little overdone for this scale, but should look good under a coat good under a coat or two of paint. Construction starts with gluing the two halfs of the hull together and inserting two spacers which help keep them apart and hold the main deck up. Once this has dried the main deck can be attached. Revell advise doing the rudder and base at this point, though I suspect most modellers will leave this until later on. Following on from this the bridge and various deck houses are assembled and attached. This sequence is then followed for the rest of the upper decks. If using Revells thread for rigging be careful to follow where it is attached under the upper deck before it is attached to the model (3 each side for each of the funnels and two at each end for the masts). After the upper deck is attached the funnels need to be made and attached. After all of the decks and funnels are in place a multitude of deck equipment, ventilators and life boats will need to be attached. Finally the fore and aft masts are placed on. Colour call outs are given for all parts in Revell colours only (No change there!) Conclusion Overall this kit should provide no real challenges to the modeller. The instructions are easy to follow and the parts look good. This should make into a nice model of the Olympic. If any modellers are up for a challenge then a conversion to the Troopship with Her multi colour dazzle camouflage and 6 guns could be made. Revell model kits are available from all good toy and model retailers. For further information visit
-
This is my second aircraft for the GB, a parallel build to my Italeri MiG-29. Like others, it will be build out of box. I choose the soviet "blue 66" of the boxart. Start soon ciao Ale
-
How exciting it is for me to submit my first build to Britmodeller. Apart from introducing myself last night this is my first submission. Oh my goodness, I'm putting one of my works in the public domain for inspection. Please be kind to me, but be honest as well. If you think it's bad then say so, I've got my hanky out in case. I'll try and be a man and take it on the chin. As they say, if it doesn't kill you it makes you stronger. I have built several kits over the years but I wouldn't say I'm a prolific builder, I build about four aircraft or AFV every year of scales 1/72, 1/48, 1/35 or 1/32. My latest build is Revell's 1/48 scale De Havilland Mosquito B Mk. IV. Kit no. 04555-0389. Since I returned to modelling about 25 years ago when I was 26 years old, I have tried to improve my knowledge and skills in the hobby. Of course, the hobby does not stand still as manufacturers have continued to turn out ever more impressive kits in recent years, and techniques and skills on how to model them, especially simulating certain effects and weathering that are on the real things, continue to develop and move apace. I have always tried to pick up on some of these ways from here and there and apply them to my models but with my Mosquito build I took this a stage further by following an article in Military Aircraft Monthly on building the very same kit. My inspiration came from Tony O'Toole's article in MAM February 2010 called 'Malta's Maritime Mossies'. Tony's modelled a silver coloured Mossi with the Royal Navy in post-war Malta. Due to the fact I couldn't obtain some of the aftermarket items he mentions I wasn't able to copy to a tee what he's made, but otherwise I followed everything else. I think it's a good idea to follow a build that's been published in a magazine or on the Internet by an experienced modeller as it gives confidence to lesser developed modellers that they are following a good path. Although I've heard other experienced modellers say there often is no right or wrong way in this hobby and instead it's a matter of preference and finding out what works best for you. My build was going smoothly but, wary of what I was reading in the article, I dreaded coming up to the undercarriage as the author had issued warnings about its frailty. I didn't help myself when I failed to follow the sequence in the instructions when I glued both halves of the main wheel wells together before inserting the u/c legs. The instructions show clearly in stage 45 that the u/c is attached to the wheel well floor before gluing the two nacelle halves together. As a result I couldn't apply pressure to the legs to make them stick in the holes in the wheel well floor. Due to this the u/c was weak and wobbly. I tore them off, they broke, and I had no spare u/c. I had no choice but to change plan and model the Mossie with its u/c closed. What a pity because I was looking forward to the icing on the cake of gluing the entry ladder to the hatch as my very last work before finishing the model. As is common with all kits pretty much these days, Revell did not supply a display stand to model it in flying mode. I used a Tamiya silver rattle can to paint the main colour as per MAM article. As with some previous projects, I've failed to get washes to stay in the recesses to give a more 3-d effect and show weathering. I first tried water paint thinned down, let it stay for about 10 minutes, then used a damp cloth to wipe it off the surfaces and leave it only in the recesses. When this didn't work I tried the same with thinned Humbrol oil paint, with more failure. I couldn't get the wash to sit in the recesses but it adhered too well to the surfaces. With this my silver bird lost much of its shine. Whilst I'm trying to represent a working military aircraft that isn't likely to remain looking as good as knew after several uses, the oil paint was not dirtying my model though in a way that looked realistic. Instead it was leaving stains and blotches that didn't imitate anything that would be on the real thing. So I carefully rubbed this off as best as I could without rubbing off the decals. I didn't manage to avoid this entirely but luckily I had spare decals. Another problem I got was that the stains from the exhaust on the side of the engine nacelles is over done. Tony O'Toole used MIG pigments powder and advises not to over do it as less is more. I don't have MIG pigments but I have Humbrol weathering powder which I was guessing is similar. I am happier with the stains on the top wings as they are lighter in tone and I used my finger to smudge the powder (with a drop of thinner) and draw it in the direction of the airflow. I'd already done the sides of the nacelles and when these were over done I was unable to undo it. Despite using Future floor polish to try and make my clear parts as transparent as possible I think the result is disappointing. I also found some of the clear parts were a poor fit. [I'M GOING TO HAVE TO LEAVE IT FOR NOW AS I CAN'T FIND HOW TO LOAD MY PHOTOS FROM MY INHOUSE PICTURES FILE. WHEN I CLICK ON THE TAB 'INSERT OTHER MEDIA' THE CHOICES ARE 'INSERT EXISTING ATTACHMENTS' or 'INSERT IMAGE FROM URL', AND NONE OF THESE SEEMS TO WORK TO GET TO MY PICTURES. MAYBE THERE ARE INSTRUCTIONS SOMEWHERE ON BRITMODELLER TELLING HOW TO DO IT BUT I DON'T HAVE THE TIME NOW TO GO LOOKING, IT'S ALMOST TIME FOR MY BED]. I'LL RETURN SOON.
-
Revell's Airbus A310 kit is well over 30 years old but nonetheless its a nice kit and quite easy to build. Unfortunately the kit is now very rare and the price tags are high nowadays. I was lucky to find this one for a reasonable price on a Swiss auction platform. I already built 3 of them about 2 years ago but I allways wanted one in KLM colors.This kit was the Swissair release,so the whole paintjob had to be done by hand using the good old airbrush. The decals are a mishmash and stash-bash...if this can be called this way ... The KLM logo for the tail was taken from a Airfix DC-10 decal set,the small KLM logos and the "Royal Dutch Airlines" are from a Revell 767 set,doors come from an Airfix A300 and the registration was build up using parts from the KLM 767 kit and from the British Airways 767 Revell kit. The cockpit window is from a left over Authentic Airlines set,cabin windows are from the Revell A330 and the coroguard panels and details from the PAS Decals A310 detail set. Paints are a mix of Revell,Humbrol and Testors enamels. The build was straight forward,the only thing I corrected was the nose and shape of the cockpit area.Revell did not get the look right there. With some filler and sanding it was an easy fix. I am very pleased with the outcome,altough I never used so many different decals for one project before. Hope you like it, And with "something else" KLMs other type for its extensive european network during the early 70s and 80s
- 21 replies
-
- 21
-
-
- Revell
- Airbus A310
- (and 1 more)
-
Hi folks Haven't seen many of these posted up yet so I thought I'd get in quick! The rivet counters have had a bit of a go at this, but it looks like a Mk.IX to me (and to 99.9% of everyone else I'd think). If you want a cheap, easy-to-build big Spit for your display shelf then look no further. Regards J A
- 14 replies
-
- 27
-
-
Hello all, Having completed the Air Baltic Avro, I have finally got round to finishing my Iberia One World A320. The kit is the Revell A320 (The Edelweiss boxing) which I recall picking up at the local toy shop, and managed to haggle a lower price for it too (Can't remember how much) but the kit itself was alright, the usual filler was required but that was only around the fuselage join, not much problems elsewhere it terms of fitting. Only problem was every part suffered flash, and there was a few pieces that suffered quite badly, not an issue obviously as it comes off easy, just delays the process a bit. Spraying was easy, white coat was all that was needed for the body, though I manage to accidentally get some green paint down the front side, so had to tidy and re-spray that bit, which set it back again. Lesson learnt, keep wet brushes and open paint pots well away from the model! The One World, windows, doors and Iberia related decals are from Classic-Airlines, and are lovely to work with. The rest are from the stock Edelweiss decal sheet. Thanks for looking! James.
- 5 replies
-
- 14
-
-
- A320
- Iberia One World
- (and 1 more)
-
1/700 HMS Sheffield from the Revell kit with WEM etches. Painted with Life Colour and Vallejo. Base is a piece of MDF with DAS clay sea, painted with enamels. Dave
-
My Revell boxing (03214) - the runners still carry the Matchbox code PK-76 Natural light using a flash Finished with Vallejo paints and Humbrol washes for Panzer Aufklärungsabteilung der Panzer – Lehr – Division, November 1944.
-
Hello, This is the beautiful Revell Rafale M converted into a Rafale C. There are many details to modify but the most important is the landing gear. Hope you like it, cheers
- 25 replies
-
- 53
-
-
 Revell is to release in Otober 2016 a new tool 1/72nd Supermarine Spitfire Mk.II kit - ref. 03953 Source: http://www.plastik-modellbau.org/blog/revell-neuheiten-2016/2016/ V.P.