Search the Community
Showing results for tags 'revell'.
-
Hi all, So I'm well into an RAF Red Arrows Hawk build and thinking about the final finish - I know they keep these super clean and glossy but would it have any kind of panel lining ? Without, I think it might look a bit toy-like in 1/72... Suggestions welcomed! Cheers, Dermot
-
 Well hello everybody! I have decided to head back to the Gentlemans scale for a nice relaxing stress free, almost spring time, out of the box build. (Probably) Since My Father's Day gift from the kids last year ( Tickets to the Cosford air show ) I haven't been to an air show since I was knee high to a grass hopper and the sight and sounds of such a wonderful aircraft have stuck in my head. The rest of the show was pretty cool too. Here's a brief glimpse of the Typhoon in flight. https://wn.com/mobile/eurofighter_typhoon__cosford_airshow_2016 I had bought the Revell kit from the bargain bin in my LMS in Birmingham a few months before not knowing that I would be seeing one in flight. Long story short, this will be my next build, it's a far cry from my last mammoth three month long build of the venerable Airfix Bf109-E. Back to the matter at hand...... The boxed offering is a "Eurofighter Typhoon F2, R.A.F Coningsby UK, 2005/2007 No.3 Squadron. It is the magic number after all. There are other schemes but this one is the one I put a pin in. The Cosford jet was a FGR4 but it was a single seater like this one so that's good enough for me. I hope you will join me in building this lovely kit. Let's hope it is a lovely kit eh? Any hoo here is the obligatory box shot after I have cleaned the bench and set up the almost ritualistic first shot of a new build. Nice innit? I'm going to post now and follow up after dinner. Take care and hope you're all having a lovely Friday eve. Happy Modelling. Johnny Typhoon.
- 313 replies
-
- 11
-

-
- Revell
- Eurofighter typhoon
- (and 1 more)
-
Hi Folks, I'm not sure if this is the right forum for this question but here goes. Following some ebaying with a touch of alcohol the other night I find myself the proud owner of a Revell 1/72 f/a-18E super hornet...... .....Without the canopy. My fault as it was described in the advert 😢 Anyway I am looking for a supplier of an aftermarket canopy for said beast, to no avail as yet. My main question is will an F/A-18a or c canopy fit the super hornet? As Pavla do one in this scale. If it doesn't quite fit no problem as I can pose it 'lid up'. Any advice please you Rhino buffs?
-
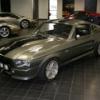
New 'prancing horse' project for my daughter... Feel free to ask any questions or make any criticism or comment - may need some 'guidance' with this one, folks. More next week. Ian.
-
New 'prancing horse' project for my daughter... Feel free to ask any questions or make any criticism or comment - may need some 'guidance' with this one, folks. More next week. Ian.
-
Its been a helluva 12 months, hospitalised for half of it, split up with my partner, moved house and then, Donald Trump. I finally feel like mangling styrene after a years layoff and thought I’d start small. Any smaller and I’d need a microscope. This will be OOB and that teeny canopy is going to test my shaky hand but it’ll be cool to get a model built again. Not sure about about which scheme, I’m favouring the tiger stripey one. Incidentally, the new issue has the instrument panels left off back in 2011 Paint wise I’ll be continuing my experiment to make my Mr El Cheapo pre-mixes from last year that worked pretty well on this beastie. Boxes: Sprues Amazingly good detail Decals and minute canopy I'll see y'all next week! A
-
"Woe to you, oh Earth and sea, for the Devil sends the Beast with wrath Because he knows the time is short Let him who hath understanding reckon the number of the Beast For it is a human number, its number is six hundred and sixty six" - Iron Maiden ("The Number of the Beast") The Aircraft I've always wanted to do a RNoAF viper since I find their uniform grey scheme to be quite interesting compared to the standard viper camouflage used by most countries. I noticed that a lot of their markings started with 6, some were 66x, and I thought... could there be a 666 around there? Being Norway, birthplace of black metal (which I happen to like), I knew there would! Indeed, the RNoAF's 666 is the original 80-3666. According to info from f-16.net, the prudish US engineers refused to work on this plane unless the 666 was covered up. It also happens to be a test bird. I decided to build this aircraft in its original form, an F-16A rather than the updated AM version. Alas, there are no markings out there to do this since Vingtor's "early F-16s" sheet is now OOP. Thankfully, it's "late F-16s" sheet worked well as there were enough 6s and 9s to do the fin numbers. I have read that early RNoAF vipers had dark grey walkway markings rather than black ones, so that would be the only inaccuracy that I'm aware of. The Kit I used the original Revell F-16A boxing which has a Belgian "Spitfire" aircraft on the artwork. It is currently the best representation of a F-16A in The One True Scale. For some strange reason, my copy had some sprues in the older light grey (with a yellow-ish tint) color and others in the more recent standard grey. The transparencies weren't tinted either which is great since 666 had a smoked rather than a golden canopy. I sprayed Tamiya smoke (X-19) thinned at 5:1 from the inside for this effect. Norwegian and Danish vipers come with a searchlight on the starboard nose, necessary since so many missions are over water. I drilled a hole where appropriate and glued some plasticard from the inside so the tiny transparency would stay put. Being a Norwegian viper, I of course wanted to be armed with Penguin anti-ship missiles. Although there is no picture of 666 carrying them, being a test bird it is likely to have done so at some point. I later discovered a picture of 667 carrying a menacing 4x Penguin load, plus 4x Sidewinders. I have no way of knowing if this configuration was ever carried by 666 but it was too cool to ignore. For this, I needed two extra weapons pylons which I took from an older kit that I was planning to send to modelling Valhalla (i.e. the bin). The Penguin missiles themselves were taken from the Hasegawa Weapons Set V and are beautifully rendered and have their launchers included too. The Revell F-16 is relatively hassle free, with an excellent cockpit (no aftermarket needed IMHO), accurate dimensions, and mostly good fit although like many Revell kits, the landing gear is a bit fiddly. Note that the instructions don't say to put any nose weight but although it is not a tail sitter, its center of gravity is quite precarious and does tend to fall back with the slightest nudge, so I do suggest putting in at least some weight (less than 5g will suffice). Panel lines are quite fine but, sadly, Revell didn't bother with any rivets which makes it look a bit dated compared to the amazing new(ish) Tamiya F-16. Alas, the Tamiya can only be built as a block 50 and I'm losing hope that any earlier variants will be released in the near future. Decals All decals including stencils came from the Vingtor "late RNoAF F-16AMs" sheet. The decals are very thin but easy to handle and snuggle in perfectly with Microset/Microsol. The only annoying thing is that they are too crammed into the very small sheet which makes it annoying to cut. I have a love-hate relationship with Eastern European decals (some are far too thin) but these were an absolute joy to work with. Painting/weathering The aircraft was painted with Gunze 36270 while the nose was painted Gunze 36118 (woefully light for the real thing but makes a good viper nose). Norwegian aircraft have their canopies painted black on the edges and this was done as well. Pylons and the centerline fuel tank were painted Gunze 36375. The red/white squadron fin marking was painted manually since there was no decal for it. Thanks to the climate, Norwegian birds are typically very clean, and so only mild weathering was done, with a Humbrol dark grey panel wash and later, some streaking with Windsor & Newton oils. Enjoy! #HailSatan #AveSatanas #nemA
- 14 replies
-
- 14
-
-
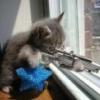
 The Boeing 727 was one of the best selling airliners from the early 60s until the end of production in 1984 with 1832 aircrafts produced. Some are still in service today. With so many airlines operating the 727 over the years,there is a great choice of liveries available. Airfix re-issued their 727-200 kit in 2010 and 2012 with nice decal sets printed by Cartograph and Revell re-issued their ancient 727-100 kit in early 2016 in the attractive Germania livery,done by Daco. I gues both kits don't need much introduction,as these have been available frequently over the years. Revell's 727 is probably the most accurate of the two,as they got the nose shape pretty much right and also some other details are better than on the Airfix kit. The wheels are a tad too big on the Revell kit,they are better done on the Airfix version. For my 727 I used the wheels from some Airfix 727 leftovers I found in my spares box. As the Airfix 727s nose shape is not the best,I decided to replace that part by the Daco windshield for the Boeing 737.It fits quite well on the 727 and improves the look significantly. The other thing I changed was the raised panellines on the wings,which I rescribed and I relocated the fence from the back to the leading edges by using plastic card. And I thined the engine exhausts by sanding them down from the inside.The plastic is too thick there. The fit of the Airfix 727 was pretty bad,the re-issues had some badly warped parts,esp.the wings and on one kit even the fuselage halves. The wings bent themselves even more after the halves had been glued together....I tried to correct them as good as possible but its still visible. On all kits I replaced the front gear doors with new ones created from plasticard in the correct size ,as on both Revell and Airfix,the doors are too short. The new decal sets are of great quality printingwise but the Iberia/Aerolineas Argentinas decal set has some serious mistakes. One piece of the aft decals had the blue reversed.Dark blue on the upper half,light blue on the lower part.Luckily I had the right colors to repaint those areas and correct that.Furthermore they forgot that the 727s door arrangement is different on the right side so the logos had to be cut off and relocated to the correct position. Being printed by Cartograph,I was surprised to find such inaccuracies.Even the Iberia set had mistakes which the instruction sheet oversaw as well. The worker was either in a hurry or a complete douchebag Revell's 727-100 is despite its age a nice little kit which is fun to build.It has no open windows,except the cockpit and no clear parts.So the windows need to be filled and replaced by decals.The very nice and detailed DACO decal set provides cockpit windows as well as cabin windows already printed on the cheatline. The sets providedes enough details to enhance the look of the finished model. On the Airfix kits I used decals from my extensive stash as well as from a detail set to further enhance the looks. Painted are all of them with Tamyia pure white from a spray can,Testors and Revell for the grey and metallic parts. It was a timeconsuming but fun project building those 4 727s simultaneously . Enjoy the pics...kitty has made a guest appearance as well.... Boeing delivery line Renton...
- 9 replies
-
- 19
-
-
- Boeing 727
- Airix
- (and 1 more)
-
Yes you may well reel back in horror as you realise these are not the latest all singing all dancing Eduardagawafix kits.I got two for a tenner at my LMS in the Revell sale and for that price I don't have to worry how they turn out! Monogram released this kit in 1979 with a plethora of fault's lack of gull wing being one but a fair few more but that shouldn't mean they don't deserve to be built,the mold's are as good as new and a lovely decal sheet is supplied only one scheme though so I think I will finish the second one as the yellow nosed trainer from Airfix's recent boxing albeit I think that was a Mk1,so grab your rose tinted glasses and let's have some fun! Box art first.
-
Decided to build a couple of easy 1/72 aircraft kits to get the Mojo flowing. Depending on what you read this is a Horten Ho229 or a Horten Go229. Take your pick Built from the Revell kit, painted with Vallejo Air acrylics, using most of the Eduard etch kit.
- 12 replies
-
- 28
-
-
 Hi all, Model number 3 while further paint dries on the Higgins Boat build. Another of Revell's "Make and Play" kits, snap together with lights and sound, pre painted. Didn't remember to take picture showing start time, sorry. Completed. It's a good size, looking at the size of the pilot's seat I'd say it was about 1/48 and could make a reasonable base for a detail fanatic. Not bad for a fiver. IanJ
- 2 replies
-
- 6
-
-
- Revell
- Make and Play
- (and 1 more)
-
With a disaster befalling my Mig-23 in the From Russia With Love GB I would like to join this GB with a 1/72 Revell Gloster Meteor. I have already build this kit in an MPM guise but this time it will be in NMF and hopefully I will avoid some of my mistakes from last time. The kit is quite nicely laid out but lots of flash. As always all comments very welcome. Dave
- 27 replies
-
- 3
-
-
- Revell
- Gloster Meteor
- (and 1 more)
-
 Quick start on a long thread! I have in the stash a number of fw200 condors. The first was from a local shop which I acquired back in 2007ish! I started to hand paint it but gave up on the interior parts! This thing predates my acquiring an airbrush! It's been sitting for a while........ then i "saw" the newer boxing c4 bomber kit, I went home with that.....finally I found a trumpeter c3 on half price. Yeah, I got that too. My plan is to build dönitz personal aircraft, but the info seems confusing/misleading, I have the of decal set for it. I will need some more bits and a load of hacking to complete this build. It needs more windows, more seats, less bomb bay and a couple of turrets, or just one? Depending on where you find the profiles. The trumpeter box will represent the longer range conversion trials aircraft, or one of them. The third kit, well, that's still wrapped up nicely......for now. I will post some pics, but I need to shoot them first. I have the kagero book fw200, winkle browns wings of the Luftwaffe, something from osprey, another periodical and some internet references. I am going to need help, especially with scratch building..... For me this will be an epic conquest.
 -
The Messerschmitt Bf-109G-10 differed from earlier versions of the 109 by the nature of its manufacturing, or rather, re-manufacturing. As aircraft came in to be rebuilt to the G-10 standard a number of differences did not seem to warrant upgrading, additionally the supply of the "right" equipment was unreliable. As a result some G-10 aircraft would have the DB605D and some the DB605AS; some had the MW50 power boost, some didn't, some were equipped the larger oil radiator and some were not. Large wheels, small wheels, wheel well wings bumps, maybe, maybe not, short tail wheel, long tailwheel, large tailfin, small tailfin...the list goes on and on. What that means for modelers is that a photo can be very helpful in figuring out which set of variations the G-10 being modeled had. Of course if there is no photo your build may not be correct BUT without a photo no one else can prove it is wrong either. Since I ended up with a couple of these kits I figured I should actually BUILD one. Started it tonight, put the teeny-tiny joystick and the tiny seat into the small cockpit floor. Magnifying glasses anyone? Greg in OK
-
Good Day All, Here's my rendition of Revell's 1/72 B-17 F. All in all it's a good model but there are a few challenges. The ball turret has several frame lines missing which were added. Also the fit of the two clear parts is not the best. The engine push rods were way out of scale and were replaces as well as adding ignition wiring. The blanking plate for the chin turret for the G model doesn't fit well at all. Quite a bit of time was expended to get it blended. You have to modify the tail guns to fit in the tail interior. The tail clear part was marred with interior tool scratches and had to be polished out. I did OK with it but next time we'll look to use the Pavla alternate though it wasn't great either. The ammunition boxes for the waist guns just did not make sense for an F, they were abandoned. Next one I will have to scratch them The ammunition boxes on the ball turret interfere with rotation and the ammunition feeds really need to be replaced. The pilot and co-pilot seats reminded me of recliners..they were modified. Eduard bits were used for the instrument panel and throttles...excellent product. I dipped the nose glazing in Future (or Pledge floor care here in the Stated now) to get it as clear as possible because it is very thick. Pavlas wasn't great either. I took quite a bit of time to blend the clear front windows and associated panel lines into the fuselage. I'm OK with it but I think Ill do better on the next one. It is painted with Vallejo acrylics as I no longer use oils except for washes and weathering, I do not spray them anymore. Kitsworld decals were used for the artwork. The kits national insignia were used as they were the correct size. The Kitsworld national markings for the wings were undersized in my opinion. Tom Probert gave me some very useful information on painting the interior...thanks so much. It was about 18 months when I asked for it Tom..better late than never. Well onto the pictures. As always all comments are appreciated. All the Best! Don ps: Yes that is the new Airfix 1/48 Stuka B-1 in the background. But that's for another post...LOL!
- 11 replies
-
- 37
-
-
Hello all ... ok im still learning so hope this turns out good. This is The Revell 1/48 F-86D Sabre Dog. I chose the kit markings for the 85th Ftr. Squadron circa April of 1955. They were stationed about 200 miles away from me at Scott AFB Illinois. Kit is a pretty much out of box build. This was my first ever attempt at Foiling a kit. Hope everyone likes it.
-
Hi folk's,the Eagle has been a favourite of mine since they appeared during my first spell in modelling,now I don't do jet's only two built in the last four years but I fancied entering this GB when it came up but a new kitchen is on the way so at present it's like a bomb site with plaster drying on every surface and being my work space all my 1/32 builds are packed away till September so I,m restricted to smaller kits at present.Anyway I was on Holiday and popped into my favourite model shop in Bridlington to find the one time alladin's cave a shadow of it's former self with nothing jumping out at me when I spied a tatty Revel box in a pile of Esci(yes Esci) kit's,the price label was faded away so eight quid was the agreed price.it's a twin seater and inside is a Monogram molding with raised lines but beautifully Molded Ideal for a quick build and hopefully fun And thankfully a decent decal sheet despite the age. I fancy the higher viz striped tail scheme.
-
Dear fellow Britmodellers, being primarily an aircraft modeller, I do go astray occasionally to the "dark side" of modelling ... yes, the stuff with tracks and wheels. This is my attempt on Revell's 1/72 Cromwell, built from the box, in markings of the 11th Armored Division in Western Europe, 1944/45. I always find it most difficult to assemble link & length tracks in this scale, especially to get them conform to the drive sprockets; luckily, the mudguards cover most of my inability! The kit's decals are supposed to be laid over an air vent (on the front of the turret) and over nuts and bolts (on the backside of the turret) which required copious amounts of setting solution ... and still look crappy. And I did knock off the antenna (?) on the top of the turret while handling the model for my photographer, sorry about that! I painted the model with Gunze/MrHobby acrylics (H73) and weathered with artist's olis and Tamyia pastel chalks. Thanks for your interest. All photographs by Wolfgang Rabel. Greetings from Vienna!
-

MiG-21F13 Syrian Air Force Revell 1:72 *Finished*
sven_ss posted a topic in From Russia With Love GB
Started this one also -
 Hello Chaps, This is my 4th and final post that will have me caught up with the builds that I couldn't post on here due to the "Photobucket Saga". Anyway, this one is the 2000 Revell re-boxing of a 1997 Revell/Monogram mold and comes with a nicely detailed cockpit and recessed panel lines. It goes together really well, was a pleasure to build and is a nice representation of the Me 410 and the decals went down really well without issues. There are some fiddly bits inside the cockpit that might be too fiddly for a beginner, but I'd imagine that anyone with half a dozen kit builds under their belt could handle it. I built this straight out of the box except for the addition of seat-belts which I made from wine bottle foil. So, I'm not going to say anything more about it except that if you have one in your stash and have been thinking about building it, you should enjoy it when you get around to it. I hope you like the following images as much as I liked building her.... So there she is and if you'd like to see how I built this model here are my YouTube "Build Update" and "Final Reveal" videos: Build Update #1 Video Link: Build Update #2 Video Link: Final Reveal Video Link: Thanks in advance for taking a look and leaving comments, much appreciated! Until my next build; the Airfix 1/24 Hawker Typhoon Mk.1B "Bubble Top" version, happy modeling and have fun! Cheers, Martin
- 10 replies
-
- 27
-
-
- Revell
- Messerschmitt Me 410
- (and 1 more)
-
Just putting a place marker down for a pair of PT 17 Kaydets (Stearmans) in 1/48th one will be Blue and yellow US Army the other a silver US Navy shade. One will be the latest Revell version and the other the older Lindburg kit. Will get started in a little bit once some hawks are finished off in an other GB cheers Graham
-
Hello Chaps, This is another build that I completed during the "Photobucket Saga" preventing me from posting photos, but now, service has resumed. I built this kit straight out of the box except for after-market resin wheels and scratch-built seat-belts, and, I have to say that it was a nice kit that went together very well without the need for filler. It has a well detailed cockpit, but unfortunately, my photos do not include a view of the cockpit complete with the steering column and bomb-sight in place, but everything else is shown. This kit would be far improved if it had a fully loaded bomb bay with bomb bay doors in the open position to show its load, and, two BMW 801L engines that you could display with the option to have engine cowlings open or closed. Ha well, I can dream. Apart from those wishes, I really enjoyed the build. I borrowed a Luftwaffe Pilot and rear gunner/ radio operator from my Revell Pro-Modeler 1/48 Heinkel He 111 build to give an idea of the scale of this aircraft. I hope you like the following results of my efforts as much as I enjoyed putting it together.... Well there she is, the third Luftwaffe bomber added to my growing collection, now sitting next to my Ju 88A-1 Bomber and my Heinkell He 111 H-22 bomber. If you'd like to see my YouTube 'Build Updates" + "Final Reveal" videos for this build showing how I built this model, then here are the links to those: Build Update #1 Video Link: Build Update #2 Video Link: Build Update #3 Video Link: Final Reveal Video Link: Thanks in advance for taking a look and leaving any comments, much appreciated In the meantime, happy modeling and have fun! Cheers, Martin
- 10 replies
-
- 32
-
-
- Revell
- Dornier Do 217E-4
- (and 1 more)
-
Evening all The latest off the bench is Revell's new 1/32nd Spitfire MkIXc, which as I'm sure you know follows their release from a few years back of a Spitfire MkII and thus the breakdown of the kits is almost identical. This was a very pleasurable build and it went together relatively trouble free; the only filling needed was as the wing root fairings where the moulding was slightly short - I've seen this on many other builds and know it wasn't just my kit which has this issue. The simple solution is to add a small plastic card shim to each fairing and smooth it in with Milliput and a wet finger, and the problem is solved in under 10 minutes. At £25 I thought it fantastic value for money and will definitely be purchasing a few more. Decals for this one came from Xtradecal as the code-letters were off colour-wise on the Revell sheet. Paints were from the Xtracolour enamel range and it was finished with a coat of Humrol Matt varnish. Supermarine Spitfire McIXc, 132 Squadron, RAF Detling, November 1943: And alongside the MkIIa which I completed earlier in the year: Let's hope Revell keep giving us 1/32nd Spitfires at such reasonable prices - and roll on that P-51D! Tom
- 10 replies
-
- 33
-
-

-

-
- Revell
- Spitfire IXc
- (and 1 more)
-
I meant this kit to be a bit of a quick build but it turn out a little more involved. The fit of the wings in-particular is pretty poor and the detail is a work of fantasy for the interior. Fortunately you can't see much of it. However, it can be bashed into something that looks half decent from about 3ft away. I am surprised no one has come out with a new Beau with the recent increase in 1/32 kits as the Revell kit is looking very tired in the market.
-
 Hello all, Well this is a bit of a return to old ways for me. It's been well over two years since I've found time in my life to even think about modelling...work and children will do that to you! The last time I tried to post a WIP on BM it was Italeri's 1/48 Tornado converted to a GR.4 which started in 2008 and didn't reach a conclusion in Ready for Inspection until 2012 so I don't have a good track record! However, in the hope that it may help spur me along a bit I figured why not post this on BM just to keep some pressure on myself! So my plan is to take the Airfix boxing of the Jaguar GR.3/ES in 1/48 scale (also recently re-released by Revell): Convert it to this aircraft which I was lucky enough to taxi a few times at Cosford a few years ago, using various bits and bobs plus plenty of scratch building: Then end up with something similar to this, as per the previously mentioned Tornado: Like the Tornado I have no plans to build it straight from the box. I hear on the grapevine that the newer Kittyhawk kit has its shape issues but stress I've not seen it in the flesh myself. Whatever the story there though, I've had this on the to-do list for a long time and, having built the Airfix Jag before, I know it's pretty good in terms of overall shape, if outdated in terms of surface detail. It's also cheap which makes it ideal for this sort of kit bashing and major surgery as if I screw it all up I'll not feel quite so bad! So this is going to be a full strip-down and rebuild to see what I can get out of a relatively old kit. See you at the other end...in 2019! Andy -------------------------------------------------------------------------------------------------------------------------- EDITED: Added on 8 Jan 2016 for anyone building a Jag at the same time as this one: JAGUAR REFERENCES Useful websites: SEPECAT Jaguar in Detail Prime Portal - Jaguar GR.3/3A Prime Portal - Jaguar GR.3/3A Britmodeller - Jaguar GR.3/3A Useful build threads: Deanflyer's Jaguar GR.1 (A very nice build of the Airfix kit) Neil's Jaguar T.4 (A beautiful full Paragon conversion - his own - of the Airfix kit) RMP2's Jaguar GR.1 (A very good dual build of a Phantom and the Kittyhawk Jag which contains some useful comparisons with the Airfix version) palacefan's Jaguar NS (The Airfix kit built as a Nigerian Jaguar International export, showing an alternative way to fit the Paragon flaps) Mike's Jaguar GR.1 (The Airfix kit built very well with some lovely modifications made where needed) Muzz's Jaguar GR.3 (A nice build of the ARTF snow scheme with some Paragon extras) Piero's Jaguar GR.3 (As always, Piero's build are a cut above with plenty of detail) Useful books: SEPECAT Jaguar GR.Mk.1 - Aeroguide 2 Jaguars 1973-2007 - Royal Air Force Jaguar A/B/GR.1/GR.3 - HT Model Jaguar Squadrons - AD HOC Jaguar - Aeroplane Illustrated SEPECAT Jaguar - Pen & Sword The RAF Jaguar - Patrick Watson Big Cat Diary - Wg Cdr John Sullivan After-market Accessories Having decided to make this a dual build, I am planning to use a fair number of accessories so list them here to help anyone else who may wonder what's out there... GR.3/3A NeOmega Resin 1/48 Jaguar GR.3 cockpit set - This will require further conversion to change the 12.5cm x 12.5cm (1:1) LCD Multi-Function Display of the Jaguar GR.3 (Jaguar 96) to the 15cm x 20cm Active Matrix Liquid Crystal Display (AMLCD) of the GR.3A (Jaguar 97) as it is the later type I am building in this case. Note, Aires also do some decent avionics and cannon bays for the Jaguar but I've elected to scratch-build these. Worth also being aware that there are differences in the avionics bay between all marks of Jaguar. The separate gun barrels set is, I believe, only useful for French Jaguars. T.4 Paragon Designs Jaguar T.2 conversion set (4895) - A resin replacement for the forward fuselage which is sadly out of production and hard to find now. Both Aires 1/48 Jaguar Wheel Bays (4595) - An excellent resin detail set which, along with the air brake interior set, is capable of fitting the Airfix kit quite nicely; despite being marketed as serving the Kittyhawk Jaguar. Aires 1/48 Jaguar Speed Brakes (4606) - Another top quality set which is designed for the Kittyhawk Jaguar but can be made to fit the Airfix kit very well too, even when used in conjunction with the resin undercarriage bays. Only one small snag in that the pressure refuelling receptacle in the starboard bay is moulded too small. Not a great drama if you're happy to live with it. Master 1/48 Jaguar Pitot Tube & Angle of Attack Probe (AM-48-057) - A high quality turned-brass reproduction of the Jaguar's pitot tube plus AoA vane. The pitot is a vast improvement over the chunky plastic or resin equivalents on the market. Quickboost 1/48 Jaguar A Correct Air Intakes (QB48 573) - An improvement set for the air conditioning pack atop the spine. Be aware that aerials for the Jaguar A are not necessarily suitable for the RAF models though. Scale Aircraft Conversions 1/48 Jaguar Undercarriage (48037) - A metal set of replacement oleos which are not only more detailed and crisp than the kit parts but, if you are adding a fair amount of resin and other details, will help support the weight.
- 182 replies
-
- 14
-