Search the Community
Showing results for tags 'raaf'.
-
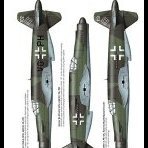
Gee this GB came around far too quickly for me. If I had sense I’d sit this one out and watch from the sidelines as I have too many builds on the go already....but where’s the fun in that. For this GB I plan to build Special Hobby’s 1/32nd P-39F/Mk.1 monster in RAAF colours. The kit looks to be nicely done (though I have seen the are wing join issues)....... with a couple of resin extras.....gotta have extra resin! ...with a couple of resin extras.....gotta have extra resin! I won’t be using most of the supplied decals, instead I’ll be using masks made for the model for all the main markings. The scheme will be the one supplied, FA-F A53-6, which unfortunately crash landed near Liverpool, NSW in 1943 and was scrapped re-crated and returned to the US 5th Air Force shortly thereafter. She is notable for her colour scheme and lack of information about it. There are very few photo’s of her and none in colour. She had Sky Blue under surfaces with a camouflage of Olive Drab and an unidentified Grey. The grey is thought to be either Dark Grey or Extra Dark Sea Grey or some other similar grey??? I’ll worry about that when I get to it. This will definitely be an OOB build for me as I just have some many other projects on the go at the moment, but it’s a build I’m really looking forward to.
- 53 replies
-
- 8
-

-
- Special Hobby 1/32nd
- P-39 Airacobra
- (and 1 more)
-
For those of you who don't know what the title of this build is referring to "whispering death" is the name given to the Bristol Beaufighter by the Japanese as it wrought havoc on their forces in both Burma and in the Pacific. For this build I will be building an example flown by the RAAF which was used to great effect over the islands of the Netherlands East Indies. I will be using the 1/48 Tamiya TF.MK.X kit which I believe should have all the parts I need to reproduce one, here are the box and contents shots; As you can see the kit is still sealed in it's original bags. No decals for it yet but I'm planning on getting this set from DK Decals which has a nice one on it in the TSS scheme; http://www.dkdecals.cz/48016 RAAF Twins 1_48_1ZS.jpg It could still end up being one in the all over foliage green scheme but I prefer the one shown above. I won't start on it yet as I have too many on the go but once the Buffalo is done I should start it soon afterwards. Thanks for looking in. Craig.
- 61 replies
-
- 13
-
-
- Beaufighter
- Tamiya
- (and 1 more)
-
 Hi all, Latest off the production line is a Tamiya 1/48 Beaufighter TF Mk.X finished in the markings of 31 Sqn RAAF engaged in operations over New Guinea and the Netherlands East Indies against the Japanese during 1944. I have used the excellent Tamiya kit and equally good decals by DK Decals with paints by Gunze and Aeromaster, the kit is an absolute pleasure to build with no problems at all and the only alteration I made to the kit was to move the aileron actuators on the tail planes from the upper surfaces to the lower surfaces. So without further waffling here are the pictures of the finished item; Thanks for looking in and for those interested here is the WIP; I strongly recommend popping along to the Pacific At War GB which I have built this as part of as there are some truly excellent builds on it, and it's not too late to join in either!! As usual all comments and criticisms are gratefully received. Craig.
- 21 replies
-
- 56
-
-
- Tamiya
- Beaufighter
- (and 1 more)
-
Dear all, Please find below some images of another recent build. It's the 1:72 Academy P-51C Mustang build as a Mustang Mk.III of the RAAF, as operated from Fano, Italy, on the Adriatic coast in 1944. I used an Eduard Zoom set for the cockpit and dropped the flaps, while the guns were replaced with brass tubes and the kit's bombs with some Eduard Brassin items. The camouflage was sprayed on using a masking set from Kora Models. The decals are from On Target decals for Commonwealth Mustangs as I liked the Southern Cross image on the tail. It's a great little sheet, but it has unfortunately a few errors when it comes to instructions. The Mustangs from 3 Sqn RAAF didn't have a medium blue spinner but a red one (like all allied fighter aircraft in Italy) and didn't have the white identification bands on the wings and tail. They didn't have the yellow markings on the wings either, but I only found that out after I finished painting the whole lot, so I left that as it was. I hope you like it! Peter PS: looking at the images I realize I need to add a bit more grime to the wheels... These Mustangs were kept well but worked hard.
-
One of the few (and perhaps best known) Hudson units operating over the MTO was Australian-manned No.459 Squadron. These Hudsons (Cyclone-engined Mk.III and Mk.IIIA as well as TwinWasp-engined Mk.V and Mk.VI) had RAF serials, of which some 80-90 are known. Last pictures of these a/c, taken in early 1944, show most of them in high-demarcation anti-submarine RAF Coastal Command scheme of Extra Dark Sea Grey and Dark Slate Grey (Temperate Sea scheme) over White. But in the web there are also photos from earlier period, showing the a/c in low-demarcation scheme. I would like to know your opinion, whether these planes wore Temperate Land Scheme (DG/DE over Sky), earlier Temperate Sea Scheme (EDSG/DSG over Sky), Transport Command scheme (EDSG/DSG over Azure) or Desert Scheme (DE/MS over Azure). Some of them feature more contrasted areas, some are less-contrasted, so.... The photos I mention depict: T9397 Mk.III http://www.adf-gallery.com.au/gallery/459-Hudson/P007594 and http://www.adf-gallery.com.au/gallery/459-Hudson/P990152 V8998 Mk.III http://www.adf-gallery.com.au/gallery/459-Hudson/P892238 AE510 Mk.III http://www.adf-gallery.com.au/gallery/459-Hudson/P027089 FH242 Mk.IIIA http://www.adf-gallery.com.au/gallery/459-Hudson/P027085 FH257 Mk.IIIA http://www.adf-gallery.com.au/gallery/459-Hudson/P007596 FH285 Mk.IIIA http://www.adf-gallery.com.au/gallery/459-Hudson/P027092 FH292 Mk.IIIA http://www.adf-gallery.com.au/gallery/459-Hudson/P027088 FH300 Mk.IIIA http://www.adf-gallery.com.au/gallery/459-Hudson/P016921 FH351 Mk.IIIA http://www.adf-gallery.com.au/gallery/459-Hudson/P027084 as well as the unidentified a/c featuring nose art http://www.adf-gallery.com.au/gallery/459-Hudson/P007597 As the "anti-sub" planes belong to the same batch FH227-FH459 it looks almost sure, that white undersurfaces and fuselage sides were introduced "in field" over the previous low-demarcation scheme. But this is only my opinion, however... Cheers Michael
-
 R.A.A.F. BRISTOL BEAUFORT MK VIII No. 6 Squadron, Goodenough Island, circa 1943/44 Flight Lieutenant William "Bill" McRae Wood, DFC (Special Hobby 1/72) Hi all! Fresh from the oven! I usually don't build models under commission, but in this case it was a especial request and a favor to a fellow member of my modelling club (SAPMA). Dudley Hokings is a senior member of the club and due his age he no longer is able to build a model. It doesn't mean he is present in our meetings and he loves a good chat. Anyway! One day he approached me and asked if Ifould do hem a favor. He was a very close friend with a veteran who used to fly the Beaufort during the world war 2. He has now passed away, but Dudley is still friend with his wife Trish. He said he had a kit and decals do make the exactly version flew by his friend Bill Wood. Of course I said Yes! Here are some reference photos: Dudley gave me some valuable information that he had been gathering along the years for this dreamed project. It has precious war photos from the pilot private collection and also the pilot's accounting regarding the correct serial number for his aircraft. The nose art consists of a representation of Diana "The Goddess of Hunt", some bombs representing the missions and "Trish" Bill Wood's wife name. The kit The kit he had available was not the RAAF version but another British original version of the Beaufort. However, it has most of the parts necessary to convert to Australian built Beaufort (Pratt Whitney engines, antennas etc), but not the essential part to convert the dorsal turret (I had to scratchbuilt it). The kit was airbrushed using Gunze acrylics: Sky Blue underside: H323 Light Green camouflage: (H302) Light Earth camouflage: (10% H47 + 90% H72) Weathered using a combination of techniques like oils, pigments and water colours. A final coat of Gunze H20 Flat Clear was sprayed overall. The antenna wire is made of EZLine. The model: Comments?
- 32 replies
-
- 60
-
-

-
- armouredsprue
- RAAF
- (and 1 more)
-
Did any of you know about this one? Sure would be great to have a Beaufort in the air! Mike http://warbirdsnews.com/warbird-restorations/bristol-beaufort-restoration-report.html
-
 Hi all, This is the fantastic Kinetic F/A-18B Hornet kit. It's already that accepted go to subject for a 1/48 legacy Hornet as most options can be built from the various boxings that have been released over the last two years. I'm building this one as the first assembled in Australia' Hornet A21-103 done up in 3 squadron markings. 'The decals will come from the now defunct Afterburner Decals sheet for RAAF Hornets. The build has been vice less so far with my available time spent doing up the cockpit tub. I've not chosen to go the AM route here as the kit tub is more than acceptable and when dressed up looks the part. Kit decals adorn the instrument panels and side consoles and funnily enough don't look to bad. I've had a good look at the kit plastic and photos from the Reid Air Publications book and the correlation between kit and real life is good. The seats are almost done, though I need to install the Aussie specific harness pattern to make them SJU-9/10 seats. Though perhaps not accurate the idea is to load it with training rounds to demonstrate what stores it can carry. So the idea is Stn 1 - Training ASRAAM Stn 2 - LGTR (BOL pylon and LGTR adapter) Stn 3- Tank Stn 4- Captive AIM-120 Stn 5 - CL LITENING Stn 6- ELTA-8222 Stn 7 - Tank Stn 8 - Training GBU-38 (BOL pylon) Stn 9 - ACMI pod or TCTS pod depending on the time frame. There's other assemblies I've worked on but this is the main output so far. Hope you like it. Michael The real thing. Airliners.net photo removed The kit tub so far. The fit is absolutely spot on. Pardon the instrument coamings as they aren't complete and are a bit on the glossy side. And the supplied seats are really nice too, just no harnesses. The full length intakes are really nice And all of the other jiggery-pokery
 -
Hello everyone ... I honestly had not considered doing a WIP for this old build. It was started in 2003 and languished in a box until last year. I had stopped it originally due to my burnout in 2005. Then when i came back to modeling a few years ago she sat there staring at me. I had kept intentionally putting it off for a few reasons. First is lack of info on my particular subject. Second is a serious lack of display space ! This thing is big, its bigger than the airfix 1/24 scale mustang i have ! When i joined Britmodeller one year ago today ... yes its my first anniversary. It was to try and get information for this particular build. Along the way ive discovered many great people and like to consider some of them friends in a way. I have over the course of three inquiries secured enough info to move this into the “Do” pile. So without further blabbing heres my 3/4’s built Monogram PBY-5 Catalina. I always wanted a Black cat so that was my intention from the word go. When i found out Australia had Black cats i knew that was for me. Im a bit of a nut for Australian subjects. So my target is this plane, a Black cat from #20 squadron RAAF. Early 1944. I have the plane broken into many sub-assemblies but here is where she is today. Major components. Interior shots of cockpit, waist positions. I added the radio room/navigators station from an old monogram B-17. Not that its very visible ? But i know its there. I removed the nasty looking molded rope and will replace it with a real piece. Port waist section. Starboard Minor sub-assemblies Im still undecided as for which ordnance i will mount under the wings if any ? I will be using a combination of decals and masks for the markings. Decals i have in my spares and whatever else is made with masks. For those interested heres is a link to the conversation in the WW2 aviation chat area. Id like to thank @Ed Russell, @Finn, @Magpie22 , @expositor, & the others for all the help you have given me. https://www.britmodeller.com/forums/index.php?/topic/235036672-more-help-with-raaf-catalinas-particularly-ordnance/ So i say thanks for your patience Britmodeller for putting up with me for a year. Wish me luck 😉 on the end of a 15 year adventure with this WIP. Dennis
- 19 replies
-
- 19
-
-
- 1/48th Monogram
- RAAF
- (and 1 more)
-
Ever have one of those kits you regret starting? I picked up the ICM 1:48 Spitfire Mk VIII going cheap. Sink marks, very poorly fitting parts and a lot of flash. I had to use a humongous load of filler. But I finally managed to beat it into some sort of submission. Brush painted with my interpretation of fresh foliage green camouflage using Tamiya acrylics, underside is Italeri acrylic. A slight weathering with diluted oils and finished with a Matt Tamiya clear from a rattle can. Markings are for A58-504 flown by F/O Rex Watson, 452 Squadron RAAF, Balikpapan, Borneo, August 1945 from the Eduard Aussie 8 package. Thanks for looking. And some photos outside
- 13 replies
-
- 30
-
-
- Spitfire VIII
- RAAF
- (and 1 more)
-
With a few successful quick builds and a couple of shelf sitters sorted, I think my mojo has recovered sufficiently for me to make a start on my first serious build of the year. Just before Christmas I picked up the Airfix 1:48 Hurricane Mk 1 in its more recent outing in its Tropical form. I rather liked the silver doped machine, however while searching around on the internet I found an Australian example, a single Hurricane Mk 1 fitted with tropical equipment presented to Australia by the UK government in 1941. The aircraft officially had the serial A60-1, however flew with its RAF number of V7476 throughout its career, information about which can be found at the following website: http://www.adf-serials.com.au/2a60.htm. I also found information on the markings from the review of an Aussie Decals sheet for this aircraft at the Aussiemodeller website: http://www.aussiemodeller.com.au/pages/Reviews/Decals/A48060Hurricane.html. My intention is to complete the aircraft in its final markings of overall silver with blue and white RAAF roundels and a red spinner. A quick rummage through my decal collection confirmed that I am able to put together the appropriate markings with what I have. Any advice or comments gratefully received!
-
 Here is my 1/48 Airfix Hurricane finished the Hurricane Mk 1 fitted with tropical equipment presented to Australia by the UK government in 1941. The aircraft officially had the serial A60-1, however flew with its RAF number of V7476 throughout its career, information about which can be found at the following website: http://www.adf-serials.com.au/2a60.htm I also found information on the markings from the review of an Aussie Decals sheet for this aircraft at the Aussiemodeller website: http://www.aussiemodeller.com.au/pages/Reviews/Decals/A48060Hurricane.html. Paints are a combination of Tamiya rattle cans and brush painted Tamiya and Italeri acrylics. Build thread can be found here; https://www.britmodeller.com/forums/index.php?/topic/235031997-airfix-148-hurricane-mk-1-in-raaf-colours/& Apologies for the dodgy photos, weather outside just too bad to take photos outside as I normally do. And updated with some photos outside:
 -
 21 Sqn & 23 Sqn RAAF CAC Mustang Decals 1/72 & 1/48 Red Roo Models This provides two decal options for CAC CA-17 Mk 20 Mustangs used by the RAAF. 1. 21 Sqn (City Of Melbourne) Sqn, reformed 1st April 1948. As a training sqn they flew the CAC Mustang, Tiger Moths and the CAC Wirraway. The Sqn provided pilot and gound crew training. 2. 23 Sqn (City of Brisbane) Sqn, again reformed on 1st April 1948 as a Citizen Air Force Sqn (Reservists). Mustangs, Tiger Moths and Wirraways again were used for training. Conclusion This is a great sheet if you fancy something different or antipodean for your Mustang. There is a small amendment sheet not shown for the Red Bird Markings. Highly Recommended. 1/72 1/48 Review sample courtesy of
 -
75 Squadron RAAF CAC CA-17 Mk.20 Mustangs Post-War 1/72 & 1/48 Red Roo Models This provides two decal options for CAC CA-17 Mk 20 Mustangs used by 75 Squadron RAAF post WWII. Following WWII Service and disbandment on 1948 the squadron was re-formed in 1949 and operated the Mustang before converting to Meteors. GA-V was the mount of the squadron commander; Wing Commander Richard Cresswell. GA-B is an overall NMF aircraft with very little in the way of markings. Both of these aircraft were kept immaculately clean. Conclusion This is a great sheet if you fancy something different or antipodean for your Mustang, Highly Recommended. 1/72 1/48 Review sample courtesy of
-
Have made some solid progress on number three. Need something camo between those two silver ladies. Fuselage together with seats and remaining cockpit items drying ahead of being added and the fuselage being closed up. I weighed the nose weight this time as I had been asked previously and forgotten to do it. There is 30 grams of lead sinkers behind the rear bulkhead which will do the trick on this one. These were flattened with a hammer and super glued in place on top of and around the forward undercarriage bay. The High Planes Models 'EE Canberra Starter and Fan Set A' are being used on this one as it carried the uprated Avon engines. They need a slight trim ahead of fitting and really look the goods. I am also using the High Planes Models 'GAF Canberra Mk20 Wingtip Bombs' set. Looking forward to breaking those out and giving them a whirl. As I was trawling through Hannants recently I noticed paint masks are now available for both the B2 and T4. Also on the way are detail brass etch sets that include undercarriage door detail and flaps. Might give these a go on number four. Cheers, AGW..
- 27 replies
-
- 11
-
-
- Canberra
- S&M Models
- (and 1 more)
-
Having followed the gestation of this much awaited kit, I received my order last week. Upon opening the box I was pleasantly surprised at the quality and detail staring back at me. I have been eagerly awaiting an accurate replacement for the old Airfix kit for quite some time so as to fill a large gap in my 1/72 RAAF collection. The five grey and one clear sprues are crisply moulded with finely engraved panel lines consistent with any of the major manufacturers. IMG_0199 The clear part that represents the canopy and navigator windows is moulded as single part that forms a section of upper section of the aircraft - Smart! It allows for easier attachment and clean up and less chance of messing up the canopy which is such a prominent feature on the Canberra. IMG_0188 IMG_0187 The instructions are clear and the decals look very nice and are in register. While I won't use the RAF version supplied in the kit the stencils will come in handy for my RAAF examples. Construction Part 1 Having surveyed the instructions several times it was time to remove the fuselage, cockpit, nose section and canopy. A little tidy up of each and some tape to check the fit and all looked very good, very good indeed. IMG_0189 IMG_0190 Things lined up rather well especially the cockpit bulkhead to fuselage and clear plastic parts. I added the nose which for my example that will be a T4/Mk21 that does not need the clear section. To make the B2 there is a different nose section that allows for the fitment of the clear nose. Note the clear nose does not come with the T4 boxing. The shape looks accurate to my references and way ahead of any equivalent Canberra kit that I am familiar with. There is some nicely moulded cockpit detail on the inside of the fuselage halves, along with the parts that make up the cockpit and navigators compartment. These should come up nicely once painted and detailed. Sadly not much will be seen through the canopy. IMG_0185 IMG_0174 With that done I set these parts aside while I tried the wings and horizontal stabilizers. All good there by the looks of it. The wing to fuselage join is a little different to most kits. Rather than a tongue and groove approach it butt joins to a lip on the fuselage. A test fit of that and it looked good too. So it was time to break out the glue and get started. I departed slightly from the instructions opting to get the wings well underway before detailing the cockpit and closing up the fuselage. The main undercarriage bays go together with 6 parts that fit neatly. Too easy. They are nicely detailed and lend themselves to much more if you wanted to go further. These were then added to a recess on the inside of the underside half of each wing before gluing the top and bottom wing surfaces together. A nice and accurate fit with a minimal amount of clean up required. IMG_0172 IMG_0175 I tested the wings again to the fuselage for fit and it looks like it will be a nice and close and with a bit of luck either no or just a limited amount of filler. Next was the intakes. Each intake is comprised of two sides, a ring and intake bullet moulded together with compressor blades. These go together easily with a minimum of clean up required. These were then put into position. This required a little fettling to eliminate the need for filler. About 5 minutes each and I was done. Much easier than my recent MPM Meteor Mk8! IMG_0182 IMG_0183 The exhausts which come in two major parts/assemblies require a little trimming of the cavity they fit in at the rear of the wing. A little fettling here goes a long way for snug fit. A little filler was required to get the right result. IMG_0181 The kit doesn't come with wing tip lights so I've elected to cut these out and will add some clear sprue and I'll fashion my own. IMG_0184 So far I am liking this kit - a lot. More to come... AGW..
- 35 replies
-
- 19
-
-
Hi mates, Time for a new project! I finished the last project yesterday, so time is a wasting. I asked my fellow Britmodellers to have a digital look at my stash and tell me what to build. The Bristol Beaufort won a tightly contested battle, 2 votes to 1 cast for the de Havilland Sea Hornet. The kit is from Special Hobby, and represents the DAP (Department of Aircraft Production) Beaufort Mk.VIII. This is the version license built in Australia for the RAAF. At this point, I like the markings and camouflage scheme for A9-486/QH-K "Scotty's Homin' Pidgin," piloted by Off Bill Scott, 100 Squadron RAAF, Tadji, New Guinea, in 1944. This will be my first model of an RAAF aircraft, and the scheme of Foliage Green and Earth Brown over Sky Blue. Nick Millman, please stand by - I have a feeling I will have a question or two for you! Or I could do it without any paint, like this: The kit has an impressive number of resin components, plus a good-sized fret of photoetch parts. It doesn't look like any aftermarket is necessary, but knowing me I will probably find some reason to buy some. I've already had a look at an additional PE fret from Brengun that looks quite nice. Oh, man, there goes my wallet again... Here are the raw materials: I won't get much accomplished in the next few weeks, as I have some medical things to attend to, plus a week at the cabin. In the woods! With beer! And the dogs! And lots of fishing! And hiking! And the family, too, can't forget those guys! Oh, and the hobby shop in Jamestown and the Antique Mall in Salamanca (where there are several stalls full of old model kits, where I found some great bargains last year)! As you can tell, I'm anxious for the short holiday to start. Cheers for now, Bill
- 494 replies
-
- 18
-
-
Managed to push this one over the finish line yesterday. My second S&M Models Canberra for the year. References for 6Sqn Canberra's in this scheme and era are difficult to find. Of the handful I found they were kept in pretty good order and were very clean. The S&M kit is a delight and I enjoyed adding a second one of these to my cabinet. The kit is finished in Tamiya's AS-12 silver and Tamiya's Fine Surface Primer White both decanted into my airbrush. The decals are a combination of kit, High Planes Models Canberra kit, Aussie Decals (The Original) and the spares box. The next one has already hit the bench. Really enjoying this kit and the results. Cheers, Wilks. PS: Canberra No.3 on the bench making good use of the High Planes Models Accessories - Avon 109 intake bullets that were recently released.
- 8 replies
-
- 32
-
-
- S&M Models
- Canberra
- (and 1 more)
-
Making progress on this next one. Finished filling and sanding, a touch of undercoat to confirm that was indeed the case and then masking and undercoat for the canopy and clear parts. There is a ton of nose weight in her and I am pleased to see that like the last one she won't be a tail sitter. All masked up and some black applied to simulate the inside of the canopy and other transparencies. So far so good. Time to add some color next weekend. Cheers, AGW..
-
Second one for the year. The fuselage, cockpit tub and intake fit are a bit of a challenge but once together it makes for a very nice example of this variant of the venerable Sabre. This one is depicted as A94-946 or the Royal Australian Air Force Aircraft Research and Development Unit / ARDU. This aircraft albeit in an updated scheme was used for the Sidewinder trials. Finished in Tamiya's AS12 rattle can silver decanted into my airbrush. The dayglo red was a home brew based on period photos and video. Decals are a combination of the kit, spares box, Model Alliance RAAF Sabre sheet and the High Planes Models Canberra. Pictures of the real deal are courtesy of Roger Lambert from the John Hopton Collection. A big thanks also to Graeme Harris for his solution to making the vent on the spine. Overall a nice addition to the cabinet. Cheers, AGW..
- 22 replies
-
- 24
-
-
Managed to get this one over the line and put a RAAF Canberra in my cabinet. Something I have wanted to do for quite some time... I thoroughly enjoyed the S&M Models kit which went together very well. Based on my humble experience and knowledge they've done a very good job of re-creating these versions of the venerable Canberra. No major issues were encountered and there is plenty of scope for detailing this kit in either its T4 or B.2 boxings. Build notes and photos are in "Work In Progress - Aircraft" for those who are interested. Now on to the next one... A B.2/Mk-20 for the RAAF. Cheers, AGW..
- 30 replies
-
- 51
-
-
-
Here is a few images of the completed Airfix 1/48 Walrus done as s/n K9515, No 5 Communications Flight RAAF. For the build log go to the link below:
- 10 replies
-
- 28
-
-
-
My first aircraft completed since January last year, and my first model completed since a semi-enforced hiatus since the beginning of October. Went together pretty easily, and the decals were great. The build stalled early in the year (I was having problems getting a good finish with the pale blue undersides). A few fumbles at the end due to lack of practice (managed to get glue on one of the door windows - doh), but looks OK from a distance. Finished in brush painted Italeri and Tamiya acrylics and made grubby with some cheap kids' watercolour paint. Thanks @Ed Russell for the advice way back on Australia Day 2015! Happy New Year to all! And some photos outside in the early morning sun.
- 20 replies
-
- 37
-
-
-
Hello Folks This is my latest off the bench and represents a few firsts for me. - First 1/32 in a long time, - First time using MRP paints, - First time using Montex masks. - First time using a turps based panel line wash. Eduard(Hasegawa) P-40N A29-607 BU-G as flown by Sqn Ldr John Waddy, 80 SQN RAAF . All but the kill tally and tail code are painted on using Montex masks. Kit stencils. I love the MRP paint and will use it again. The Eduard kit gives you resin wheels and exhausts and some etchy goodness. Hope you like my BU-G. Cheers Andrew P.
- 39 replies
-
- 67
-
-
Here are some completed images of the Tamiya 1/48 Beaufighter converted to a Mk 1c as used by 30 SQN RAAF. PS. yes the tail flash is supposed to be that way around as it was back to front on the real aircraft. The build log is at the link below:
- 15 replies
-
- 34
-
-
- Beaufighter
- Tamiya
- (and 1 more)