
Search the Community
Showing results for tags 'prototype'.
-
US T34 Heavy Tank (84513) 1:35 Hobby Boss via Creative Models Ltd Toward the end of WWII, when Allied tanks were encountering German heavy tanks such as the King Tiger and Jagdtiger, the American military put projects in motion that would be capable of matching them and dealing with German heavy armour (or Soviet for that matter), whilst remaining safe thanks to their own thick frontal and side armour. The designs were designated T29 and T30, both of which were almost identical save for the guns mounted in their turrets, sporting 105mm and 155mm main guns respectively. A further development, possibly inspired by the Nazis using their 88mm anti-aircraft gun in heavy tanks, was to see the high velocity 120mm M1 Anti-Aircraft gun reconfigured into an adapted turret. The gun could fire on aircraft up to 60,000ft, and consequently its armour penetrating power was devastating, far outstripping the other two guns that suffered from lighter-weight shells and with slower muzzle velocity respectively. It took until 1947 for the prototypes to be delivered to the proving ground in the US, and to balance the enormous barrel a sizeable chunk of armour was fitted on the bustle of the turret, possibly 99% redundant, but useful if the crew were caught napping. At a startling sixty-five tons, it was a weighty beast, and the US Army felt that it would be difficult to find a use for it thinking its weight could cause problems with bogging down on softer ground, and crossing bridges, in much the same manner that the Germans experienced with their heavy tanks during WWII. There was also an issue with fumes from the gun entering the turret, which was fixed by using an aspirator, but this came too late, and no production orders were made, the prototypes going into storage, and eventually finding their way into museums. The work wasn’t a total waste however, as a year later a lightened version of the T34 was designated as the T43, and was to enter service later as the M103 Heavy Tank, by which time its weight had ballooned up to the same 65 tons that had doomed the T34, using the same M1 gun, which was re-designated as M58 due to changes that had been made to it in the interim, including higher barrel pressure and quick-change capability. The M103 served with US forces until retired in the mid-70s, by which time Main Battle Tank doctrine had rendered the Heavy Tank a historic dead-end of tank design. The Kit Unsurprisingly, this kit is based upon the 2016 tooling of the US T29 tank that the T34 was based on, in a case of modelling production mirroring history. It has since had new parts added to turn it into a later T29 variant, a T30 and now a T34. The kit arrives in a typical Hobby Boss top-opening box with a slight corrugated surface to the lid, which has a dramatic painting of a T34 in the process of firing its main gun, with the muzzle-flash rebounding from the mantlet and turret. Inside the box is a cardboard divider glued to the tray to keep the large hull and turret parts from moving around the box and causing damage, plus most of the sprues are individually bagged, with additional foam strapping taped around various areas of the sprues and the front of the upper hull to further protect them during shipping and storage. There are ten sprues, two hull parts and the upper turret in grey styrene, eight sprues of track-links in brown styrene, two small frets of Photo-Etch (PE) brass, and a tiny decal sheet. The package is completed by the black & white instruction booklet that has a glossy, full-colour painting and markings sheet loosely inserted between the pages. Detail is good, and includes weld-beads, sand-casting and rolled-steel armour textures, plus individual track links and PE grab-handles/tie-downs for the sides of the many stowage boxes on the hull deck. Construction begins with preparing the lower hull for its road wheels by adding bump-stops, swing-arms and other suspension parts to the sides of the hull, including the idler and drive axles, with some wheel stations having additional dampers moulded-in to improve the ride for the crew. Massive final-drive housings are inserted into gaps in the rear bulkhead, along with a pair of hinged armoured panels, first fitting the seven paired idler wheels all along the upper run of each track, then building paired road wheels with a loose washer trapped between them, doing the same with the four-part drive sprockets, all of which can be carefully glued to the axles with the hope that they will remain mobile once the glue has cured, which might work, or might not, depending on how dainty you are with the glue. Each track run consists of 113 links, which are joined together by fitting the figure-eight pivots to the track pins, the outer edge having additional plates to widen the track that spreads ground pressure. A jig is included to assist you with production, and you’ll be pleased to hear that there are no ejector-pin marks on the inner faces of the tracks. Each of the track links has three sprue gates, while the pivots have just one each, all of which are sensibly placed to minimise clean-up, so whilst it will take some time to create the tracks, it shouldn’t drive you crazy in the process. With the lower hull looking good, attention turns to the upper hull where all the detail is. The upper deck is started by building two banks of stowage boxes around the base of the turret, which have separate lids, rails with eyes, and eight PE handles running along the outer sides. These assemblies are installed either side of the turret aperture, adding various small parts, including headlights, side-facing vision slots for the front crew, and a pair of two-part exhausts that mount at the rear of both fenders. A short run of track is bracketed to the glacis opposite the bow machine gun housing, and a few pioneer tool are fitted onto the fenders. On the engine deck, six louvred panels are inserted into holes, fixing a C-shaped exhaust pipe to the backs of the mufflers on the fenders, with an armoured cover protecting the straight central section. More pioneer tools are glued to the fenders, and these are joined by more PE handles along the edges, with cages mounted over the headlamps and the bow gun made from three parts including the barrel, sliding into the armoured shroud moulded into the glacis. The front crew hatches have rotating 360° vision blocks inserted into holes in the surfaces, then they are fitted into the hull, adding a grab-handle next to each one for egress purposes. At the rear, a small section of bulkhead is inserted into the remaining space, adding rear lights and other small parts once installed. The turret of the T34 is as large as some early WWII tanks, and is built from upper and lower halves, with a seam running along the side of the deep bustle, along the swage-line where the vertical side sweeps underneath. A machine gun is flex-fitted in a pintle-mount, adding twin grips, an ammo box made from three parts, and a two-part post into which the mount slides. The mantlet is also prepared from two layers of styrene, adding caps over the pivot pins so the gun can elevate, plus a pair of lifting eyes on the upper surface, making the commander’s cupola with a separate hatch, then fitting this and the mantlet to the turret, which has some very nice texture moulded-in, including weld-beads and casting roughness. The bustle receives an armoured panel to balance the barrel weight, inserting four parts into holes in the lower edge, plus brackets around the bustle sides, a shell-ejection port on the right side, stowage basket on the same side, a pair of aerial bases at the rear of the bustle, and the other two hatches either side of the keel that is moulded into the roof of the turret. The machine gun fits in front of the left hatch, and behind the commander’s cupola, a fairing sweeps around the side of the deck. The last parts for the turret include a choice of two styles of barrel, both of which are made from two halves that are split vertically, inserting your choice into the mantlet with a circular PE washer trapped between them. The turret locks in place on the hull by its bayonet lugs, and you have a choice of finishing the build with the travel lock in the stowed position flat against the engine deck, or vertically, supporting the barrel of the turret, which must be turned to the rear. Markings There is just one option on the decal sheet, and four white decals on the front fenders and the rear bulkhead, denoting T34 and 1949 on opposite sides. You might have already guessed that it’s a green tank, so pat yourself on the back if you did. Hobby Boss decals can be a little scant, but that’s what’s needed for this prototype, and as there is no registration to worry about, they’re perfect for the job in hand. Conclusion The T34, not to be confused with the Soviet T-34, was a monster of a tank, and it’s the first thing that hits you on opening the box. Detail is good, especially the textures moulded into the surface, resulting in a good-looking model that can be a canvas for your weathering techniques. Highly recommended. Review sample courtesy of
-
Can anyone recommend a good book or website that describes the changes from prototype onwards so that I can backdate the Academy kit, please? Cheers, Mike
-
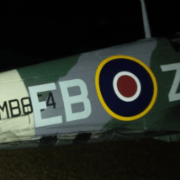
Hi Chaps, As some of you know I have just moved from Thailand back to the UK and have about half my stuff with me. This half includes clothes, most of the stash, paint, children etc . What I don't have is my modelling bench and tools which I kept in Thailand during Covid 19 lock down. While emptying some box's today I rediscovered my Revell 1/48 Tornado as in the picture below. This was posted in July last year when the GB was approved and we were discussing kits choices. The overly huge original box was ditched the when I got the kit so had put it into an old T-33 box and then forgot where it was. I was very happy to find it today. While I wont be able to actually start for a few weeks until my tools arrive I might be able to tinker a bit. The plan is to build the first British Prototype in the red and white scheme not in wrap around as she is now at Cosford. This will complement my NA39 in the Buccaneer Group Build earlier in the year. If I can find enoght bombs I might go with the famous publicity shot of 8 x 1000lb bombs under the fuselage. This looked great but never appeared over Kuwait! Planned changes should be limited to the tailerons and base of the fin. The Red and white scheme should be OK to paint and I will have to print the markings. The problem area will be those Tri-National Roundals. Colin W
-
 Hey all modellers, my name is Troy and this will be my first post on here following through this, imo, jank process of making a one-off 1/24 Hawker Tornado, specifically, P5224 This is being constructed by a 20 year old who is obsessed with kit building but only has the most basic of tools plus a 3d printer. I started this project late last year so this is a catchup of sorts. Props to @Troy Smith for putting the idea up to post it here. Enjoy! It must've started from this and the fact I have a handful of Typhoon kits in the stash ready for action From then I bought two 1/24 Merlin engines and, well, cut them down the crank line and smushed them together, along with other bits of plastic like a Citroen injector sleeve (the reduction gear housing) I did use diagrams and measurements to make sure it actually is scale accurate to a Vulture. A RR Vulture which is two RR Peregrines, being a RR Kestrel that is lengthend to take two sets of conrods. Trying to figure what pipe went where and how things should look isn't too easy when old scans and one drawing is all you have but I think it worked out out okay Now this is where the Tornado really started. I wanted to make the truck and Sabre engine diorama so naturally I did but now I've opened the Typhoon box so naturally I need to finish it now So now it has began, starting off wings spars and cockpit tubing which was already removed for the previous project as well as cutting the wings up where the 3inch (3mm to scale) drop should be The first bit of scratch building was the quite different cockpit up the front. Thank goodness for the Valiant series Typhoon book It wasn't really meant to be a super serious project but seeing as this is probably the only model of a Vulture and only 24 scale Tornado I thought, maybe I should do this good I found that after taking out the Sabre and it's relative supporting structure, that the kit sort of falls apart in that there aren't many places to glue. The instructions were vaguely being followed but the rest was just figuring out how to make it work. Lots of calculator and ruler work More recently, I was finally getting somewhere. The wings are 3mm lower from their mountings but also 5mm back from there mounting as I discovered after something wasn't lining up. Something I don't think is documented The pencil line on the belly shows the change in positions quite well. Visible also is the replacement forward wing spar and the gaps where new sheet will put to make the iconic flattish bottom of the Tornado Following the repeated removal and fitting of the engine to make it "right", I was on to the accessories which obviously needed modifying, this being the coolant trunks on the side of the radiator The exhausts needed cutting down as they protruded too far of the cowlings. The cowlings, canopy hood and propeller unit are all 3d printed. Some technology it is, brilliant piece of hardware if you can use it right which my younger brother Eddy is especially good with. This is where we are now. No photos show the mount bracket for the radiator so it's anyone's guess as to how they mounted it. Just one photo of the cowlings removed is found unless there are more *plezz* The Rotol propeller, which, from what I can see, is 100% spot on with size. This has a 14Ft diameter to the point when scaled up
- 41 replies
-
- 14
-

-
- Hawker Tornado
- prototype
- (and 1 more)
-
This was on deck right after my YF-16 and again using the vintage Monogram. The 1980 kit F-18 has the open LEX slots perfect for the first prototype but still needs some small changes, mainly adding dog tooth on the elevators and wings plus some changes in the cockpit instrument panel. I added seamless intakes and a vac canopy as the original was too small and not the more rounded omega shape. In both kits I used the original landing gear struts, they are of the day's molding capabilities but despite some chunky areas are well detailed and even have the brake lines included. Paint was a mix of Testors MM enamel blues and Testors gold, Caracal and Monogram decals. Caracal had matched their 'F-18 Hornet - The Early Years' with the original blue auto paint used in the rollout F-18 which saved me from repainting the Monogram decals the correct color.
- 48 replies
-
- 84
-
-
I'm a fan for the old Monogram 1/48 kits, they had so much more detail than other kits at the time. This kit I first built as a child, brush painted with some red paint that took ages to dry.... I've wanted to retry it and have had the kit in my stash for a while. After reading Robert Coram's book 'Boyd: The Fighter Pilot Who Changed the Art of War' did the trick and I was finally ready to dig out my 1979 Monogram F-16 kit and make what Boyd referred to as a pure fighter. The YF-16 at that point was more like his vision, not a multirole aircraft but light, fast and maneuverable. This project also got an F-18 prototype kit out too and was next on the bench, another Monogram kit from 1980. The F-16 kit is pretty close to the YF-16, it needs nose reshaping, cockpit/seat changes and some other little things but comparing my changes to profile photos it worked well. Vingtor decals were used. This shows how the nose got bigger with the radar on the production versions. And some minor differences from above And finally to my studio where the shelves are and I paint other things. If interested you can see my paintings here.
- 40 replies
-
- 92
-
-

-
 Well, I had a sort of schedule in mind for what I was going to build next, but something has occurred that blew all that out of the water! A couple of weeks ago, I saw a preview or review of this kit, and sat down immediately to order one from Ukraine, as I could hardly wait. It was scheduled to arrive around July 4th, but showed up unexpectedly yesterday. Wow! Talk about fast shipment, from a war-torn country -- words can not express how amazed I was. Sometimes, it takes longer for me to get a package from Canada to Atlanta, Georgia USA. (NOT THE FAULT OF CANADA POST!). The US postal system seems to like sending parcels back and forth between New Jersey and New York, before banishing them to south Georgia, before they can figure it all out. I say this as a US postal service retiree, so i feel justified in saying that "the old grey mare ain't what she used to be"... but then, what is? Anyway, here's what they sent me in a nice sturdy mailing box. The kit box was un-assembled and included: The kit includes 16 pages of illustrated instructions, plus a paint/decal guide for the two aircraft built: and a BUNCH of parts, including a PE fret, and actual nose glazing: For references, I shall be using one book, one magazine article, some photos grabbed decades ago from a great old movie, I think called "Towards The Unknown", as well as some pictures grabbed here and there on-line: By the way, and sadly for those desiring such, the decal sheet in the kit does NOT include the markings for the fictional Gilbert XF-120, which would have been a heck of a huge fighter -- image the Thundbirds markings for these! Now, it's not like I haven't tried building a model of the XB-51 before. Decades ago, (before being burned out on modeling), I began an old Execuform "Nostalgia On Wings" 1/72 scale scale vacuform offering, and then a while later, the Anigrand version, both of which ended up on the Shelf of Doom. While they both had their problems, the major problem was me.,.. Below, a comparison of the fuselages from each kit. Top to bottom, the Execuform kit, with a few embellishments, the the Anigrand, followed by both halves of the Mir kit: As you can see, they are all pretty close. A while back there was a build claiming that the Anigrand kit was way to short, and had to be lengthened and fattened to shape up. I decided to measure this kit, to the best of my capability, and I think that I have found out what the problem was. Below is is a picture of this process: When determining the length of an aircraft, it is important to know whether it will fit, whether it be into a hangar, onto a hangar deck or elevator, or what have you. Sometimes, you have to contend with a nose boom or the like. In this case it will be from the tip of the nose cap or glazing, to the rear tips of the horizontal stabilizer, NOT the rear of the fuselage! In my process above, the parts are just taped together, and the Horizontal tips rest against a box, and the forward position is marked just ahead of the fuselage tip, as I did not attach the nose cap/glazing to the fuselage. The standard length given for the XB-51 is 85 feet and 1 inch (85'-1"). My crude assembly measures out to be 84'-6", or about 7 scale inches short, call it a slightly fat 2mm in real life. There may be that much slack in my tape job or whatever! Anyway, I don't think that I have another 20 years or so to wait for another "more accurate" kit to show up, so by golly, I'm gonna finish this one! Stay tuned, Ed PS: If anyone would like to make an offer on either the Anigrand or Execuform kit, started but complete, PM me, or they'll end up on E-Bay.
 -
The latest AMW arrived today with next year’s Airfix catalogue. November 2019 is the classic box art of the BOAC Concorde. Does this mean a re-release of their early short-tail and heat-shield cockpit visor is on the cards? I assumed that the original moulds would have been doctored for the production type... Cheers Will
-
copy.thumb.jpg.d8f94c146f5d2da12880c4799901d6dc.jpg) 17 years ago I emailed Flankerman and asked if he had any pictures of the 1988 Su-27M/Su-35 prototype that was later left at Monino. He very kindly got back to me with a goldmine. The reference photos he sent me were a game changer as he had discovered the disruptive scheme was mirrored underneath and had a bundle of photos to illustrate it. I loved the Ferris like camouflage but also the new Su-27M nose profile with the traditional cropped fins as later Su-27Ms had the squared tips. I did all the hard work expected of an Academy and Sol conversion way back then and put it away; it sat in the box (with the occasional peeks) until this year. I've made a real effort to finish unfinished projects and clear the stash a bit. I'm pleased to say it's the last 1/48 Academy for me (7 built)! I'm now looking forward to all the newer companies much improved kits. Colors were mostly AKAN mixes, Neomega cockpit, Eduard etched details, DANmodels intake covers, Armory wheels and one of Haneto's (Fairy-Hobby) beautiful corrected canopies. The decals were from Begemot except for the stars which were hand made. I s I spent the last few days repairing my Su-37 Terminator so I could take a photo similar to this one of 711 and 701 together. i And finish with a hat trick.
17 years ago I emailed Flankerman and asked if he had any pictures of the 1988 Su-27M/Su-35 prototype that was later left at Monino. He very kindly got back to me with a goldmine. The reference photos he sent me were a game changer as he had discovered the disruptive scheme was mirrored underneath and had a bundle of photos to illustrate it. I loved the Ferris like camouflage but also the new Su-27M nose profile with the traditional cropped fins as later Su-27Ms had the squared tips. I did all the hard work expected of an Academy and Sol conversion way back then and put it away; it sat in the box (with the occasional peeks) until this year. I've made a real effort to finish unfinished projects and clear the stash a bit. I'm pleased to say it's the last 1/48 Academy for me (7 built)! I'm now looking forward to all the newer companies much improved kits. Colors were mostly AKAN mixes, Neomega cockpit, Eduard etched details, DANmodels intake covers, Armory wheels and one of Haneto's (Fairy-Hobby) beautiful corrected canopies. The decals were from Begemot except for the stars which were hand made. I s I spent the last few days repairing my Su-37 Terminator so I could take a photo similar to this one of 711 and 701 together. i And finish with a hat trick.- 45 replies
-
- 82
-
-
-
 Hi all and looking forward to this one! I'm in with the first F-14A Tomcat in 1/72...specifically this one. Kit will be modified as necessary to backdate it to a prototype, with decals from the good people at Caracal Models CD72106 - F-14 "Tomcat" - The Early YearsCaracal. Photos to follow soon, good luck with your builds and happy modelling. All the best, Dermot
 -
Hi all and here's my first for this year, Grumman's model 303E which would become the F-14 Tomcat. Built for the Prototypes, Racers, Research, Record breakers, Special schemes megaGB here on the forum. The short build thread is here but to recap: Kit: Revell 1/72 F-14D converted Paints: Tamiya and Mr Hobby Acrylics Decals: Caracal for 'F-14 Tomcat, the Early Years' Mods: Earlier seats; modified wing gloves and fences with plasticard; earlier TF-30 engine nozzles; extended 'boat' tail; nose pitot from stretched sprue; removed lumps and bumps The #1 prototype made its short maiden flight on December 21st 1970 with Grumman chief test pilot Robert Smythe in the front and project test pilot William Miller in the back. On 30 December, on the aircraft's second flight, the aircraft was lost due to failure of a hydraulic pump which caused a total loss of flight controls. The crew ejected safely and the aircraft crashed short of the runway at Grumman's Calverton plant, New York. Revell_1_72_Grumman_F-14_prototype_build (10) by Dermot Moriarty, on Flickr Revell_1_72_Grumman_F-14_prototype_build (15) by Dermot Moriarty, on Flickr Revell_1_72_Grumman_F-14_prototype_build (16) by Dermot Moriarty, on Flickr Revell_1_72_Grumman_F-14_prototype_build (5) by Dermot Moriarty, on Flickr Revell_1_72_Grumman_F-14_prototype_build (19) by Dermot Moriarty, on Flickr Revell_1_72_Grumman_F-14_prototype_build (6) by Dermot Moriarty, on Flickr Thanks for looking, take care and happy modelling. Cheers, Dermot
-
My next effort will be the RS Models XP-79B, mostly because I don't yet have it in the collection, but also, until now, I wasn't certain how to build it with a few added things I wanted to do. I was also happy to find a kit review of the model over on Modeling Madness, by Scott Van Aken HERE This helped alert me to some possible problems, but didn't supply all the answers. So, here I go again, with something that I HOPE I know how to do! Of course, the nickname "Flying Ram" is totally inaccurate. Despite the legend that it was re-enforced to ram through enemy bomber formations, it was actually designed to carry 4 .50-caliber machine guns to do the dirty work. Besides, being made almost entirely of magnesium, only a scratch or two wrong and the aircraft would have become a flying bonfire. That was actually it's fate, the single prototype having crashed just 14 minutes into it's initial flight, when the aircraft began uncontrollably rolling to it's right, and the pilot bailed out. Unfortunately, the aircraft struck the pilot and he was unable to open his parachute. He died and the aircraft burned to a very small pile of ash on the desert floor. For some odd reason, the U.S. Army lost interest in the aircraft, and the project was cancelled... The kit: The kit consists of 31 fairly small parts, and a decal sheet, apparently including some "what-if" markings for a British aircraft. The drawing instructions, for me at least, were not crystal clear: Above left, right out of the box, I thought that part #30 (the cockpit rear bulkhead was supposed to go where part #12, actually goes, behind the canopy opening on the upper fuselage half, which has two small padded lumps that eventually will be painted leather-colored. (To digress for a moment, I have thought long and hard, wondering about how the pilot was strapped to the airplane, and I could not imagine any harness that would allow him to lay prone, and still get out of the rig to bail out. Guess it's amazing that he at least got out of the aircraft.) Anyway, due to the usual fact that RS does not provide locating pins on it's models, the cockpit "tub" has to be assembled on it's bottom edge, free-standing. Part #31 (the instrument panel) will be glued across the front, as seen above right, after the tub has been glued into place, which is largely a matter of achieving the best fit you can. Next, I glued the connecting shaft for the control yoke to the yoke while it was attached to the sprue. This allowed me to get it pretty much perpendicular to the yoke: Above right, the shaft and yoke are glued into place, with the yoke just proud of the bottom canopy opening, after gluing the little "V"-shaped part to the floor. The two "X" 's show ejection pins that must be removed. It was after test fitting everything to this point, that I discovered that the instrument panel, part #31 set too far back to clear the yoke, so I sawed it off the model, glued on two small bits of scrap card. When the glue is dry, these will be sanded to shape, and serve to simply extend the length of the IP so that it fits further forward: Above right, I used fly-tying hackle pliers to hold one half of the two clear canopy parts, while they were glued together with G-S Hypo (watch) cement. The pliers don't hold the halves together, they just give me something to hold the tiny parts while applying the glue! They are very tiny, awkward parts! Next, the intakes were temporarily glued into place, to allow proper spacing for some tiny split shot that I glued in with white glue, to get as much weight forward of the main gear as possible, a tip provided by Scott in his review -- thanks: Next, the "belly pad" was added, along with two forearm pads, made up from scrap card, which RS did NOT provide. Then, everything was painted interior green, leather and black. The kit plans call for the yoke to be painted aluminum; it was not. And with that, I'll close for now. See you next time, Ed
-
Hello again. Back this time with some finished pictures of a project I've been dragging along on for some time. Years ago, I bought this Anigrand XP-49 kit on-line, as a used kit. It had some problems. The boom halves were badly warped, the landing gear doors and nose gear leg were missing, as were the mass balancers for the elevator. So, I started slowly sawing, slicing, bending and scrounging replacements parts,in this case from the same old MPC P-38F kit that I scrounged other parts from for my XP-38 prototype build. Only the nose gear door had to be fashioned from an old fuel tank of the right diameter, as the one on the XP-49 was longer than on the P-38. This became one of those kits that were only worked on while paint or glue on other models in progress were being built, so I never shot pictures for a build thread. Other than the above-mentioned problems, this was just another simple resin kit, albeit, one of the older Anigrand offerings. Like most other resin vendors, Arnold has improved his techniques in later years, and are these days, his kits usually quite build-able. The Lockheed XP-49 was a later proposed variant of the P-38, with larger, more powerful engines and weapons, as well as a pressurized cockpit for higher altitude flight. The newer engines didn't pan out, and while the XP-49 was said to have "run circles" around the P-38's, the advent of the long-range P-51's made it not worth the effort, First flown in 1942, it was tested to destruction at Wright Field in 1946. In any event here are a few pics of the finished beast: And, for those interested, here is a shot of the Lockheed twin-boom brethren, from left to right, the XP-38, the XP-49, and the XP-58 "Chain Lightning", for comparison purposes. As always, I'm glad to add it to the collection. Thanks for looking, comments or questions always welcomed. Ed
-
Another oddity from warplanes of the First World War. Designed as a fighter pre synchronising gear the idea was that the observer could stand up to wield the single Lewis gun. I think it looks wonderfully quirky so fits the collection perfectly. The Sage. First order of business some working 1/48 scale drawings. As I’m committed to getting my KUTA builds and 109s done ( hopefully) this side of Christmas I think this will be a comparatively slow build, but as 2022 is looking like I’ll be building a lot of kits for GBs I thought I’d get at least one scratch build in to the bench.
- 38 replies
-
- 4
-
-
- 1/48
- scratch build
- (and 1 more)
-
 Focke Wulf Fw 189C/V6 "German Attack Plane" (SH72432) 1:72 Special Hobby The Fw 189 won the competition in to replace older reconnaissance type with the Luftwaffe beating the Ar 189 and Bv 141. The type went on to become the Luftwaffe's standard tactical recon platform. The aircraft features a central fuselage pod heavily glazed, with twin booms leading back to the tail, the front of which housed the engines. The Luftwaffe looked at expanding 189 production and called for a training version, attack version and a maritime version with floats. Only 2 prototype attack versions were built, and the single float version was never finished. Along with the prototype Fw 189B trainer two more B-0 aircraft were built, followed by 10 B-1 aircraft. As well as for training the aircraft were used in the Liaison role, though little is really known on this. The attack version featured a much smaller central pod which was armoured to protect the crew. Testing proved the view for the pilots was very bad, and the aircraft was underpowered. The Kit This is a rebox of the MPM kit with parts for the attack version and new decals. Construction starts with the small central pod. The basic seats for the pilot and gunner are added t the floor along withe control column and instrument panel. The floor is fitted into the rightside pod and the rear defensive machine gun added. The pod can then be closed up and the small cockpit glazing can now be added. Each of the twin booms can now be built up. There are front and rear bulkheads for the gear wells which support the gear well roof. At the front the engine face goes on, and to the left side resin intakes are added. Its now time to add the fuselage pod and the wings together. The lower wing is in three parts; a centre section and the two left/right wings. The upper wings are in left/right and attach to the fuselage pod, a hole will need cutting to accommodate the attack pod. A small clear resin gunsight is included which goes in front of the kit windscreen. The twin booms fit on to the underside with the centre section joining on one side and left/right sections on the other. The tail will also need putting in between the booms at the same time! This does look like it will need some time and patience to get everything aligned correctly. Once all of the main structure is assembled the landing gear needs making up and installing in each boom. The last things to do are to install the props and the tail wheel and s couple of small PE parts including an aerial. Markings The glossy decal sheet is printed in house and looks sharp and in register. There is only one decal option NA+WB. Conclusion It is good to see this released. The kit will take some fettling im pretty sure off, but once assembled it should look the part. Recommended. Review samples courtesy of
 -
 My build of the Airfix 1/144 BAC Aerospatiale Concorde (Air France) (SK700) This was an Airfix 1970s Air France boxing with decals that were shot so I printed my own. The white plastic of the old kit was a joy to work with. Three down now, only one more Concorde to come! Dave
 -
Following hot on the heels of my other three Concordes, here is my build of the Airfix 1/144 BAC Aerospatiale Concorde (A05170V) as the BAC Prototype G-BSST. Decals came from F-DCAL. Here it is along the other three I built for the same ATF Group Build. There won't be any more Concordes for a long while! Dave
-
My build of the Airfix 1/144 BAC Aerospatiale Concorde (BOAC) (05170-3) This was a 1970s boxing with decals that were shot so I used a set from a 2021 Vintage Classic release. The white plastic of the old kit was a joy to work with. BTW, here it is alongside two more Concordes well on the road to completion. There is a 70s Air France boxing using home-made decals. The BAC prototype is the grey plastic Vintage Classics release with F-DCAL decals: Dave
-
Here is a very strange type, an aircraft I hadn’t even heard of before, until I was asked to build it as my second pro build for a client. In fact I hadn’t even heard of Planet Models either. It’s 1/48 but still tiny, with vac-form canopies and some metal parts. A very strange looking contraption indeed! But it should be an interesting build, very different from my recent Tornado and Jaguar! Has anyone else built this kit before?
- 19 replies
-
- 13
-
-
- 1/48
- Planet Models
- (and 1 more)
-
OK, @stevej60, this one's for you! Don't worry, I had it in mind long before I saw your comment in chat, so no guilt necessary- in fact I took these photos about the time the Group Build started, and then got distracted. This morning I printed side and top views from @Tailspin Turtle just to see if this pathetic kit actually does "look like a Skyhawk" (film at eleven...) My desire is to represent the prototype, though that may be subject to revision. I'm envisioning this as "low impact" modeling- relatively little AMS and worry about perfection, and I figure this is the right sort of canvas! Oh yes, and low impact among the audience, too... Of course, I'll indulge at least a teensy bit of tweaking (no, not twerking- trust me, you don't want to see that) just for the fun of it. And I'm already thinking of ransacking my 1/72 USN modeller-chum's boneyard, though no guarantees. bob
-
The Northrop McDonnell-Douglas YF-23 was the losing contender to the Lockheed Martin YF-22 in the 1990s Advanced Tactical Fighter competition. These are two very different kits, one nearly 20yrs old and one a recent offering, both requiring a lot of work. The 2002 Collect-Aire is the more accurate and much of the dual build was to get the HB model to look more like the C-A. Some photos of the build can be seen here. F-15, F-18 parts where used for the landing gear just like the real aircraft, lots of modifications to both aircraft's cockpit although the C-A was the more accurate but lacking details, both canopies needed scratchbuilding interiors. The C-A had the dropped flaps and the weapons bay. There's no photos I've seen of it ever carrying weapons but the PAV 1 (gunship gray) aircraft had operating doors. It had some decent details and I only added riveting in the bay but left the Collect-Aire's offering of a weapons mount intact, I may add the door mounted sidewinders later but for now I wanted to show the essence of the company's endeavors on putting out such a remarkable kit especially considering the resources and published photos at the time. Probably not a dogfighter but they still haven't published it's top speed.
- 17 replies
-
- 33
-
-
- Collect-Aire
- Duct Tape
- (and 1 more)
-
 Hooray - I can open the kit at last! I bought the kit in 2006 when it came out. It looks really nice. Good panel lines, lovely gull wing profile and the wings look great with very good detail in the wheel wells. But as you may be able to see, the canopy hasn't aged very well - bright yellow! So I invested in the Falcon Spitfire canopy set (No. 41) which has a prototype canopy - but only one, so I'd better be careful cutting it out! The kit decals weren't quite in register, so I got the Xtradecal set 075 which covers the prototype... which also aren't in perfect register . OK, better get started!
- 48 replies
-
- 15
-
-
 Well, I was going to wait to the eleventh, but as so many of you have put up what you are doing, I might as well jump in. My contribution to this group build is the 1/72nd resin Spitfire prototype from CMR and a conversion using the Airfix Spitfire Ia and a conversion kit for the PRIF from Airkit. This is a resin conversion kit designed for the 1979 Airfix MKIa, but they look as if they will fit with some fettling The CMR kit represents the Spitfire prototype after it had been painted and the first set of changes made to the rudder and possibly the wings. It comes in a sturdy cardboard with the contents well packed and padded against breakage and loss. The resin parts appear to be well cast with only the odd air bubble. The parts, as can be seen from the photo are on moulding blocks that look to be straightforward to remove with care. Decals for the first prototype are printed on two sheets to give enough serials and are in register, I suspect they will be very thin and require careful handling. There is good detail on the resin parts with very neat surface detailing and a good interior that is enhanced by the inclusion of some coloured PE by Eduard for the seat belts, instrument panel and a couple of other parts. A choice of vacformed canopies is given with the later still of canopy seen on early MKIs fitted with the flat top canopy. Spares are given and the canopies look very clear. Separate rudder and elevators are provided. The kit looks like a good package and I look forward to starting on it, the one piece wing might make life a bit easier. I have a an old bottle of Compucolour Supermarine Grey that will form the basis of a match in acrylics for the airframe colour as there is still debate as to the actual colour, it does have a nice 30’s look to it. The Airkit conversion dates to the 1990’s and produced by a P Lucas. I wonder if that is the same Paul Lucas who writes in SAM? It consists of resin parts for the new deeper oil tank in the nose, a fuel tank behind the pilots seat, a pair of large underwing blisters and smaller ones for the top and a new part for the under fuselage where the cameras are. Not sure I will use that piece as cutting the bit of the undersides on the wing-rear fuselage fairing looks more trouble than it is worth. A quite thin vacformed canopy with side blisters is also supplied and will need careful handling. One of the big differences between the earlier and latest Airfix Ia’s is the way the canopies fit on to the fuselage. No decals are provided but I have an old Almarks and a Model Alliance sheet that have suitable markings. Clear instructions are given on a type written photocopied A4 sheet in the manner of pre home computer cottage industry days. Provided the replacement oil tank and canopy fit, should be an interesting build.
- 7 replies
-
- 5
-
-
- Prototype
- PRIF conversion
- (and 1 more)
-
The Snark am experimental triplane using the ill fated ABC Dragonfly engine. Three machines were built this is the third prototype. Side by side with my scratch built Pfalz Dr1, imagine if these two had seen service. With my scratchbuilt Pup, surprisingly big for a triplane. The WIP thread.
-
Here are is Anigrand Craftwork's 1:144 Focke-Wulf Fw 191 V1 which I built back in 2013. This came in a set of four resin kits covering the four proposals for the ill-fated Bomber-B programme and represents the first prototype in early 1942. Apart from adding some details in the cockpit I thinned the gun barrels and added missing ones for the nose from stretched sprue as well as the wing pitot tube and the radio mast, also from stretched sprue. The rear end of the underside gondola was moulded solid and is clear so I cut away the section and added a part made from a clear piece in my spares box (Airfix Do 17 I believe!). The u/c doors were thinned as usual. Internet references were needed to place them properly. The kit was fully painted with brush except for the final coats of satin varnish which were airbrushed. I ignored the colour call outs of the (minimal) instructions and painted the kit RLM02 overall with the propellers in RLM70 Schwarzgrün and placed the wing crosses in a more correct position. Due to the little use of the prototype I didn't apply any weathering and only highlighted the panel lines of moving surfaces. Thank you for looking and, as usual, all comments are welcome. Miguel


