Search the Community
Showing results for tags 'nightfighter'.
-

Eduard Me.262 Wheels (632100 for Revell 1:32)
Mike posted a topic in Aftermarket (updates/conversions)
Me.262 Wheels (632100 for Revell) 1:32 Eduard Brassin Hot on the heels of our review of the new Revell kit here, here is a nice set of wheels to add a little bit of extra detail to the model. As usual with Eduard's resin sets, they arrive in the familiar Brassin clamshell box, with the resin parts safely cocooned on dark grey foam inserts, and the instructions sandwiched between the two halves, doubling as the header card. There are nine resin parts on six casting blocks, plus a set of pre-cut masks on yellow kabuki tape, which supply you with a full set of masks for the wheel hub, allowing you to cut the demarcation perfectly with little effort. The detail on the wheels is superb, with sidewall markings and maker's technical data, while the rolling surface is covered with hexagonal tread blocks that look oval to the casual observer. The casting block attaches to the contact patch, which is slightly deformed to give the impression of weighting, with outriggers barely touching the tread pattern, primarily to ease the casting process. Both the main wheels and the single nose wheel have separate hub details, which could be painted separately if you'd rather, or masked with the abovementioned tape if you don't. Superb detail and highly recommended. Review sample courtesy of -
Eduard Me.262B-1 Update Sets (for Revell 1:32)
Mike posted a topic in Aftermarket (updates/conversions)
Me.262B-1 Update Sets (for Revell) 1:32 Eduard Revell's new 1:32 Schwalbe has ticked a lot of boxes for many larger scale modellers, making up for the scarcity of the main competition in the scale recently. We've got one that we'll be reviewing soon, so keep your eyes peeled, but Eduard have been Johnny-on-the-spot and brought out this spread of sets tailored to the kit to improve the detail over what is included in the box. As usual with Eduard's Photo-Etch (PE) and Mask sets, they arrive in a flat resealable package, with a white backing card protecting the contents and the instructions that are sandwiched between. Interior Set (32893) Two sheets are in the package, one of which is bare brass, the other nickel-plated and printed with cockpit details such as instrument panels, bezels etc. It includes a new gunsight; rudder pedals, a complete set of new instrument panels laminated from multiple parts; side consoles, knobs, dials and levers; additional seat details and of course the prominent electrics panel in the front cockpit. In the rear is the big black box between the crew; a detailed rear panel; various small structural parts; the NAXOS radar detector that sits in between the crew, and other canopy details. You will need to supply a few lengths of rod for the NAXOS antenna from 1.2mm, 2.2mm 3mm round stock, plus a few of other sizes through the build, all of which will likely be to hand if you're prepared. Seatbelt Set (32894) Hived off to a separate set to utilise their new STEEL technology with wafer thin etching that is pre-painted, and has additional relief hinted at by the addition of shading on the belts to give extra depth to buckles and overlaps. They are extremely flexible and drape much more realistically than traditional PE, which can be difficult to manipulate. Exterior (32395) This set is bare brass and supplied on a large fret, the contents of which are used all over the airframe. Starting with the lugs at the tips of the bullet fairings in the engine intakes, it jumps to two panel inserts for the nose gear bay; brackets for the front bulkhead in the gun bay; internal skins for the removable engine cowlings; fine detail upgrades for the gun bay; hinges, teardrop panels and closures for the gun bay doors; end-caps for all the flap segments; replacement slat guides and skins for the slat bays themselves, which requires you first to remove the styrene parts and create a notch for each new part to project from, as detailed in the accompanying diagrams. The remaining parts include actuator arms for the various trim-points on the flying surfaces; a wrap-around part for the main gear legs, and additional details for the bay doors. Masks (JZ196) Supplied on a sheet of yellow kabuki tape, these pre-cut masks supply you with a full set of masks for the canopy, with compound curved handled by using frame hugging masks, while the highly curved gaps are in-filled with either liquid mask or offcuts from the background tape. In addition you get a set of hub/tyre masks for the wheels, allowing you to cut the demarcation perfectly with little effort. Review sample courtesy of -
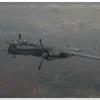
Hi All, A long time in the making, she fought me along the way, and, I ended up putting her to one side and finishing something. But she is now 'over the line' and, while my modelling skills weren't up to the challenge, I am happy she is finished. The last in my Nachtjager series I'm keen to do something more colourful I based the camouflage on the first picture and the kit instructions. It looks to me as if the light coloured 'splotches' (wonder what the German is for that!) were applied in the field so I painted the basic splinter camo, applied the decals and then sprayed the splotches, hope it looks all right. Complete OOB and while I would like to say it was a pleasure to build, I can't. Perhaps I'm a bit jaded after 7 odd German Nightfighters Thanks for looking and sorry about the photos, best I can do I'm afraid. Cheers, Shane
- 8 replies
-
- 19
-

-
- 72
- nightfighter
- (and 1 more)
-
Hello all. For very personal reasons I want to make a model of the de Havilland NF M.XVII in 1/72 scale. My question, or rather questions, concerns the following: is there any other kits in this scale besides the Tamiya? And: how accurate is it (they)? I'd like to make the model as detailed and accurate as possible, so I will likely post more questions regarding the particular aircraft. Thanks in advance! Dennus
-
Ok I’m the first to admit I am totally mad and this build will prove it! My work pattern has changed so I will have more time for models!!! So rather than signing up for more GB’s…or actually completing the ones I’ve signed up for on time I decided I needed a new long-term project. The Heinkel He-177Z was a long term project which I loved so instead of building the bigger one I have gone for this project which I had mentioned a few times. I love the look and it’s super cool, plus a nightfighter as well! I had received all the bits sometime ago but after a quick look at them I got very scared!! The reason for this is the add on bits from Unicraft!!! The parts may be a little bit basic which is to say they are basically lumps of resin and not much else! So the basis for the build will be Hasegawa’s 1/48th Arado Ar-234C-3 which will provide the body, interior and undercarriage, though it will probably end up providing a of other bits as well! The wings from Antares are nice and need little work to fit my build. The engines or turbo-props are barely recognisable as engine parts and as can be seen I have had to add sheet plastic to help build them up so they at least may be round in shape! They even come with an internal engine sections if I wanted to leave the engine covers open…or should I say a blob to match the rest of the engine blob! The new nose is….well more or less useless, as can be seen from the photo is much smaller than the canopy section. The mod kit is for the Hobby Craft Arado Ar-234 which is completely the wrong in the nose section compared to the Hasegawa model, it’s way too narrow! So I can either modify the clear section which is pretty well impossible or completely build a new nose section! Plus all the other bits in this mod kit are pretty well useless as well, I will have to use most of the kit parts for this build! I will either have to modify the resin bits I have or make a completely nose section, which at the moment looks to be the easiest path! So I have pretty well given myself a not so easy task for this build. Whether I complete this build or if it is destine for the box of doom is something to be decided as the build progresses. For a start I need to get these engines at least round in profile, hence the addition of card to the engine bodies and spinners. If I can get these sorted there may be a possibility this project will get going. Once the main bodies are round in profile I can work on the nose cones and props. Once these are done I can then start to work on how they will mount to the swept back wings, custom mounts will be needed for this. So this is going to be a crazily big project, nothing that will be completed in a couple of months for sure! Again I must be completely crazy to attempt this build, I had planned it for the WhatIf III GB, but given the work required it’s not possible in the time given. So this Christmas or next I’m not sure when it will be finished so welcome aboard on this crazy adventure. So welcome along for the ride, it will be bumpy and the driver will curse at regular intervals....oh and regular updates are not included!
- 86 replies
-
- 12
-
-
- total madness
- Arado Ar-234
- (and 6 more)
-
 Hello All, not sure if I posted this. Completed it earlier in the year - a Tamiya 335 kit with some owl resin Ju88 SN2 aerials. A bit of a what if night fighter. The build is not great but I am happy with the finish. Thanks for looking and have a great Christmas, Ian
- 12 replies
-
- 31
-
-
- Tamiya
- dornier 335
- (and 3 more)
-
 And all through the skies, Not a creature was stirring not even the flies. The ammo was stacked by the cannons with care, In hope that the Englanders soon would be there. Hey all After my brief bout of insanity, during which I constructed a car model (see http://www.britmodeller.com/forums/index.php?/topic/234991043-deuces-wild/) I have returned to the side of light and reason with yet another aircraft Today I present Revell's 1/48 Bf 110G-4 finished as the example flown by Obst. Hans-Joachim Jabs of NJG 1 in the spring of 1945. Enjoy... So the Revell/Promodeller Bf 110 gets a lot of criticism for supposedly inaccurate engine nacelles... I don't know about you but it still looks like a Bf 110 to me, so it can't be that bad. The kit went together quite well, with some, but not terrible seams to clean up, mostly at the unusual wing to fuselage join. The prop hubs required the most work as they were slightly mis-molded (is that a word?). This required plastic sheet and putty to fix. The cockpit is second to none and only requires careful painting and some harnesses. The radar array was scratch built, as the kit arrays are attached directly to the sides of the nose, whereas Jabs' plane carried the antennas as depicted. All markings were masked and painted with use of a Montex masking set which also supplied masks for the canopy. The camouflage was done freehand with custom mixed Tamiya colours adapted from those used by J.M. Villalba in his RLM Painting DVD, for the RLM 75 and 76. The exhausts were painted with Dark Iron lightly misted with Vallejo Rust and slathered with dark wash. Just realized I forgot to install the rear machine gun before pictures... it's err.. out for maintenance. Yeah, that's believable Regards
- 35 replies
-
- 47
-
-
- bf110
- nightfighter
- (and 1 more)
-
Hello! So after some time I show you my JU 88 G6 from Dragon/Cyber Hobby- Orange Box in 1/48. Pretty old kit and because of the many re-edtions the moulding suffered from that. The construction was a real challenge. I've tried to avoid filler. So dry fitting is a "must do". I have replaced all MG 151 with brass rods. The FUGs are from Mastermodel. Another challenge, because I tried the solder them. In the end it wasn't that hard, as I've thought. I made a template that helped me a lot.The rear antenna holder is also a brass construction soldered togehter. I've rescribed the fuel hatches on the top of the fuseage. Soon as the construction was finished, the painting started using Vallejo RLM 76 and Gunze RLM75. I really liked the paint scheme done by Chris Wauchop from Hyperscale. That black tail fin really got me! After all I'm happy this project is done. Greetings
- 11 replies
-
- 34
-
-
- Nightfighter
- Dragon
- (and 2 more)
-
I've always fancied making an all black Korea bird, or a late Vietnam Electric wizzy, wither USN or USMC. (Also used by the US Army too, but details are scarce to say the least. I suspect test aircraft only?) Can I safely assume the Sword release has been abandoned? So that leaves: 72: Matchbox or 48: Encore A choice between an old kit in my preferred scale) or an expensive one. I know there are issues reported with the fit of the matchbox canopy, and lack of cockpit detail is pretty much a given, so a rare trip to the aftermarket will be likely to achieve food results. Have I missed anything? If I stumble across a MB kit is it still worth the effort considering the lack of competition (note: whilst I don't mind basic detail I don't want to be filling trenches)
-
Ok here we go with another GB. Was a bit hard to choose what to build for this one, but after much thought I decided to go with a common theme that I like Nightfighters. And seeing that all my nightfighters so far are twin engine the Tigercat seemed the logical choice. So I’ll be building Italeri 1/48th F-7F 3N Tigercat, this will almost be straight out of the box but …………. will be adding Quick Boost Undercarriage Cover and Gun Barrels sets, and Scale Aircraft Conversions Landing Gear set. I have always liked the look of this aircraft but had just not gotten around to building one, so here we go, this should be fun….and hopefully a simple build. Not too sure what the colour scheme will be, have a bit of time to think about it. First post of the group!
- 41 replies
-
- 2
-
-
- Tigercat
- nightfighter
- (and 3 more)
-
 I'd like to present the second of my two Defiant nightfighter builds using the new tool Airfix kit: For the build thread of both kits please see here. The kit goes together very well with few pitfalls for the unwary and none for the wary; as long as you test fit and know what you are sticking to what, where and why, it more or less builds itself. Mine is OOB apart from the addition of an aerial wire from EZ Line. Once again I've painted the wingtip navigation lights in red and green; in real life they were clear perspex covers for coloured lightbulbs but I am content to let the colours represent what they are. I had a hell of a time trying to get a subtly distressed effect for the paint finish and was about 20% successful at a guess, though the camera then decided to overlook much of the subtlety so it was a largely wasted effort, however it was a laugh if nothing else I used the kit decals for most of the national markings and stencils, but the fuselage roundels, codes and serials are from the Print Decals set for the Defiant - I don't really know what to say about these... they are thinner than the kit decals and had very little carrier film but apart from that I felt they were inferior in every other respect which is a sad look-out for a set of aftermarket decals. The 'red' of the roundels and serial has a strange Fuchsia tint to it which does not look good next to the slightly bricky-red of the Airfix decals which looks better to my eyes. The colour density and printing was also inferior to the kit decals though perhaps with that fuchsia tint that is for the best. I might have got a dud set, I certainly hope so, as there are some very nice options on the Print Scale sheet. Anyway enough, I am happy with the end result; here are the two kits together: Thanks for your attention gents Cheers, Stew Edit: nearly forgot; here is the real N3313
- 44 replies
-
- 35
-
-
I tried to be patient, and to hold my peace, telling myself that if I just waited until July I could build a few of the new Airfix Boulton Paul Defiant kits for the BoB GB... but the kits looks so nice, and there are so many possible options that I would like to build, that my cunning lower animal brain hatched a plan: build a couple of nightfighters, and maybe in July when the BoB GB starts, a couple of day fighters if I do run out of other things to build (which given the contents of my stash being specifically tailored to the first 18 months or so of the war is not likely to happen unless by choice). So I find myself here: Looking at these: ... which is a bit of an embarrassment of riches. I think I will be building the sharkmouthed N3328 from the kit decals, and N3313 of 264 Squadron from the Print Scale set. I recently moved into a new flat in a tenement, and being on the ground floor means all the other tenants have to trek past my front door in the communal hallway to get to their flats. This is a new experience for me but logic dictated that it is probably not best to have the sort of smells emanating from my flat that the uninitiated might erroneously associate with a crack factory or methamphetamine lab, so as an experiment I invested in a set of Hataka RAF acrylic paints (though I will only be using the interior grey-green for these builds). For sprue shots I refer you to Mark's pictures here, which are better than anything I might attempt. Construction starts with the fitting of various internal parts, I will be using the crew figures who are unique to this kit and look rather good... The floors, seats and bulkheads etc are just clicked into place to keep the mating surfaces free of paint, which was then sprayed: The Hataka paint went on nicely and covered well, didn't smell too chemically either... The detail parts were painted and the painted pilots fitted: Then posed for a picture with the gunners: The instrument panel was decalled and fitted into the fuselage - note that it sits a bit aft of the coaming, so you need to paint the back of the panel as well: I think I got a bit out of sequence with the instructions and built the wings next (I was waiting for the decal setting solution to dry on the IP, that's my excuse and I defy anyone to prove otherwise): Then joined the fuselage halves: The wings and fuselage halves both fitted very well, I needed a smear of filler along the upper cowling to disguise the join and sanded the leading edges of the wings just for tidiness' sake. As Mark (FZ6) noted in his build, the trailing edges of the wings are rather thick; how much of a problem this is for you depends on your tolerances but to me it is not excessive enough to be worth remedial action (I have fairly sloppy standards though). I then fitted the aft turret fairing - both raised, although you have to option to build it lowered if you prefer; I am so used to seeing it raised that it looks a bit weird if it isn't, so as you see it was an informed decision on my part and not just some whim that occurred on the spur of the moment: Then I sort of slipped out of sequence again and masked and fitted the pilot's canopy and the forward turret fairings. I chose to do one closed up and one open; it seems it was fairly common practice for pilots to leave the hood open and anyway, because I can, okay? A word on the canopies - again, as noted by Mark (FZ6) the framing is not terribly well defined, it is as if it has been moulded at an angle and I think it might be something to do with Airfix moulding the turret 'glass' as one-piece (which is an excellent thing)... if you are particularly averse to masking I would recommend you wait until Peewit, Montex or Eduard make a masking set for this kit - you can bet that these are being worked on even now (and you can also bet that the Eduard one will cost almost as much as the kit, so I leave it up to you to decide whether you really do hate masking that much, although the Peewit and Montex sets are generally much cheaper). Still got those turrets to do Finally, I assembled the various parts for the radiator and the oil cooler, I plan to Blu-tack these on so I can spray them when I do the camo then remove them to paint the grilles before permanently gluing them back on: ... and that's where I am now. Hopefully will get some more done at the weekend, so far it has gone very well. Cheers, Stew
- 125 replies
-
- 21
-
-
 Typically lovely kit from Hasegawa, no problems to report - just fancied a problem free build for once!
- 22 replies
-
- 18
-
-
Hi folks, This is my first GB on Britmodeller and, given the relatively generous building time, I thought I'd try my hand at enhancing a Revell 1/72nd He219. Note that this is Revell's original release, not the ex-FROG one that has relatively recently been re-introduced. Regarding 'enhancement', I'm no Tom Probert or Nobby, but I like adding a bit of representative detail where I can, with the aim of causing doubt in whoever looks at it as to which particular kit it started out as. Whatever, the Uhu it is and we'll see how it turns out; I have a small amount of AM to throw at it (wheels, etc.) but it will mostly be just the Revell bits and whatever I can cobble together to add to them. I will add the obligatory sprue shots when I get the kit out of the loft, but I won't be starting immediately as I have a couple of other things to finish first. regards, Martin
-
 Almost time to start another one. Though this time I'm going to have everything but the kitchen sink thrown at it!! I'm going to build the Hasegawa 1/48 Ar-234B-2/N Nachtigall, I have always wanted to build this beasty so I'm really looking forward to this one. Plus this will be another to add to the collection of nightfighters, maybe 25+ and counting, still mostly packed away as I don't have space or shelving to display! This will be the 5th 1/48 nightfighter I have and will join the; Ju-88G6, Ta-154A-0, He-219A-7, and P-61A. I'll be doing it in the alternate RLM81/82/76 colour scheme of 140145, one of only two that are recorded to have flown, plus the splinter camouflage will be a nice change from the more normal (?) RLM75/76(/66) colour schemes of German nightfighters. As you can see I'll be throwing all sorts additions onto it as I go along, other than engine, they are; Aries Cockpits set & wheel bays Aries Wheels & masks Eduard Cockpit masks Eduard PE set Master Model FuG 218 Neptun antenna set Squadron Crystal Clear canopy, to replace broken item! And anything else I might find on the web! I love the Master Model antennas, they're just so fine and detailed, much better that the PE ones included in most models and reasonably priced if you get them from Hong Kong! Well this should keep me busy...now just waiting for starters orders then the fun starts!
 -
Hi all, I’m about to embark on a fairly major build project on a 1/48th Hasegawa Ar234B-2/N Nachtigall. Have got lots of extras to add and have lots of info and pictures of the more normal beast but very few on the nightfighter version. Records indicate there were only two that actually flew “operationally†so pictures are quite hard to come by. It’s the cockpit that I really need info on, mainly as to whether the bomb site in the daylight version was still fitted to the night time variant? Plus the centre gun pod doesn’t really fill me with confidence when compared to the drawings that are around. If anyone can point me in the right direction with links or pics, that would be great. Plus any additional info would be great on these rare beasts. cheers