Search the Community
Showing results for tags 'monogram'.
-
B-1B Update Sets (for Revell) 1:48 Eduard The massive but ageing B-1B Lancer in 1:48 is back on the shelves after a long absence, and even though it is getting on a bit, it's still an impressive chunk of plastic, measuring almost a metre long when it's finished. Eduard's sets have been dusted off and brought back to address some of the less detailed areas, which is a good thing for anyone looking to improve the kit. As usual the sets are split into areas of the airframe, allowing the modeller to pick & choose which areas to focus on depending on budget, skill and where their interests lie. Each of the Photo-Etch (PE) sets and masks set come in the usual re-sealable flat-pack with white card insert protecting the sets as well as the instruction sheets. Interior (49737) Comprising three frets, two of which are nickel-plated and pre-printed, the larger one also being self-adhesive, while the last is bare brass. The main focus is on improving on the kit instrument panels, which take up a lot of the cockpit, replacing the main panel, side consoles and centre console and aft panel with new pre-painted parts, as well as a nicely detailed throttle box. Additional parts are included for the rear bulkhead; the four crew seats, all of which get belts and seat details, and the cockpit sidewalls. The only issue with the set is the slightly bluish grey of the instrument panel surround, but if that bothers you it is a simple matter to overpaint the background to blend it in with your cockpit paint. Exterior (48857) This set consists of two bare brass frets with a substantial part count. The nose gear bay is detailed first with additional panels and rib detail, plus bay door actuators, and a substantial upgrade of the nearby crew ladder, which receives a totally new set of steps, leaving just the side rails from the kit parts. The crew access door is also detailed internally before the ladder is attached. The main gear bay is next, and is detailed with additional panels to improve on what is already there. The large gear legs are also given additional parts, some of which are designed to be slotted into grooves in the curved top of a leg section, so have your razor saw handy. The huge weapons bays are upgraded with detail on the bulkeads fore and aft, including the big baffles that drop down to disrupt the airflow that allows the bombs to successfully leave the bay at speed. The separating bulkheads are also detailed with extra parts, which should help to reduce their dated appearance. The outer skin of the Lancer is next decked-out with a large number of aerials, static-discharge wicks, and two-part vortex generators under the tail. A few small probes and vents are also added around the nose, with additional detail installed between the twin engines on each side, with some fan detail parts inside. Mask Set (EX480) While there aren't many windows on the Bone (B-one, geddit?), they are large and rounded, the radiuses for which can be difficult to cut manually. The yellow kabuki tape is pre-cut for just such purposes, and you get the main canopy halves, side windows and portholes, most of which are of the strip type to hug the frames and avoid the compound curves that could cause wrinkles. Fill the centres of the masks with liquid mask or scrape tape before you spray for best results. Review sample courtesy of
-

1/48 Douglas TBD-1 Devastator VT-3 pre-war
Reini78 posted a topic in Ready for Inspection - Aircraft
#37/2015 The newest roll-out and one of my dad´s rare excursions to USN subjects. Used the classic Monogram kit, white box 1974 edition, mostly oob. Decals were taken from the GWH "Wake Island" kit. One of the "T"s was missing the horizontal bar, luckily my dad found a suiting decal piece in the spares box. Seatbelts added, aerials with EZ Line, Gunze and Tamiya acrylics. BTW, forgot to remove the masks on the little fuselage side windows... -
Here is my old Monogram P-47 finished in the markings of Captain Ken Dalberg France 1945. I rescribed the main panel lines and rattle canned the silver finish, the rest is brush painted. Other than a set of resin main wheels and some PE for the bomb pylons its out of the box. Detail wise its no where near the Tamiya or Academy kits but still builds up in to a nice representation of a Thunderbolt. Hope you like.
- 11 replies
-
- 19
-

-
I going enter with this one: I want to do 61-0069 "Cherry girl" from the Print Scale sheet, but I can't find any references showing the artwork on deployment, as the only pictures around is from 1983. some interesting but quite graphic pictures of "cherry girl", hence the code: http://scalemodels.ru/modules/myarticles/img_7309_1397662041_var-1.jpg.html Anyway I will get started on the cockpit soon.
-
Hi Guys, As the Co-host I will start with putting my stuff on this GB. It is the 1/48 Monogram B-24J Liberator. With a few extra's. I have got a set gun barrels from Quickboost witch is original for the B-17G, but I think it will fit without any trouble. I also have 3 extra decal sheets. I still haven't decided totally on witch scheme I will use. The model was a second handed one and was already started. I have managed to losen a few parts from each other. The only part I didn't touch was one of the wings. It was glued firmely and would brake if I used to much force. I have also done some rescribing of the model recently. It may not be totally correct but will in the end give a better look after painting and a wash. The model was also in a box with a B-24D so I don't have a picture of the top of the box. It was a great surprise to see two kits in one box and that for just 25 euro's!!!! Here are the pictures of what is in the box. the sidepicture of the box it came with. the content. the sprues, or what was left of it. The glassing was twice in the box for the B-24J. the lose parts (also partialy because of the rescribing). Also the cockpit was already painted. Don't worry about this I will re-paint this durring the build and try to enhance it. and the building manual. and the decals from the kit with the quickboost set. And the after market decals I have. My preference go to "Sweeter Gal" from the 93th BG. And some of the reference material I have. Cheers,
-
When the 90ies began and I was in my starting teenage years, one time I got a 1/72 Airfix Red Arrows Gnat a 1/48 Revell Bf109G-10 from my uncle as Christmas presents, model kits for the first time. I had no idea what to do with them. Luckily my dad built models when he was a teenager and a young man and he showed me how to build models. So I started the hobby and he restarted it after 20 years. Back then I built almost only 1/35 armour but my dad became a 1/48 aircraft modeller. Initially he intended only to do each version of the Bf109 and the Fw190 and some postwar German jets, but it turned out differently......as you have surely realized it´s only a hobby, it´s only a hobby Here´s one of my dad´s earliest models, Monogram kit 1992 edition, built in the early 90ies. Pre-internet time, no easy online ordering or research, mostly Humbrol and Revell enamel paints used, much brush painting, first steps with the airbrush, no aftermarket items.....modelling in its basic fun form.
-
OK, first WIP, please be gentle! Quick background – built loads of kits in the early 80's before getting old enough for the pub. When I got my own house I started back with model railway layouts. Then a couple of years ago my wife gave me an airfix spitfire for christmas. And that was me off again. After a couple of 1/72 kits I got a 1/48 Canberra PR9 from modelzone. I had done a couple of 1/48, 1/32 & even 1/24 kits as a youngster, but I enjoyed the 1/48 detail. So, the Canberra needed a Hunter to go with it and then a Lightning. Now I live near Wattisham and the Hunter was a Wittering example, and the Lightning from Binbrook. Both (along with the Canberra) are in late 70s grey / green camo. So I fancied making a Phantom. Should it be FGR2? If its camo then its nots likely to be a Wattisham example. Maybe a 74 sqadron F4J (UK)? But on the cheap – not going to pay £50 for a kit thats out of production on ebay. Got to be sub £20. For me its about the fun of the build, not the extreme detail. Love the builds that do spend a fortune on etch & resin and when my skills get to the point of making use of this level detail I will have a go. So on ebay up comes a deal – not one but two phantom kits in one auction. One Esci, one Monogram, enough parts to complete both, but neither complete & only one set of (US only) decals. Won for less than £20. The kits were slightly started. Wings glued together & a bit of one cockpit started. One is a C/D, one an E/F. But a result on the E/F, the standard rad dome and all of the front wheel bay gear for a standard nose. So time to get started This is the result of 2 mongram cockpit interiors. One fits the Monogram kit (as it should!), the other needed to be modified a bit to go in the Esci kit. As I said I had one set of decals, so I photocopied them, cut them out & stuck them in. Hardly the high detail seen on other builds, but looks ok to me. Positioned in to their respective homes they look OK. The wings were just dry fitted at this point
- 114 replies
-
- 2
-
-
- 1/48 Phantom
- Esci
- (and 1 more)
-
Kit - Monogram 1:24 Paint - Bodyshell: Tamiya acrylic aerosol. Internals & Chassis: Tamiya acrylic, Tamiya & Humbrol enamels. Decals - Kit Extras - None Of course, straight after taking the photos, I realised that I'd forgotten to fix the exhaust pipes, but they're attached now. Another great NASCAR kit from Monogram back-in-the-day, thouroughly enjoyed every minute of this project and already got the next one on the bench... BIG demands on my time just now (I'm working at the FIFA U20 World Cup for the next couple of weeks), plus the day job, plus the whole 'house husband' thing... Who knows when the next model will arrive here at Britmodeller. In the meantime, thanks for taking the time to look and/or comment. AFN Ian.
-
 Here is the 1/72 F-4J from Monogram. This one has been in The Stash since 1985. As GordonD pointed out, it was at the bottom! The box is very battered indeed. When kits have been in The Stash for so long, I feel that they have become old friends and so I have to do right by them. When a kit has waited patiently for more than three decades, it needs to be treated with respect. I will be building this in the box art scheme.
 -
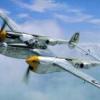
I would like to offer Monogram’s 1/48 ProModeler P-38 G/H Lightning done with Kagero decals for a P-38G flown by Lt. Kenneth G. Ladd, 80th FS/ 8th FG, Dobodura, New Guinea during 1943/44. It is called the Nulli Secundus/X-Virgin with “Ruthie” on the outer port engine. This kit has been around for a long, long time, back in the 60s or 70s when it first came out. The version I have is a 2002 reboxing with some new decals. (More about that later). Other than Accurate Miniatures, I cannot think of a line that has better instructions than the old ProModeler series. Most of them have pictures of actual aircraft (not the best quality, but at least they are there) and some helpful hints on how to make your build better. Anyway, looking forward to this build to help get my modeling mojo back. Here are the box and sprue shots. And here is the Kagero scheme I will be attempting to replicate. The cockpit is first up as it is inserted into the top fuselage half. The parts layout consists of 10 pieces. Detail for the kit’s age is not too bad Once the cockpit is built up, it rests on top of the nose wheel well. I am going to use the ladder provided in the kit, so I have to open up the bottom of the lower fuselage half. The cockpit parts get their base coat of either chromate green or NATO black. Then the weathering and dry brushing begins Once the parts are painted, dry brushed and weathered, the kit detail is pretty darned good. Especially when you consider this kit is about 50 years old. The detail on the control wheel and instrument panel are better than some modern kits that are just coming out. Assembly of the cockpit begins with the seat, the control yoke and wheel, instrument panel, rudder pedals and side panels. Some more details have been picked out to add a bit of color to the cockpit. Although given the fuselage opening, I doubt much will be seen. Must make a mental note to myself to not close up the cockpit before I source some seat belts for this plane. The cockpit is inserted into the bottom fuselage half. Next up, the wheel wells need to be built up to be inserted into each tail boom. The wheel well consists of a roof and two sides. The roof of the port wing well is warped. So with the application of brute force, some CA glue and accelerator, the roof is conformed for the most part to the wheel well sides and is now pretty square. I was hoping the starboard roof would be in better shape. No luck, it is even more warped than the port side. So some more persuasion is used. Then the two wheel wells are placed inside of each tail boom and the two tail boom halves are sealed. The kit instructions would have you place the undercarriage at this time, but with some dry fit testing, the undercarriage can be added after painting making my masking a whole lot easier. After the booms are glued together, the scoop faces and intake are put on each boom The upper fuselage half is glued to the two booms. Then the bottom half is attached to the upper half and fuselage booms. At the same time the main tail piece is fit between the two booms to make sure everything lines up correctly. Twin boom planes are always fun and games to align, but the engineering of this kit makes it a very easy thing to do. Some tape is applied to keep everything in place as the glue dries. While I wait for the glue to dry I start the job I like least in modeling, masking the canopy. Yechhhh. And why do I hate masking canopies, could it be this: Earlier in the day I had masked a canopy for an F-117 with all of its fun sharp angles and points. No problem. With this canopy and fairly simple lines, I skewer myself. This is why I buy pre- cut masks right? I tape up my finger, finish the rest of the canopy masking, (I cheated, but more on that later) and by that time the glue has set on the mainframe because I am so slow at masking. The tape is removed and now I get to inspect the seams for “irregularities” that must be corrected. And there are a few: So the plane is puttied up and left to dry overnight. While I wait for the putty to dry, I work on the propellers. These consist of a hub, 3 separate propellers, and a spinner. Now the kit comes with 4 propellers per engine. Why 4, I have no idea? Is there some P-38 variant I missed that had 4 propellers? Anyway, according to the paint scheme the back part of the hub is black, the blades are black with yellow tips, and the spinner has a green tip with a white stripe. It is morning now and the always enjoyable (not!) task of sanding the seams presents itself. So various grades of sandpaper are used to get rid of the seams and smooth everything out. The grey undersides are painted, let dry and then masked for the upper olive drab. The olive drab is then applied Now the picture tonal quality is a bit warped as the weather outside is not ideal. So the spray was done in the bathroom with the vent to the outside on so I don’t poison anyone else. Obviously the bathroom lighting leaves a bit to be desired. Might have to get different lights. Once dry, the olive drab seems to be spot on. The tape is removed and the green tips to the tail fins are applied. Once that dries, a coat or two of future is applied to get ready for the decals. Now the kit decals will have to be used for the national insignia and stencils. The Kagero decals only have items specific to each paint scheme. I start with the topside decals and stencils from the kit. The kit decals, though only from 2002 did not hold up well. They were fragile, took a long time to release from the backing and if I looked at them wrong, shattered apart. Almost every kit decal had to be pieced together. Since this will be a tired old plane, it may work out in my favor, but putting them on was very frustrating. I can’t wait for the Kagero decals. I start with the port side. The Kagero decals were superb. They went on well, could be moved around to get in the right position and reacted very favorably to Micro Sol. The kit decals, more shattering and piecing together. The starboard side decals were next. The nose art went on smoothly and looks great. The bottom was done using the rest of the kit decals, but less shattering for some reason. Now, I am going to let everything dry and let Micro Sol do its thing. Next up will be a protective coat of future and then the weathering will commence. I am still cogitating on how best to proceed with dirtying this bird up. As always, all comments are welcome.
- 9 replies
-
- 2
-
-
- Monogram
- Promodeler
- (and 4 more)
-
My Monogram B26 Marauder 1/48 ,not the best of kits but deff not the worst ,half way through i decided i wanted to try a water feature/crash dio, first attempt but reasonably happy with it .It needed something a we bit to add to it so i bought the Verlinden USN Pilots WWII in Dinghy,(changed the colour scheme to USAAF Crew) hope you like ,comments welcome.
-
 Hi all, I really got hooked on making this kit! Love these Monogram kits - they do take a bit of work but the detail is good and I think they look terrific. Having finished this I can believe how huge the F102 was. Pretty difficult to handle too - how long in the pitot going to last?? Already broken once!! Still unarmed as yet but wanted to take some pics today...
- 25 replies
-
- 26
-
-
 As a spinoff of my "[more] accurate T-33" attempt in the "Lesser Built Air Forces" group build, I'm also going to be converting Hobbycraft T-33 and probably Monogram F-80 parts to make the first prototype, now enshrined in the National Air & Space Museum. It'll probably be a week or two before things really start happening, but I think I've got the answers I needed (and haven't thought of the next questions yet!) I'm looking forward to this one, and I've had some great help already, most notably Tommy Thomason (see post 3 below, and see his link) so far, but others to join the roll of honour. Oops, that includes you, Troy! Next on the roll of honour is Pip Moss (don't know if he comes 'round here) who is working on some Lockheed logos for me to have printed (custom decal). bob p.s. I'll do a better introduction later...
- 17 replies
-
- 4
-
-
- 1/48
- shooting star
- (and 3 more)
-
Evening folks! It's been a good while since my last project on here (the Dynavector Wyvern - which is still languishing waiting for paint...) as modelling time has been pretty much non-existent for the past year and a half due to a pretty hefty change in career, which saw me trade my aspirations for a light blue uniform for a dark blue one and a move to the south coast. Thankfully things have settled down a bit now, so while I'm on holdover waiting to start my Observer training in the Spring, I thought it was about time I sunk my teeth into another big project to keep me occupied in the evenings and at weekends. So here we go once again... So here she is, Monogram's classic 1/48 Hustler kit, which despite all the well known issues with the kit such as the dodgy fit of the engine pods to the wings, the odd moulding bump in front of the windshield and the raised panel lines, still builds up to be an absolute beauty of a kit (not to mention an absolute monster... still haven't quite worked out where I'll keep the finished product or the other one I've got in my collection! ) As you can see I've also got the Fisher Models detail set for the kit, which includes replacement elevons, replacements for the kit intakes + shock cones, replacement exhausts and also the earlier mark of ejector seat. Early Seat: Replacement Intake: Fisher Exhaust vs Monogram part: The first job for this beast was to re-scribe the panel lines, which at first I was a bit apprehensive about, but really isn't all that huge a job. The raised panel lines on the kit are quite prominent and almost entirely straight lines, so this task wasn't too bad. Using the kit panel lines as a guide, two evenings of re-scribing and sanding were enough to get to this stage. There are still a few areas left to be scribed, but these will need to wait till the fuselage parts are joined together as the panel lines run across both parts, so I don't want any massive misalignments in my scribing. This is where she stands at the minute, and I'm now about to commence painting of the cockpit and undercarriage bays. At which point I've run into a small problem... Does anybody have a definitive answer as to what colour the undercarriage bays and doors should be? I've seen various walkarounds which show about four different answers to this question - white, overall aluminium, what looks like a zinc chromate yellow and a fairly hideous shade of green which I can only describe as looking like Games Workshop's old style shade which was called 'Rotting Flesh'... Just to add to the confusion, the instructions for the kit call for them to be in Medium Sea Grey! Any advice would be more than welcome on this subject! My other concern is that this is going to be a fairly heavy kit once it's all together, would anyone here who has previously built one care to comment on the strength of the plastic undercarriage legs? Would a set of metal replacement legs be necessary? Anyway, this little essay has gone on long enough now, hopefully some kind soul can point me in the right direction with the colours for the undercarriage bays/doors and by posting the build here it'll give me the motivation to actually finish a build for a change (I will finish my Wyvern! I will!!!) Cheers folks, Nik
-
North American A-5A Vigilante Training Squadron VAH-3, Naval Air Station Sanford, Florida, 1962 Back in the 60s when I was 16 or so I came across a guy called Jo Thompson. He turned out to be an expert on post war US Navy stuff and sent me all kinds of info which was a real gold mine for me in those days. One of those photos was this one : Ever since then I’ve been meaning to build a GJ coded Vigilante. I bought the old Monogram kit sometime in the 70s or 80s but I was too busy with work and family to build it. So at long last I got around to it! This was a basic kit to say the least. The box says 1/72, but even though the wingspan checks out as 1/72 the general bulk of the fuselage looks small when compared with the Airfix RA-5C. But I was still going to build it anyway. All surface detail (including control surfaces) were raised so there was quite a bit of scribing to do. The interior of the fuselage looked as if it was originally designed to have a spring-loaded bomb ejection system. Part of this was a rear fuselage fairing that simply had a hole in it. 3 holes, in fact, as there were also no exhausts provided! A spare set of burner cans from a Phantom came to the rescue here. Nothing fitted – much Milliput, etc – you know the story – but that’s what we do isn’t it?
- 19 replies
-
- 21
-
-
Hi guys here is a Heinkel He 111 H22 from Revell Monogram. It's in 1/48 scale and hase new prop's (RBS), a big edition set from eduard and self made exhausts. It is a nice kit to build. Here is the building thread. http://www.britmodeller.com/forums/index.php?/topic/234967990-heinkel-he-111-h22-update-19-10-2014-and-finished/ It was made for a friend of mine from IPMS Netherlands. Rene, I hope you like it. Here are the pictures. Cheers,
- 14 replies
-
- 15
-
-
 Hi Guys, It hase been a while sinds I worked on this model. I started this one in januari 2013 in the Battle of the Reich GB. Here is the link. http://www.britmodeller.com/forums/index.php?/topic/234932979-148-heinkel-he-111-h22-update-25-03-2013/ But I didn't manage to finish it. So now I have started it up again. The no go at that time was all the etch in the cockpit, but that hase now been taken care of. Here are some pictures of what hase been done lately. And some coloured etch. and the cockpit compleatly placed. And some pictures of the glasswork. I have given them a dip in some Klear. The grey part on the first picture is a eject shute for the MG131 in the nose. I also have sawn out the top hatch for the pilot and the hatch I have taken from a Falcon set for the He 111. I have also made up the prop's but no pictures of those. Cheers,
 -
 The old Monogram kit, with Eduard's photoetched set, and decals from Techmod. Hope you like it! More photos and the full text (in Greek) here: http://www.modellingnews.gr/el/%CE%BC%CE%BF%CE%BD%CF%84%CE%B5%CE%BB%CE%B9%CF%83%CE%BC%CF%8C%CF%82-%CE%BA%CE%B1%CF%84%CE%B1%CF%83%CE%BA%CE%B5%CF%85%CE%AD%CF%82/tbd-1-devastator-uss-enterprise-1939-monogram-148
- 14 replies
-
- 5
-
-
- Devastator
- tbd-1
- (and 2 more)
-
 Dijimos Cobra, dijiste Harrier! (You say Cobra, we say Harrier!) Harrier EAV-8B II, 01-903 / VA.1A-15, Escuadrilla 009, Arma Aerea de la Armada Espanola, (Monogram 1/48th) The latest model in my Harrier build project (#17, 3 to go) is the EAV-8B II variant flown by the Arma Aerea de la Armada Espanola – the Air Arm of the Spanish Navy. The Spanish Navy named the AV-8S the “Matador” and the EAV-8B II the “Cobra”, but we all know it as the “Harrier”, of course. Irrespective of how they refer to the aircraft, they have logged over 50,000 flying hours with the Harrier. The Air Arm received their first EAV-8B II (note “E” denotes “Espana”) in late 1987, receiving 12 in total. Five were later remanufactured as EAV-8B II Plus aircraft, four went through the SNUG (Spanish Navy Upgrade) Programme (01-903, -907, -909 and -911) to become EAV-8B II Plus equivalents (minus the APG-65 radar) and three EAV-8B II have been lost in accidents. All are based at Rota when not deployed. This build uses the Monogram kit plastic straight from the box, with just the addition of a Douglas A-4 Skyhawk fuel tank which now acts as a baggage pod. The serial chosen is 01-903 / VA.1A-15, the oldest surviving EAV-8B II and recently upgraded via the SNUG programme. It’s likely that the four aircraft pushed through the SNUG programme will be retired shortly due to budget constraints, leaving the Spanish Navy with a radar-only EAV-8B II Plus fleet of Harriers. The model shows the original camouflage scheme applied in the late 80s and early 90s of Dark Compass Grey (FS36320) over Light Compass Grey (FS36375). She is brush painted with Lifecolor’s acrylics and I used Series Españolas decals. The model is weathered using Tamiya powders, artist pastels and Zig brushable pens. Microscale’s micro flat matt varnish used to flatten the finish. With the canopy open, I added the “drop-down” step from the intake – something that’s guaranteed not to survive a trip or two to the model shows with the West Middlesex Scale Model Club. Officinados will note that the stencils are the wrong colour for this scheme, but I chose to ignore this minor detail due to the difficulty of trying to produce my own. The “weathering” is based on the real aircraft – obviously the car wash had broken down. This is how it turned out ... All feedback welcome as ever. Next arrival at the hover pad will be an EAV-8B II Plus.
 -
The Harrier Project – 20/20 Vision My last act of self-aggrandisement on BM – a final pointer to my completed Harrier Project for those of you who want to see it. I counted them all up and I counted them all down. Here’s the collection … … and more photos for those that way inclined via this link. So it’s goodbye from them. And it’s goodbye from me. Happy Modelling folks!
- 9 replies
-
- 13
-
-
- Harrier
- Sea Harrier
- (and 4 more)
-
This has been an interesting build. First time I have used an airbrush. (I know I cheated by using only one color, but give me a break.) Have had an airbrush for the last 2, almost 3 years that SWMBO got me for Christmas. Just haven't had the gumption to use it. It went remarkably well and was fairly easy. I chose this model to begin on as, (1) it was a single color (2) the color to be finished in was the same color as the plastic (3) an old kit I have had for decades and have 2 others in the stash and (4) my next kit will be the 1/24 Airfix Mosquito and I really don't want to mess it up by experimenting the first time. As for the kit. It is Monogram's version of the A-26 glass nose version released in 1996. Most of the newer releases have been of the solid nose version. I have the ProModeler version and the most recent release. The detail of this kit, being from 1996 was quite good. The fit was great with one exception, the undercarriage. (There is a build in progress for more details. If I was smart enough to know how to link it to this I would, but I am not. Go search the old fashioned way.) Of course, I left off the undercarriage to ease in painting and put it on the very last. It was painful. The nose wheel rested too low and the spot for the main undercarriage to attach was wide for the parts and the parts are a bit flimsy. The main undercarriage was put to rest with copious amounts of super glue. The nose wheel finally ended up being extended with some brass tubing to make it sit right. Even now, I think it sits a bit too high. The only completely daft thing I did; forgot to notice it was a tricycle undercarriage. Did I remember to use any weight, nope. So now have to decide to use clear sprue as a brace, or reopen the engine nacelles to fill them with lead weight. Anyway, here are the pictures, comments and criticisms welcome. I liked the glossy black finish so much that I only did a hint of light weathering. And here it is in its place in the kit cabinet. I must apologize for the photos. I shot them outside and it is 20 degrees (F) with ice so did not take a lot of time for composition and detail shots.
-
I have made the decision to experiment with my old/new airbrush on a model other than the 1/24 Airfix Mosquito being built. So, I dug out the old Monogram 1/48 A-26C Invader as I have the Promodeller version in the stash. Starting out slow and plan to do it in a gloss black finish. (Baby steps I know.) So, the shots of the box cover and sprues are: Okay, before I begin, a bit of a rant (I know, like I never do this.) All weekend I have been trying to upload pictures for this WIP. And all weekend, nothing but grief. I now can chalk it up to the wonderful Microsoft company that seems to be a bit peeved at us old folks that are not switching to their Chrome product as quickly as they would like. I truly appreciate (please read that with the heaviest amount of sarcasm you can) their upgrading basic Internet Explorer to make it impossible to use with forum such as this. While at the same time, if I use their new product, Chrome, it works like a charm. Not being cynical here, (oh yes I am), but it seems odd the same company putting out both products would have trouble with a new update for their old program not working while their new program which they desperately want everyone to convert to works fine. Okay, nothing I can do about it, is now out of my system. Back to the build The kit was done in 1993 (at least that is the stamped date on the lower wing). I am amazed at the level of detail that is in the interior of this kit given the time it was produced. Hope I can do it justice. Here goes with an OOB build. Start with the cockpit and interior. Again, the level of detail is terrific and the fit is good too. For your amusement and comment: Going to button up the halves and hope everything fits. This is the second try as on the first, I stupidly forgot to put in the top turret before closing up the halves. Pried it apart before the cement had dried, second attempt with turret in place. Well, it fits, but there is a seam. And I am chalking it up to me, not the kit. I don't know how there are builds out there that do not need sanding and filling. I always have to sand and fill. (Next to taping canopies, I detest filling and sanding). Started the rough sanding, will wind it down with finer grades of paper and more filler and primer. Okay, checked the fit of the wings to the fuselage and it seems as if I can paint and then put together if I am careful. (A huge assumption.) So the fuselage is in the last stages of fill, sand, and prime for painting. And the wings and nacelles interiors are being finished. Here they just have the base coat. Nacelle interior pretty well finished. Engines are up next with the beginning base coats. One still in base coats, one for the most part weathered. (Still need to remove a bit of the excess wash.) Okay, now the hard part for me. I have read the instructions for the air brush about 5 times; read three beginning articles about spraying and thinning paints; and picked out a very glossy black paint for this bird. I am hoping to avoid total disaster as I am just using one color scheme. How hard can it be to just spray on one color in an even pattern? (I guess the captain of the Titanic probably wondered how hard it would be to avoid a rather large iceberg? Custer probably wondered "Where did all these Indians come from?) And the results of my first ever use of an air brush: Not too shabby and not as difficult as I thought it would be. Even cleaning up was not that big of a chore. The wings are just slotted in and not affixed yet, but you can see the fit, when joined will be quite good. Just have to add the decals and all of the little nit picks. Have to also repair all the damage I did in handling the model. Have succeeded in knocking off the pilot's seat, bomb sight, gunner's chair and station, 4 of the 8 interior bombs and 1 of the 4 bomb racks. Also need to touch up some paint bleed on the wheel well doors that I did not tape up properly. Okay, to whoever cares, the finish right now is a very glossy black. With the red lettering, it will look pretty awesome. The question is, do I leave it in the pristine, just off of the assembly line, spit and polish finish . . . or gum it up with all sorts of weathering to make it ratty and tatty? Just do not know which way to go.
-
This is the ancient Aurora kit, re-issued by Monogram in the 90s. It's actually pretty good plastic, with plenty of detail to work with. The opening doors, bonnet and boot bring their own issues, but the end result is rather nice compared to today's buttoned-up kerbside kits with aerodynamic under trays. As you can see, there's a fair bit of work to fine-tune the kit into a more accurate representation of the original classic, which is a truly beautiful, and very purposeful looking GT car. The windscreen is still not right -- it should be more upright, and the base is much more semi-circular, not the large rectangular cut-out Aurora gave us. Personally, I think all the shape issues in this area come from placing the firewall to make room for the operating door hinges, which mean that it's too far forward. The engine is nice, and a bit of time with wiring pays big dividends. Many thanks to Skip Jordan who has been nudging me to give this a try for a couple of years, provided invaluable reference resources, and acted as chief cheerleader along the way. I'm now going to go away and build something from a state of the art kit, out of the box, before I even THINK about tackling the Singer 911 kit-bash... bestest, M.
-
Hi folks, A few months ago I let the fantasy lose on one of my all time favourites. I can not really put my finger on why, but I just love this plane, she is a sleek beauty. I did build it as a child and when I got my hands on a second hand kit I just could not resist it. The question was just what to do with it... After some long and anxious thoughts I decided to make a SAAF camo scheme, like the ones they had on their Mirage F1AZ. Some of those Mirages was later sold to Gabon, and there we had it The Monogram kit is beautifully detailed but with raised details. I re-scribed the panel lines, opened up and scratch built the gear bays and the hatches. Moreover I added some PE from Eduard (F-5E) and a Quickboost Gun Bay. The front office is a mix of PE and original kit parts. A MPM exhaust from the Gripen fighter filled the rear and a snorkel for extra fuel in the air was added. A Skyraider gave up it's fuel tanks and together with some Hasegawa practice bombs (that was doomed to never be used) and two Python 3 missiles she was ready for practice run take off. She is painted with Gunze and Aclad II. A build thread in Swedish language can be found here: http://www.ipmsstockholm.se/phpBB3/viewtopic.php?f=3&t=3676 Hope you like it Cheers /Fred
-
Here’s another Crusader that I built several years ago. It's the old reliable Monogram F-8E that I converted to a 'J' model, which I have ugraded over time. I added an aftermarket seat, and an out-of-production flap/droop/underwing bay set by High Flight. I scribed lines on the leading edge droops to at least depict the appearance of the extended droops of the 'J' version. The UHT’s (unit horizontal tail) are larger on the J version, but I didn’t correct that (yet!). I also extended the main and nose gear struts to correct the too-low stance of the kit gear, and later used parts from a Hasegawa Crusader kit for the ‘football’ ECM antenna on the tail. I added scrap plastic rod and wire to busy up the gear wells, and scratch-built steps and a boarding ladder. In addition, I added a canopy restraint strap, replaced the plastic pitot probe with wire, and added an afterburner nozzle from a section of an old F-18 exhaust cone. I used SuperScale decals to depict the VF-211 CAG jet from USS Hancock, circa 1972. The Remove Before Flight flags are from Eduard, and the Sidewinders are from Hasegawa’s weapons set (which I need to replace with a later variant!). Monogram’s Crusader is a great value for the money, with the biggest innaccuracy being the cockpit is a few scale inches too wide, giving the canopy and windscreen a flattened appearance when compared to the actual jet. But with a little extra work, it can be buit into a fine model.
- 14 replies
-
- 3
-
-
- F-8
- F-8J Crusader
- (and 3 more)