Search the Community
Showing results for tags 'missile'.
Found 18 results
-
iBristol Bloodhound (A02309V) 1:76 Airfix Vintage Classics Following the cancellation of an earlier Ramjet-powered Surface-to-Air missile project by the name of Blue Envoy, due it seems to the 1957 Defence White Paper by the now-infamous Duncan Sandys, a shorter-range project was considered to pick-off the remaining enemy bombers that made it past the English Electric Lightnings that were responsible for point-defence of the Great British airspace. The fact that the Blue Envoy project had been progressing well, with successful trials of a scale-version of the missile, caused some scratching of heads, but the new Bloodhound missile benefitted from its technology, giving it a head start on its development path. Much of those technology benefits were incorporated into the Mark.II Bloodhound, extending its range to almost double that of the Mk.I. When launched, the missile accelerated incredibly quickly thanks to the four booster rockets that were ejected after only three seconds, by which time it would be travelling at an ear-popping 1,800mph, with attendant sonic boom in addition to the roar of the rockets and ramjets, making hearing defence an absolute necessity. It homed in on its target using a combination of semi-active radar and powerful computing capability (for the day) that gave it a high level of resistance to electronic countermeasures, and allowed it to accurately track low altitude targets, making it a lethal opponent for the expected waves of lumbering Soviet bombers and their escorts in the days before ICBMs took over the role of delivering nuclear weapons. It remained in service with the British and Swedes until the 90s due to its abilities, and Britain took their Bloodhounds out of service when the Berlin wall came down, while the Swedes kept theirs until just before the new millennium. The Bloodhounds first paired with the Thunderbird shorter range missile and then the Rapier that covered the required defensive envelope between them. The smaller missiles could also be transported comparatively easily, while the Bloodhound was of a size that lent itself to fixed installation, often around strategic areas such as airfields. The Swedish Bloodhounds were converted to be vehicle transportable, and a possible future development of the missile was to introduce this facility wholesale to the Mk.IV, while the Mk.III was to be nuclear tipped with a longer range that would presumably be used to thin the bomber stream over the sea, hopefully keeping any fall-out away from the land. Both those variants weren’t completed however. The Kit This kit was first released in 1960 when the missile itself was still new. It has been reboxed several times since then, and up until the announcement of its long-overdue re-release, it was achieving eye-watering prices on a certain auction site. It’s amazing how some people are prepared to throw money at something if they want it badly enough. Now that it is back in Airfix’s catalogue under the Vintage Classics line, there will be a few people feeling a little silly, but the rest of us will just be glad to see it again, and pleased that the moulds are still in good condition. I built one myself as a nipper, and remember it fondly. Where my kit went though, I have no idea. The kit arrives in a diminutive red-themed top-opening box, and inside are six sprues of various sizes in the new darker grey styrene that Airfix have been using, which has been well-received. There are no decals, but there is a Land Rover with missile trailer, and a set of figures to guard the emplacement, including a dog that one of the chaps has on an invisible lead. Detail on the missile is good, and once the seams are dealt with, it should look suitably sleek. The trailer is a nice inclusion, as is the Landy, but if you want to give it an improved look, you might consider adding some clear acetate windscreens, a bulkhead and a couple of seats for the crew, or at least the impression of those things. There are of course some ejector-pin marks here and there, most annoyingly on the canvas roof of the Land Rover, which will make careful removal and making good very important. There is surprisingly little flash too, most of it around the sprue runners and the figures, which should be quick enough to remove with the edge of a sharp blade and some fine sanding. Construction begins with the missile, joining the main halves that includes the two Bristol Thor ramjet engines, then adding delta-shaped steering fins forward and square fins to the rear, plus the support structure for the temporary boosters in the form of a cruciform part at the rear of the missile. Each Gosling booster rocket is made from two halves, one of which has the fin moulded-in, and once complete the quartet are joined to the main body on lugs near the front fins, and at the rear on the four points of the cross. In action, the rockets were hooked to a ring fore and aft, and once their thrust became less than the ramjets, they would slide backwards, opening like a set of petals before falling away. That’s the missile finished. The Land Rover is next, building the canvas-topped bodywork onto a flat-bottomed floor, adding the windscreen, bonnet and radiator assembly to the front, plus two axles that thread through holes in the arches, to be finished by adding wheels to each end of the axles. A scrap diagram shows that if you leave the glue off, the wheels should rotate. At the back of the vehicle a bulkhead with a notch for the towing hitch closes the rear. The launch platform has several parts left unglued to allow it to be moved, based upon a flat turntable, which is joined to the floor by a styrene pin that joins them together and allows them to rotate. The side walls trap the launch rails and their supports into position, adding extra supports as the parts are joined together, and finally a stopper pin that plugs into the back of the missile so it stays in position. The last main assembly is the trailer, the chassis made from two halves that trap the tread-plated floor in position, adding twin wheels into the rear arches on both sides, another frame is glued to the trailer’s gooseneck, and twin supports are added fore and aft. The front wheels are based on a pivoting platform secured in position by another styrene pin, adding two stub axles beneath that have more pins to hold the wheels in place, and an A-frame with towing eye on the front. There are five human figures and a dog on the sprues, although you only use three of them according to the instructions. One is an officer waving while a ‘Snowdrop’ RAF MP stands to attention, and a dog-handler should be linked to the dog via a fine wire so it doesn’t bite anyone. The other two dog-handlers don’t have a dog to handle, but you could adapt them to other poses if you feel the urge. Markings As already mentioned, there is only one colour scheme depicted, which consists of a white missile with yellow boosters, green launch platform and trailer, and an RAF blue Land Rover. Other schemes were used, so check your reference if you feel like a change. Conclusion A great many modellers have been waiting for this kit to come back in stock, and unlike those with bottomless pockets, we appreciate the reasonable price that it is now being offered at. Most of us won’t notice the slight difference in scale from the usual 1:72, and if you give it some care and attention, you should end up with a creditable replica of this Cold War Warrior. Highly recommended. Review sample courtesy of
-
Instead of add the WIP pictures to a discussion of a different object I divert the discussion here. An engine from a Frog V1, droptanks from an Airfix Viggen and probably the horrible from the Gripen prototype from Revell became the start. The Gripen tank was cut in the middle and parts added to the ends. Plastic card added for the shape to take the form of the missile.
-
 Hi Comrades, I am calling this build done. My OCD was telling me that showing the engine would look a bit out of place without a good excuse for it, so a split radiator hose looked like as good an excuse as any! This meant getting hold of a couple of resin figures, at 1/35 scale they were a challenge for me to paint, my late 50's eye sight and patience is not what it used to be. I also added some metal chain links to bring a bit more real world life to the model. Overall, I found this 2003 Trumpeter kit went together quite well, and I hope you agree it builds into a nice representation of a Surface to Air missile and vehicle of the Soviet era. Happy modelling. Finally, if you want to see the work in progress of this build, click the link below. Built mostly out of the box, with some Eduard photo etch for the Zil 157 truck. Tamiya, Mr Color paints, AK/Flory models pigments and washes. Abteilung oils. Alclad matt clearcoat.
- 12 replies
-
- 22
-

-
Hi all, I’ve started this new project about a month ago and here is the work in progress so far. Here are a few pictures showing the Zil 157 SA truck build so far. It's an early Trumpeter kit, so I did expect a few issues along the way, but so far not too bad. The biggest issue has been the intermediate gearbox installation, the gearbox lower case fouled the chassis, I had to shave a few millimetres off to get it and the driveshaft’s to sort of line up. Once primed with Mr Surfacer 1500 grey primer, I used a 50/50 mix of MRP grey-green 165 with Aqueous H52 olive drab, thinned with Rapid thinners. This gave me a nice smooth finish that looked very close to the kit sprue colour. Also, to add fading and sun bleaching effect later, I mixed a 50/50 mix of MRP 10 brown green with H52 olive drab. The Eduard PE set is being used, but only about 50%. I have bent the engine bonnet hoods into shape, but I am not sure if I will use them yet, as the kit parts look good. Once I have completed the truck, I can move on to the Missile trailer.
-
If anyone has missed it, BBC are starting a new 6 part series starring Suranne Jones as a detective who investigates a murder abooard HMS Vigil, a British missile submarine. https://www.bbc.co.uk/news/entertainment-arts-58334990 Initial previews I've read seem encouraging, and although I'm sure I'm wrong, there's a bit in the trailer that makes me think Suranne Jones gets put into a torpedo tub at one point! I'm also more sure that the BBC weren't allowed to film inside a real missile submarine, but hey, who knows? Starts tomorrow night at 9 pm, part two on Bank Holiday Monday at 9pm, nd then Sundays at 9 pm.
-
SCUD-B Tactical Ballistic Missile (03332) 1:72 Revell While the Scud missile system was know about there can be little doubt that the Frist Gulf War drew attention to this missile system with the then Iraqi regime firing them at coalition forces and into Israel. The Scud was a Tactical Ballistic Missile developed by the Soviets in the 1950s and can trace it linage back to the V-2 via the SS1-1 Scunner. While NATO called the missile the Scud the Soviet designation was R-11 Zemlya. The Scud B or R-17 was the most numerous of the Scud systems. It could carry Nuclear, Chemical and conventional warheads. Following unsuccessful trails with a tracked launcher a wheeled launcher based on the new MAZ-543 vehicle was chosen. The missile had a range of 300km with a 925kg warhead. The Kit Here Revell have re-boxed the Toxso kit from 2014 (A company I must admit to not being aware of). It would seem from what I have read that this kit is very much the same as the DML Scud-B. The kit seems fairly detailed for the scale though the interior can be a little sparse. No injection windows are provided for the kit. It would seem on the original kit these were printed on clear acetate for the modeller to cut out. Revell seem to have degraded this even further by just providing two strips of clear acetate and providing templates you first have to cut out from the pages of the instructions to then cut out from the acetate. The kit has 157 parts over 4 spures and can be built with the missile in the raised or lowered positions. Construction starts with the main chassis an in particular the wheels. 4 types for the steering axles, and 4 for the non steering axles are built up. The main chassis rails are assembled and then the wheels mount to them. A series of sub modules which make up the main body can then be built. The first of these is the rear module which holds part of the elevation system. This can then fit to the body. The triangular storage lockers and control panels then fit between the rear axles. The next module up is the control module. which goes in the centre of the vehicle. This has separate doors for each side. Each side has a crew seat on the curved mudguard section and various control panels moulded in. The next sections the front section which connects the cab to the centre section. Following this main front cab can be assembled. There are two sides for the cab, the left containing the drivers seat and controls, with a second crew seat, the right contains two crew seats. These are linked by housing for the main engine. All of these modules can then be assembled to the chassis. Work now moves to the missile and the launcher. At the rear the platform holding the rear hydraulic stabilisers is built up and attached to the main chassis. The main rear launch cradle is then built up from its base and two main supporting arms. At the top of the arms goes the A shaped protective cradle. Supporting braces connecting the two side arms then go in. The two part missile is assembled with two additional fins and the base plate going on. Additional parts go the base which will aid with erecting the missile. The missile can be mounted to the launcher in either transport or launch mode by connecting the hydraulic rams in the right places, and if in launch mode putting the stabilisers down. Decals A small decal sheet gives a few white markings for the Soviet version ,and very small national markings for the vehicles. Three vehicles can be built from the sheet, Iraqi, East German and USSR; though in reality you could represent any user with a little extra decal help. Conclusion If you really want a 1/72 Scud B then this is a good deal from Revell. Recommended. Revell model kits are available from all good toy and model retailers. For further information visit or
-
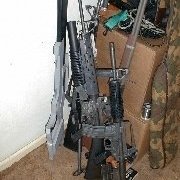
For my third (and last) entry in this very enjoyable GB there can be only one possibility. Located in this box there are parts from three Bloodhound kits purchased some years ago as a project to build a diorama based on the box art which showed 4 Bloodhounds etc.. For various reasons the project never completed but I guessed that the box contained enough parts to build one set while keeping within the 25% rule. As there are only 12 pieces made up (mainly the Landrover) this comes to about 18%. Why the only possibility. When first issued (1960) this was an Airfix Series One kits - with 4 separate builds + personnel and dog, this seemed great value. So I have to revisit this one. Will be OOB and built as a kid - I might even leave a fingerprint on it! As an aside it's worth looking at the Scalemates entry for this as it contains the American boxing. This is an all action boxing and has the bizarre placing of the launch pad on the trailer! https://www.scalemates.com/kits/airfix-02309-0-bristol-bloodhound-missile--181446 Here are (most of) the parts I noticed the missing part when I looked in the box.
-
Something a bit left of centre and a first for the GB as well! A ship launched cruise missile. This is another Easter Blitz build, the kit includes 2 missile comprising of about 15 parts each (plus stands) Instructions and parts trees, not decals though! They went together rather quickly (including the stands) And then they were painted, first colour, grey of course) then the next grey and finally the stands I think I will try a wash on them and weather the VLS launch base next, and that will be it.
-
AGM-114 Hellfire (BRL32037) 1:32 Brengun The AGM-114 Hellfire missile is an air-launched missile for destroying ground-based targets with a high level of precision. They are carried most famously by the AH-64 Apache as well as drones and other slow-moving aircraft, and are used extensively for destroying enemy bunkers and compounds in the Middle East, despite its original mission as a tank buster. They are fire-and-forget and because of their relatively low explosive yield when compared to a standard JDAM they have a lower collateral damage likelihood. They are frequently carried in "packs" of four on one pylon because of their light weight, giving any aircraft a substantial capacity to inflict damage. The Kit The set arrives in a cardboard box that is sealed by the label, and inside is a ziplok bag of resin parts, a sheet of stencil decals, a small fret of Photo-Etch (PE) and an instruction sheet with five steps plus painting guide. There are ten casting blocks, the majority of which are in grey resin, but two are in clear resin and hold the clear seeker heads for each of the eight missiles included in the set. Each missile has the choice of a protective yellow FOD guard or the clear seeker head, PE fins front and aft, a toroidal exhaust port and a separate resin attachment lug. The launch rails are made up from a pre-moulded pair that have the pylon attachment points moulded into the centre, two stanchions that project downward and two more rails for the lower level. To these are added command umbilicals, PE locking arms and rear skin, plus resin attachment lugs. When the launch rails are completed, you can attach up to four missiles to each one, allowing you to house the full complement on the two rails supplied. Some of the decals are called out during construction, but the balance are shown in the final section of the instructions, and the overall colour is mentioned briefly at the beginning as black. Conclusion This set is excellent value for money, highly detailed, and you get everything you need barring paint and glue. Either missiles and two rail packs for your large scale project for a very reasonable price. Very highly recommended. Review sample courtesy of
-
Here is my finished model of the topical SS26 Transporter erector and launcer kit from ZVEZDA. I have problems making small kits now, ,but wanted to include this on in my collection, so I did as best I could. The unusual digital camflage I saw on several web sites, and thought interesting. Made straight out of the box. The model transmission parts are minute and very fiddly to do all the bits! the position of the cab and other top parts are delicately mounted on the model to fit exactly the same as the real ones. where the engine fits wasn't clear, so I messed that up, but it is hidden inside. I painted the interior of the cab matt black, then took special care to paint all the sides of the transparencies with a matt black pen, as this made the very thick windows look better, without internal reflections. I do this to all kits and it helps a lot I think. I messed up the details on the rockets so I just painted them green. the digital camouflage was seen on parade pictures, and done thus: 1 felt tip for the black , 2 over: paint brush and enamel for the white bits. The model is of a topical system as the missile is supposed to be nuclear capable, and thus contravening Tactical misslile agreements. An interesting addition to any armour collection. though a very expensive kit. Added to my missile section. SS26_4 SS26_5 SS26_6 SS26_2 SS26_3 SS26_1 after seeing the enlarged pictures, I realise I have a few bits to paint: the cable, the tow hooks, the wipers...
-
Here is my finished model of the topical SS26 Transporter erector and launcer kit from ZVEZDA. I have problems making small kits now, ,but wanted to include this on in my collection, so I did as best I could. The unusual digital camflage I saw on several web sites, and thought interesting. Made straight out of the box. The model transmission parts are minute and very fiddly to do all the bits! the position of the cab and other top parts are delicately mounted on the model to fit exactly the same as the real ones. where the engine fits wasn't clear, so I messed that up, but it is hidden inside. I painted the interior of the cab matt black, then took special care to paint all the sides of the transparencies with a matt black pen, as this made the very thick windows look better, without internal reflections. I do this to all kits and it helps a lot I think. I messed up the details on the rockets so I just painted them green. the digital camouflage was seen on parade pictures, and done thus: 1 felt tip for the black , 2 over: paint brush and enamel for the white bits. The model is of a topical system as the missile is supposed to be nuclear capable, and thus contravening Tactical misslile agreements. An interesting addition to any armour collection. though very expensive. SS26_4 SS26_5 SS26_6 SS26_2
-
 So... my second entry! The Back-story In 1981 tensions between the East and West became so high that on the 24th October the USSR and its allies moved west into West Germany, Holland and Sweden. This huge and never-ending assault of soviet tanks was met by swift resistance at the borders, much of this resistance was based around aviation, however, the Soviets came prepared and had installed mobile SA-2 SAM missile sites, which, in the first 3 months shot down 37% of all Western aircraft called to combat. The West was starting to lose the war. In 1983 a stalemate emerged at the borders of West-germany, Holland and Sweden. The losses continued to amount until one day an ex WW2 lancaster pilot had an idea, one of the reasons for the the nazis' surrender being the continued bombing of key cities such as Berlin.
 -
Afternoon all, Sorry to trouble you with another quwey regarding the Blue Steel missile When viewing photographs of the Blue Steel missile being loaded onto the Vulcan and Victor, the upper tail surface appears to be missing from a few of those. So my questions are as follows: Was this fin removeable? When carried in the recessed bomb bay of the Vulcan and Victor, was the tail surface kept vertical and fitted into a recess or was it folded down? Thanks, Sam
-
Good morning all! I am just wondering whether anyone knows how the Blue Steel missile was attached to the V-bombers, specifically the Avro Vulcan. I have seen a Pathe film of Blue Steel showing the ground crew "winding" the missile up into the bomb bay of the Valiant, I am not sure whether this would be the same with the Vulcan? On a related note, having been to Cosford and seen their Blue Steel far too many times for it to be deemed normal behaviour (only kidding, Cosford is a wonderful place) I noticed that on the horizontal "wing/winglets" at the rear of the missile, there are two cylinder shaped attachments which are attached just above these wings. I don't think that the Cosford Blue Steel was a test vehicle so I don't think it could be carrying any sort of flare to mark its location (if the test vehicles ever used such a setup), however I suspect that it has something to do with its suspension from the V-bombers??? I also tried obtaining an estimate for how much it would cost to copy some Blue Steel technical drawings from the national archives and the answer came back- £350!!! So a dead end there... Anyway, thanks for reading my verbal ramblings, Sam
-
Just clocked this over on Armorama, looks very nice indeed. http://www.armorama.com/modules.php?op=modload&name=SquawkBox&file=index&req=viewtopic&topic_id=226523 Regards Dan
-
Just caught this on Armorama. Looks nice. http://www.armorama.com/modules.php?op=modload&name=SquawkBox&file=index&req=viewtopic&topic_id=225088 Cheers Dan
-
Hello friends. New item from Northstarmodels - NS48014 Set of 2 resin Soviet tactical air-to-surface missiles with APU-68 launchers. For MiG-23, MiG-27, MiG-29, Su-15, Su-17, Su-24, Su-25, YaK-38 Decal from "Begemot".
-
Hello again people, A while ago I asked for color advices for Revell's 1/144 Sukhoi Su-47 Berkut to paint it in an assumed operational camo here http://www.britmodeller.net/forums/index.php?/topic/234935325-berkut-color-advice/ and using an advice from niki and Revell's PAK-FA kit manual for colors and camo I built my aircraft but before it is ready for inspection I have one more question for you guys if you can give me ideas. I have some spare missiles, fuel tanks etc from previous 1/144 builds but mostly American stuff. As I tried to build it in an assumed operational camo I thought arming it could be good too so shall go for it and use the spare stuff to arm the aircraft or not? And where on the bird and how many of them shall I use? I saw in wiki that it was planned to have two on wingtips, 6-8 under the wings and 4-6 under the body so what are your suggestions? Thanks