Search the Community
Showing results for tags 'matchbox'.
-
Hi folk's,second Matchbox Spitfire in recent day's this time a very different animal,the big 1/32 22/24.Not much loved by most and not without reason,clunky,innacurate and wierd breakdown in part's I know the younger me I failed to complete it after spending what was then a fair chunk of Birthday money on the original boxing,this is a Revell re-box and cost a tenner! OOB build nothing added or corrected as with my earlier Mkix take it for what it is a snapshot in modelling time,thank's for looking in build can be found in the Matchbox GB if you feel mad enough to build one!
-
Hi all, This is my first armour model in years, certainly since joining BM and it's the old Matchbox T-34. I have built this as part of the ongoing Matchbox GB and mine is not the only bit of armour being done for it, though some more would be nice. I know it's not a super accurate kit but was built as a bit of nostalgia and fun and I really enjoyed building it, and it will not be my last armour model either. Anyway here are some pictures; And for those of you who are interested here is a link to the build. Thanks for looking in. Craig.
-
Well, after some deliberation i have decided to go with my first idea and finish the Bf 110 i started some yeras ago with my son. He lost interest in the model after a while, and it went back in to the stash. After consulting with the hosts i got the green light to enter this one in the GB as being less than 25 per cent started. I intend to build it OOTB without any alteration to the kit at all. I will be building the BoB option with the shark teeth (i hope the transfer still work!!) IMG_2548 by G DSC, on Flickr IMG_2549 by G DSC, on Flickr Thanks for looking, Cheers Greg
-
The princely sum of £5.99 secured this immaculate and unmolested example of PK-23 which I will be doing as an Indian Air Force example and as proof of my Indian heritage , it will be seen in the gallery with my homemade Chicken Balti. Build will be enhanced by a failed Airfix Typhoon which will be cannibalized for parts, accurate or not. Should at least keep my F-5B company as it approaches primer and masking. I'm hoping that with some judicious dry fitting and fettling I should avoid the large amounts of priming and sanding that's been the F-5B to date. Cheers Anil
- 10 replies
-
- 10
-

-
Hi folk's,we're all in a seventies time warp over in the Matchbox GB and those of us of a certain age must have ran home from the newsagent's to have a crack at this kit when it came out,an OOB pure nostalgia build even stuck a pilot in and wheels up on the iconic stand,decal's were useable but a bit naf so replacement's used.
-
With a few hours to go before the starting gun, time to start my thread. This is Revell's retread of the Matchbox Twin Otter kit, of 1983 vintage. Box art: That rather attractive scheme is not going to be the subject, what with those odd round things hanging off the bottom. The kit's second decal option is for a West Coast Air Twotter in blue and white, an example of which one can see on Airliners.net: http://preview.tinyurl.com/ycp7deeq From what I can see, West Coast kept their aircraft very clean. Sprue shots; Revell haven't gone for the lurid Matchbox colours, so it's all in glossy grey. Revell provide a most bizarre double-ended paintbrush. One end is splayed to oblivion, the other appears to have been dipped in varnish before being sent out. Waiting for tomorrow to kick off!
- 58 replies
-
- 8
-

-
Its been a while since i built any Matchbox models, and consequently i am looking forward to this a lot! It took a while to decide on a suitable victim from the stash but eventually i came up with this one.... IMG_2525 by G DSC, on Flickr IMG_2528 by G DSC, on Flickr IMG_2526 by G DSC, on Flickr There may be trouble ahead...! IMG_2527 by G DSC, on Flickr Not unfixable..... Look at all that groovy 70's plastic. I wonder how or who decided to use these colours???! This will hopefully be the first of a few entries by me as i do not anticipate it will take long to build. Thanks for lloking, cheers Greg
- 74 replies
-
- 10
-

-
Hi all, the postman brought today my ordered Canberra kit. Re-Released by Revell some years ago with an excellent new decal sheet i finally got one for a good price. Cheers Bernd
-
Hi, All In January 2017 I decided to restart old Revell's Spitfire Mk. 22/24 kit, which I started around a year earlier, but gave up temporarily due to its poor fit and lack of detail - and the most important, lack of idea, how to paint it. This time however it was most of all to be an exercise in rescribing, scratch-building and riveting (using RB tool and must say it was fun) - did this all for the very first time in such a large scale, so didn't want to spoil any better or more expensive kit... Therefore added here some more details: upgraded wheel wells and new landing gear covers, SAC gear legs, resin wheels, formation lights, Eduard's seat belts and dashboard, CMK's resin gunsight. This is really a vintage kit and it shows. The workshop thread is here: I was hoping to get a result, which would look nice in the second row on my shelf, in Southern Rhodesian markings. Have I won? Well, she's not perfect, please judge yourself - I hope you like it Best regards Hubert (The prop'n'spinner are "bluetacked" only and moved a bit during the photo session... sorry for that).
- 20 replies
-
- 43
-

-
Hello one and all,So I've dug another kit out of my stash, I wanted a nice simple quick build, so decided on the above kit. I am going to use some aftermarket decals I've got and do some simple mods in order to convert it. The decals will be form Model Art Decals System and I hope to make it into a Hurricane Mk.I from the Free French Air Force in North Africa 1942.Here are the customary photos of the box and its contains as well as the aftermarket decals.A nice classic Matchbox kit!! A first for me as an adult, I don't think I've done one of these since my childhood and even then I think my dad helped me slap some polycement on a BAC Strikemaster and called it done no paint maybe a decal or two. Anyway i digress here is the photo of the box that I picked up for £4 at SMW 16.IMG_0533 by Neal, on FlickrInstructions are pretty straightforwards, so even I shouldn't get lost!IMG_0534 by Neal, on FlickrIMG_0535 by Neal, on FlickrIMG_0536 by Neal, on FlickrThe kit decals seem to be in pretty good nick considering the age of the kit!IMG_0537 by Neal, on FlickrThe back of the box which depicts the kit proposed versions.IMG_0538 by Neal, on FlickrTime for a sprue tour, it will be quick as there aren't many. The panel lines are deeper than some of the Somme's trenchs, and the clear parts are about as transparent as the future trump administration!IMG_0540 by Neal, on FlickrIMG_0539 by Neal, on FlickrIMG_0541 by Neal, on FlickrThe kit is 10 years older than me!! #vintageIMG_0546 by Neal, on FlickrHere are the decals I am going to use to on the kit, I bought them for the 1/72 Heller Mirage IV that is in the stash, so I thought I'd see how they behave by trying them on this build.IMG_0542 by Neal, on FlickrIMG_0543 by Neal, on FlickrIMG_0544 by Neal, on FlickrIMG_0545 by Neal, on FlickrTime to cut some styrene and get some glue and paint out! Hopefully the kit will go together ok and I can concentrate on the painting, dealing and weathering of the kit.Neal
-
My Revell boxing (03214) - the runners still carry the Matchbox code PK-76 Natural light using a flash Finished with Vallejo paints and Humbrol washes for Panzer Aufklärungsabteilung der Panzer – Lehr – Division, November 1944.
-
I finished this a couple of days ago, it is the 1/72 Matchbox kit and is built OOB with a few scratched additions. The multi-coloured plastic gave me a bit of a headache with the red colour tending to come through the white primer, then a fellow Britmodeller suggested using a black primer and this solved the problem. It was painted with Halfords Gloss Appliance White straight from the rattle can. Due to their age, the adhesive holding the decals to the backing paper also became a bit of an issue, not allowing the decals to sit down properly. I got around this by carefully washing it away with a soft brush before fixing them in place. Link to photo of XX507 Link to build thread
-
As per my recent WIP threads - my first foray into a RFI so please be gentle. The threads: http://www.britmodeller.com/forums/index.php?/topic/235019580-rn-phantom-buccaneer-finished/ http://www.britmodeller.com/forums/index.php?/topic/235016981-done-quadruple-booms-parallel-build-vampire-t11-and-a-sea-vixen/ I think everyone is probably sick to death of seeing Airfix Vampire T11s so I'll skip that The gang: Things I'm already aware of: - silvering on the decals of the Sea Vixen - need Sidewinders for the Phantom - Phantom nose wheel door hinged to the wrong side - realised after Buccaneer picture that a couple of stencils still need to go onto the canopy framing - Missiles all look a bit bare
- 16 replies
-
- 31
-

-
Hello All, After several years on the shelf of shame, my Matchbox/Revell Privateer is done. It has been converted to the Coastguard version and the next time I see him it is going to a pal of mine. His Dad flew in these back in the day. The conversion involved replacing the side gun turrets and with big picture windows and replacing front and rear turrets with observation canopies. I also added interior framing (mostly now invisible) wheel well detail, exhausts and some other minor engine detail. I could have done more accurisation and improvement, most notably the air intakes around the cowling and the propellers, but it isn't appropriate for a desktop model (and would have taken another two years at my rate). This is my first 4 engine "heavy" and my biggest model ever. My wife's only comment on it has been "It's very big isn't it" so I think she's quite happy it's going to my pal's house! The insignia are from an aftermarket sheet but all the lettering, coastguard emblems and engine grilles are all laser-printed onto clear decal paper. The "DANGER" lettering was applied on top of scrap white decal squares and the coastguard logo was applied over a spot of white paint to deal with the transparency issues. Pics: Thanks for looking, Adrian
- 48 replies
-
- 89
-

-
With the end of my other build approaching and some time to wait while things to dry I've been giving some thought to what to pull out of the stash to build next Given how pleased I've been by the look of Extra Dark Sea Grey it swayed my thinking towards this pair And pulling everything out of the boxes (I like to prime everything on the sprue to take the shine off and let me better see what I'm doing) Next post: questions for the britmodeller hivemind
-
Hello Chaps, This is my fourth "Hairy Stick" adventure that I completed in January 2017- again, this was a very basic kit by Matchbox from 1980 that has been in my stash untouched for a very long time. Upon opening the box, I found that the decals were missing along with the port-side air brake. I was fortunate to discover that a fellow modeling buddy had a spare set of decals for this kit that he kindly sent to me, the port-side air brake, I scratch built by using the starboard side air brake as a template and marking out the shape onto a molded part that had very similar surface geometry. The cockpit for this two-seater version was very basic- just two seats in a blank tub, so I decided to scratch-build 27 parts and added 15 sections of decals from my spares box to dress up the scratch-built instrument panels and the side-consoles. I scratch-built foot pedals and their support mounts, two joysticks, two instrument panels, seat-belts, ejector pull handles- 2 to each seat mounted at the front ends of the seat side panels, green display screens for front and rear IP's, the canopy actuator and its housing behind the Pilot seat. The exhausts were just two hollow tubes which I didn't like, so, I decided to make the inner afterburner tubes and thrust rings to dress those up a little and include the turbine fans in the rear of the tube. The inner tubes were created from spare bomb parts that I glued together then chopped off the nose ends. I then took spare 1/32 scale Eduard Me109 E-3 wheels and cut the center hubs out and the rings that were left were used as the thrust rings. The spoked hubs that I removed were used as the fan blades in the back end of the tubes. For an old basic kit, I had a lot of fun building it and adding the extra scratch-built items, crude as they may be.... If you'd like to see my "Build Update #1" YouTube video showing what did within the cockpit, here is the link to that: ...and if you'd like to see my "Final Reveal + rest of the build' video, then here is the link to that one: Thanks in advance for checking in and leaving any comments, much appreciated! Happy modeling, Cheers, Martin
- 27 replies
-
- 38
-

-
- McDonnell RF-101 Voodoo
- 1:72 Scale
-
(and 1 more)
Tagged with:
-
So while I wait for my local shop to carry the new Airfix Victor, I'm going to start on the Matchbox K.2. I built this kit, years ago, when I didn't know any better and now that I'm much more experienced and patient, I'd like to have a proper go at the venerable kit. I'm terrible with using aftermarket, and the Flightpath set is about the cost of a new Airfix Victor (therefore negating money I need to purchase said Airfix kit), so I'm going out of the box, with as many corrections as possible. I'll rescribe and shorten the stabilizers 3mm, maybe even add a little scratchbuilt detail, but what about the intakes? I've seen descriptions of people making their own corrections, but I can't visualize what was done. Would someone provide me with a little guidance on how to do this? Thanks!
-
Thanks to @Nigel Foster60's kit clear out I find myself with a refreshed stash including a Matchbox Viggen which I've made a solid start on
-
Just finished the Matchbox Siskin. I am impressed by the excellent engineering these kits had. Fun build, landing gear was a bit of a terror, but still fun. Greg in OK
- 21 replies
-
- 38
-

-
Hello Chaps, This is my third "Hairy Stick" adventure that I completed in December 2016- a very basic kit by Matchbox from 1973 that has been in my stash untouched for a very long time. Again, I was really concerned about the decals being so old and the fact that they had "yellowed", whether they would work or not, but, if I let them sit in warm water for a few minutes, I was able to carefully peel them from the backing paper, they wouldn't slide, but I was just happy that I got them to work! The cockpit for this two-seater trainer version was very basic- just two seats, so I decided to scratch-build two instrument panels, four side consoles, two joy-sticks, seat belts made from wine bottle foil and ejector pull handles for both seats. The canopy was one solid piece which wouldn't allow for displaying the model with the rear section of the canopy open, so, with a hot knife, I carefully separated the rear section from the front section, glued the front section in place, then scratch-built a canopy actuator for the rear section and displayed it in the open position.... If you'd like to see my YouTube build video for this vintage model, then here is the link to it: Thanks in advance for taking a butchers and for any comments made, much appreciated! Happy modeling! Cheers, Martin
- 23 replies
-
- 49
-

-
- Matchbox
- 1:72 Scale
-
(and 1 more)
Tagged with:
-
Hello Chaps, This is my second "Hairy Stick" adventure that I completed in November 2016- a very basic kit by Matchbox from 1976 that has been in my stash untouched for a very long time. I was really concerned about the decals being so old and the fact that they had "yellowed", whether they would work or not, but, if I let them sit in warm water for a few minutes, I was able to carefully peel them from the backing paper, they wouldn't slide, but beggars can't be choosers...I was just happy i got them to work! I'm not going to say anything about the kit itself, because it's no longer available and I'm just going to post my efforts with a very basic kit... If you'd like to see my YouTube build video for this model, here is the link to it: Thanks in advance for taking a gander and commenting, much appreciated! Happy modeling, Cheers, Martin
- 27 replies
-
- 41
-

-
- Matchbox
- 1:72 Scale
-
(and 1 more)
Tagged with:
-
Hi guys, another one from me. Completely rescribed, interior completely upgraded, but you can't see it from the photos, exhausts came from Revell, props are reshaped and thinned, gun barrels are Quickboost. Paints are Gunze, exhaust stains and wash Tamiya.
-
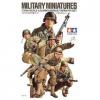
Matchbox / Revell 1/76 Half track, T34, Krupp
combat posted a topic in Ready for Inspection - Armour
Hope all you BMers are having a good winter. My modelling room is just making 5 degrees C, so it's a little tough on the old fingers. Building up energy to start a new build thread. For now here are some classic Matchbox / Revell 1/76. There are 3 kinds of kits I really appreciate - with figures, with dioramas, with interiors. A lot of fun with these kits! -
Another kit is added to my Matchbox collection 2nd Patches was an Italy based olive drab painted B-17G, at some point or points in it's life various parts of this machine were replaced with parts from other aircraft giving it a part painted / unpainted livery. Nearly all the larger clear parts have been replaced on this model, but apart from that is pretty much as Matchbox intended with very little re-scribing or other work. Paints are Revell olive brown with Humbrol and Testors olive drabs, while the bare metal is alclad. To sum up, a fun build that I could of carried on messing about with for ever. The windows need a bit of a clean. Thanks for looking.
- 18 replies
-
- 35
-

-
- 2nd patches
- b17
-
(and 1 more)
Tagged with:
-
Matchbox 1/72 Boeing P12e first one finished this year. the 1974 boxing so nearly as old as me. detailed the cockpit and added some PE seatbelts. for the age of the kit it went together really well. painted with with vallejo and mr hobby. the kit decals were very old, faded and useless. used the starfighter decals sheet, which were not the easiest to use, but went on ok, but needed loads of set and sol. rigged with EZ line. turned out ok.


