Search the Community
Showing results for tags 'magister'.
-
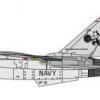
Fouga Magister 1:48 Kinetic The Magister is probably Fouga's most well know design even though they had been producing aircraft since 1936. Post war the company was working on sailplanes and the heritage from this can be seen in the Magister design. In 1948 the French Air Force were looking for a jet powered aircraft to replace the then piston engine trainers. Fouga's original design the CM130 was underpowered with two Turbomeca Palas engines. Fouga then re-designed their aircraft to incorporate the more powerful Marbore engines. This became the CM170 Magister. The distinctive V tail, and slender wings bear testament to Fouga's sailplane designs. The prototype Magister flew in 1952 with an order for the first 10 being placed in 1953. The Magister was the worlds purpose designed/built jet powered trainer. It is also worthy to note the Magister made it into carrier aviation. With a few changes to the structure and undercarriage, the addition of an arrestor hook, and sliding canopies the CM175 Zephyr was born. Interestingly carrier trials took place on HMS Bulwark and HMS Eagle. The French aircraft industry in parallel with the UK went through many mergers with the aircraft being known as the Fouga Magister, Potez Magister, Sud Aviation Magister; and finally The Aerospatile Magister. Development of the aircraft continued until the French selected the Alpha Jet to replace the Magister. Overseas sales were made to primarily to Germany, Belgium, Finland, and Israel; the last two countries building them under licence. The basic jet was affordable to operate for smaller Air Forces and other users would include, Algeria, Austria, Bangladesh, Biafra, Brazil, Cambodia, Cameroon, El Salvador, Gabon, Katanga, Lebanon, Libya, Morocco, Nicaragua, Rwanda, Senegal, and Uganda. Many counties including Austria, Belgium, Brazil, France, Germany, Ireland, Finland; and Israel would use the aircraft for their National Aerobatic display teams. The Kit This kit was a surprise from Kinetic when it was released, even more surprising was that it comes in a double boxing. Good for those who will build more than one, or if you like to keep costs down you can split the boxing with a friend. The kit arrives as three sprues of grey plastic, one clear sprure and a small photo-etched fret for each aircraft. Construction as with most aircraft starts with the cockpit. The main floor pan is one part to which the rudder pedals, control columns and instrument panels are fitted. A periscope is provided for the rear cockpit. Seats are added and the rear bulkhead is added. At this stage you start to see some problems with the instructions. What appear to be oxygen bottles are shown on the instructions for the cockpit, however there is no instructions as to where they need to be located?? only by looking through the instructions do we find them much later shown as being fitted behind the front seat. The modeller is also given a choice of rear cockpit bulkhead to fit. However there is no indication as to which of the decal options has which part? I guess its up to the modeller to find out from their research. Once the cockpit is complete its onto the front landing gear. The tubular strut arrangement for the front gear is made up and attached to the rear bay bulkhead. The nose sides then wrap around the front gear parts. Holes will need to be opened if using the antenna mounted there (again no indications from the instructions. The machine guns can then be added to the nose, and the top cover placed on. As far as I can tell the only aircraft on the decal sheet which would have been armed is the Israeli on which saw combat. Luckily Kinetic have provided both styles of nose panel, though again this is not mentioned in the instructions. Next the modeller moved to the main fuselage. A credit to the kit is that full length intakes and exhausts are provided. These are a two half affair which you join and then slide into each fuselage half. One outer panel at the front is then attached. Once these are in a few small intakes and antennas are attached to the outside. The cockpit assembly can then be placed inside and the fuselage closed up. The prominent top area behind the rear cockpit is added along with some antennas on the top fuselage. The modeller will again need to consult their references as the instructions don't actually indicate where these parts go! A small tail wheel is added (mainly there to protect the tail from over rotation, not actually for landing on!) Construction moves onto the wing next. These are of a conventional top/bottom split and contain positional control surfaces. The tip tanks are moulded direct tot he end o the wing. There is provision using PE parts for the airbrakes. On a magister these protrude out vertically from the top and bottom of the wing, and its good that the modeller can have them raised or lowered. Provision is made for armed aircraft with underwing pylons, and twin stacked rockets. The main landing gear is added at this point (if needed) and consists of a three part hub/tyre assembly with a main leg and retraction arm. Once the wings have been constructed these are added to the main fuselage along with the distinctive V tail. The tail planes are one part and have PE hinges at the top, these are prominent on the Magister and PE provides a scale thickness for these. Lastly the modeller can choose between a one part canopy, or a five part one with the main canopies in the raised position. It is good in the kit that both these options are provided. Canopies The clear parts are one of the best parts of the kit. A one part clear canopy is provided for those who prefer that type, or a five part canopy is provided if you wan tto open the cockpits up. The parts are very well moulded, clear and free from flaws. Not mentioned (again!) in the instructions is that some aircraft in particular the Belgian ones flew with a covered rear part of the canopy. Rather than just paint over the clear parts Kinetic have provided this part in normal plastic with an appropriate level of detail. Decals Decals are provided for five schemes. The decals are printed by Cartograf and are up to their excellent standards. The colours are very good and the dayglo panels for the French Trainer are very bright. Red Devils - Belgium Aerobatic display team - Overall red aircraft. Patrouille de France - French Aerobatic display team - Overall blue aircraft. Armee de l'Air - French Air Force trainer - NMF. Israeli Air Force - Camouflaged Aircraft as used in the Six Day War 1967. Israeli Air Force - White over Red Trainer Aircraft 1976 Conclusion A thoroughly modern tooling of an important aircraft which was used by many countries. This is great kit from Kinetic let down only by the instructions. Highly recommended. Review sample courtesy of
-
 Miles M.14 Hawk III/ Magister Mk.I "Egyptian, Turkish and Thai" Special Hobby 1:48 The Miles M.14 Magister was designed to meet the Air Ministry Specification T.40/36. Miles based the Magister on their existing Hawk Trainer. The Magister was a tandem open cockpit design with a low wing cantilever monoplane. The main structure was Spruce with a covering of plywood. The centre wing section was of constant section, having no dihedral. The outer sections had dihedral and tapered towards the tip. The undercarriage was fixed on the main and tail wheels. The main wheels could be covered by spats. Production was started in 1937 and by the start of WWII over 700 Magisters were in RAF service. As well as the central flying school 16 elementary flying schools used the type. By the time production ended in 1941 1203 aircraft had been built. As well as these 100 were licence built in Turkey. As well as use by the RAF the aircraft were used primarily by The Irish Air Corps, The Egyptian Air Force, and The South African Air Force. Other users Were Thailand, Portugal, New Zealand, Malaya, Latvia, Estonia, Belgium, Canada and Australia. The Kit The kit arrives in a standard open-ended box from Special Hobby. They must be trying to economise as the box is the old release Magister box with a cover glued on, so you can only open one end. The kit comes as two main sprues of grey plastic, one clear sprue, one vac formed clear part, one bag of resin parts; and two photo etched frets. Also there is one small sprue of a light grey plastic, this seems to be a harder plastic than the kit and this is used for the landing gear struts. Shockingly construction starts with the cockpit! This area of the kit is highly detailed, most of which will be seen through the open cockpits. Many photoetched parts are added to the inside of the fuselage halves and to the resin cockpit floor. Resin seats attach to resin seat backs. Four part seat belts are provided for each seat, and the small rudder pedals are made up of four separate parts for each cockpit. Instrument panels are made by laminating the photoetched parts. Once the cockpit has been completed the rest of the airframe does not take much work. The fuselage halves are joined and the engine section is joined and added. Following the the tailplanes are added along with the rudder. The aircraft in this boxing had different rudders so please chose the right one. Next the landing gear is added. The Egyptian machine has Spats while the other two options do not. The tail wheel is added along with the propellor and its boss. Some small parts of photoetch details are nearly the final parts added. The last stage is to add the blind flying hood (not used on the Egyptian Machine). This can be added in the lowered or up position using the appropriate parts. I am sure if not wanted it can be left off as I doubt they flew with it attached all of the time. Photo-etch Two small frets of photo etched parts are supplied.These contain most of the parts for the cockpit, instrument panels and seat belts. Other parts are for the landing gear, small metal airframe parts; and attachments for the blind flying hood. Canopy Small injection windscreens are provided for both cockpits. As well as this a vacform part is supplied which is the blind flying hood in the open position. The parts are clear and well formed. Decals Decals are provided for three aircraft. Black 4/L-204 Light Training School, Egyptian Army Air Force, Almaza, Egypt 1938 (trainer Yellow). White 2, Initial Flight Training Squadron, Turkish Air Force 1944 (Olive Green/Light Blue. Black 116, Royal Thai Air Force 1951/52 (overall Silver). Decals are printed by Avi Print, look to be in register with good colour definition. Conclusion The model is a typical shorter run multi-media kit we would expect from MPM. The plastic has some nice detail if sparse (but then the real aircraft did not have too much in this respect). The resin and photo etched parts are well made and will add interest to the open cockpits. Some thought has gone into its production with the harder plastic for the landing gear legs a nice touch. This would be a good level entry kit into the world of mixed/multi media kits. Overall highly recommended. Review sample courtesy of
- 7 replies
-
- 5
-

-
- Special Hobby
- Miles
- (and 2 more)
-
 It is just simply to show how AMK develop model kits. The 10 processes are listed below: 1. Information Gathering. 2. 3D Design. 3. Sprue Design/Mould Layouts. 4. Mould Design. 5. Mould Making. 6. Plastic Testing. 7. Box Design. 8. Manual Design. 9. Decal Design. 10. Professional Review. Pictures of each process will come correspondently................
 -
Miles Magister, pics thanks to Mark Mills. G-AKPF wearing schemes for V1075 & N7388 In overall Yellow scheme. For some information the aircraft V1075 was civilianised as G-AKPF but later rebuilt with the fuselage of N7388 an earlier aircraft. This scheme and the spats are good for N7388 but not V1075 which would have been camo over trainer yellow.
-
Hi All, I have a choice of things to build... Choices... by arrjaytee, on Flickr I have plumbed for the Magister, although I have never built a kit with resin or photo etch or a limited run kit. Luckily, I have a back-up plan in the two very good looking Airfix Gnat and Vampire Kits, but I'll see how things go. Hopefully with patience and care I can do the Magister justice. Miles Magister Box contents by arrjaytee, on Flickr Looking forward to this group build as the Obselete GB (my first) was great. Rob.
-
 Source: http://www.britmodeller.com/forums/index.php?/topic/234949713-any-other-new-telford-news/page-3 Kinetic - and obviously later Wingman Models (http://wingmanmodels.com) - is to release a 1/48th Potez-Air-Fouga CM170R Magister kit - ref.48051. Any pictures from this Kinetic 1/48th Fouga Magister test build/test shot? V.P.
 -
Source IPMS Belgium news Valom , aircraft, injection, 1/72 Fouga Magister Several boxings : - ref. 72084 - Potez Air Fouga CM.170R Magister - Luftwaffe http://www.aviationmegastore.com/fouga-cm170r-magister-luftwaffe-72084-valom-vaclav-lomitzk-val7284-scale-modelling/product/?shopid=LM51c6cddd39ba56498c089f571e&action=prodinfo&parent_id=212&art=116595 - ref.72083 - Potez Air Fouga CM.170R Magister - Armée de l'Air http://www.aviationmegastore.com/fouga-cm170-magister-french-af-72083-valom-vaclav-lomitzk-val7283-scale-modelling/product/?shopid=LM51c6cddd39ba56498c089f571e&action=prodinfo&parent_id=212&art=116594 V.P.
-
Recently finished three of these using the limited edition IAC markings included with the standard kit by one of our LHS, the 4th Fouga(220) was completed with one of the Maxdecal IAC sets from a a couple of years ago. Hope you like them
-
First time posting anything I've built on BM... Built OOB with the kit supplied decals. I didn't bother to weather the aircraft - I just loved the scheme too much to do so *LOL* The kit went together quite nicely but I know I still need practice when it comes to filling/sanding/smoothing and the pressure I'm using to airbrush along with thinning the Xtracrylix used probably could use some help as well *LOL* I'm just happy when I'm able to finish one!! Cheers, Dave
-
After its future Aero L-29 Delfin (http://www.britmodeller.com/forums/index.php?/topic/234934843-148th-aero-l-29-delfin-by-avantgarde-model-kits-cad-drawing/) the next AvantGarde Model 1/48th kit should be a Potez Air Fouga CM.170R Magister - ref.88004 Source: https://www.facebook.com/AMKHOBBY?ref=stream V.P.
-
I scanned one of these a few weeks ago so I thought I may as well scan the others from this display at Fairford, 1997:
- 7 replies
-
- 2
-
-
- Irish Air Corps
- Silver Swallows
- (and 4 more)
-
Been busy with work so not a chance to get any modelling done in a while, so it was time to move out of my 1/144 scale zone and onto something a little bigger. This is the vintage Heller Fouga kit, to say it was a challenge would be an understatement. I built this for a workmate who wanted it for his Father, it is all raised detail and due to age some of the kit parts had warped including the wings and fuselage, Main ref book was Fouga Magister, An Irish Perspective By Joe Maxwell and Radu Brinzan As it is such an odd scale Maxdecals 1/48 sheet was used instead, it was my first time using these and I found them to be superb in quality and they had no problems conforming to the kit details even without using decal softener. It was also my first time using Tamiya fine primer spray and the Humbrol rattle cans and with the heating tip in warm water worked brilliantly, the dayglo (looks orange in the pics but its more red in real life) and other colours are from Humbrol tins ( hairy stick application!!) Anyone who knows this kit is aware that the canopy is split down the middle and must be fixed in place before the fuselage is joined, this presented the biggest problem. Some details where not included and need a little scratch-building such as the periscope on the canopy, battery cover vents, new aerials and standard tamiya tape belts. Anyway I think it all worked out in the end and it built into a really nice kit, as always all comments appreciated.( ADF red and white aerials on the nose where added after these photos where taken)