Search the Community
Showing results for tags 'lightning'.
-
 Hello everybody, As said and already shown in the chat section, my entry for this STGB will be this Italeri 1/72 P-38J. A single look at the sprues clearly shows that it's the nice Academy kit and should someone have any doubt about the origin of the plastic, the box mentions "plastic parts made in South Korea". We have their now usual "super decals sheet" for 4 versions: 2 NMF, 1 OD over NG, an experimental "intruder" scheme with flight blue over black. Quite thin and no flaws, will look perfect after some polishing. But after a look at this glasshouse, this Eduard PE "zoom set" suddenly seems more useful. I'll try to use at least part of it. We'll see ..... as I prefer to paint details and the pit is - IMHO - more than decent: Except for the seat that looks armored like a Tiger MBT .... but wait, there is a seat on the PE fret. "Hurray!" My original choice went long ago for the Miss Ann box scheme, an "experimental" one on a 7 th FG plane. Still, I'm pondering about 2 of the 3 other options in the box or even something entirely different - surprise, surprise - if I'm able to produce decent self-made decals. Hope this pic can be useful to you @Christer A. Italeri instructions say FS35190 Flight Blue for the upper surfaces. I hope not to disappoint this time. Comments, as well as tips or even stop signs if I'm about to do something dumb are more than welcome. Pat. PS: be safe and be well AND keep being cautious. That 👹 virus finally caught up with my wife and me.
- 43 replies
-
- 11
-

-
 Evening all, Here is my most recent completed build - the excellent 1/48 P-38G Lightning from Tamiya. This is a well known kit so I won't go into much detail about it, but suffice to say it is near perfect, and probably the best kit I've built. Tamiya have done an excellent job designing a kit which is easy to build, goes together well with no gaps, allows for strong location of landing gear/gear doors and has great detail. It's a shame that their decals are so thick. However, that is where Exito Decals come in with this: The set has been reviewed right here on Britmodeller already: Without repeating what Mike has already said, the Exito decals are well printed (by Cartograf! so expect good things) and offer some unique albeit racy marking options. I chose the 3rd option, Lt. Edgar L. Yarberrys P-38G of the 48th FS as used in Tunisia in June 1943. This allowed me to use the nose art in the decal set, and play around with some interesting weathering options given the desert conditions. Without further waffling, here's the build I think this is my best build so far (very few mistakes which is pretty good for me ) and I'm tempted to get another P-38 already, though I may wait for the almost inevitable P-38J or L from Tamiya. I used Gunze/Mr Color C304 for the OD, and MRP Neutral Grey for the...er, netural grey. Is C304 the right shade? I don't know - it seems a close match to the spray can Tamiya recommend in their instructions, and to some reference photos of restored P-38s I've seen, but is probably a little light for the OD used, but hey, maybe the Tunisian sun has bleached it? Aside from these, I used MRP signal red, MRP black, Tamiya flat yellow, Tamiya LP-11 silver, MRP interior green and Tamiya Nato black for the rest of the build. To give a sense of random fading/weathering, I pre-shaded the model prior to the base colours, and then used Abteilung 502 oils for further panel to panel variation. I used a few different sepia, umber, grey and sand shades to add some random fading similar to what is visible in period photos. Panel lining was done with Ammo blue-grey wash (over an X-22 gloss coat), but a lot of areas with heavy traffic were redone with Abt. 502 Starship filth thinned with VMS universal weathering carrier (standard). The exhaust staining is heavily thinned MRP tan and this is the only part I am not too happy with as it looks a little too light, but I can't change it now so it stays! The Exito decals went down well, yet again reaffirming my faith in anything printed by Cartograf! Speaking of, Exito don't provide all the stencils, and I didn't fancy using the Tamiya decals (I used one in the cockpit and it took some work to conform to a slight curve) so I used some stencil decals from Fundekals, also printed by Cartograf which were also excellent. Although the real P-38 (and Tamiyas decal placement guide) have a lot of stencils marked out on the underside, I didn't apply all of them because I'm lazy and not all would be visible. The Tamiya kit requires the gun barrels to be added early in the build, but I would almost certainly snap them off, so I used a Quickboost set which allows the barrels to be added later. The Quickboost set is well detailed, fits well (unlike a lot of resin replacements) and means no snapped barrels, so given it's low price it's a win for me! Also visible here are the Eduard resin wheels which I used because the Tamiya main wheels are supplied in 2 halves and I would ruin the tread cleaning them up. As a plus, the Eduard ones are bulged nicely. The weathering was done with oils over an X-22 gloss coat, and once that was sealed, watercolour pencils from AK and Faber-Castell. The "Babe" in question...Lt. Yarberry had nice taste This was the only decal where the carrier film didn't disappear that well and is still a little visible but not the end of the world. The trademark chipping on the wing roots was done with Tamiya LP-11 silver and AK heavy chipping fluid. The toughness of the Gunze C304 lacquer meant a lot of work was needed to chip it, but that just meant I had more control of where I was chipping. I sprayed, chipped and resprayed the wings a couple of times trying to get this right. The same method was used to chip the nose and engine covers especially at the panel lines where the crew would handle them during maintenance. The leading edge paint chips were done with Humbrol masking fluid applied with a sponge over the LP-11. Also visible here are the HGW belts - my first attempt at using them, and whilst they look excellent, I am not sure the effort is worth it in 1/48 - at least HGW provide enough spare buckles! The staining on the props/cowls was done with oils and pencils. The turbos were painted with a mix of Tamiya dark iron, silver and JGSDF brown, and weathered with thinned MRP lacquers and oils. Another look at the nose art The landing gear and bays were all done with LP-11, which is a great silver paint; it sprays extremely well and is very tough once try - must be why it's always out of stock in the UK. The tyres are Tamiya Nato black, and the weathering is again Abt. 502 oils, Ammo washes and pencils. I added radio wiring with Plusmodel 0.2mm lead wire to add some detail to the radio bay. Also visible is a bit of the Quinta studio 3D cockpit decals. Again these were something I used for the first time and they look excellent (although a little grainy), but in the case of the P-38 so little is visible once built that they aren't worth it - if the kit you're building is more visible then go for it though! Also visible are some of the Fundekals stencils. Something I struggle with is shiny oleo cylinders. Silver paints don't give the necessary shine, buffing a small area is difficult and although it was shiny, the Uschi chrome polishing powder seemed to lose it's lustre quickly. So I used a Molotow chrome marker refill, applied with a brush and this gives a very shiny, smooth finish. Given how hard it is to see the underside of the centre section, I didn't concentrate weathering here, focusing instead on the more visible areas. I applied some sand oils behind the gear as if it was thrown up by the wheels. The rest of the grey underside was weathered with oils again. The staining is again oils and pencils. The decals settled in very well over the surface detail That's it then - sorry for the rather large images, but I also upgraded my camera to the awesome Nikon D850 and whilst it's great the images are quite large! Anyway, thank you all for looking! Cheers,
- 35 replies
-
- 62
-
-

-
 In September Sword (http://www.swordmodels.cz/) is to release new tool EE Lightning F.1/2 & F.3 kits - ref.72081 & 72082 Source: http://www.modelforum.cz/viewtopic.php?f=1&t=68170&start=4890 BAC/EE Lightning F.1/2 - ref.72081 TWO decals versions: F.1 - 74 Sq. RAF - XM137/D F.2 - 92 Sq. RAF - XN768/S Colored PE parts for cockpit interiors and details PUR parts of ejecton seat and jet exhaust Sources: http://www.hannants.co.uk/product/SW72081 http://www.aviationmegastore.com/bac-lightning-f12-sw72081-sword-859297772081-scale-modelling/product/?shopid=LM53c056b10982364d72a2bdddd0&action=prodinfo&parent_id=212&art=122811 BAC/EE Lightning F.3 - ref.72082 Two decals versions: F.3 - 111 Sq. RAF - XP740/J F.3 - 56 Sq. RAF - XR719/D Colored PE parts for cockpit interiors and details. PUR parts of ejecton seat and jet exhaust Sources: http://www.hannants.co.uk/product/SW72082 http://www.aviationmegastore.com/bac-lightning-f3-sw72082-sword-859297772082-scale-modelling/product/?shopid=LM53c056b10982364d72a2bdddd0&action=prodinfo&parent_id=212&art=122812 V.P.
 -
Italeri is to release a new tool 1/48th Lockheed-Martin F-35B Lightning II kit - ref. 2810 Not a bad news considering the only other available 1/48th F-35B kit is the Kitty Hawk one. Now we'll just need a better F-35C. Source: https://www.italeri.com/uploads/news/AY8p8Mc4VebT1GVJ5SVhR0wRFuvMlyG6nbu5dgSD.pdf Box art V.P.
-
Hello again. Back this time with some finished pictures of a project I've been dragging along on for some time. Years ago, I bought this Anigrand XP-49 kit on-line, as a used kit. It had some problems. The boom halves were badly warped, the landing gear doors and nose gear leg were missing, as were the mass balancers for the elevator. So, I started slowly sawing, slicing, bending and scrounging replacements parts,in this case from the same old MPC P-38F kit that I scrounged other parts from for my XP-38 prototype build. Only the nose gear door had to be fashioned from an old fuel tank of the right diameter, as the one on the XP-49 was longer than on the P-38. This became one of those kits that were only worked on while paint or glue on other models in progress were being built, so I never shot pictures for a build thread. Other than the above-mentioned problems, this was just another simple resin kit, albeit, one of the older Anigrand offerings. Like most other resin vendors, Arnold has improved his techniques in later years, and are these days, his kits usually quite build-able. The Lockheed XP-49 was a later proposed variant of the P-38, with larger, more powerful engines and weapons, as well as a pressurized cockpit for higher altitude flight. The newer engines didn't pan out, and while the XP-49 was said to have "run circles" around the P-38's, the advent of the long-range P-51's made it not worth the effort, First flown in 1942, it was tested to destruction at Wright Field in 1946. In any event here are a few pics of the finished beast: And, for those interested, here is a shot of the Lockheed twin-boom brethren, from left to right, the XP-38, the XP-49, and the XP-58 "Chain Lightning", for comparison purposes. As always, I'm glad to add it to the collection. Thanks for looking, comments or questions always welcomed. Ed
-
 Hello! Not including much info on this build, one of my fastest yet (17 days) and I'm very happy with it. WIP thread: anyway, without further ado, here she is, EE Lightning F.2A XN793 92Sqn. RAF Gütersloh, ~1972: Here she is with my other two lightnings!
 -
Hello! WIP Thread Without any further ado, here she is: XN781 of 19 Sqn. RAF Gütersloh, flown by Wing Commander R.K. Barcilon, late 1974. Here she is with XS921. I had a lot of fun with this model, unfortunately the decals silvered a bit but not much I could do about it. I will be building another lightning soon, most likely XN793.
- 10 replies
-
- 37
-
-
Finished this a couple of weeks ago and was waiting for some sun to get some good pics (which promptly hid behind a big black cloud on the first pic!) Trumpeter 1:72 lightning F1A of 56 squadron 1960s. Acquired from a friend minus a seat so seat made up roughly just to fill the void and bloke unused from a Canuck model to hide the dodgy seat. OOB build otherwise and painted with humbrol and revell paint and trialed a can of silver for the NMF which really shows up the texture in the plastic I didn’t realise pre painting. Not a bad build except for the instructions/decals. They only supply enough decals for 1 missile of either type and the 56 squ decal instructions only show one side so lots of guess and cross refer to other schemes. Word of advice for anybody with this in the stash. Do not glue the jet pipes in till the end I hadn’t and glad I didn’t as it needed some nose weight which can be pushed down the rear fuselage to the nose. So here she is added to my 15yo F6 and with an F2A in the stash I think a lightning Air Force is likely.
-
Hello everyone, I finally finished a model on Britmodeller! Here is the WIP post: I proudly present my 1:72 EE Lightning F.6 Overall, I am happy with how it turned out, took me a good year to finish it because it was an on and off project lol. Hope you guys enjoy it too.
- 13 replies
-
- 54
-
-
-
 Had this mostly built gathering dust on the shelf for a couple of years. If it wasn't for the fact that this was mostly built up, it was too advanced in build to enter into the Interceptors GB but since as I'd just done the MiG, I thought it was only right that I should complete its western counterpart Finally got it done & at last got to grips with Alclad as opposed to the Vallejo Metal Colour on the MiG. Added another pic of them both side by side for size comparison & comparison between the metal finishes. So this is the Sword kit which is a short run kit & should be treated as such. The seam lines on the underside were a pain to ensure that they didn't show up after priming. There was a lot of filling & priming involved but the underside join still faintly shows through. Sword provides a resin insert for the two Avon exhausts which are quite nice only once in, they're not a perfect fit. Either a fine shim inbetween the fuselage halves is needed, or a little bit of filler around the resin is needed. Talking about the resin exhaust, would have been good if they had produced a resin nose ring. The kit halves around the nose were short shot, so it would have taken some sprue filler to correct that, so I added the Quickboost resin nose ring for the Trumpeter kit which fitted exactly & improved on the overall length of the model. I also find that Sword kits in 1/72 have very shallow fine panel lines, so I usually give them a going over to slightly deepen them. Decals are a mix of the kit decals & used some stencil data from the Airfix F.6, only those that applied, similar to what went on the F.3. Thankfully the Sword tail fin markings actually fit the tail fin which was a bonus as a lot of the time with large dcals, they're not always exact in dimensions. Everything else is just out of the box. First success using Alclad over their gloss black base. Used some Vallejo Metal Colour for picking out some individual panels. Used Ammo Mig red for the spine, custom mix Klear gloss & Ammo PLW. English Electric Lightning F.3 XR719 D Wattisham Summer 1965 And a couple for size comparison. Thanks for looking! Martin
- 37 replies
-
- 69
-
-
 BAC Lightning F3 53-692/L 13 Sqd RSAF, Tabuk 1977 Ok so just finished this today and rather pleased with the outcome! It is one of two Saudi Air Force machines they did in camouflage in 1977 - this being the one with the wrap around camo. The other one had a sky blue underside with camo top. It is the Airfix F6 kit and I used Model Alliance decals and some aftermarket for the bang seat. Paints are Tamiya and Gunze and Alclads and I am particuarly pleased with the nose ring as I must have re-done that 10 times to get it right! Chris ty pleased with the nose ring as I must have re-done that 10 times before I got it
- 43 replies
-
- 82
-
-
-
I have the Dmold corrected item, had a look at it and thought: "so nearly round" I want to try my hand at turning one in alu and 'deforming' it to the right shape (will be hard, as it Is and elusive non circle) does anybody have four view drawings of the ring (front, back, side, top)? it would help in determining if it would be worthwhile.
-
Hobby 2000 from Poland is to rebox the Dragon/Cyberhobby 1/72nd Lockheed P-38 Lightning kit. - ref.72041 - Lockheed P-38J Lightning - Europe 1944 - Limited Edition https://ksmodel.pl/sklep/szczegoly/hobby-2000-72041-p-38j-lightning-europe-1944-limited-edition-1-72-24284/ - ref. 72042 - Lockheed P-38J Lightning - Pacific 1944 - Limited Edition https://ksmodel.pl/sklep/szczegoly/hobby-2000-72042-p-38j-lightning-pacific-1944-limited-edition-1-72-24285/ - ref. 72043 - Lockheed P-38M Night Lightning - Limited Edition https://ksmodel.pl/sklep/szczegoly/hobby-2000-72043-p-38m-night-lightning-limited-edition-1-72-24286/ V.P.
-
Hello! I've actually almost finished this kit so most of this is just recap. It all started with a masking tape seatbelt and a dream about a year ago now... Aaaaand of course a model too... I was very much looking forward to making it as Lightnings are one of my favourite aircraft and I have only built one before it and that one turned out baaaad (pics of both together later). I decided to go for the Metallic RAF Luqa/Cyprus 1974 decal scheme So, as I was saying, I started with the seat, I added a bunch of stuff using card, bluetack (cursed ik, would do it differently in hindsight) and masking tape, I think it turned out good for 1:72! I would like to thank shortCummins for some excellent reference images on his wonderful 1:48 build I then built the aircraft (I don't have any pictures of the process or the cockpit but it was mundane anyway). There were some fit issues, especially at the bulge, but I will get to that later. I then brushpainted it using citadel stormhost silver Looks a bit nasty at this point it gets better later don't worry. I then neatened up the front I then thought, hey, it might be a cool idea to add panelling. So I did. here's a side view of it in-progress wings I then made the gear and other parts as sub-assemblies. I then started putting everything together and decalled the tanks. I somehow lost the "hud" so I scratchbuilt one. I think it turned out good. Here it is with and without tanks at that point. It's starting to take shape! Here it is next to aforementioned old lightning: I have a feeling this one will look much better I also fixed the fit issues on the "bulge" by puttying it and giving it a good sand. It's time for decals! And here it is now! I still have quite a lot to do... approx 30 stencils, some more paint (nose gear doors for example) and weathering. It's going well though, however I did cock up both front decals. Oh well, I tried to fix it. I don't know if I'll be able to update soon though, school is going to be really extreme after the Easter holidays. Hope you guys enjoyed it so far! See you later!
-
Model Number 5 - best build by far - cannot express how good this kit is - it was a little expensive, but the reviews were right - easily the best fitting model so far, the detail is insane and you can barely see any seams between the panels, in-fact there was very little glue needed the fit was that good. Very clever how the kit is put together overall, Tamiya really seem to have thought about the method of construction - there was serious engineering put into this! an absolute joy to build. Not a bad effort, but overall I wasn't that happy with the finish - this is of course no detriment to Tamiya - the model is excellent, its my crappy paint job - just think i dint know when to stop, i may retouch this one at some-point.
-
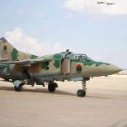
 Hi comrades! Here is my Lightning F.53 in ground attack configuration. RSAF was the only air force to use Lightnings in real combat. The build is here: Used aftermarket is decals (Model Alliance), Reskit MATRA pods, Master pitot, Aires resin ejection seat, wheel wells and exhaust, Eduard brass, New Ware masks. The pilons and other additions was scratch built. Thanks for looking
- 10 replies
-
- 27
-
-
-
 Back in the days before the internet , when we had to look at books for refferences , after market was virtually nil , an amazing man produced a quite limited kit of the Lightning in 1/32 scale. OK Yes it was Vacform , but it was superb. I was a teenager and was looking through scale aircraft modelling magazine and saw an ad for said kit. I had to have one. My Dad drove me from Essex to Maidenhead to get one from the Man himself , Frank Brown. He was a very friendly man. He showed me some built up ones and also the most gobsmackingly good solid resin fuselage with white metal inserts. I believe it was a master for the kit. No idea what resin it was but it was glass smooth and dark blue.Fantastic. The kit was built and displayed in my room before finally getting destroyed years later somehow. I have built a few over the years , i even started one using the Aires bits for the Trumpeter kit , but sold it on to a friend before finishing it. I now want to build another one. One came up on the web for a good price and it arrived today. All is good and the kit it as beautiful as the first time i saw it. Unfortunately the canopy is very yellow. Not to worry i will attempt to make a vac form machine and make a new one. I will post photos of the kit this evening.
- 48 replies
-
- 11
-
-
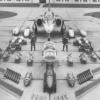
 P-38F/G/H 3D SPACE Cockpit Sets (3DL48009, 3DL48010 & 3DL48011 for Tamiya) 1:48 Eduard SPACE Tamiya’s new P-38 Lightning in 1:48 was a welcome release, as the old Academy kit is getting long in the tooth now and needed a successor. It’s a lovely kit, but some new-fangled detail sets can always improve on styrene injection moulded parts at this scale (and many others too). Now we have a trio of 3D Printed instrument panels with Photo-Etch (PE) accessories to use instead of either the kit parts or traditional PE. The Instrument Panels are 3D Printed with relatively new technology resin “inks” onto a carrier paper, with depth replicated by successive layers in different colours as appropriate. Instrument faces are also overcoated with a clear gloss-coat to give them a shine and replicate the glass. The other details are supplied on a fret of PE brass that has been nickel-plated and pre-painted with detail and colour. Eduard's new SPACE sets arrive in a flat resealable package, with different branding and a white backing card protecting the contents and the instructions that are wrapped around. P-38F SPACE 3D Printed Cockpit Set (3DL48009) The 3D Printed sheet contains a brand-new one-piece instrument panel with glossy dial faces plus a number of dials, black box faces and a few small placards. The PE set has a set of four-point seatbelts; rudder pedals; support for the canopy interior glass panel; control column dial; skins for various boxes around the cockpit; overhaul of the twin throttle-quadrants and other instruments on the sidewalls. A little filling and scraping off of moulded-in detail will be required to fit some parts, but nothing taxing. P-38G SPACE 3D Printed Cockpit Set (3DL48010) At first glance this set is identical to the P-38F set above, but if you look really hard at the panel, there are a couple of dials in the main panel that are different, and some changes to the side consoles. Let it not be said that Eduard don't differentiate between the smallest details. You might also have noticed that the PE sheets are the same for all three sets. P-38H SPACE 3D Printed Cockpit Set (3DL48011) This one also looks identical to the P-38F and G sets above, but closer inspection reveals that there are a couple of dials in the main panel that are different, and the side panels have reverted back to more closely resemble the earlier F. Conclusion 3D Printed panels are very impressive, and Eduard’s method really lends itself to these WWII birds, so the resulting panels are believable, simple and realistic, backed up by the PE extras that give you a little more depth around the rest of the cockpit. Highly recommended. Review sample courtesy of
 -
After the F-35A (link) Academy is to release in 2020 a 1/72nd Lockheed-Martin F-35B Lightning II kit - ref. 12569 Source: http://academy.co.kr/1aden/site/01_academy_kor/notice/2020_catalog.pdf V.P.
-
Hi folks, Firstly - I'm aware of the great build threads (with fix observations) that have been posted here on BM - the some excellent thoughts and input - you there Bill? What I'd like to get together here is a definitive list of errors - with dimensional/photographic proof. So - looking out for theories/physical measurements/photographic evidence... Reason - I *really* love the Lightning and I doubt we'll ever get another in 1:32. And IMHO there is a lot that's good - we've got injection moulded 1:32 Lightnings for one! Sooo - am looking at making up some 'correction' patterns for these kits - possibly... What I have on the list at present is: Fuselage plug (5 mm to fuselage length) - This is something I will be double checking with a real airframe. Nose ring Intake/nose gear bay Replacement fuselage tanks (all versions) Fuselage cable ducts (as required per Mk) Rear fuselage cross section Possible narrow chord on fin (F2A/F6) Canopy - I have a gut feeling looking at a few completed models that the canopy is somehow wrong - gut feeling is far too wide - again - to be confirmed Wheels/Refuelling probe available elsewhere and main gear can be shortened. Anything missing from list? Any further observations? Iain
-
P-38H Gun Barrels (648596 for Tamiya) 1:48 Eduard Brassin After the launch of Tamiya’s new P-38F Lightning in 1:48, a limited edition of the P-38H in a special box has arrived, drawing in more modellers to their excellent kit. Here comes the aftermarket! As usual with Eduard's smaller Brassin sets, they arrive in a flat resealable package similar to their PE sets but with different branding, with a white backing card protecting the contents and the instructions that are sandwiched between. This set contains barrels for the nose of your kit that are drop-in replacements once you have removed a couple of moulded-in pips inside the kit’s nose cone part. There are four barrels on a spacer part that ensures correct arrangement, which slides in through the top four holes in the nose, with a further short barrel that has a moulded-in collar to obtain the correct projection for the lower gun. Each barrel has a tiny “bubble-catcher” tube added to the tip, so ensure you cut thos off before installation, and you should note that the barrels aren’t hollow, but in this scale it is hardly visible, and you can always drill them out if you feel the need. The cooling jackets are perforated and there is the correct step-in where the jacket ends and the very tip of the muzzle is exposed. Casting is excellent as usual, and this quick upgrade to the detail should improve your model incrementally at low cost, which is exactly the intent. Highly recommended. Review sample courtesy of
-
Finding myself in a weird situation of wondering if my Airfix Lightning F.2A has *enough* stencils.. 🤪 I accidentally got hold of the starter kit from flea bay last week and when I looked at the decal sheet immediately thought it was very small. I have compared it to the F.6 I also "accidentally" acquired a while back and it seems to have a lot more. Does anyone know if the F2A had less stencils or is this a result of the F2A being a cut down starter kit? Or maybe the green camo scheme makes the stencilling less visible.. Typing this also makes me realise I appear to have a "stash", something I swore wasn't going to happen this time round as I was only going to build a Phantom and a Tornado for old time's sake. Oops... Al.
-
Hello guys! While I am in qarantina,-at work place (1150 kms away from home) I am not able to paint my kits So, I left my 1:72 Airfix B-17G aside and focused on my 1:48 P-38J. There are lots of negative commends about the kit but I wanted to give it a chance. Mine was moulded in 1993 therefore I found out that my decals are dead! I didnt decide which paint (OD-NG or metallic) yet. I am open to any ideas I intend to use Eduard's zoom set at cockpit. first; my poor B-17g (fortress mk.III) waiting its fate... sexy box art. So far, dry fits seem ok. Some modellers say 'it is ok when you dry fit the booms, but the party starts when you glue in the wheelbays' so I am a bit scared. I stolen wheels from Tamiya's kit. Tamiya is slighty bigger and looks much better.
-
Another Ebay purchase. Not my favourite aircraft growing up, but like the new Lightning its grown on me, plus I think the box art for this one looks amazing. Normally i have a mooch around on scalemates and on here for reviews and builds for any pit falls to lookout for or aftermarket needed, but for this one I went in blind. Having just built 2 airfix buccs, and in the past the jaguar and tornado gr1 I wasn't really expecting much, but that was fine, planning on just a quick out the box built after stalling trying to build the revell gr4 farewell tornado. Box Art and Sprue shots, Cockpit was just sprayed with Tamiya medium sea grey and kit decals used for the instrument panels, seat looks pretty good out the box, sprayed black and dry brushed with silver, and put the pilot in to save time messing around with harness straps. Engine and intake area fitted nicely and was pretty impressed with the detail and fit of the kit, but its been an enjoyable change just to sit down in one evening and be able to reach this stage with out any faffing about. Pilot doesn't fit into the seat, so removed the base of the cushion, and sanded down the base of the seat a little. Rest of it came together pretty quickly, no need for any filler, no flash and very little sanding needed to tidy up the parts once off the sprue. Still undecided on the final paint scheme, but leaning more to a wrap around camo with silver/grey undersides.
-
 F-5A Recon Lightning Conversion Set (4399 for Tamiya) 1:48 CMK by Special Hobby The Lockheed P-38 Lightning was a fast aircraft, and when stripped of unnecessary weight and combat equipment it was faster still. Lockheed developed the F-4 as a reconnaissance airframe with a new nose to house the cameras where the guns had been, plus the necessary controls and avionics to perform the task. The F-5A was a P-38G conversion, with 181 airframes made. The Set This set arrives in one of CMK’s yellow card boxes, with six grey resin parts on four casting blocks, seven clear resin parts for the camera windows, a sheet of decals and even some masks for the camera windows. The two largest parts make up the new nose, which entails cutting a small section from the two fuselage nacelle parts, which are shown on the accompanying instructions. Before gluing the new nose in place, the window apertures should be de-flashed and the crystal-clear resin windows glued in place, then the nose cone added. Later in the build a small antenna is fitted to a pit on the upper nose behind the faired over gun troughs. Inside the cockpit is a new more rounded control yoke, and an instrument to fit inside the centre cockpit. Another yoke is included on the casting block, but this is unused. Markings There were only 20 of the type made, with two on the decal sheet. F-5A 4213965 "Shark", 12th PRS, Florennes, Belgium 1944 F-5A, Groupe de Reconnaissance 11/33 "Saviie" , white 80 maned Jeane, Sardinia 1944 The decals are well-printed with good register, sharpness and colour density, and you will need to complete the decals with the kit supplied stencils, as this set includes only the national markings and individualisations. Conclusion An interesting set that will fill a gap in the market that will either be missed by Tamiya, or arrive sometime before the heat-death of the universe knowing their glacial release schedule. Highly recommended. Review sample courtesy of