Search the Community
Showing results for tags 'lavochkin'.
Found 23 results
-

1/144 - Lavochkin La-7 by Stransky Kits/Mark I - released
Homebee posted a topic in The Rumourmonger
Stransky Kits is working on a 1/144th Lavochkin La-7 kit - ref. Source: https://www.facebook.com/stransky.kits/posts/1015152925300525 V.P. -
The Mig-15 looks like a thick pumpkin next to the La-15. That's why I already have the La-15, but not the MiG-15 yet. The model, according to the Mars Models instructions, represents the first serial La-15. I hope it actually has ever looked like this one because, as I realized after applying the decals, the photos prove otherwise. However, I did not want to go back into the construction process. The construction ran almost without problems until it turned out that the cockpit and air intakes to the engine did not fit into the fuselage. The diameter of the front and rear part of the fuselage after pressing in the cockpit also differed quite significantly. Somehow these problems were managed by the strength and persuasion of the file. Besides these issues - a pure pleasure: nice details, the set includes photo-etched details and masks. Painting - MRP in the interior; for the rest, I used mainly AK Extreme Metal. Dark gray wash from Modellers World. The gun barrels are made of the AK brass tube. I hope you like it Hubert
- 22 replies
-
- 48
-

-
- early jets
- Lavochkin
- (and 1 more)
-
Hi all, I present to you Ivan Kozedub's la-7 in 1/72. The kit is the hobbyboss easy assembly version, it has 28 plastic parts including the canopy. It also comes with a metal prop shaft. Detail is lacking in all areas, although the panel lines are molded quite nicely. All in all, this kit is very good for beginners, or as a quick mojo boosting build. Here are the photos: Q&C welcome Cheers, Riley
-
Another completed model. Very old model, but it can look quite decent. I really like this Russian camouflage scheme. Here's the picture. Enjoy.
-
Clearprop Models is to release a 1/72nd Lavochkin La-5 early variant kit - ref. CP72014 Sources: https://karopka.ru/forum/messages/forum430/topic29736/message1373431/#message1373431 http://scalemodels.ru/news/14489-anons-Clear-Prop-1-72-la-5-rannijj---3D-rendery.html 3D renders V.P.
-
Another completed model. Quite an old and demanding model, but with the effort it can look nice. Here's the picture. Enjoy.
-
Fly is to re-release the Gavia 1/48th Lavochkin La-7 kit. Source: https://www.facebook.com/208070375871052/photos/a.208144655863624/3069904713020923/ V.P.
-
 Hi, Here is a selection of photos of my latest completion. Its built using the 2014 weekend edition of Eduard's kit. The kit is one of Eduard's older tools so not up to their current standard. Unfortunately as a weekend kit it lacks the Photoetch which presumably came with previous boxings, resulting it a lack of cockpit detail and in particular the main gear door actuators. These issues were remedied with a bit of scratch building using plasticard and albion alloys micro tubing. The kit does come with a set of Eduard's Superfabric seat harnesses. These work alright but are a bit flat because the buckles are printed the same as the straps. I prefer their Photoetch belts in general or making my own. The model is mainly airbrushed using Hataka red line paints for the camouflage scheme. It was my first time using these acrylic paints. I found they worked well with Vallejo Airbrush Thinner with Vallejo Flow Improver although there was still an occasional issue with tip dry. The star on the cowling is supplied in the kit as decals but I decided to spray it instead to better match the forward part of the cowling and spinner. I also had to touch up the white wing stripes as the decals were too short as I positioned them. To weather the model I used a combination of Ammo by Mig Panel line washes, Tamiya weathering sets and chalk pastel dust. I used Ammo by Mig Lucky matt varnish to give it its final coat. The aerial is made from Uschi van der Rosten rigging thread, painted aluminium. The Canopy was dipped in AK Interactive's Gauzy Glass Coat to improve its clarity. I had trouble in the past with this stuff drying to quickly and not allowing it to level out. That's until I decided to put the bottle in the fridge for ten minutes before using it. It may sound weird but it seems to make it slightly less viscous so it levels out before drying. Here is the cockpit precariously posed before the fuselage got closed up. Everything behind the seat bulkhead is scratch built apart from the yellow bottle and so is some of the detail on the cockpit side walls. This kit was originally designed to use photoetch for detail so it lacks moulded alternatives unlike more modern Eduard kits. I think it predates Eduard's Profipack/weekend edition philosophy. Accuracy wise the kit seems to match reasonably well to the references I could find online. Although I did reshape the wing tips and extend the tail wheel opening rearwards to better match the real aircraft. Hope you enjoy! Mark.
 -
Dear fellow Britmodellers, there's been a couple of Eduard 1/72 Lavochkins around here, recently. May I add another one to the growing collection? This is "White 23" from 2nd Sqn, 2nd GIAP, “Mongolsky Arat”, operating in spring 1945. The model was built from the 'Profi Pack' which includes paint masks and photo etch details. I replaced the pitot tube with a piece of wire. The spinner of Eduard's kit is slightly mis-shaped, resembling a "kremlin tower"; this was substituted with a resin item from Hungarian manufacturer SBS Models. Painted with acrylics from the Mr.Hobby range. Photographs by Wolfgang Rabel of IGM Cars & Bikes. Thanks for your interest!
-
Decided to start work on building my Eduard Lavochkin La-7 profi pack kit, while waiting for the Vampire to dry. This is my first Eduard kit, first glimpse at photo etch, and first Soviet aircraft. The box and contents are perfectly presented, only one (very shiny) sprue, along with photo etched parts, masking and a detailed sheet of decals. Makes me think attention to detail is important here. I'm considering finishing the aircraft in the colours of Lt.Col. S. F. Dolgushin, having achieved over 500 missions and was regarded as a fighter ace of WWII.
-
 Hello and thanks for your interest, here's another Lavochkin La-5FN from Kovozavody Prostejov. "Yellow 8" was flown by pilot P. Rakov in summer 1944 (according to kit instructions). I used photoetch parts (for dashboard, seatbelts and landing gear covers) from an old Extratech set. Photographs by Wolfgang Rabel.
- 6 replies
-
- 21
-
-
- 1/72
- Kovozavody Prostejov
- (and 6 more)
-
Lavochkin La-7 1:72 Eduard ProfiPACK Edition The Kit The Eduard La-7 kit is fairly new dating back from 2007, whilst this is a good kit after just reviewing the new tool Fw 190's from Eduard, it is surprising to see how much mould technology has moved on since then. The kit arrives on one sprue of grey plastic, with a clear sprue, sheet of photo-etch, a sheet of masks; and a comprehensive decal sheet. The parts are well moulded with no issues or flash. Construction starts in the cockpit with various parts of Photo-etch being added to each side consol. Next up the exhaust parts are fitted into each fuselage half. Once these parts are in the fuselage can be joined up not forgetting to insert a blanking pate in the tail wheel well. Next up the wings are put together; these are a one part upper & one part lower. The top of the upper wing forms the base of the cockpit and the control column and rudder pedals are added. The instrument panel and pilots seat complete with rear bulkhead are then made up and added through the bottom of the fuselage; once these are in fuselage can be added to the wings. The canopy (one piece or three piece) can be added along with the tail planes, rudder, engine cowling, propeller and top gun parts. Lastly the landing gear is made up and added along with the gear bay doors, and the large ventral radiator. Decals The decal sheet is in house printed by Eduard and is in register, colour dense and should pose no issues. Decal options are provided for eight aircraft: Maj. IN Kozhedub, 176th IAP, Germany Spring 1945 (Mask provided for nose painting this option). Maj. AV Alelyukhin, 9th GIAP, Berlin Operation 1945. Maj Amet Khan Sultan, 9th GIAP, Germany 1945. Lt. Col SF Dolgushin Co. of 156th IAP, Kluzov airfield, April 1945. Flt Sgt Stefan Ocvirk, 2nd Fighter Air Regiment, 1945. Unknown unit, Soviet Union late 1945. 2nd GIAP, 2 Sqn "Mongolsky Arat", Spring 1945. Co. of 4th GIAP, Lt. Col Vasily F Golubyev, Spring 1945. Conclusion This is a great kit from Eduard and it is good to see it re-released. Recommended. Review sample courtesy of
-
Hello, this is the new release Kovozávody Preostejov Lavochkin La-5FN in markings of the Slovak Uprising, 1944. I had high expectations following the release of Kovozávody Preostejov's Mustang series, however, this kit looks as if it's been produced by a different manufacturer. There are no locating aids, some flesh present and heavy sprue gates. Having said that, the kit goes together without any major issues. Kovozávody Preostejov have done the 'open canopy' option in a very unusual way, providing both clear hoods (that slide over each other) as one massive piece. You will need to paint the underlying canopy rails from the inside - not an easy task. This is still a very welcome new release as it's the only modern, up-to-date tool of an La-5FN. Here's how mine turned out, built from the box: All photographs by Wolfgang Rabel, IGM Cars & Bikes. Thanks for looking!
- 6 replies
-
- 17
-
-
- Kovozávody Preostejov
- VVS
- (and 4 more)
-
Hello all A few pics of my latest completion - this is Zvezda's Lavochkin LA-5 in 1/48. This is a lovely kit with a lot of detail, some it unseen deep into the fuselage. In more skilled hands, it could be displayed with all the engine and gun detail exposed. I made a bit of a hash of aligning all the struts of the frame that holds the engine in place, so backtracked from that option and closed her up to hide my errors. Also managed to lose the pitot tube - having escaped the jaws of the carpet monster, i fell prey to the laminate wood monster as the part pinged off into the unknown... Had some minor issues with the canopy, which didn't like being dipped in clear gloss at all, but still a very enjoyable build. It was painted in a mix of Tamiya and Mr Hobby acrylics, weathered with Flory's dark dirt wash, oils and thin acrylic mix for the exhaust stains. Thanks for looking Adam
- 17 replies
-
- 19
-
-
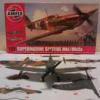
Back by popular demand, it's my modelling output for the year just past! Hot upon the heels of my prodigious 2014 modellistic endeavours (2 finished models!), I followed up that triumph by doubling, yes, you read that right, DOUBLING my output! I present for your dubious enjoyment piccies of no less than 4 models I finished in the last year! I'd like to say that I made up in quality what I lacked in quantity in my 2015 production, but my solicitor advises me not to break deceptive advertising laws, so I can't say that. However I will say that the following photographs contain a surprise - a NON-SOVIET model! And a Spitfire to boot! All right, enough of the hyperbole, down to business. In order of completion, first up was the inevitable Lavochkin fighter, in this case the La-5F by AML. Reading some reviews of this kit some reviewers made this kit out to be almost unbuildable. Just to show that you can't believe everything you read, even on the Internet, the kit wasn't very hard to build, with no more than the usual bit of fettling seemingly inevitable to all short-run kits. At any rate I'm pleased with the results, and it's the first time I've done the Soviet two-grey fighter scheme used from late 1943 to the end of the war. I rather like the scheme. Next up was the very nice Airfix Spitfire F.22. An easy build, and an easier scheme - all silver. The kit went together easily, and the decals worked out quite nicely. I only very lightly weathered the aircraft, with just a bit of exhaust stains as these aircraft were kept in good condition I'm led to believe. Thirdly was yet another Lavochkin fighter, the LaGG-3 Series 3 from Roden (nee Toko). Although this kit also took a bit of fettling, a result of Roden fitting all the bits and bobs to do every version of the LaGG-3 into one moulding, I'm fairly pleased with the results. If you look closely, you will see that like the La-5F, it has a cat on the tail, a white one in this case, whilst the La-5F features a black cat with a white outline. This is not mere coincidence as both aircraft belonged to Soviet GPW ace Leonid Akimovich Galchenko. The cats must have proved reasonably lucky, as Tovarish Galchenko ended up the war in one piece, with 24 victories to his credit. He was interesting in being one of the few advocates of the LaGG-3. Last but certainly not least, is the inevitable Il-2 (have I ever told you that I'd written a book about the Il-2 - yes? Well I have.). In this case it's a Shturmovik in a rather striking partial winter camouflage. The kit itself is the Eastern Express reboxing of the very good Dakoplast kit of the single-seater Il-2 with the wooden-covered outer wings. The scheme is particularly unusual in that most of the rear fuselage, including the underside, is finished in black. Why this was done is unclear from the record, but I've seen a photograph of one other Il-2 where this was done. At any rate, below are the models in all their questionable glory. As usual all (favourable) comments are welcome, and unfavourable comments will be treated with the derision and verbal abuse they deserve in the order they are received. Enjoy! Best Regards, Jason
-
Okay the bad news first; despite the rather lurid title, I only completed two models this year, an Il-2 Shturmovik and an La-5, both in the gentleman's scale of 1/72nd. Now the good news - this doubles my output from last year! The Il-2 arrow (swept-winged variant) was from the Toko kit, with wooden wings represented by labouriously sanding down the wings to rid it of the engraved panel lines. The La-5 was built strictly out of the box, and the kit is a repop of the old, but quite nice Cooperativa kit. I'm not too happy with the exhaust stains on the La-5, but I was in a hurry to get if "officially" finished for 2014. The lack of weathering is deliberate - looking at photographs, the La-5 was usually kept in pretty good nick. I may well revisit the exhausts and the near lack of exhaust stains on my Il-2. The Il-2's engine, the Mikulin AM-38 was not a particularly oily or greasy engine, but it did put out quite a bit of exhaust. At any rate here they are, in all their mediocre glory! As usual I apologise for the poor quality of the photography, assembly, decaling, weathering, etc. Best Regards, Jason You may wonder why I have so many photographs for such so-so models, but I happen to go by what the Vozhd ("Boss" - Stalin) is reputed to have said - "Quantity has a quality all its own.".
- 16 replies
-
- 9
-
-
- Il-2
- Shturmovik
- (and 8 more)
-
Lavochkin La-5FN and La-7 Limited Edition Eduard 1:48 History The history of the La-5 and La-7 are inextricably linked and they became the ultimate wartime designs of a line of fighters that began with the LaGG-3 in 1941. The LaGG-3 suffered from a heavy structure due to its designers unfamiliarity with modern aircraft design and the fact that the state of the Soviet aircraft industry forced them to use wood throughout instead of the lighter aluminium structures being developed in the west, and the lack of a engine of suitable power other than the M-105 1,000 h.p. license-built derivative of the Hispano-Suiza 12-Y series. The LaGG-3 was forced into service due to a lack of alternative, and gained the nickname among its pilots of “varnished guaranteed coffin.” The design team was not unaware of the problems of the LaGG-3. The appearance of the Fw-190 on the Eastern Front was enough for them to obtain official permission to explore the possibility of developing a radial-engined fighter, the result of which was the La-5 series which appeared in 1943, with 150% more power than the LaGG-3 and a worthwhile armament of two 20mm cannon. The ultimate development of this series – the La-5FN – was the first Soviet fighter that could really hold its own against the Fw-190 in combat and was superior to the Bf-109G at low altitude; it was widely produced. While the La-5 could at least confer equality on Soviet pilots, the designers wanted superiority. A more powerful Shvetsov radial was developed, but it was unreliable; there would be no possibility of increasing engine power past the 1,850 h.p. of the ASh-82FN engine used in the La-5FN. Thus, the designers engaged in a program to further lighten the airframe by the substitution of aluminium structures for the main spar and other parts of the design wherever possible, as well as a general cleaning-up of the airframe. The result was the La-7, which first appeared in prototype form in January, 1944. With the airframe gaps sealed, a different propeller, and the engine oil cooler removed from the drag-producing position atop the engine cowling to a neat scoop under the fuselage, the wheel wells covered completely, and a different exhaust cover, maximum speed was increased to 407 m.p.h at 15,000 ft. – over 40 m.p.h. faster than the La-5FN – making the La-7 the fastest of all Soviet fighters to see service during the war. Interestingly, the control stick changed from the spade grip of the La-5 to an American-style stick almost exactly the same as the P-39 Airacobra. It had been originally planned to arm the La-7 with three Berezin B-20 lightweight 20-mm cannon; however, delivery delays required that the majority of the La-7s that saw combat were armed with the two ShVAK 20mm cannon used by the La-5; only 368 3-cannon La-7s were delivered to combat units before the end of the war, compared with more than 3,000 of the 2-cannon variety. In combat, the standard La-7 was 44 mph faster than the Fw-190 at sea level, was 22 mph faster than the Butcher-bird at 20,000 feet, and out climbed it at all altitudes below 20,000 ft. The La-7 was more than 2,000 pounds lighter than its German opponent, which translated into manoeuvrability the Focke-Wulf could not match in close manoeuvring combat at any altitude. The first La-7s to reach an operational unit were delivered in July 1944, to the 176th Guards Fighter Aviation Regiment, of which Ivan Kozhedub – the leading V-VS ace – was deputy commander. Kozhedub would score 17 of his 62 kills in the La-7, including a Me-262 shot down on February 15, 1945. Between September 15 and October 15, 1944, the 63rd Guards Fighter Aviation Regiment scored 55 victories – 52 Fw-190s and 3 Bf-109Gs – for the loss of only seven La-7s. The new Lavochkin fighter was clearly a winner where it mattered. The aircraft did not survive long in service after the war lasting only until 1947 The Model Both of the kits contained in the large box with a very nice artists impression of the two aircraft flying over a Russian mountain have been released before, but this special edition package also provides a fabulous book, some resin, etch, masks and a large decal sheet. The downside is that the book and historical notes in the instructions are only in Czech, but at least the book has a great selection of period photographs to help the modeller. The La-5FN is from the Zvezda moulds, whilst the La-7 was originally from Gavia. Even though they are re-pops the quality of the moulding is still good, with no sign of flash or imperfections. Detail is pretty good with fine panel lines where required along with the rivets, vents and other details well represented. Since the aircraft were mostly made of wood there are large areas without surface detail. The clear parts aren’t the best I’ve seen as there is some slight distortion, but they are eminently useable. Whilst the Zvezda derived kit is definitely the more detailed the Gavia kit is more of a weekend build, even with the addition of the etch. Each kit has its own build section within the instruction booklet, while the painting and decal placement guide requires a completely separate booklet almost the thickness of the instruction booklet. La-5FN Build As stated above the La-5FN is the more detailed of the two kits and construction starts with the assembly of the two nose mounted ammunition boxes followed by the fitting of the instrument panel backing pa plate to the top framework structure. The rear bulkhead is then added to the underside of this framework along with the side frames, which include the engine bearers, the ammunition boxes and the engine mounting ring. The cockpit assembly includes a floor, joystick, rudder pedals with PE straps and floor mounted PE switch and its backing plate. The wings are then assembled with the fitting of what looks like a fuel tank fitted to the lower wing, just behind the wheel wells, four ring ribs which are fitted, two per side along with the rear spar parts over the outer wheel wells. The inner wing sections are then glued into position, followed by the outer sections, which have clear navigation lights fitted on top of each wing tip. The cockpit and internal framework assemblies are then fitted to the wing centre section along with additional bulkheads above, below the structure and to the rear of the structure. The radio shelf is then assembled and glued into position. The engine is really highly detailed and comes as two halves for each cylinder bank, which when assembled are joined together with the valve rods fitted to the front bank. The two piece accessory drive cover is then fitted to the rear bank. Each of the intake and exhaust pipes are separate and will need a bit of care to fit correctly as there is a specific route for each pipe. The instrument panels are fitted to the cockpit, and this is where the pre-painted PE really comes into its own, producing a nice clear panel. Also fitted to the panel are the forward machine gun cocking levers and I presume a canopy jettison handle. More PE parts are fitted to either side of the internal framework and the seat is fitted out with a set of etched straps and belts. The seat is then fitted into position and the gunsight is fitted on the front coaming. Before the fuselage sides are added there are even more detail parts to be attached, items such as the trim wheels, placards, throttle quadrant, landing gear lever, and flap lever. The i internal engine cooling flap bays and tail wheel, made up of the oleo, wheel and attached to the tail bulkhead, also need to be fitted to one side before the fuselage is closed up. The engine assembly is now affixed to the support ring, whilst on the wings the ailerons and slats are attached. There is now plenty of panel work to be added, with the upper fuselage, engine cooling flaps, engine side cowling panels and the nose cowling. Alternatively the model can be posed with the upper fuselage panel removed, showing off the two machine guns complete with ammunition belt guides and link ejector guides. The horizontal tailplane with its separate elevators are now fitted along with the separate rudder, followed by the three piece canopy of which the centre piece can be posed open or closed. The main undercarriage is pretty much the last major assembly of the build with each unit being assembled from the main oleo, resin wheel/tyre and the undercarriage door. The tail wheel doors are also fitted. These necessitate the separation of each door from the single piece part which can be used as is for the retracted tail wheel. Whilst the model is upside down the radiator, complete with two radiator blocks is fitted into position. Lastly the propeller, assembled from a single piece propeller, backing plate and spinner is attached and the radio mast. La-7 Build This is a much simpler kit as mentioned above, but with the addition of the etch there is still quite a bit of detail, particularly in the cockpit where you need it. The seat if fitted out with an etched height adjustment lever and the obligatory seatbelts and straps, while the instrument panel needs to have the raised detail removed before the etched panel can be fitted, also with the cocking levers and canopy handle. The seat is then fixed to the rear bulkhead, but before fitting to one side of the fuselage there are lots of small details to add to the fuselage sections. These include both etched and styrene parts and make up the throttle quadrant, trim wheels, flap and undercarriage levers, auxiliary instruments, document pocket and canopy opening lever. The radio shelf, complete with radios is also assembled ready to fit into the fuselage. Before closing the fuselage up the tailwheel assembly is constructed from a single piece wheel, oleo, complete with yoke and the retraction jack. The subassemblies are fitted to one half of the fuselage along with the forward bulkhead and seat head armour after which the fuselage is closed up. The wing is constructed from single piece upper and lower halves but before joining the main undercarriage bays are fitted to the lower section. Once the wing parts are assembled the rudder pedals and joystick are added to the centre section and the pitot probe fitted to the starboard wing. The completed wing is then attached to the fuselage assembly followed by the forward upper panel front cowling with added cooling fan, the horizontal tailplanes, each produced as upper and lower halves, the propeller, assembled from the backing plate, to which the single blades are fitted before the spinner is added to finish it off. Each main undercarriage is assembled using the main oleo, PE scissor link outer door and resin wheel. These are then fitted into position and completed with the addition of the retraction jack. The inner doors are then attached along with their retraction arms. The oil cooler and radiator, assembled from a two part “bathtub” styrene radiator and PE grilles, are fitted along the centreline between and just aft of the wheel wells. The build is completed with fitting of the gunsight, three piece canopy and aerial mast. Decals The decal sheet is quite large and contains markings for twenty two different La-5FNs and five La-7s. The camouflage is pretty samey for the La-5FNs, with the exception of one example and all serving with the Russian Air Force . The same goes for the La-7s, although these are all with the Czech Air Force, but at least they have some interesting markings and slogans painted on them. I would normally list the units and locations for each of the markings provided, but it’s all in Czech, so haven’t a clue what they say, which is a shame. Conclusion Overall this is a very nicely produced boxing and with the number of decal options should result in a pair of very nicely models being built, particularly with the help of the etched parts, resin wheels and masks. The addition of the book will help with the research and there are some very nice photographs, but I would have like to have seen an English translation to have been included as well. Very highly recommended. Review sample courtesy of
-
Lavochkin La-7 “Russian Ace” Academy 1:48 History Lavochkins La-7 aircraft were the ultimate development in the Lavochkin series of fighters during World War II. Their stopgap predecessors were made almost entirely of wood, and were easy prey to Luftwaffe fighters. In 1941 development started on upgrading the fighter's airframe to accommodate a 14 cylinder engine, replacing the formerly used V-12. The goal of designing the Lavochkin La-7 was to achieve longer range and higher overall performance. The resulting La-7 was an excellent thoroughbred fighter. The aircraft featured the most powerful engine put into Lavochkin fighters, the Shvetsov ASH-82FN that produced 1,850 hp. In addition to greater engine power, the new aircraft used metal wing spars in place of its predecessors wooden ones, was lower in weight, and had much improved streamlining. The pilot was protected with thicker cockpit armour and later models of the aircraft reduced pilot workload by introducing single lever propeller pitch control. The La-7 was highly manoeuvrable, with a fast rate of climb and excellent high altitude performance. The aircraft quickly gained a reputation as an excellent fighter. It was extremely responsive to control and could outperform all other Soviet fighter aircraft. Its three 20 mm cannons delivered a deadly punch According to some records, Lavochkin La-7 aircraft downed some 3,100 Luftwaffe aircraft vs. only 115 of their own aircraft being lost. One is credited with a victory over a Me-262 jet fighter, the only Soviet aircraft to do so. Over 5,750 of the aircraft were produced. These aircraft continued to serve the Soviet Union through the mid 1950's. The Model Originally released in 1990 this kit has been re-popped a couple of times before this release including once by Hobbycraft. Although a relatively simple build, it does look fairly well detailed for its age. The kit is packaged in a top opening box with an artists impression of the aircraft in flight, unusually viewed from the underside. Inside there are just three sprues of blue-grey styrene, a small clear sprue and a sheet of decals. Even though the kit is getting on a bit, the moulds still seem pretty good as there is no sign of flash or other problems. There are some flow marks, particularly on the upper wings, but these will be invisible under a coat of paint. The finely engraved panel lines look pretty good as do the fasteners and rivets. The only real problem areas appears to be on the flight control surfaces, where the ribbing under, what I presume is fabric, is quite heavily done and could do with some rectification to lessen the effect. The build begins in the nicely detailed cockpit. The cockpit consists of the floor, front and rear bulkheads, separate instrument panel, joystick, seat and behind the seat armour panel, rear coaming, two black boxes, which I presume are for the radio and battery, and completed with the fitting of the clear gunsight. The completed cockpit is then sandwiched between the two fuselage halves The single piece lower wing has a number of holes that need to be opened up, should the provide bombs wish to be used. Once this is done the lower wing is fitted with the two upper parts, and then slotted into the fuselage recess. This is followed by the fitting of the single piece horizontal tailplanes and rudder. The forward cowling is fitted with the cooling fan, whilst the propeller is assembled from the spinner, which included the prop shaft, three separate blades and the back plate. The assembled propeller is then slid into the cowling hole and the styrene washer glued from the rear, allowing the prop to turn should you wish. Most modellers would probably leave the prop off until the aircraft has been painted and not worry if the prop turned or not. Once the prop and cowling have been attached to the nose the two exhaust gills can be fitted, one each side. The main undercarriage is now assembled, each unit made up of the main oleo, single piece wheel, which has some nicely moulded detail, and the main gear door. Before fitting the undercarriage, a keel beam needs to be added in the centre section of the wheel bays, followed by the inner doors and their retraction actuators. The main undercarriage can now be attached and each fitted out with the retraction jacks. The single piece tailwheel is then fitted along with the tail wheel bay doors, followed by the centrally mounted radiator housing and the separate intake lip. If the bombs are to be used then these need to be assembled from the main body, separate tail half, nose fuse and the two mounting crutches. The assembled bomb units are then attached to the respective positions. Finally the starboard wing mounted pitot is attached, followed by the three piece cockpit canopy, completing the build. Decals The decal sheet provided markings for four aircraft and are designed by Crossdelta for Academy and beautifully printed by Cartograf. The decals are sharp, in good register, nicely opaque and with minimal carrier film. The aircraft markings are for the following:- 9 Guards Fighter Aviation Regiment, flown by Major Sultan Amet-Khan, Twice Hero of the Soviet Union, East Germany, 1944-1945 9 Guards Fighter Aviation Regiment, flown by the CO of the regiment, East Germany 1944-945 9 Guards Fighter Aviation Regiment, flown by the Deputy CO of the regiment and twice Hero of the Soviet Union, East Germany 1944-1945 The same aircraft as that immediately above, but as it was allegedly repainted so that the pilot could fly over Berlin in a Red aircraft. Conclusion Although quite simple by todays standard, the real aircraft wasn’t exactly complex, this model would make a nice build for someone who has lost their mojo. There is scope for adding extra detail should you wish, but if not then it will still look good on the display shelf. My only real gripe would be that the painting instructions really should have been in colour. Highly Recommended. Review sample courtesy of
-
While working on my "big one" - Airfix 1/72 Lancaster BII - I have completed these two kits on the side. They are from Eduard's "Dual Combo" set which comes with Photo-Etch parts and an extensive decal sheet. Both kits were built from the box with the addition of SBS resin spinners - the kit's items look a little bit like "Kremlin's Towers". I also added Rob Taurus vacu canopy on "White 24", as the plastic kit part is too thick to fit over the back section of the cockpit. Both kits were painted with Gunze/Mr.Hobby acrylics and weathered with artist's oils and pastels. Metal blanking plates behind the exhausts were painted with Alclad II. The pitot tubes were exchanged for a piece of wire. So, first here's "White 24", the mount of Major Sultan Ahmet Khan (http://en.wikipedia.org/wiki/Amet-khan_Sultan) of III/9.GIAP, 1945. According to Wikipedia, there's also a movie about his life: http://en.wikipedia.org/wiki/Haytarma Sultan Ahmet Khan was killed in 1971 while flying a Tupolev Tu-16LL. Next is "White 33" of Col. Georgy Golubev, 4th GFAR, Baltic Region, 1945. All photographs by Wolfgang Rabel of IGM Cars & Bikes, Vienna. Thanks for your interest! Roman
- 14 replies
-
- 14
-
-
Lavochkin La-7 Commander of the 156th IAP Lt.Col., Hero of the Soviet Union S.F. Dolgushin, 215th IAD, 8th IAK, 4th VA, Kluzow, Germany, April 1945 Kit: 1/72 Eduard ProfiPack Afermarket parts: Pavla vacuformed canopy The main problem areas of the kit (fixed in this build) were: Wrong shaped wing tips (actually beginning at approx. 1/3rd of the span from the tip) both in profile and frontal view. While fixing this error, the aileron surface detail (being originally in "shrink-wrap" style) was lost and a new, more correct representation of doped fabric tautened over the frame with rib tapes added was done. Almost empty main wheel-wells: very little detail was provided and the most of what was available was wrong anyway. So, they had to be almost completely reworked. Some detail was scratch built of plastic and some corrections were done using Mr. Surfacer as well. The correct “ceiling” of the wheel bay area being originally just the inner surface of the upper main wing half was cut off, given the accurate profile and then positioned on its correct place. Inaccurate propeller spinner. It was corrected with Mr. Surfacer. Very basic representation of the louvers mounted in front of the engine being originally just a disc with a relief detail, while there should actually be empty intervals between the separate blades as well as between the blade tips and the cowling inner surface visible. To achieve the desired result, the excess plastic was removed from the original part, the edges of the blades were sanded off and the part was positioned onto a plastic tube mounted in the cowling interior. Gun ports being just holes in the cowling front ring, while their lower surface should actually go through the entire cowling. This was corrected by adding plastic inserts to the appropriate areas. The same had to be done with the wing root air intakes. Cockpit interior behind the pilot’s seat/radio compartment - again, almost empty and what was available, was wrong. Eventually the entire interior was scratch built there. The cockpit itself, despite some etched parts provided, could also benefit from some improvements as otherwise it still looks somewhat toy-like. Some cables and instruments were added there for more realism as well. The cockpit borders were too thick and, in addition, not exactly parallel, therefore, some sanding was required here as well. Canopy. Although crystal-clear, it is (both 1-piece and 3-piece parts) unfortunately thick enough to be unusable for displaying in open position. On the other hand, if displayed in closed position, due to the thickness, the cockpit interior looks severely distorted. The kit part was eventually replaced with the vacu-canopy by Pavla. The joint of the wing and the fuselage resulted in some sort of a small “peak” in the lower fuselage line. While correcting this, some moderate re-shaping of the fuselage in this area was required. In addition, the landing gear flaps were thinned down, some missing access hatches were engraved and some small details (e.g., Venturi tube) were added. Almost all kit decals proved to be of little use due to their wrong shape or dimensions: white borders of the stars too narrow, the number “93” and the under-wing stars undersized. So, mostly spare markings were used instead. This particular La-7, before handing it over to Dolgushin as his personal a/c, was completely re-primed and repainted and the stencil data weren’t re-applied, so that no use for all those beautifully printed markings either...
- 12 replies
-
- 14
-
-
Hello everybody; second completed model for me here on BM, it's Academy's 1:48 Lavochkin LA7, Soviet Ace Ivan Khozedub's machine. The subject is probably well known, and the kit too; I built it as part of my learning curve, experimenting new (to me) techniques and some scratch building. Some details about the kit and my built: - first time masking with blue tac (called Patafix here in Italy, and it's actually white); I must say I'm pretty happy with the soft edge you get with demarcation lines - scratch built pitot, using a prescription needle - scratch built details in the wheel bay - scratch built minor details inside the cockpit (harnesses, some piping and control wheels) - I had a horrible time with the kit decals, so I decided to paint on the red stars on the tail rudder (I think it shows, as the inner star is a bit off center compared to the outer), the two red&white triangles on the engine covers, and part of the numbers. - aerials went south when I painted them, so lesson learnt for next time: first paint, then glue 'em in (it's a standard white cotton thread) - gun barrels are from the spare box On with the pics, any comments welcome Underside: More details: Cockpit details Pitot Cockpit again Tail Nose
- 19 replies
-
- 10
-
-
Good evening guys, i would like to share with you few shots of my last finished kit. It was built just OOB as kind of relax build and i had some problems during the process, but i thought i would share it anyway, as there are not many russian warbird kits on BM. As i said, it was ment as quick OOB build. Thanks to the time i was spending on it (like few mins/day when i had free time from my other projects), it took me pretty few weeks to build, but if we ll speak about the real time spent on it, it could be something like 6-8 hours (speaking about the build, not paint), where most of the time took the cockpit + everything about it and fuselage/wing fit. The Eduard kit is pretty nice - i got cheap dual combo profipack version (it was missing some not-so important parts, masks and all clear parts), bought Rob Taurus vacu canopy for it and decided to build one of these just as OOB quick build (also bcs it was missing the few parts). Only things i made new for it were : gunsight, some stuff behind seat (only poor part of the kit as there is one big hole), gear doors for the tail wheel and the metal strips around cowling(made from can). There were only two bigger problems with the kit : the fuselage/wing fit was not good, but a bit of sanding/cuting while dry fiting sorted this. Second was the decals.. the colours are off-set at stars and some symbols. As for the marking, this La-7 was originaly in the usual grey/grey russian late fighter camouflage, but based on the sources i did read, somewhere between april-may 1945 it was repainted red on the top surface. I thought i ll make the kit to look like from this time, so theres not much weathering as the paint was not so old yet. Though the front side of cowling was red also on the original look so i did a bit of chipping there and a bit of chipping on the most used parts - the canopy rails, plates covering the guns. The inside of cockpit and wheel bay is quite dirty as it was not repainted. Thanks to the problems with decals, i had to repaint some of the off-set white around stars and i needed to paint new lines around the cowling heart symbol. Thats the worst part and if you asked me to do it again, i would not.. would rather get some silver pencil for it or so.. painting thin line with acrylic white was realy pain for me and my shaking fingers, so try to close eyes when u look that way Also, around the number on fuselage is some mark, set+sol+12-15 layers of varnish didnt help to cover it So, here it is. Built for fun and to have something special between my kits Hope you ll like it at least a bit. The photos are in my usual "quality", the best i can make , sorry Thanks for watching and any feedback is welcome Do not worry, there is a lot to be criticised so go on if you have anything to say
- 16 replies
-
- 11
-
-
 I am currently in the process of building an old Novo La-7/S-97 kit which I picked up for £2 at the Old Toy Museum at Bletchley Park a few weeks ago. Leaving aside that it has a few bits missing, being a lazy modeller I am slightly foxed by the paint colours given on the header card. For the version I am building, an S-97 of the Czech Mixed Air Division Czech Air Force,Slokavia 1945, it gives Matt White, Matt Black, Matt Dark Blue, Matt Red, Matt Dark Grey, Matt Light Blue, Matt Brownish-Green and "Stained Natural Metal". Is there any ready-reckoner I could use in order to relate these to my favoured Humbrol paints, or could some kind person suggest some acceptable matches/mixes? (It is particularly the last six I am after advice on.) Many thanks in advance. More on the kit here: http://www.novokits.ru/index.php/kits/11-novo-novoexport-kits/75-novo-1-72-lavochkin-la-7.html