Search the Community
Showing results for tags 'japan'.
-
There is something about Japanese fighter planes, something exotic, something mysterious. It makes you all the more happy when you find a really "colorful" Army aircraft that looks good. The aircraft was flown by the 1st Hiko-Sentai commander, Major Kinshiro Takeda, stationed in Hanoi in October 1942. What makes this machine noticeable is the so-called “leader markings”, a special marking of the machine’s rank using stripes. That was an invitation to build exactly this machine. Overall, Hasegawa has produced a great kit whose accuracy of fit and originality can be rated very high. I have a little more wear on my machine than can be seen in the photo. It took me a while to find this template. © Model-Art: Ki-43 (Japan)
- 3 replies
-
- 18
-

-
- Ki-43-I
- colorful a/c
-
(and 1 more)
Tagged with:
-
Bored with the standard Japanese solid green or two-town green-brown colour schemes on your JGSDF tanks? Well, here's a Type 61 with a difference! I don't know if it's a Japanese attempt at Dual-Tex camouflage, or if it's just coincidental. Still, it's an interesting scheme that will draw the eye (and test the patience)! Arii used it on the box art of their Type 61 (I know, I know, at 1/50 it's not the one true scale...😉). A potted history of the camouflage trial is here: https://news.line.me/detail/oa-trafficnews/67d99db86568. Enjoy, and happy painting!
-
- 2
-

-
- camouflage
- Japan
-
(and 1 more)
Tagged with:
-
The Komatsu light armored vehicle (Japanese: 軽装甲機動車; (kei-sōkō-kidōsha) is a Japanese military vehicle first produced in 2002. Currently used exclusively by the Japan Self-Defense Force (JSDF), it has seen use in the Iraq War. It is built by Komatsu Ltd. Defense Systems Division in Komatsu, Ishikawa, Japan. Komatsu's factory designator for the vehicle is KU50W. The exterior resembles the Panhard VBL, used by the French army, but the LAV has 4 doors and a large cabin for carrying soldiers. The LAV can also be transported by air in vehicles like the CH-47J and the C-130H. The Tamiya kit comes with a die-cast chassis, which will be a first for me. I'll probably go for the Armour School Regiment option, complete with machine gun and rear equipment racks.
-
Model presents "SHUSUI" on the day of the first flight 07.06.1945, Oppama, Japan Some time ago I did this and successfully participated in competitions around the world. The model is out of the box with a few extras in scrachbuild and template colors HINOMARU. https://svmalem.blogspot.com/2011/03/mitshubishi-j8m1-sushui.html The host page where I had the pictures crashed. I uploaded new ones today. Samo/P.k
-
This is the Hasegawa AH-1S in one of its JGSDF boxings. This is a very nice kit with some lovely surface detail and a good shape, moulded in a hard olive plastic that reminds me of some of Hasegawa’s older kits. The cockpit is a little bare so the interior was dressed up with a little plastic card and rod, and some seat belts from Tamiya tape. The exterior doesn’t need much attention but I used a set of Master barrels for the M-197 cannon, which are a nice addition. Camo is Gunze H320 green, Model Master FS30219 for the tan, and Tamiya NATO black. Decals are from the kit (I do like a sharkmouth!) and went on nicely, needing just a few nicks with a sharp knife to conform around the nose. After a bit of search around for a new photo hosting site when Village Photos stopped working, I followed a tip from @Markh-75 and went for Postimages. Let's hope this works for a while! Chris
-
Hi, Back to shelves with Japan airplanes, next one cleaned from the dust:) - the Kawasaki Ki-48 type 99, in Allies code "Lily". This was a tactical bomber. Markings are presenting machine from 34 Sentai, JAAF, New Guinea 1944. Kit was from Mania (I do not know if it is the same kit as produced by Hasegawa, or different?). I made her about 20 years ago, OOB. Comments welcome and regards Jerzy-Wojtek
- 15 replies
-
- 22
-

-
- Kawasaki Ki-48
- Lily
-
(and 1 more)
Tagged with:
-
Kora is about to release an 1/72 Rikugun Ki-93 limited run injection moulded kit in four versions. The prototype which flew once and three what-if or Japan-46 versions. Complete plastic kit from new moulds with clear canopy and decals retailing at 66€ for a twin-engined fighter.
-
Camouflage & Decals Japanese Fighters (9788366673229) Kagero Publishing via Casemate UK The Japanese produced some excellent fighters in WWII however their production was never able to keep up with demand, even more so once the US Started the strategic bombing of Japan. The book is primarily colour profiles of the various different aircraft used.. There are 40 pages of profiles and a page listing model paints for the original colours. These are listed in FS number, Humbrol, Gunze, Pactra, Aeromaster, Testors, Xtracolor and Lifecolor brands. As well as the Book there is an accompanying decal sheet. While the book contains the profiles there is no information accompanying the profiles as to the colours used on that aircraft. By Kagero's own admission in the preface the profiles used in the first 5 of these books have been previously published by them before. Future books will feature new material. Decals There is n the book a sheet of decals in both 1/72 & 1/48. The decals look well printed, glossy with minimal carrier film. I was surprised and disappointed to find out these only contained the national markings. I was expecting maybe a decal sheets to supply some of the markings to build a few of the aircraft in the profiles. As it is if you dont have these already in the spares box or decal stash then you will have to source these separately. Conclusion Sorry but a combination of recycled profiles along with a decal sheet only containing National Markings does not make me want to rush out for more of the same. Recommended only if you are a die hard fan and must have this publication. I feel Kagero are riding on the coat tails of some excellent publications they have done in the past with this volume. Review sample courtesy of
-
Hi all, I've built a few model railways over the years but haven't touched any of them for quite a while. One that I started but never finished was a model of the Enoden so I have a bit of history with Japanese N gauge and the bug appears to have bitten again. I'm in the planning/experimentation stage for a model of the Hakone Tozan Mountain Climbing Railway. It's extraordinarily pretty: Link to photo on Flickr by rainbow_bread It also has several interesting switchbacks and a very close distance between adjacent tracks. I don't know exactly what I'm doing plan-wise but I'm pretty keen to have one of the switchbacks (and maybe just that?) So the first thing was to figure out how that would work. None of the commercial track systems have pointwork that fits together so closely, but Peco's small radius turnouts are about right in curvature. I thought I'd see if I could modify them as the idea of laying my own track is way too scary. I cut the rail with an etched saw, which was very neat but quite hard on the saw teeth. I had to re-cut them with a file after each turnout! With the rail out of the way it was easy to saw and clip away the sleeper web, although a bit mind-mangling thinking about how the mirror image cuts would fit together. Then repeat all the steps and use a file to true up the edges so the turnouts fit together into a crossover. Makes quite a big difference compared to the unmodified crossover! and my Tomix EMU negotiates it happily enough I've made up both crossovers now, so have enough for one switchback. But I'll need to trim them back at the other ends when I figure out how long they actually need to be Hopefully some more interesting/less technical stuff to come, i.e. scenics, but I've got a fair bit to do first. Track plan is probably the big one, I need to decide between a single module, potential future modules, or something that captures more features of the real thing but is a bit more caricatured? Cheers, Will
- 13 replies
-
- 10
-

-
Hello guys, here are some photos of my most recently completed model, Hasegawa's 1:72 N1K2-J Shiden.
- 5 replies
-
- 11
-

-
- Kawanishi
- Naoshi kanno
-
(and 1 more)
Tagged with:
-
I’ve always loved GHQ’s ‘Micronaut’ line of 1/2400 scale warships. Intended to be used as wargame counters, these models are simple to assemble and ridiculously tiny, but the detail on them is first rate! This one is one of the Japanese navy’s ill-fated light aircraft carriers, the IJN Ryujo.
-
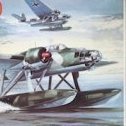
Hi, I would like to enter into my second GB with Hasegawa's classic floatplane fighter. I have long been fascinated by this plane: floatplane fighters are one of the most bizarre categories of military aircraft and almost a mission impossible to design. Floats are hard to reconcile with low weights and good aerodynamics. Nevertheless, Kawanishi had done a good job with the N1K1 (based on the equally fascinating E15K fast reconnaissance aircraft). A design so sound that it was later turned into a land-based fighter, the N1K1-J. This must be one of the very few cases when a floatplane or flying boat was converted into a conventional plane and not the other way round. The only other case, I can think of, was the Piaggio P.166 which was based on the amphibian P.136. Do you know others?
-
Ki-86a/K9W1 "Cypress" (32032) 1:32 ICM The Bu 131 was designed by Carl Bucker and Anders Anderssen after Bucker Flugzeugbau was established in Germany in 1932. This was to be the last biplane built in Germany. The aircraft is a conventional two seat trainer with a fuselage made of steel tubes, and wings made of wood; everything being fabric covered. A Hirth HM60R 60hp engine was fitted. The aircraft was, and still is praised for its handling characteristics against even modern aircraft. The aircraft was before and during WWII the basic primary trainer for the Luftwaffe. It was also selected in this role by the Japanese Army (Kokusai Ki-86), The Japaneses Navy (Kyushu K9W), and the Spanish Air Force (CASA Production). In deed CASA continued manufacturing the aircraft well into the 1960s. Additional licensed production also took place in Switzerland, Hungary, and Czechoslovakia. A further 21 aircraft were produced in 1994 in Spain using the CASA jigs. The aircraft is still being produced today by Air Res Aviation in Poland. The Kit The kit arrives on two main sprues, and a small clear sprue. Like the real aircraft construction is pretty straight forward. The build starts with the main lower wing. This is of conventional construction with a single pat lower and split left/right upper. There is an additional sprue in this boxing for the Hitachi Ha-47 engine used by Japanese (Though both the cowlings for the Bu 131B & D are in the box as well). The centre of the wing will also form the bottom of the front cockpit. A section of framing for this cockpit must be placed in once the wing is completed. The ailerons are separate parts and can be added at this stage as well. Construction then moves onto two parts side by side. The rest of the cockpit steel tube framework is added to both the fuselage halves, at the sometime the aircraft's engine is also made up and added to its bearers. Once the cockpit frames are in the fuselage can be joined up. The fixed parts of the tailplanes are added at this stage also. the fuselage can then be joined to the lower wing. Moving back to the fuselage the coamings for both cockpits are made up and the instrument panels are added. Instruments are provided as decals. The seats are then added along with the forward fuselage metal panels and the engine firewall. The engine can then be mounted and its covers added. The prop and its housing can then be added at the front. Next up the two part upper wing is also made up and added. Again the ailerons are seperate parts. The interplane struts are then added to the upper wing. Once done this can be mounted to the lower wing. To finish up the under carriage is made up and added along with a few external parts A basic rigging diagram is provided in the instructions, this is not too clear to be honest and the modeller would be recommended to check their references. Markings There are four decal options included in the box. From the box you can build one of the following: Watanabe K9W1, 381st Kokutai, Malaya 1945 (Green over yellow) Kokusai Ki-86, Koku Shikan Gakko, Manchuria 1945 (overall green) Kokusai Ki-886a, Tachiarai Rikugun Hiko Gakko, 1945 (Overall yellow with brown cowl) Kokusai Ki-86a, Koku Shikan Gakko, Manchuria June 1945 (box art aircraft in camo) Decals are printed by ICM, with good registration, sharpness and colour density, with a thin gloss carrier film cut close to the printed areas. Conclusion It is good to see an important trainer aircraft kitted in a larger scale, which for the aircraft still wont be a massive model. The quality of the kit is up there with ICM's latest releases, and really could only do with a set of seat belts to improve on whats in the box. Very highly recommended. Review sample courtesy of
-
Blurred props for the “in-flight” look.
-
I’ve always loved GHQ’s ‘Micronaut’ line of 1/2400 scale warships. Intended to be used as wargame counters, these models are simple to assemble and ridiculously tiny, but the detail on them is first rate! This one is one of the Japanese navy’s ill-fated light aircraft carriers, the IJN Ryujo. I started by cleaning up an old Nichimo 1/200 U-Boat stand. Taking a sheet of high quality artist’s drawing paper intended for watercolors, I traced and cut out an outline of the ship. After gently rolling the paper over a pen to create a lightly undulating “sea”, I lightly attached it to the base with dots of cyanoacrylate (super glue). Once I was happy with the positioning, the whole paper got a soaking with the cyano. This fixed it securely in place and made it rock hard. Then I trimmed the paper and sanded the sides smooth to integrate the sea seamlessly onto the base. The sea base was painted with a coat of Tamiya Royal Blue (X-3) acrylic with enamel paints for the wake. The sides were then shot with Tamiya Desert Yellow (XF-59) acrylic followed with a streaky coating of Winsor & Newton Burnt Sienna artist’s oil (with just a touch of Burnt Umber) to simulate the look of a wood base. Now back to the ship! To depict the Ryujo as she appeared at the time of her loss at the Battle of the Eastern Solomons on August 24, 1942, the model was painted in Tamiya Kure Naval Arsenal Gray acrylic (XF-75). Then I applied the decal to the previously glossed flight deck. The end result is quite effective – and SO much easier than painting all this would have been! To complete the paint job, I added small details on the boats and funnels followed by a thin dark gray oil wash over the gray acrylic to outline details and deepen recesses. The ship was then attached to the ocean base with Soft Gel Medium, a clear viscous polymer used by artists as a thickener for acrylic paints. It works great as an adhesive, too. As with all Imperial Japanese Navy aircraft carriers, the Ryujo carried multiple masts to support communication antenna wires. These masts rotated down to horizontal during combat or flight operations. Matching the dimensions of a scaled down drawing of the vessel, I cut the three smaller units from brass wire and attached them to the ship with polyvinyl acetate (PVA) glue. To replicate the main mast’s lattice structure, I repurposed a type 13 radar from a 1/700 scale Japanese destroyer photoetch set, cutting the piece down and attaching it to a wire cut to the appropriate length along with a yard and antennae spreaders. As a final step, I installed copper wire rigging taken from an old coil. This stuff is about as fine as human hair, but even so it is fairly heavy for 1/2400 scale. I added just a representative sampling of the ship’s rig to keep from overwhelming the little model. The tiny IJN Battle Ensign is a Peddinghaus decal from their 1/1250 scale “Marineflaggen Japan” set. And done!
-
Hi everyone, This is my 1/72 H8K2 Emily, unfortunately the right tail stabilizer isn't perfectly at 90° with the vertical tail plain I hope that you guys will like this massive seaplane as much as i do
- 12 replies
-
- 48
-

-
I'm building Tamiya's 48th A6M2 Type 21, not the best kit, part of one wing was short shot and the cowling has little to no contact points, so it glues where it touches. I also sanded away by accident part of the raised detail while trying to remove CA on the fuselage. What I wanted to know is if I could paint the aircraft in RLM 02 to simulate the Ame Iro, or just play stupid and paint it in light grey as shown in the coloured poster of the kit. My objective is to paint it as Saburo Sakai's V-103 A6M2 Type 21. I'm not trying to be super accurate, I want something passable. Thanks!
- 8 replies
-
- A6m2
- Saburo sakai
-
(and 1 more)
Tagged with:
-
Hallo again The Mitsubishi F-1 in 1/48 from Hasegawa was the basic for this model. The model is equipped with training weapons. The colorful air-ship rocket is the eye catcher. Since much of the F-1 fleet is stationed in the very north at Hokkaido, the surrounding is very different from central Japan. Here we are at the same northern position as Vladivostok i.e. Sapporo. The northern part is very close to Sakhalin and the eastern part faces the Kuril Islands. This F-1 are always in close contact with the Russian air force. Happy modelling
-
I´m interested in knowing if there´re any profiles or photos of Muto´s N1K2-J Shiden Kai. I´ve only managed to find articles with pictures of a recovered Shiden Kai from the Bungo channel (where Muto, Takashi Oshibuchi and other 4 pilots fell), but it was restored with the national insignia only, since the historians couldn´t find who flew the aircraft. If nothing can be found, then I´ll buy a Shiden Kai and build it as the restored aircraft, while adding the 343 decal (since Muto was a member of said unit). Better than nothing I imagine. Any help would be appreciated. http://www.ww2wrecks.com/portfolio/salvaged-and-restored-the-story-of-the-kawanishi-n1k-j-shiden-紫電-probably-flown-by-kaneyoshi-muto-武藤-金義/ http://ww2awartobewon.com/wwii-articles/kaneyoshi-muto-restored-shiden/
-
Finished the Shinden yesterday, and I can say that this model has aged nicely, almost no flash, crisp raised panel lines and good fit overall. Since the real aircraft only made three flights before World War Two´s end, I decided I could go the IJN 46 route and paint it with some ace pilot markings, such as the yellow engine intakes and the band in front of the cockpit. Other than that, I didn´t deviate too much from the standard IJN camouflage scheme of green over (white) grey. And yes, I know I missed to paint the yellow leading edge bands until they met the fuselage. The decals were of Hasegawa´s new style, and they worked perfectly. I knew though, that the Hinomarus on the upper wings wouldn´t conform to the bumps there, so I decided to slice the decals over those areas, and repaint them in red after the decals were dry.
-
Hallo again This B2M2 is a carrier bomber of the late years before WW2. It was used for operation against China and Manchukuo. This a/c are very seldom to find. As well as rare pictures as well as models. I have a certain linkage to Japan, and therefore this a/c was a must. The kit from Coroszy is nice. The instruction not easy, but Coroszy by itself is a fair partner. When a part is broken, you get replacement. The rigging I did is a basic rigging, I will put it on the forum soon. Different from rigging of WW1 1/32 a/c! And much easier. Happy modelling
-
I decided to give Flickr for Android a try, since my table is currently occupied by the Shinden. Its pretty bad, it doesn't let me share the images because "there isn't an image for that url." I began the model today, and this is its current state, ready for painting. I decided to leave out the canards until after decaling, putting the aircraft on its gear and adding the propeller assembly, should I need to add more weight in the nose. Hasegawa recommends 1g of weight to be put as forward as possible, but I added a 10g weight and a smaller one ahead of it above the nose gear well. I don't know if that will be enough to avoid tail sitting, but the landing gear is really skinny and tall, and I don't want to add useless weight and overstress the nose gear. What do you guys think, will I need more weight?
-
Hallo again With this a/c and some other special Japanese models my wife and me exhibited at Shizuoka hobby show in Japan. For this purpose Choroszy gave us some kits to distribute in Japan, and my friends there were all glad to see such unknown interwar planes of Japan. Two link may help you: https://modelbud.pl/ http://arawasi-wildeagles.blogspot.com/ On this blog you find hundreds or thousands of rare photos! In 2014, we did a special model exhibition in Austria, about Japanese modelling. In context with the IPMS-Austria GoMo (go modelling) 2014 my wife and me organized the topic about Japanese modelling. It was an overwhelming success. Together with Japanese artists and citizens, it was wonderful. The owner of the Arawasi publications was also present, especially from Japan. Happy modelling
-
Finally, something that isn´t German in my collection, Tamiya´s 1:48 J2M3 "Raiden." The decals worked well after soaking them in hot water for a moment, however, the Hinomarus over the wings didn´t totally conform to the raised details of the ailerons. The model was brushpainted with Revell 40 Black Green for the upper surfaces, and Revell Satin 371 Light Grey for the undersides (which was a pain to paint).
- 2 replies
-
- 12
-

-
- japan
- mitsubishi
-
(and 1 more)
Tagged with:






.thumb.jpg.0bc57cb4bb3dec8e063e1951db6690c2.jpg)
