Search the Community
Showing results for tags 'italeri'.
-
One cannot have enough started kits I think,,,,, while one is drying, youcan always sand some parts, or rescribe something, or else,,, so I decided to do another Mirage with canards, this time it is set to be a Mirage IIIEBR of the Brazilian Airforce (FAB), or F-103E as they used to call them the kit will be the ancient ESCI/ Italeri kit for an Mirage IIIE, still mor or less the only choice out of the box. As I bought a Neomega resin cockpit once for it and also got an AML exhaust nozzle, I really wanted to build it once.... so here it is.... parts are already partially rescribed, the raised lines were quite crude. (as is my rescribing for the moment...) Resin parts are cleaned and dry fitted, so far so good! here some pics: hope it turns out at least somehow decent!! Werner
-
 Goodmorning fellow modellers! First post in the Ready for Inspection corner! Been wanting to build a Mirage V in the lovely SEA camo for a long time. Only the fonderie miniatures kit with extra resin was available. But last year Italeri released a Mirage III pack which gave me the option to build a Belgian Mirage V. The Mirage is an early model, this particular Mirage crashed in Holland in 1977. I built the plane white/grey belly and SEA camo on top. The model is completely rescribed and further more a resin MB Mk.7 seat was added together with an Air Master brass pitot tube. Paints are Vallejo. Together with a French Mirage IIIE (hobby boss kit) Hope you like'm Evert
- 14 replies
-
- 15
-

-
 Photo Etch Details for the Italeri Sunderland Mk.III 1:72 Eduard Having built the Italeri Sunderland I, I was very impressed with the kit on the whole, bar perhaps the excessive panel lines which needed some work to tone down. The detail is pretty good, but Eduard being Eduard have released several sets to enhance the new Mk.III kit further. These sets aim to provide both internal and external enhancements as we'll see. Set 72583 Sunderland Mk.III Bomb Racks The Sunderland had a somewhat unusual arrangement for stowing the bombs. A pair of lifting beams locating within the wing structure allowed the bombs to be stowed inside the fuselage. Hinged doors enabled the bomb racks to be guided out under the inner wings when open. This rack assembly is brilliantly recreated in this set with good scale representation of the bomb racks and box frame that supports them. Set 73510 Sunderland Mk.III Interior The cockpit, forward nose compartment & turret and mid upper area get attention in this set. A coloured Self adhesive fret provides a main panel, side walls for the cockpit and overhead panel housing the throttle quadrant & mixture controls. Also included on this fret are seatbelts and a selection of cockpit controls. The unpainted larger fret contains the perforated structure in the nose compartment, additional detail to enhance the front turret interior and the rails around what is the beam gun locations on a Mk.I Set SS510 Sunderland Mk.III Interior The budget alternative for the interior set as per usual is the Zoom set which just provides the coloured self adhesive fret shown above, certainly worth considering for the rather large cockpit that is on show. Set 72584 Sunderland Mk.III Surface Panels If improving the exterior of the kit floats your boat, then the surface panel set may be of interest. The prominent fuel cell covers on top of the wings are catered for on this fret along with many other smaller panels gracing both the wings and fuselage. How the wing fuel cell covers will sit on the kit I don't really know given the quite deep panel lines. They may look better with these particular panel lines filled in. Set 72585 Sunderland Mk.III Exterior Complimenting the Surface panel set is the exterior set. The engines get the triangular cowling framework that sits in front of the large radials. The plug leads are also included, 42 of them, so some patience will be necessary at this stage! The four oil cooler inlet mesh's and intake duct framing are provided for the leading edges of the wings as well as the landing light surrounds. The porthole windows along the sides of the fuselage get treated with the ring surrounds giving a subtle prominent finish. Mask CX396 Sunderland Mk.III In common with the familiar mask sets, this sheet provides masks for all the transparencies on the kit as well as the beaching wheels. With so many windows, this set will alleviate one of them stages I for one don't particularly enjoy! Conclusion Eduard have provided a modular and thorough makeover to make a good kit better in the guise of the charismatic Sunderland. I only wish these sets were available when I built the Mk.I following the in- box review. Perhaps I'll need to get a Mk.III now to put these to good use on! Review sample courtesy of
 -
 Agusta Bell Utility Helicopter (I=Italy) from Italeri The AB 204 helicopter, was in service by the Royal Netherlands Navy from 08 june 1962 until 17 march 1978. Operations: search and recue, transport,firefighters,communication. Crew: 1 or 2 pilots (1 officer-1 NCO) + 1 flight technician. They operated from the Naval Air Station "Valkenburg" and "De Kooy" with SQ 7. The turbine engine had a maximum trust of 1050 HP, cruising at 200 km/h, with a radius of 400km. Seven were on service, two crashed. These were replaced with two Agusta Bell's from the Vatican (Air Force) Sikorsky SH-34G/J from Revell The West German Navy received 27 helicopters. 22 G type and 5 (all weather) J type. Operations:Anti Submarine, search and rescue (many F-104 Starfighter pilots), communications, Medical Evacuation from the Islands and transport. These airframes were divided over two squadrons MFG4 and MFG 5. (MFG=Marine Flieger geschwader) In 1973 still 23 airframes were operational. In 1974 they were replaced by the Westland Sea King MK41. Volkswagen Crew bus is from PJ productions with decals from the old box. Landrover Ambulance is from JB Models. Baseplate is from Trumpeter Figurines from Fujimi Belcher Bits rotorblades with the correct lenght for the AB 204B. Xtra colour enamel paints. (Excellent paints) Hope you enjoy the scenery. Regards, Derek The Netherlands.
- 11 replies
-
- 15
-
-
hello everyone, this will be my second 1/32 planes to be build so far, in the market there are only 2 sabres in 1/32 scale, one by Hasegawa and the other by Italeri, between the two Italeri is the best so far in detail, but it have lots of problems with the molded pieces and some fitting issues, will see how it turns out. For this one i will use some AM stuff, all resin pieces, the cockpit, wheel wells,airbrakes, and metal pitot tube. I have found some injection problems in some of the big pieces, for example in the aft part of the fuselage some panel lines and rivets are almost invisible due to poor injection pressure into the mold, it will be shown in pictures later one, and some distortion on the wing upper surface due to the same problem before. So far i just did some cockpit work, the sabre cockpit is really plain in details, not much knobs on the side panel, and the panels and knobs are all in black color, so i used my imagination and to give some contrast and life to the side panels i used some data decals around some knobs so it wont look plain and toyish in apperance about the instrument panel, it is the old fashion way, a front pohotoetch cover (to flat in detail) and an acetate face in the back for instrument dials (at least this will give the look of glass cover in the instruments, not the best panel ever made but in the model it look quite in scale and real and here you can see the shine on the instruments looking like real glass
-
http://www.die-leitplanke.de/1-herzlich-willkommen/4-modelle-im-bau-gebaut/scania-r-730-8x4-heavy-haulage-tractor-m1-24-no-3900-mt/ Due out in March '14, €120 - €150. Andrew
-

Italeri 1/72 CH-47J Chinook JASDF
modelling minion posted a topic in Ready for Inspection - Aircraft
Hi all, This is my first post of a completed model on Britmodeller so please be gentle with me! It is also my first time using photobucket so I apologise in advance if you get lots of copies of the same picture. This is Italeri's CH-47 built and painted as a CH-47J of the JASDF. I think the camouflage makes it look completely different, which is what attracted me to it in the first place. I hope you all like the end result.- 18 replies
-
- 12
-
-
 Oh-58b KIOWA light armed reconnaissance helicopter of the Austrian armed forces or Bundesheer Italeri 1/48, OOB with spare decals Its armament is composed solely of a 7.62mm minigun on the port side. It is still used as of today in this role and the only armed helicopter in Austria apart from the side mounted MG used in the Blackhawk it was recently seen quite a lot in international exercises often with fancy camouflage schemes! Her one is depicted in its more usual green brown: and a special one for patch enthusiasts:
- 4 replies
-
- 9
-
-
- Austrian Armed Forces
- Italeri
- (and 1 more)
-
Hello once again from Greece! This time I built a Typhoon Mk.Ib Late from Italeri's kit, which is a rebox of Hasegawa's one. Painted with Tamiya acrylics and weathered with artists' oils and airbrush, hope you like it! More info and photos here: http://www.modellingnews.gr/el/%CE%BC%CE%BF%CE%BD%CF%84%CE%B5%CE%BB%CE%B9%CF%83%CE%BC%CF%8C%CF%82-%CE%BA%CE%B1%CF%84%CE%B1%CF%83%CE%BA%CE%B5%CF%85%CE%AD%CF%82/hawker-typhoon-mkib-late-italeri-148
-
Hi everyone ! This is my last completed model . The italeri kit is not that good but it gives a good model if you spent some time on it . Painted with AKAN ( the two greys ) and Gunze ( for the green ) . Weathering with artists oils . Hope you like it !!! PA260181 by nionios_v, on Flickr PA260184 by nionios_v, on Flickr PA260183 by nionios_v, on Flickr PA260180 by nionios_v, on Flickr PA260177 by nionios_v, on Flickr PA260176 by nionios_v, on Flickr PA260175 by nionios_v, on Flickr PA260191 by nionios_v, on Flickr PA260188 by nionios_v, on Flickr PA260185 by nionios_v, on Flickr
- 12 replies
-
- 13
-
-
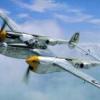
Hi everyone! I finished this one a while ago, but have not yet presented it to the Britmodeller readership. It's the Revell (Italeri rebox) A-10A, that was built under a strong influence of 'A-10s over Kosovo' book. While A-10 is in my top 3 US aircraft list, it is said to see so many A-10 models built with totaly unrealistic loadouts. In this case, I replicated the warload as it was on that fateful day, including the empty Maverick rail. For more photos and full story (I bet you are wandering what's with the green engine pod), click on the below photo. Thanks for watching!
- 19 replies
-
- 25
-
-
 Italeri is to re-release the ex-AMT/ESCI 1/72nd Stratotanker kit as KC-135A - ref.1353. Source: https://www.facebook.com/ItaleriModelKit/photos/pb.454765391262753.-2207520000.1412880396./744625815610041/?type=3&theater Box art & profiles V.P.
 -
Hello Britmodellers; here's my latest model, Italeri's 1/48 Reggiane RE 2002 Ariete, in the markings of Major Giuseppe Cenni mount (supposedly) just before the armistice, August 1943. For this reason, all the "fasci" on the original AC were either cancelled or over-painted, as I tried to reproduce. Sadly enough, Major Cenni was shot down a few days before the official armistice date, after a chase operated by some Spitfires, in southern Italy sky. The kit is ... oh well, as Troy says, a real pig: inaccuracy and fit problems all over; I tried to correct something, such as thinning the wings and using a resin spine, I did some scratch-building and some surgery, all of which can be seen in the WIP Thread Paints are mainly Tamiya Acrylics and Lifecolor Acrylics; the antenna wire is one of my eldest daughter's hair. White band and rudder cross are painted, only the marking on the latter was cut out from the kit decals Now the pics, comments and suggestions are more then welcome Wing guns are small copper pipes coming from electric contacts, cut to size It was while taking this pic that the disaster happened: I was outside, wind arose and ... .... disaster Well, I fixed it all, and as a matter of fact some of the pics above have been taken after the fix (which also involved replacing the antenna wire, that now stays much tighter) Details you can't see in the completed model; the rudder pedals were completely scratch-built; some cables, pipes and knob were added; instrument dials are kit decals, with a drop of PVA glue to simulate glass Engine was detailed adding some wirings I've also scratch built the radio rack, using some leftovers from an old Tornado kit (!?!) Ciao
- 18 replies
-
- 15
-
-
This boxing and some extra seats I got off a member here. Want to do a medium sea grey over light aircraft grey scheme, Gulf 1 ish. Not too keen on the kit decals currently, need to have a look round see whats out there. If anyone has any suggestions, I'm all ears for decals! It's a well known kit so I'm not going to go into detail on the sprues. Started with smoothing the airbrakes in. They're only designed to go in the up position and I don't like the look. Used strips of card to build it up and then filler to skim the gaps. A lot of work went in just to get it to this stage! When I first started the kit, I just chucked it together, painted the gear bays white and then dirt wash. Honestly, it looked crap so I oversprayed it all with primer and decided to try and add some life in the bays. The panel I've made with the wire and card will eventually by a circuit breaker panel as that's what it seems to be on the photos I've seen of it. And with a quick coat of white primer. Cockpit next!
-
 Hello Britmodellers; here is my first aircraft WIP on BM: it's the Italeri 1:48 Reggiane RE2002. The kit box: The only aftermarket I'll be using: First damage (while removing the excess resin): Easy fix, anyway, with some CA. See the difference with the kit fuselage spine: Quick dryfit test: There's going to be some work to be done on the wing-to-fuselage joins: Even more so here: Opened up the wing gun holes: And put a stop for the gun barrel: Some rescribing (wing gun doors): Opened the radio access panel and scratch built some details of the internal structure (not much would be seen, but a minimum maybe...) See you for the next update
 -
Hi all this will be the first time I have posted a build of anykind. I am taking a break from building 4 Airfix Lancasters (1 finished 3 half built) and decided that I fancied doing something a little different! The kit I have picked is this: Italeri's Stort Sunderland MkIII I love the box art and you can almost feel the releif from the bomber crew! I'm on a weeks leave and have decided to try and build it within the week!!! (No Hope) I am going to do it OOB with the only addition being Eduards paint masks. I have made a start on the wings and the floots and will post some pic's when they are done.
-
 Well folks....here it finally is. If anyone has followed the WIP you'll know how ridiculous this build has been! Things I tried.. Freehand camo RLM colours from Testors Aftermarket decals (spinner spiral OMG!) Metal tubing to replace the plastic guns I am really thankful for the kind and supportive suggestions during the WIP from many many contributors... Even if sometimes the support was just comedic relief! LOL So here you go ... Not perfect ...the spinner spiral does not belong on the build but it was the last of four attempts available on the decal sheet! Stuffed the angle on the internal canopy back plate thingy......should slope forward with the canopy in the closed position Couple of marks on the model have shown up on the images but I'll clean those up no big deal so....I present the Dopey Dora!!! spinner spiral number 4 finally worked Cheers!
- 18 replies
-
- 13
-
-
Righto! Chocks away! Having just completed my P-39 Airacobra and having managed to get it into the cabinet of glory without further incident I turned my attention to an ugly weird Italeri FW190 that I had in the stash.......god knows why I even purchased it! Anyway....because the kit looks weird and I don't love it and thus don't care I think I am going to try some new techniques on it and see how I go. I'm thinking.. 1) it's 1:72 dont fuss too much with the interior no one sees it 2) build simply and don't get hung up on detail 3) Make it interesting in the camo irrespective of authenticity 3) and this is the big one....free-hand airbrush the camo and see how that goes!! Should be interesting Then I got to the kit itself. Damn this is THE weirdest most confused kit I've seen so far Here's the box art... I've never made a 190 so this is cool....what's that?? Figure not included....oh well who invited this guy???? Looks a bit weird but it takes all types to make a party. How's the camo going to look?? Sorry before I get to that...here's the drop tank....that applies to no version and isn't in the instructions. Now where was I? The camo....looking okay on the back box art....don't mind the light blue should look good on either version. can't wait to try a few freehand tricks on the camo.....let's check the detail on the instruction sheet Right......mmm.....no blue here ... oh...righto....must be this one....nek minnit..... deary me...more light ghost grey!... Oh well.....not to worry. Anyway here's the sprues.....and at least I'm definitely not hung up on authenticity with this build!
-
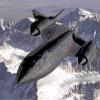
I have an Italeri SR-71 ready to be decalled. Unfortunately, some of the decals seem to have faded. So I filled in the form on their website, and they are trying to charge me €6 for some decals that were already broken out the box. So does anyone have any hints on how to get spare decals from Italeri, preferably for free? Also, if I cant get Italeri decals, do you know whether one can get spares from revell without buying the kits? Thanks- Bobthefrog.
-
Hi folks,here,s my second entry for this GB and back on home turf with a 1/72 Italeri Dakota/Skytrain.Nice kit for it,s time and the first time since I was kid that I have built one,my dad had a spell as an air dispatcher on them at the end of the second world war. I am going for a 1 week build on this one no work on the interior other than the basics as I am off on holliday next Friday.
-
Here is my latest attempt at making a Sunderland flying boat on the sea. It was the Italeri kit with the huge panel lines and the plate armour photo etch. I hope you enjoy it. http://s1294.photobucket.com/user/SY64/library/Processed%20Sunderland?sort=3&page=1 Regards, Marags.
- 64 replies
-
- 44
-
-
Hi Guys Recently completed. Built pretty much out of the box with just a little added stowage. I didn't do any of the corrections as it was built just as an exercise to see if I still had the mojo for 1/72nd scale. Hope you like it. Regards Dave
-
Hi folks,sat on the sidelines until my other two projects are near completion as they now are, so as a Mustang lover time to take part.I was going down the excellent Airfix new tool kit as I have a couple under my belt already but noticed a lack of early mk,s in the group and I always loved this scheme.also here,s my previous Airfix builds.
-
Thought I would share my Stuka 1/48 panzerkraker , fun build and should have been quicker built but work got inway lol
-
 Hi all, Despite a self-imposed 'F-14 only builds for 2014', I couldn't pass up the chance to build a Harrier! So I'm in with this one (in between a couple of Tomcats, obviously) Will be mostly OOB but might swap the Sidewinders out (as they look like the earlier ones). Does anyone know if the decals in this kit are accurate for a Falklands-era Sea Harrier? Thanks for looking and good luck with your builds! Dermot