Search the Community
Showing results for tags 'italeri'.
-
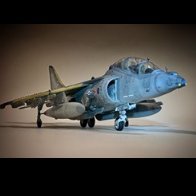
I needed a break from grey RAF fighters! The ETPS schemes are always a nice change. Here's the old Italeri 1/72 kit with a slightly hybrid livery - I don't think XX145 was ever in this (newer?) version of the scheme, but if she's ever restored and repainted, who knows! Mostly built OOB but with a little aftermarket etch from Eduard, and resin seats and wheels (can't remember where from though, as I started the build ages ago). Decals were from the Air Decal "Raspberry Ripple" sheet which I found on eBay, over Hataka Red Line acrylic airbrushed paints. I'm not sure if the various shortcomings in fit and finish are from the kit or my lack of skill, although it was certainly much more of a struggle than the last kit (the fantastic Airfix GR9). Don't peer too closely! Thanks for looking (from a distance). And with a previous T.2 (Hasegawa kit)...
- 19 replies
-
- 48
-

-
I consider Reggiane Re. 2002 "Ariete" model in 1:48 from Italeri as finished. It depicts a machine from Reggia Aeronautica. 239Ma. Squadriglia, 102 Gruppo Reggio Emilia, Italy, February 1943. Model made straight out of the box, I know the carbon paper is getting silvered because I copied it myself. Workshop - Reggiane Re.2002 "Ariete" 1:48 Italeri - Work in Progress - Aircraft - Britmodeller.com
-
I consider Reggiane Re. 2002 "Ariete" model in 1:48 from Italeri as finished. It depicts a machine from Reggia Aeronautica. 239Ma. Squadriglia, 102 Gruppo Reggio Emilia, Italy, February 1943. Model made straight out of the box, I know the carbon paper is getting silvered because I copied it myself. Workshop
-
If you followed my 'Re-Mojo' build of the T-28B you know it was, unsurprisingly, a bit challenging but enjoyable build - after all it was a Roden kit. You also know that life beyond the bench sucked as I lost my job. The P-400 double build is still in progress, but as it is in the painting stage, and the paint schemes are intricate and the kits were not cheap - I will have to attend to them when I have some more energy. So I cruised the part of my stash that is stored at home (a small part) for some fun build. I have a couple P-51's of different models in my stash - most of them good kits (Tamiya, Eduard, Modelsvit) and also this Italeri P-51D/K. I think this could be a good quick build. It is an NMF build, but I think can build it quickly and it will help out in restoring the fun and good spirit I get from my bench time. So here we go: Not too complicated (I hope), nice decals and an appealing subject - who can ask for more? Ran
-
Hi guys! Here's my next project, Italeri's Mirage IIIE with aftermarket decals to paint it as an Argentinian machine. The decals I'll be using are Condor Decals 48054. The Italeri kit comes with the extended fairing for the empennage as a not for use piece, but I'll use it to make this kit as a IIIEA. I'll be painting this aircraft as I-007. I'll also be my first three coloured camouflage aircraft. Paints to be used will be RLM 79, 71 and 70 for the upper surfaces, and white for the lower surfaces. I'll be picking up the kit this Friday, so pics of the contents will be posted on Friday's afternoon. Photo of the real machine. As you can see, it doesn't have the yellow rudder shown in the profile of the decal sheet.
- 19 replies
-
- 7
-

-
- Argentina
- mirage III
-
(and 1 more)
Tagged with:
-
Well, after totally ruining my 3 month build of the Italeri Alfa Romeo 8C 2300 Monza (see below), it's got hidden away in a box until I can pluck up the courage to look at it again without crying. I've decided instead to have a go at spoiling a different Alfa kit I have in my stash instead, an Alfa Romeo 179C. This next build will probably be of the 179C that was driven by either Mario Andretti or Bruno Giacomelli back in 1981. My original plan was to have an Alfa Romeo racing car from the early days and one from nearer to today. Unfortunately, due to my ham fistedness with an airbrush and unfortunate accident with a Q-tip (do NOT ask!), its now just going to be the later car! As per usual, I'll be totally ignoring the order of build as advised in the instructions and so will probably end up with lots of containers all awaiting detail painting! I'll be using Zero Paints to apply the finishing colours but first a lot of research has to be done as I'll probably be adding and amending parts as I go along if the 8C was anything to go by! Build progress photos to follow - when I actually do make some progress!
-
In 1977 the Finnish Air Force ordered 50 Hawk Mk 51 trainers to replace the already obsolete Fouga Magister and Saab Safir ones. In the 1990's 25 more Hawks were purchased bringing their total number In the FAF's service to 75 planes. The Hawks are estimated to stay in service till the 2030's. In order to build the Finnish version of the Hawk I bought the Italeri Red Arrows Hawk kit in 1/48 scale (it was molded in bright red plastic). The quality of the kit was allright, but didn't reach the tamigawa level, though. The nose of the plane needed surprisingly much weight, some 50 grams, to prevent the model from being a tail sitter. For the cockpit I bought a FAF photoetch detail set sold by the Finnish manufacturer Kuivalainen. To replace the over sized pitot tube of the kit I ordered a Master Model brass tube. The decals for the Finnish Hawk are from the sets of Gal-decals and Avalondecals. I added the orange day-glow stripes to the tail from a Microscale sheet (the stripes were used for marking the adversary planes in combat exercises), I also scratched a lot of details, antennas, etc. that were seen in the Finnish Hawk versions. Unfortunately, the kit didn't include missile pylons that I would have liked to add to the model. For the FAF camouflage I used the following paints: Light Bronze Green FS24151 (Xtracolor Interior green, nro X117) Very Dark Drab FS24064 (Xtracolor Braunviolett, nro X210) Light aircraft grey FS26440 (Xtracolor Light Gull Grey, nro X137) The landing gear, the wells and the doors I painted with Revell's light grey SM371. For smaller details I also used Vallejo acrylics and Humbrol/Revell enamels.
-
Not content with the Matador and Fw190 multi build I joined the VSTOL group build with the intention of building the prototype V22 as the Italeri kit needs correcting to make a decent MV22. Since I missed the GB deadline I will move the build here. And this is where it sits at the moment
-
Hi all another model from old Italeri mold finished. Yes, there are a lot better F-16s on the market, but those are still worth to be done, as at the end represents this nice plane quite fine (with all existing flaws....but) I wanted to do this colorful version for a long time, and now it is done. I tried to do small corrections, like drilling intake duct and make it deeper, adding cockpit details, relocate horizontal tail surfaces to more correct position....and some other minor details. Colors are AK, with minimal weathering as i wanted to have this one clean as possible in balance with beautiful tail decal. Not to bother you more, i hope you will like it, best regards, Djordje
- 14 replies
-
- 39
-

-
Hi All after long time not making models, again got some free space to finish one. I planned to do this version of MIG for a long time, as it really differs with its crazy non standard colors. As i understand information from the web, this plane was shown in fresh colors to Kim Jong-un for one of his birthday, with interesting detail, text under cockpit in red squares. Model is old Italeri, with some upgrades: riveted surfaces (quite visible on mig-s, replaced nose cone, replaced models intake covers with new made from plastic, added details in cockpit. Colors AK acrylics...mixed to get closest as possible to real thing, decals Dream Model. Very light weathering as i can not imagine that somebody leave dirt on plane during visit . So it is finished, i do not like MIG in this colors, but i am happy with overall look of this old mold. Till next post, wish you all happy modeling time. And at the end, compare image with referent photo from the net:
- 6 replies
-
- 19
-

-
- MIG 29
- North Korea
-
(and 1 more)
Tagged with:
-
Russia 1943
-
OK with time running short on the GB and lots of other kits in various states of destruction what better to do than to start another (actually I'm tempted to build a F117 for the GB too). So I'd been planning to do this in the Tornado GB last year but didn't get around to starting it... I seem to be continuing in my recent theme of yellow/brown or black vehicles! It's a pretty basic kit, so hopefully not going to take a massive amount of time, I'm just planning on doing it straight OOB, there doesn't seem a whole heap of bits in the box, in fact Scalemates suggests it may have it's roots back in the 70s. Instructions seem basic but adequate and decals look good, only possible issue is there are areas with what look like the body paint colour on them which might be a problem matching. I'm planning to model it in-flight, as I kind of hate doing landing gear and balancing tail sitters on the flimsy legs (the instructions show adding 4g in one step and another 20g in the nose in another???) Often trying to close up the undercarriage doors can prove a nightmare, unless the kit is designed to be friendly in that way, so the first thing I tackled was checking the fit, since it looked easier to get to the front doors from both sides before I've closed up the fuselage. The rear doors fitted quite nicely (as seen above), they were just a touch proud from flush when first tested, so I simply needed to persuade them with some sandpaper on the upper side. The 3 front doors looked like they might be a bit more of an issue - one nice thing on the kit is there are small attachment pins for them (I hate trying to superglue doors on post painting - but that's not of any help here. Since the underside is pretty flat I attached the 2 forward doors by aligning them on a piece of paper then just running a little extra thin glue down the join. Whilst that was setting I checked the parts on the interior, normally I'd stick a bit of plasticard or similar at the back of the doors so I cut out the wheel well to check - then I wasn't sure if the cockpit sits directly on that, so I cut out the floor and 2 end cheeks. They're quite nicely designed in that they both fit into small slots to keep the floor in the correct spot, I managed to dry fit them then run some glue in the seams (so the 3 bits are connected in the correct orientation) without hitting the slots so I can remove the cockpit again for now. I was scratching my head for a while as to which way to orientate the front part (since the horizontal opening isn't central) until I noticed a small arrow on it (handy), also appears to be there in the instructions (though not immediately obvious). I managed to nicely get the front doors in - just a bit of sanding down needed, one tip for sanding flat edges : place the sandpaper on a flat surface and rub the piece on the paper rather than the other way round (probably obvious to most people but it took me ages to work that one out!) Managed to get a gluey fingerprint in as the thin solvent ran through from the other side but there's some holes etc. that will need filling and sanding back, hopefully it should cleanup nicely. Once set I took a scrap piece of sprue and flattened a side down by sanding before gluing it on the inside of the doors to add some strength and added the internal wheel well too. So that's it so far.
- 16 replies
-
- 4
-

-
- Tornado GR1
- Italeri
-
(and 1 more)
Tagged with:
-
Finnair and Flybe had a joint operation for Nordic area's regional traffic from 2011 to 2015. Their fleet in Flybe's livery consisted of several ATR 72-500 turboprops. After the co-operation ceased Finnair have continued to use the planes under the brand name of "Norra". As to Flybe, they filed for bankruptcy in May, 2020 but I've heard rumours that they will return to the skies later on this year financed by the investment fund Cyrus Capital. However, I don't know whether it's true. My model was a very tough kitbashing project mating the longer fuselage and wings of F-RSIN's ATR-72 kit with Italeri ATR-42's engines, propellers, landing gears and wheels. The decals for the plane I ordered from 26Decals. There was lots of puttying and sanding to be done and at some point I got so tired of the job that I almost threw the whole thing to the bin. Finally I made it and the outcome could be worse. Had I, however known how difficult the project was going to be I probably would have skipped it and decided to wait for a new ATR 72-500 kit. I primed the whole plane with Mr. Surfacer 1000. For the white areas I used Tamiya Fine Surface primer which I then varnished with Tamiya clear gloss TS-13. The underside of the Flybe livery is blue and in my eyes the closest shade was Revell enamel paint nr. 50. I also scratched quite a lot of details to the model and used Vallejo acrylics and Humbrol/Revell enamels for the smaller parts.
-
Hello Here are a couple of 1/72 Grumman Hellcats from Italeri. This is not the best kit of this aircraft but I bought some of them when the price was very cheap. First is the F6F-5 of VBF-20 CO's aircraft in 1946. The decals came from the Blackbird BMD72012 sheet. Next is an F6F-5K from VU-1 with many colours on. When the decals were in place I discovered a nice picture of this aircraft and I saw that the wing tips were deeper. I could not modified the kit. Decals came from an old Hasegawa box. I started building both kits last year and this is the reason why I did not insert them in the Hellcat GB. Patrick
-
I suppose I have built 2 109F previously, the first being the original Airfix 109 which was later renamed 109F but was a bit of a mess, and about 10 years later the Frog F which I still have. Ihave always felt that the Friedrich was a little under-represented so when Italeri brought out their kit in the mid 1990's I bought 2 of them though I have since seen review suggesting that the F and related G have accuracy problems - nothing new there! I intend to build at least one, possibly in a slightly unusual Russian theatre scheme of brown and green, and maybe another in normal Western European colours. The kit comes with the options of an F-2 of JG26 (Galland?) in France in December 1941, an F-4 of JG2 also in France in June 1942 and an F-4/Trop of JG27 in North Africa in September 1942. If anybody knows what is supposed to be wrong with the kit by all means let me know and I may even try and improve it. Pete
-
Hello folks, inspired by my friend Francis who recently built an M47 Patton, I decided to present the Croatian Balkan War version called “AZDAJA”, that means “DRAGON”. Look the real tank...these are the only two photos about AZDAJA that I found. Note that the tank does not have the headlights: and have the T80E1 links.... For this project I will use the M47 Patton from Italeri, kit number 6447, and I will added a set of photo-etched and resin parts from DEF Model, code 35024, plus the set of metal tracks T80E1 type from Fruilmodel, code ATL-145, and decals from Star Decals 35-C 1085 M47 Patton Balkan War and Peace. I agree with the others modellers that despite its age, this M47 is one of the best kit produced by Italeri, and it is a great platform for improvements. Well, first I assembled the bottom of the hull, the rolling train, I added some missing bolts (only 68) in the most notorious parts of the supports of the oscillating arms: Then, I added casting detail and foundry numbers in the hull and turret, and I replaced the support for the .50 machine gun and added rear lubrication points too: After that, I scratchbuild seven triangular hooks and added more 4 bolts over the rear plate, plus I made corrections in the gun lock: That's all for now...
- 54 replies
-
- 15
-

-
- Scratch
- photo-etched for tank
-
(and 1 more)
Tagged with:
-
Here is the first (and the last so far) helicopter in my collection - Wessex HAS.3 in 1/72. Italeri kit made straight out of the box. The only change is tail rotor direction (wrong in kit) and, of course, add of antenna wires. Generally it was fast and simple work, just to try if build of helicopters models makes me happy.... I have discovered that it`s fun, so I hope that it`s not my last heli. This is well known Wessex HAS.3 in boring blue-gray, which was embarked on HMS Antrim during Falklands War. Note that not all decals from the Italeri`s set have been applied - the painting of this Wessex in 1982 was little different from today`s at Fleet Air Arm Museum (lack of emblems etc.). Maybe one day I`ll add some A-S weapons to this Wessex, but I don`t have any so far. For now my Wessex HAS.3, perhaps the most ugly helicopter in the world , looks like this:
- 19 replies
-
- 36
-

-
Hi Folks! After I bought this kit I realized the tons of info and reviews written about the legendary Hurricane on 1/48 scale (thanks Troy!). However, I decided to give it full throttle to the Italeri kit, as a challenge for my amateur skills. And boy the beginning was tough! Cockpit assembly (with the add of a spare Tamiya pilot) was a violent skirmish, but the Force prevailed. Thanks Obi-Wan! Fuselage and wings needed a generous amount of putty... but after that, everything went very smooth. And -the most important thing- I ended up quite happy with the results. Well, enough talking. Here are the photos of the Hurricane P 2923, No. 85th Squadron, VY R, September 1940. PS: Oh, I know the spinner colour was black and the edge of the wings were painted Sky... but I gave to myself some historical permissions. Hope nobody gets annoyed. Cheers and happy modelling, Cris.
-
Another placeholder. This kit was first released in 1983, but it was a few years before I bought it, in what seems to be the original box style: I will probably build the more colourful of the two subjects (VMA-331), as opposed to the toned-down aircraft from VMA-214 "Black Sheep" on the front cover. The VMA-331 aircraft has the early fin tip. There is nothing supplied for the outer wing pylons, so I will rustle something up from the spares box:
-
Alongside the single-seat 1983 Italeri A-4M, I will be building the 1998 two-seat OA-4M variant, which shared as much of the A-4M tooling as as was possible. Markings are included for two USMC H&Ms (Headquarters and Maintenance) aircraft.
-
Some sharks
-
In 1940 the Me321 Gigant transport glider was hastily designed for Operation Sealion, the invasion of England. It could accommodate 200 troops or 22 tonnes of cargo. Initially three Bf110s were required with rocket assistance, to achieve take-off. Later the Ju290A-1 or He111Z proved more practical. The Me323 was a development from the Me321, designed to overcome the problem. Ing Degel utilised captured French Gnome-Rhone 14N radial engines and the six-engined D variant was developed. The D-1 could carry 120 troops, 60 stretcher cases or equivalent cargo. It was an invaluable supply transport on the Eastern front but suffered heavy losses working between Italy and Tunisia. Transportgeschwader 5 prepare to supply an Sd.Kfz 9 – 18t heavy recovery vehicle to the Russian Front in the Me 323 Gigant. 1943.
-
Hello to all of you guys and girls.I have finished the old Italeri F-117A as a quick and pleasure build.The kit itself its quite nice and the fit is really good.I have rescribed the panel lines.I did add some simple cockpit details like some knobs and seatbelts.The decals used are for the only f-117a to be lost in combat and the decals came from balkan models set for the downed ac over yugoslavia.I have made a video build that I have posted on my youtube chanel so if interested feel free to look it up on the following link. Regards,Dragan
-
Hello guys.This one I built OOB for a customer of mine.The fit is not the best but not the worst I have seen.The plastic is a bit soft but it is easy to sand.The panels are pretty shallow and wide but with a light pass of the rescribing tool can be made much deeper and able to hold a wash.I painted it in ak interactive colors and the clear varnishes are from vallejo. Enjoy the photos .
- 15 replies
-
- 34
-

-
Here is my take at two Vietnam Huns. Pretty straightforward builds using the Italeri kits with a bit of Eduard PE in the cockpits. As both kits only come with a closed canopy, I cut off the respective windscreens and built the canopy actuators from scratch. On the F-100F, I added the appropriate antennae under the nose/belly and on the tail fin, while drilling out the cooling intake on the tail, to portray one of the early Wild Weasels. I added a Shrike missile (which was typically carried on the port in-board position) and rocket launchers from the spares box (I believe from Italeri's A-10). The F-100D was armed with Hasegawa Mk.82s and M-117s from the kit (with some leftover fuse extenders). I also used a Taurus vacform canopy on this one, to correct the wrong Italeri canopy. Decals are from Caracal, with markings for: - F-100D no. 55-2932 “Nashville Sound”, 90TFS 3TFW, Bien Hoa AB (Vietnam), ca. 1968 - F-100F no. 58-1226, 614TFS 35TFW, Korat RTAFB (Thailand), December 1965 For the fun of it, I used two different sets of paint: the F-100D is finished in Gunze paints, for the F-100F I used Vallejo's colours for the first time. Enjoy the pics! Patrick Credits background picture: designed by Freepik, photo by jannoon028: https://www.freepik.com/free-photo/clouds-sunset-mountains_986559.htm
- 18 replies
-
- 58
-

-




.thumb.jpg.d3635a7ef6507d35f372dd09671fe96f.jpg)


