Search the Community
Showing results for tags 'italeri'.
-
This is a mini WIP combined with an RFI, as I built this around 10 years ago, and some day I may get around to replacing the sand shields with some etched ones, but given the number of unfinished models that I have at the moment, that's not going to be any time soon. A Brief Intro. Operation Battleaxe was the first time that Crusaders were used in any significant numbers, and they didn't exactly cover themselves in glory. Thin armour, an ineffective main gun which couldn't fire HE and reliability problems were three of it's drawbacks. On the plus side, it was fast. I'd built Tamiya's 1/48th version of this, and decided to do the same in 1/35th, using the Italeri kit as a basis. Although the kit is for a Mk.l/ll, it didn't cover the version used in Battleaxe. There were some alterations needed, but nothing too drastic. First job was to add the prominent rivets along the sides of the lower hull. This early kit from Italeri omitted them, but the AA version included them. In all, there were approximately 300 rivets, but a day and a half saw the job done, and my sanity intact. I was going to finish this tank in the marking of 6 RTR, and their vehicles had different air filters to those supplied in the kit. They are a simple box shape and I made them from different thickness’s of card. The pipework leading from the filters to the engine deck was altered by removing the 90 degree bend and making new pipe from tubing. The track guards were also of a different configuration, so I cut away the kit part where it bends downwards, and made new track guards and glued them into place along with the new air boxes. Along the back of these Crusaders was a rack for 2 gallon POW cans. The rack was made from 10thou strip and filled with cans from Accurate Armour. The kit's right front track guard has a box shape on it which is for the spare tracks, but again, not applicable for this version, so it was removed with a chisel blade. A length of track was glued to the left track guard and a 10thou strip of card was added as a retaining bar. Turret. To my eye, the mantlet protrudes too far forward, so I sawed it in half, thinned it by about 4mm, and then reattached it and blended it in with Mr Surfacer. The main gun barrel was replaced with an aluminium one from Jordi Rubio. The searchlight was detailed with a bulb and lens and some etched bass from Eduard. On the other side there is a pot shaped item (it's purpose eludes me) which I made from a piece of dowel, fixed it to a square of card and glued in place on the side of the turret. There was no blanket box fitted to the rear of the turret, so a number of rivets had to be added along with a pistol port, new hatch bump stops and some detail to the aerial mount. Painting and weathering. I painted the tank in the Caunter scheme of Portland or Light Stone, Silver Grey and Light Grey. I mixed my colours from Tamiya paints using Mike Starmers mixes. Markings were minimal, being just the census numbers on the turret and rear hull. Weathering consisted mainly of chipping along exposed edges and dust courtesy of Mig's Beach Sand and Light Dust. The rest of the photos are RFI. I've included one of the original photos which I took years ago, to show what the colours should look like as the ones that I took recently give it a rather grey appearance. Sand Shields. As I said, I should replace these as they haven't lasted as well as I hoped. I cut them from thin card and scored the back so that they could be bent to shape. I glued thin rod into the groove to try and get it to keep the correct shape, but over the years, they have flattened out, hence the need for replacement with etched brass items. Thanks for looking. John.
-
Hello colleagues, this time I would like to share with you about my elaborate building F-35I by Italeri 1/32 I have a complete etch set from Eduard for the kit. I made the cables in the chassis shafts and bomb bays of lead wires of different diameters. I am currently repairing the nozzle because the kit is really terrible. I use the etchings of my own design, which I lay on myself to create the characteristic look of the nozzle. Perhaps you will like the building
-
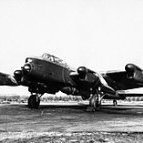
Hello Britmodellers! This is my heavily optimized Italeri Kit in 1:72 built in 1998 Cheers, Thomas
-
Completely missed the STGB, oops, but seems reasonable to post it here. Started this over the last couple of days, and finally got to the point where there's something to show I also have the full Brassin set - consisting of Seat, Nozzle and wheels Work unsurprisingly starts in the cockpit, the first stage with the Brassin is replacing the seat rails with the resin replacement, complete with a couple of PE spacers Then primed with Black Styrenex primer, followed by Mr Hobby Aircraft Grey as a base Then started painting and weathering the seat and cockpit floor - not started on the actual cockpit yet, and the seat is simply slotted in the rails for the moment Peter Today's work on the Missile with a Man in it - Added the final PE parts to the Seat Then finished off the cockpit - the moulding on the parts is a little soft in places but still effective Peter
-
Hi Folks, This is the italeri model mostly built OOB. Not the best kit ever but good enough to get a correct Intruder. I only added miscellaneous details, relocated some fences on the wing, drilled some holes and applied some filler (wings, windscreen...). The only extra parts are the decals from Hi-Decal Line. I used H308, H307 Gunze paints. Hope you like it. Cheers
- 22 replies
-
- 44
-

-
With work on My two current builds stalled due to lack of funds (two birthdays and a trip to Stalag Luft 3 and Colditz this month!) I thought I would complicate life even more by re energising my modeling Mojo! So, after trawling the interweb for inspiration and rooting through my stash I dragged these two out! Both kits are getting on a bit, although the LAV 25 is a reboxed anniversary reissue. I do like USMC armour, so it didnt take long for the juices to start flowing, the basic kits are ok for accuracy given their age, so which to build? I know........ coin flip! Well there`s the answer........................BOTH! So the LAV 25, three sprues in sand coloured plastic, an aftermarket 25mm barrel and two lots of photo etch, one specific to the Italeri TUA and one for the Trumpeter LAV 25, I dimly recall being unable to find a specific set for the Italeri LAV 25 so when I came across the Trumpy set thought I would give it a punt and use that for the turret and the TUA set for the hull! l The LAV TUA has two common sprues as per the 25 and the TOW turret parts are on a third, and there's also a photoetch for the specific kit.so all good for a straightforward more or less OTB build then! So the plan is....................Two LAV`s a 25 and a TUA, I`ll go with early vehicles, (the kits have the early pattern tyres and these two have been in the stash for a while, so the cost of replacing the wheels with later pattern resin wheels would be excessive and counter to the Mojonation restoration of this build) Marine Corps MERDC camouflage, limited stowage, crewed up and restrained weathering, might even build a base for em, a bit of beach or something eh?.................Well, that's the plan, that way I can avoid the characteristic tail down attitude of the heavily loaded Gulf War and Afghan vehicles, so no drastic chopping of the suspension or weighting the wheels and save a bundle on resin aftermarket stowage! Oh, and I can make the front wheels steer too! Already figured that one out! Ta for lookin` no "G" Granto
-
Going to call this one done. A simple and quite quick build, kit bashing a couple of kits into one. There is a WIP for anyone who cares to look. There's mainly Tamiya and some Italeri but there is some Accurate Armour the commander is Meng and other bits out of the spares box. As ever she's brush painted using Humbrol enamels and finished with Winsor & Newton Galeria matt varnish. Just a little dirt on this one. So I started off with this; M113 ADV - 1 by phil da greek, on Flickr And ended up as this. Seen later in her days in a modified NATO camouflage as part of the OPFOR for various training exercises in the US. M113 ADV - 16 by phil da greek, on Flickr M113 ADV - 17 by phil da greek, on Flickr M113 ADV -18 by phil da greek, on Flickr M113 ADV - 19 by phil da greek, on Flickr M113 ADV -20 by phil da greek, on Flickr M113 ADV - 21 by phil da greek, on Flickr M113 ADV - 22 by phil da greek, on Flickr M113 ADV - 23 by phil da greek, on Flickr Thanks for looking in. Here's hoping for some sun over the Bank Holiday.
-
Well I didn't see this coming Italeri Will be launching the S 38 early Schnellboot in December http://italeri.com/news_scheda.asp?idNews=738 Kev
-
 Combat Kits 1/72nd - ref. CKS-001S - BAe Sea Harrier FRS.1 "Falklands Fighter" Source: https://www.facebook.com/freightdogmodels/photos/a.238637406163951.82458.119466081414418/2107010259326647/?type=3&theater Available here: https://www.freightdogmodels.co.uk/featured/combat-kits-bae-sea-harrier-frs-1-upgraded-kit-limited-edition.html V.P.
- 1 reply
-
- 1
-
-
- Italeri
- Freightdog Models
- (and 1 more)
-
A few shots of the current WIP; the 1/35 scale Chevrolet 15CWT by Italeri. The tarpaulin is scratch built as I didn't like the stock part. Still very far from finished; haven't even started weathering the cab area yet, but happy so far.
-
 Here is my finished 1/72 Italeri Messerschmitt ME-210 A1 finished in Hungarian Air Force colors, using the Print Scale Decals sheet number 72-298 The Italeri kit was lovely to build as was the Print Scale decal sheet to use. I hope you all like it. I tried to fix the aerial with black cotton and glue didn't quite work and may well unpick it and have another go, I find that you cannot pull tight the cotton, any ideas please. Thank you Colin.
 -
 Early retirement has increased my build speed !! Here's a kit I've had in my stash for a couple of years. Went together quite well, straight from the box really. Paint was a bit of a mix Vallejo MA Barley grey+ white, I then tried some Mr.Hobby 334 Barley grey which seemed a bit weird to start with.....almost like varnish, seemed better on the second coat. Decals were ok to use but according to my research they are a little inaccurate. Pirate sensor was provided but not fitted till later in the aircraft's life I believe. Vallejo Satin varnish was the final quote. used some generic line decals for the AMRAAM stripes. I almost buggered this up at the last leg; after a gloss coat I decided to use some Vallejo Panel line wash, however it's apparently acrylic not enamel based so adhered to well to the outlying parts. In removing the excess I removed it from some panel lines inadvertently. Making a right-pig's ear of it . This accounts for the rather 'over-weathered' look for a prototype.....seems to be my trade mark of late. Anyway for good or bad, here it is !!: PS: It looks like PostImage has thrown a wobbler and the link addresses have changed to .cc suffix. I've changed previous posts to correct. What a ball ache
 -
Morning chaps, finally got round to purchasing a kit for this GB. I've fancied a Harrier of some sort for a while so I've purchased the Italeri Sea Harrier, should be a fun build! Here's a pic of the kit, mines in the post
-
I built this as part of the hawker gb, it went together well, no issues, painted with tamiya and laquer thinners, eduard cockpit etch but seeing as i wanted the canopy closed not a lot can be seen, otherwise simple oob, Thanks, Glynn
-
#7+8/2018 Would have waited for one of the big halftracks to be released but none in sight. So my dad used the new Tamiya Hanomag tractor as a towing vehicle for the Italeri Flak 37. Both models built OOB, painted with Gunze and Tamiya acrylics. Build thread here DSC_0001 by Reinhard Spreitzhofer, auf Flickr DSC_0002 by Reinhard Spreitzhofer, auf Flickr DSC_0003 by Reinhard Spreitzhofer, auf Flickr DSC_0004 by Reinhard Spreitzhofer, auf Flickr DSC_0005 by Reinhard Spreitzhofer, auf Flickr DSC_0006 by Reinhard Spreitzhofer, auf Flickr DSC_0008 by Reinhard Spreitzhofer, auf Flickr DSC_0009 by Reinhard Spreitzhofer, auf Flickr DSC_0010 by Reinhard Spreitzhofer, auf Flickr DSC_0011 by Reinhard Spreitzhofer, auf Flickr DSC_0012 by Reinhard Spreitzhofer, auf Flickr DSC_0016 by Reinhard Spreitzhofer, auf Flickr DSC_0017 by Reinhard Spreitzhofer, auf Flickr DSC_0018 by Reinhard Spreitzhofer, auf Flickr DSC_0019 by Reinhard Spreitzhofer, auf Flickr DSC_0020 by Reinhard Spreitzhofer, auf Flickr DSC_0022 by Reinhard Spreitzhofer, auf Flickr DSC_0023 by Reinhard Spreitzhofer, auf Flickr
-
This is going to my entrant for this GB: I picked this up at Telford, I was drawn to it as I have a bit of a Russian theme running through my models. I bought it without researching it's history and was slightly disappointed to find it was first tooled by Italeri back in 1977. It has subsequently been re-boxed by Revell, TOMY, Testors, Heller, Tamiya and even Matchbox so it's had quite a history. This re-boxing is from 2009. The kit consists of four khaki runner frames: Funny, the box states "Figure not included" but what do we have here? http://i1285.photobucket.com/albums/a597/nheath100/1-35 M4A2 Sherman/P1150538_zpsb61hv5ce.jpg http://i1285.photobucket.com/albums/a597/nheath100/1-35 M4A2 Sherman/P1150540_zpsr4px92m9.jpg http://i1285.photobucket.com/albums/a597/nheath100/1-35 M4A2 Sherman/P1150541_zpskv6jdn5n.jpg Those vinyl tracks are easily the worst feature of the kit and need to be replaced. I think there are several aftermarket options and would be keen to receive any advice on the best option. Despite it's age the surface detail is actually pretty good: http://i1285.photobucket.com/albums/a597/nheath100/1-35 M4A2 Sherman/P1150539_zpsknrg6b20.jpg I was also impressed by the crispness and lack of flash such as on this grill detail: http://i1285.photobucket.com/albums/a597/nheath100/1-35 M4A2 Sherman/P1150543_zpswjnnafc3.jpg Monotone decal sheet: http://i1285.photobucket.com/albums/a597/nheath100/1-35 M4A2 Sherman/P1150544_zpsmvik8n5e.jpg The kit offers four scheme options with frankly not much to choose between them: http://i1285.photobucket.com/albums/a597/nheath100/1-35 M4A2 Sherman/P1150545_zpsz8w7glio.jpg I might go for the one in the top left hand corner. I'm not sure how much progress there will be on this, at least initially, as I would like to finish my He-280 V2 before starting. Bye for now, Nigel
-
Hi again Folks, My latest finished product is the Italeri 1/72 Spitfire Vb, picked up box and decal-less on ebay for a song. The Italeri Spitfires are a cow to put together and this was no exception; it has a kink in the fuselage that just won't fix. used a small amount of PE in the pit from the airwaves spit mk1 set, which seemed to fit. Decals were from the Sky models Spitfire set and paint was Vallejo MA azure & mid stone and MIG dark earth. I held back on weathering for the most part. Let me know what you think. Cheers Nige.
- 13 replies
-
- 33
-
-
Decision time gang. After much dithering I've dug into the stash and unearthed one of the many Sea Harrier kits which have resided untouched for far too long. The Italeri kit and a Pavla resin cockpit along with an as yet undecided aftermarket decal option from that pile. There's also a growing stack of reference books appearing to support or complicate matters but I'll sort out some photos soon as I can remember how to work Flickr
-
 Another one from my Falklands collection - 1/72 Harrier GR.3 of 1. Squadron RAF, Operation Corporate, Falklands 1982. Italeri (ex-ESCI) kit. Resin MB Mk.9B ejection seat from Pavla was used. Some modifications were made (1mm longer nose, "bubble" with antenna under the nose, air scoops etc.). The rest is out of the box, including decals. Model is still waiting for some armament on outer pylons. Harrier serial XZ988, number 34 was onboard HMS Hermes. During attack on Argentine land forces on 27th May 1982 this aircraft was shot down by Argentine AA, pilot Sqn. Ldr. R. D. Iveson ejected behind enemy lines and was successfully evacuated. Remains of XZ988 you can still see somewhere in the area of Goose Green. Hope you like it! Regards, Alex
- 29 replies
-
- 47
-
-

-
- Harrier GR.3
- 1/72
- (and 1 more)
-
So working away on the Italeri 1/35 Chevrolet 15CWT truck as part of a diorama. Bit of a pig of a kit to be honest, and it needs all the help I can give it. Decided to complete the cab interior out of sequence as it'd be impossible to paint once assembled. Here are a few pics of the project.
-
I purchased the Italeri 1.48 HC.21 Shawnee earlier this year and started building it only to suddenly find work drowning any modelling mojo I had. I have finally managed to get a bit of energy up and managed to do heaps of work on it. At the moment I am trying to decide what colour to paint the troop seats before I seal up the fuselage and start on the exterior.
-
Hello. My newest project that just got finished.
- 26 replies
-
- 45
-
-
My entry for this GB is Italeri's M-32 Recovery Vehicle. Undecided at to build it with the lifting arm raised or stowed. Would like to build it raised but need to check if it will fit in my display case. So what's in the box? Also have AFV Clubs M-10 in the stash, but saving that one of the Britmodeller 10th Anniversary GB.
-
 My next major armour project will be this, an Italeri RSO with PAK-40, a strange little German vehicle designed to fill the role of a mobile anti-tank gun. I bought this packaged with the Eduard etch (an ebay bargain), which so far has been a nice test for my new bending tool. Here's some progress pics, after a few night's work. I enjoyed upgrading the driver's compartment, the etch makes a difference in this case. While the rest of this kit is decent, the tracks are what I would call garbage- stiff, thick, and seemingly too big for the model. I'll try to work out a solution, but I may have to find aftermarket tracks- if anyone has any of these to hand, or knows of some affordable ones, please tell me! Finally, a Zvezda Volkssturm man. The figure was fine to assemble, and nicely moulded for an inexpensive plastic figure, apart from one thing. The arm holding the gun does not fit at all, the provided Kar-98k being useless in this regard (but a nicely well-moulded rifle nonetheless), so I had to replace it. Luckily, I remembered from prior studies that Volkssturm units were commonly armed with Italian rifles, so a spare Italian M91 Carbine was chosen, and fitted fairly well into the hands. The way he is holding it isn't perfect, but a mostly untrained man would probably not have had the best grasp of how to use his rifle, so that's my excuse.
 -
This will be my project for my next 28 day trip away at sea starting Saturday. At the end of this trip we will be flying back from Norway so with that in mind I chose something from my meagre stash that would in theory be easily packed and should it get damaged no great loss. Also the amount of modelling gear, paints etc. is also having to be kept to a minimum. Once I get started, hopefully on Sunday, I'll try and post regular updates of my progress here.