Search the Community
Showing results for tags 'italeri'.
-
T-34/85 Zavod 183 Mod.44 (6545) 1:35 Italeri The T-34 gave the German invaders something of a shock when they first encountered it during operation Barbarossa, their attempt at conquering the Soviet Union, and they were instrumental in reversing the tide through both their impressive performance and weight of numbers, due to their simple construction and the overwhelming industrial capability of the Russians. Even when the Germans were knocking on the gates of Moscow and Stalingrad, production was shifted lock-stock-and-barrel further east with barely a flicker, and in Stalingrad there are stories of fresh tanks rolling off the production lines and almost straight into combat. The simple design used tried and tested technology, together with innovative sloped armour that increased its effective thickness when hit in the horizontal plane. It was initially fitted with a powerful 76mm gun, but when this proved less able to penetrate the frontal armour of the Tiger, it was upgraded in 1943 with a bigger ZiS 85mm gun, which was equipped with a larger three-man turret that reduced the combat load on the crew, enabling the commander to concentrate more on the task in hand. It's diesel power plant gave it a good speed over most terrains, and as production ramped up there were over 1,000 produced each month, plenty to replace losses and more besides. The 1944 mod introduced a simplified new gun, improved crew layout, better sight and the radio moved into the turret to take advantage of increased space. The Kit This is a complete new tooling from Italeri, and shouldn't be confused with older toolings and collaborations, as it's a different animal. It arrives in a standard box with a fetching painting of the subject matter ploughing past ruined German armour, and inside are four sprues in dark green styrene, one in grey styrene, two lengths of insulated cable, a sheet of Photo-Etch (PE) brass, two rubbery tracks, decals sheet and the instruction booklet. The tooling is well-detailed, and as well as the rubber tracks there is also a full set of link-and-length styrene tracks, which should please almost everyone. What will also please many is the inclusion of a complete interior, even down to the engine compartment, the parts for which are on the grey sprue, so may have been a later addition. Construction begins with the lower hull, which has slots for the suspension, and circular holes for the drive sprockets, which are glued together from two halves, and fitted to a cone-shaped moulding with a cap inside to allow you to leave the idler movable. The suspension units are added to the inside of the hull with springs in diagonal housings, comprising two sections on each side, leaving enough room for the engine, which is next. You don't get a full engine, but the detail is plenty for the installation. The firewall has the engine top slotted into the back, and the aft of the engine with big fan is attached to the aft end of the top panel. The exhausts and large fan are glued in place, and the assembly is dropped into the hull, locating on tabs in the floor. The final drive housing is built up and dropped in behind the engine, and a set of ammo boxes double as a turret floor in the centre of the hull, with the driver's controls fitted at the front with some rather arm-chair style seats for driver and bow gunner. A scrap diagrams shows the correct position for the tools, controls and air bottles, after which the suspension and wheel set are glued in place, with nice detail on the wheels and their treaded rubber wheels, which are moulded-in. They fit onto swing-arms with stub axles in pairs that fix into two holes each in the sides of the hull to ensure the correct angle. The idler wheels are also added at this stage with their axle, two-part sprocket and hub cap holding it in place, and allowing it to rotate too if you're sparing with the glue. The final drive cover fits from underneath, with a note telling you to install parts 38A after adding the towing cable later, and then you can choose which style of tracks you'll be using. The rubber-band tracks are the simple option, and are moulded in a gun metal plastic that can be glued using super glue (CA). You can even forego painting them if you hate that sort of thing. The more complex option is to use the included link and length tracks, which have more detail, and will leave you with the correct faceted appearance where the tracks wrap around the ends of the runs. The top sections are each moulded as one piece, the bottom sections in two parts, while the curved sections are individual links, which are each made from two plates. More care will be needed for this option, but the results will be improved, and even more so with careful painting and weathering. The upper hull needs 11 small holes drilling out before you begin its assembly, mainly for the later mounting of fuel tanks, so get those out of the way before things get busy, or you might regret it. The louvers for the engine deck are inserted from the inside, and the hull is then turned over and detailed from the topside, with a central engine hatch and a big radiator box on top of the aft louvers, which has a two layer PE grille glued over its aperture after gently bending it to fit the curve of the box. Another two boxes with louvered parts are added to the sides of the engine deck, and a little tool box gets added to the starboard fender at the rear, then spare track links are assembled and lashed down with PE straps, with an additional length pinned across the glacis plate. The glacis plate also has the ball machine gun mounted and the large driver's hatch, which can be fitted open or closed and must have been a bullet-magnet when open. This is then fitted to the hull over the inner front panel, the turret insert is added, and three fuel drums are fixed to the hull sides along with some pioneer tools, more stowage, lights and shackles glued in place, with an overhead diagram showing their correct location. The two hull halves are married up, the front fenders added, and yet more barrels, this time smoke dischargers are added to the rear bulkhead skin, which is a separate part. The armoured exhausts are assembled and fitted to the apertures on the skin, and a central access hatch can be modelled open or closed. The whole rear bulkhead can be posed open on its hinge-points, and a PE lip is included on the brass sheet to give this a more realistic look. The exhaust pipe tips sleeve onto the main exhaust during the closing process, although the break-point looks slightly different from the pictures I have seen, so if you want to add a little more realism, drill out the ends of the pieces and add a collar near the end of the fixed part of the exhaust that comes out of the mufflers. The tip that is visible outside the tank already has a hollow end, which is nice. As yet the tank is turret-free, so the next steps rectify this with a full breech, ready rack holding 12 rounds, sighting equipment with gunner's stool attached, and the relocated radio gear, as well as a couple of periscopes in the roof. The commander's hatch has a periscope built into the front half, and can be posed open by gluing them into the ring in an appropriate position, then mating them with the cupola ring. This and the gunner's hatch are fitted to the top of the turret along with a couple of mushroom vents, various tie-downs and rails, while the mantlet with cover, two part styrene gun barrel and cheek armour are added during the mating of the top and bottom sections. These cast turrets weren't put together with extreme care, and the joints are sometimes horribly rough, so check your references and decide what they look like in the flesh. The turret has a nice sand-cast texture moulded-in, as does the mantlet, rear bulkhead and final drive panel. The barrel is split horizontally, so there's a seam to fix there, and once that's in place, the turret fits to the hull, locking with a bayonet fitting. The last job is to create the towing cables from the two insulated wires that are included in the box. You cut them to length, twist the strands as you slide off the insulation, then glue the styrene towing eyes to each end, draping them over the fenders and attaching them on the shackles as indicated. Markings There are four decal options from the box, all of which are painted Russian/Soviet Green, and one is over-painted with white winter distemper camouflage. Each tank has unit markings, as well as some additional markings and emblems. From the box you can build one of the following: 9th Guards Tank Corp, 2nd Guards Tank Army – Berlin, Apr 1945 64th Guards Tank Brigade, 1st Guards Tank Army – Pomerania, Feb 1945 44th Guards Tank Brigade – Yugoslavia, Spring 1945 2nd Motorcycle Tank Battalion, 1st Tank Corp, 2nd Polish Army – Jul 1945 The decals are printed by Zanchetti in Italy for Italeri, and have good sharpness and colour density. They are all either black or white, so there's no issues with registration either, as there isn't any! Colours are called out in Italeri acrylic paint codes, as well as FS numbers, which should be a help if you use another brand. Conclusion It's nice to see Italeri moving with the times, including PE and metal towing cables with their kits, and options to please modellers with different needs, such as the two track options here, and with this being a popular subject it should sell well, particularly with their wide distribution network. Highly recommended. Review sample courtesy of
-
Reading back through the chat I realised I originally signed up for GB in 2013 with the plan to build a Hudson. My entry for this GB is Italeri 1/72 Lockheed Hudson, will be finished a 500 Squadron aircraft in the classic Dark Sea Grey / Dark Slate Grey over White.
-
 Italeri is working on a brand new - 100% new moulds - 1/32nd Lockheed F-104G/S Starfighter kit! Source: http://www.primeportal.net/models/thomas_voigt6/italeri/ V.P.
 -
After the Lockheed F-104AC & G/S Starfighter (http://www.britmodeller.com/forums/index.php?/topic/234954473-132-lockheed-f-104ac-starfighter-by-italeri-released-victory-models-decals/ & http://www.britmodeller.com/forums/index.php?/topic/234912123-132-lockheed-f-104gs-starfighter-by-italeri-released/), here are the two-seaters Starfighter to be released by Italeri in 2016 2017. Source: http://www.italeri.com/imgup/Preview%20Italeri%202016(1).pdf - ref.2509 - Lockheed TF-104G Starfighter AMI Source: http://www.aviationmegastore.com/lockheed-tf104g-starfighter-ami-2509s-italeri-it2509s-aircraft-scale-modelling/product/?action=prodinfo&art=134765 - ref.2512 - Lockheed TF-104G Starfighter Source: http://www.aviationmegastore.com/lockheed-tf104g-starfighter-2512s-italeri-it2512s-netherlands-military/product/?action=prodinfo&art=134764 V.P.
-
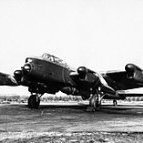
3 Down, 3 to go in my Canberra project This time, its a Vietnam-era US cloned Canberra all set to attack the Ho Chi Minh trail: Not a lot I can say about this kit, it builds very easily, doesn't need any filler and clearly shows the differences between the US variant of the Canberra and the British B(I).8, which was intended to fill much the same role. Italeri provide a good representative 500 & 750lb bomb load showing just how much of a bomb truck this aircraft was. No pilots though, so I have added a Matchbox navigator and Airfix pilot to fill the open (but nicely detailed) cockpit. Flaps and air brakes are open, as provided for in the kit. ... and finally, all 3 (thus far) lined up. I will need a bigger board to photograph them on when the next one is finished: FredT.
- 15 replies
-
- 48
-

-
Finished the CMP at last, (delayed by moving house half way through the build). Depicted as part of the 2nd Bn, Royal Ulster Rifles, France 1944. On now to do the figures, then the diorama. Apologies if the photos are a bit naff; combination of a cheap camera phone and half a glass of scotch.
-
Hello, I recently acquired an Italeri ATR-42 and I already an F-RSIN kit under construction. I know of all the criticism on the Italeri kit but I wanted to give it a try.. On comparing the parts though I found out a huge difference in the cabin section (not mentioning the wonky nose shape). I'm now just curious to know who is right: unfortunately all I could find searching around are INTERNAL cabin dimensions, which are very useful to sell the product but not so interesting for us modellers. Anyone would happen to know the fuselage external height and width of the ATR series?
-
"So, where are we?" Black primer does this picture no favours really! This is pretty much the full extent of my work on the Mitchell Gunship to date, I've modified some figures, added some greeblies to the barren, superbly fitting (& utterly fictional) cockpit, oh and I've glued the wing halves together.....It's a pretty simple kit but I'd still hope this will be deemed less than 25%? PS - Just discovered I have also assembled the engines (four whole parts) and painted them a vaguely enginey colour too.
-
In 2017 Italeri will reissue the following aircraft: Source: https://www.italeriusa.com/product-category.php?comingsoon=1 V.P.
-
Sukhoi Su-34 Fullback Italeri 1/72 This is a bit of a blast from the (not to distant) past. It's the first model I built on getting back into the hobby in early 2012. At the time I hadn't really built a model in 20+ years apart from a couple of AMT Star Trek kits in the mid 90's and this build marked a number of firsts for me. 1st time using an airbrush, 1st time using acrylic paints (Vallejo in this case), 1st use of Alclad and 1st time using an after market etch set (although in the end, I hardly used any of it). I was aware that there were a few issues with the kit but I didn't want to get bogged down with trying to make corrections when this was the first aircraft I'd done in 22 years, I just wanted to get it done without making a complete pigs ear out of it. In the end I did make a few additions, mainly the door in the rear cockpit bulkhead and a crude attempt at the boarding ladder on the nose gear. The colours are pretty much approximations and far from accurate but at least it looked like a Fullback (just about) and the main thing was I enjoyed the build immensely and it hooked me back on modelling. I'd like to think I'd improved a little since then and I'd certainly do some things different if I built another but it's still one of my favorite builds and sits right in the middle of my display cabinet Hope you enjoy the shots Thanks for looking Andy
- 36 replies
-
- 51
-
-
Is decals from Academy and Italeri as bad as often mentioned in build reviews and "in the works" or should those decals be handled in an different way than most decals? Is there something many builders miss when working with Academy, Italeri and Roden decals? What's behind those bad experiences? Cheers / André
-
Hi, This is my work this year. I builded without big accessories, only clean box with small accessories. I only used HGW safety belts and a back seat from the old jeans. Bleached car spray - acrylic paint and at the end 4 layers of Polish lacquer with UV filter.
-
The first aircraft is an Italeri re-box of the Hasegawa kit and the second is the Hasegawa in 1:48. The first aircraft is also my first attempt at mottling. I would love to say the second aircraft was my first attempt at smoke rings but Italeri provided these as decals and if you look closely you can see the spray pattern. Well done Italeri.
- 14 replies
-
- 23
-
-
Dear fellow Britmodellers, this is my 1/72 Italeri Macchi 205 from 1a Squadrilla, 1. Gruppo Caccia based at Campoformido in February 1944. Decal markings from the box. I painted the smoke-ring camo with Gunze/Mr,.Hobby acrylics using LF Vinyl masks (M7213). These masks fit well on plain surfaces, but not on curvatures (such as the wing/fuselage joint). Some touch-ups were neccessary. I added MPM seatbelts and True Details resin wheels. All photographs by Wolfgang Rabel of IGM Cars & Bikes. Thank you very much for your interest in this topic. The model will be on display for "Bella Italia", a special exhibition on Italian technical designs at GoModelling Vienna in 2019. Kind regards, Roman
- 18 replies
-
- 31
-
-
Hello everyone. Here is my Italeri Junkers Ju 88A-4 built OOB back in 2002. The decals came from an Inscale sheet on Finnish Ju 88s. It represents JK-254, "3", 1/LeLv44, of the Finnish Air Force, Finland, in June 1944. The main scheme was painted with airbrush using Tamiya paints. According to the decal's instructions, the RLM70/71 greens were reversed. I built this kit before I knew what RLM71 really looked like so the shade used isn't correct. Thanks for looking and all comments are welcome. Miguel
- 17 replies
-
- 38
-
-
Hi All, Here's the much lambasted Italeri Bergepanther kit. It's my first Italeri kit and I won't be rushing to get more, but it was very cheap and whilst it's been made clear that it's not accurate I quite like the way it looks. Lots of sink marks some of which I missed but I'm over it. Completely OOB apart from the AA mount,P/E Grilles and a few spare tools. The cannon was rarely fitted but adds to the appearance I think. There are a couple of million part Takom kits on the way which I'm sure will be much better but in terms of enjoyment this was one of the best £18.99s I've ever spent. Usual C&C welcome Cheers David
- 4 replies
-
- 16
-
-

-
- italeri
- bergepanther
- (and 1 more)
-
Hi all. Please, let me show you my lastest finished kit. It's the old Italeri's Junkers Ju52/3m, in airliner colours. It's actually a comission build, ordered by a gent whose father used to fly these planes regularly. He wanted an OOB kit, with no weathering at all. I've finally managed to build it in a few evenings. He's going to take it away next friday morning. I hope you'll l IMGP0001 by Arturo Navarro, en Flickr IMGP0005 by Arturo Navarro, en Flickr IMGP0002 by Arturo Navarro, en Flickr IMGP0004 by Arturo Navarro, en Flickr
-
My second build for this GB will be the Tigercat alongside my Eduard Hellcat. One of my favourite aircraft in the fact it just looks so good. Kit has been started but below the 25% rule. Planning to finish as the bottom aircraft based at Cherry Point.
-
Italeri is to release a 1/32nd Lockheed-Martin F-35A Lightning II kit in 2017- ref.2506 Sources: http://www.aviationmegastore.com/f35a-lightning-ii-2506s-italeri-it2506s-aircraft-scale-modelling/product/?action=prodinfo&art=134766 http://www.italeri.com/imgup/Preview%20Italeri%202016(1).pdf V.P.
-
1er and 2e Batallions, 1er Régiment de Chasseurs (Old Guard) and 1er and 2e Batallions, 2e Régiment de Chasseurs (Old Guard) The mounted Major is from the Italeri 6016 French Imperial General Staff set and the remainder are Esci 214 Napoleonic French Guard Infantry
-
A while back someone pointed out to me that while I had a Wethersfield F-100, a Bentwaters A-10 and a Lakenheath F-4, I had a gap for Alconbury (I won’t count the F-5 aggressors as neither are in Fully UK schemes). So when an RF-4B/C kit came up for a good price on eBay it seemed time to sort this gap out. I had thought that RF-4Es were the only reasonably easy kit to get hold off & had thought of trying to back date one. But this Italeri kit claimed to be just what I wanted And the decals I got for my Lakenheath F-4 contained decals for Alconbury RF-4Cs in SEA camo, SEA wraparound, and Euro One. After a bit of checking around for both the angular nose and the curved nose, I settled on a wraparound camo version. So here she is Her tanks are grey Euro One tanks - both schemes were around & changing from one to the other. With her Lakenheath cousin And with the the rest of the Phantoms She doesn’t have all of the stencil decals yet & may get a bit of weathering down but not for a while. Hope you like her.
-
Morning Folk's second build will be Italeri/Esci's F 100 RDAF 1963,the kit is still a little beauty and the scheme will be a challenge as NMF and me don't mix,be a couple of week's before kick off kit should be here in afew day's then I'll post sprues. While ordering I added HB's F-86 sabre in the 1960's Camoflaged Black Tulip scheme (only £4:50) so may due to it's being an easy-kit do a third.
-
The other night I finished my Italeri Sunderland which has been on the stocks since February - thus messing up my plan of a model per month for 2018. There has been some (a lot of) frustration along the way. If you'd like to read more about how I built the kit please see my article in this issue (pages 31-33) of our group newsletter. I assume early war bombs were painted in an early "its health and safety gone mad" bit of bureaucratic nonsense - bombs are dangerous so paint them yellow? A good portion of a tube of Squadron Green was used up on the plane, trying to level out the nose in front of the cockpit and even worse on top of the wings. The mainplanes are 1-2mm thicker than the stubs on the fuselage, so the filler was slathered on, for some reason I forgot to tape off the good side of the joints to ease clean up. Oh well. The top and bottom half of the wings weren't the same chord either so brute force was used! I didn't recall ever using such brutal methods when I read about them on Britmodeller, but obviously I had previously attacked models with this file as there was a goodly amount of squadron green on it... Another niggle was that the guy who did the panel trenching on one side of the aircraft was very heavy handed, whilst somebody else with a much lighter touch did the other side! Once the camo paint was on I also discovered there are very faint lines where there are mould inserts to change from Mk.I to Mk.III - needless to say I decided fixing these by that time would cause more damage than would be justified, but worth watching out for anyone else - I wonder whether the Mk.III ends up similarly afflicted? Although you get a good selection of decals, Italeri obviously didn't look closely enough at the famous photos of DAG as the code letters should be wider and the tail stripes thicker - at least as an emergency unit level paint job there are no stencils. Overall I'm pleased with the look of the plane, but I think it will be a while before I do another large flying boat. I usually avoid weathering, but I'd like to think I made a reasonable stab at the appallingly dishevelled state of DAG in period photos. I don't know where I'm going to put it now though. My main annoyance was clouting bits of it on the light or whatever in the workshop area, as it takes up so much more space when manoeuvring compared to a 1/72 Spitfire. Cheers Will PS for those concerned about such things I cut the grass tonight!
- 44 replies
-
- 70
-
-
-
Hi Folks, I hope you will forgive me but I'm one of many affected by the money grabbing !£$%&%%$£!$^&^% at PB. The MAS boat was my first project on Britmodeller and my first 'Plastic kit' in more years than I care to remember Being rather proud of my efforts I didn't want it to disappear so reposted using Postimage.org For those that missed it first time around the detailed interior For those interested the full build is here http://www.britmodeller.com/forums/index.php?/topic/234943576-another-mas-boat/ Unfortunately thanks to the %$^&*$£"!*+*&^$%£"! at photobucket the pics are no longer there but if you have any questions I still have the originals. I hope you enjoy them as much the second time around as I did Cheers Kev
- 68 replies
-
- 43
-
-

2nd (Royal North British) Dragoons (Scots Greys)
Ratch posted a topic in Figure Ready for Inspection
A mixture of Esci and Italeri figures (though the men are almost identical, the horses differ)