Search the Community
Showing results for tags 'hasegawa'.
-
I'm calling this done, it's not great and I made a few mistakes. Learning experiences! I added some ignition leads and used the photo-etch kit. Sprayed with Gravity Colors titanium white and 3-part clear.
-
Well, since my Mirage seems to have stallen, I'd thought I'd try this for a change.....a kit bought in 1984. it will be built as Richie''s plane on the morning of his 5th kill. decals will be ancient microscale, with a black box cockpit, aires 'cans and wheel wells and seamless suckers intakes. with some Eduard added for good measure. Some serious thinning on the wing bottom.....I was warned and the same for the wheelwell....paperthin......... Top of the cockpit sides, I cut an L shape out of the edge so it would fit..... Left hand side right hand side Tub, the black marks are where some machining will be done so the nosewheel well will fit. 'burner cans.......must take better pictures, as the bluing doesn't really show up inside of the 'cans
-
Nakajima C6N Saiun, (Myrt) 1:48 Hasegawa History The C6N originated from a 1942 Imperial Japanese Navy specification for a carrier-based reconnaissance plane with a top speed of 350 knots (650 km/h) at 6,000 m and range of 2,500 Nautical miles (4,960 km). Nakajima's initial proposal, designated N-50, was for a craft with two 1,000 hp engines housed in tandem in the fuselage, driving two propellers mounted on the wings. With the development of the 2,000 hp class Nakajima Homare engine though, this configuration was abandoned and Nakajima decided on a more conventional single-engine layout. However, the Homare's output turned out to be less than initially expected, so the design had to be optimized in other areas. The resulting aircraft was designed around a long and extremely narrow cylindrical fuselage, just large enough in diameter to accommodate the engine. The crew of three sat in tandem under a single canopy, while equipment was similarly arranged in a line along the fuselage. The C6N's low mounted laminar flow wing housed fuel tanks and was fitted with both Fowler and slit flaps and leading edge slats to lower the aircraft's landing speed to ease use aboard aircraft carriers. Like Nakajima's earlier B6N "Tenzan" torpedo bomber, the rudder was angled slightly forward to enable tighter packing on aircraft carriers. The first flight was on 15 May 1943, with the prototype demonstrating a speed of 639 km/h (345 kt, 397 mph). Performance of the Homare engine was disappointing, especially power at altitude, and a series of 18 further prototypes and pre-production aircraft were built, before the Sauin was finally ordered into production in February 1944. Although designed for carrier use, by the time it entered service in September 1944, there were few carriers left for it to operate from, so most were used from land bases. Its speed was exemplified by a famous telegraph sent after a successful mission: "No Grumman’s can catch us. The top speed of the Hellcat was the same as that of the Myrt, so overtaking a Saiun was out of the question. A total of 463 aircraft were produced. A single prototype of a turbocharged development mounting a 4-blade propeller was built; this was called the C6N2 Saiun-kai. A night-fighter version C6N1-S with oblique-firing (Schräge Musik configuration) single 30 mm (or dual 20 mm) cannon and a torpedo carrying C6N1-B were also developed. The C6N1-B developed by Nakajima was not needed after Japan's aircraft carriers were destroyed. As Allied bombers came within reach of the Japanese home islands, there became a need for a first class night fighter. This led Nakajima to develop the C6N1-S by removing the observer, and replacing him with two 20mm cannons. The C6N1-S's effectiveness was hampered by the lack of air-to-air radar, although it was fast enough to enjoy almost complete immunity from interception by Allied fighters. Despite its speed and performance, on 15 August 1945, a C6N1 was the last aircraft to be shot down in World War II. Just five minutes later, the war was over and all Japanese aircraft were grounded The Model Originally released in 2002 this kit has been released in a number of different schemes, in fact this example is the eighth iteration. That said the moulds are still pretty good and the parts are all well moulded. The finesse on the details such as rivets and panel lines is very nice indeed. There is no sign of flash and only a few moulding pips, plus no sign of imperfections on the review example. The instructions are well printed, clear and easy to read. The standard Hasegawa style of box comes with a nice painting of the aircraft in flight. Inside, there are five sprues and a separate cowling in a medium grey styrene, one sprue of clear styrene, a medium sized decal sheet, and four poly caps. The plastic is quite glossy, and will need either a light rub down with a fine emery cloth or a good etch primer for the paint to stick to. The build begins with the very nicely detailed cockpit. The long single piece cockpit floor is fitted out with the pilots rudder pedals, joystick, six oxygen bottles, and a couple of electronic boxes. The pilots seat is then assembled from three parts and glued to the floor, followed by the instrument panel, co-pilots shelf, two piece seat, three piece instrument panel, and what looks like a large gyro instrument. The inside of the fuselage halves are fitted with large interior side panels and a rear bulkhead before the cockpit assembly is fitted. The third crewman’s seat is fitted to the starboard fuselage, along with the DF loop and its associated platform. Before the fuselage is joined, you will need to open up the hole for the front drop tank steady. With the fuselage halves joined the win assembly is built up. This comes in a single piece lower wing, main undercarriage bay boxes, and two upper wing panels. More holes need to be drilled out if you are goin got fit the drop tank. The moulded navigation lights also need to be carefully removed, and replaced with clear parts. The wing is then attached to the fuselage assembly, along with the two single piece horizontal tailplanes. The engine is also a very nicely detailed part, even though most of it won’t be seen with the cowling fitted. The single piece engine is fitted to the rear bulkhead, which is moulded complete with the cooling gills. The six parts that represent the exhaust pipes are glued to the rear of this bulkhead, whilst the front of the engine is fitted with some pipework, and crankcase before the cowling is slid onto the engine and glued to the rear bulkhead. The whole assembly is then glued to the front of the fuselage. The main undercarriage units are each made up from a single piece leg, separate scissor link,, three piece wheel and two outer bay doors. The assemblies are then fitted to the undercarriage bays and fitted with the retraction actuators and a third outer bay door. The inner doors are then attached, and fitted with their retraction jacks. The arrestor hook isn’t fitted, and the resultant empty bay is covered with a blank panel just forward of the single piece tail wheel. On the underside of the fuselage, there are two clear viewing panels fitted, along with an access step. The flaps are provided as single piece units, and are designed to be displayed dropped, as are the leading edge slats. The four piece drop tank is then assembled and fitted to the lower forward fuselage. With the model the right way up the multi-part canopy is fitted. The modeller has the option of having the canopies open, using the individual parts, or closed using the full single piece part, a nice addition by Hasegawa. The rear section is fitted with a single machine gun, whilst the windscreen has a separate upper section. The propeller is made up form a spinner, three separate blades and a back plate. When assembled it is glued into position. The rest of the parts, which include a three piece intake on the port side of the rear cowling, aerial mast, pitot probe and rudder trim tab are then glued to their respective positions, thus completing the build. Decals The decals from the latest batch of Japanese aircraft kits from Hasegawa have been pretty good, and it’s no different with this kit. Well printed, with thin carrier film, they are in good register and nicely opaque. The walkways on the wings, fin stripes and the identification numbers have any significant visible film, but on a nice glossy finish this shouldn’t silver too much. There are two aircraft for which markings are provided. All are from the 121st Naval Flying Group, based on Tinian Island 1944 and both are in the Nakajima green over silver scheme, with aircraft numbers 21-101 and 21-103 represented. Conclusion This is another aircraft i was previously unaware of, but it will fit well into any collection of Japanese Naval aircraft. The standard is pretty much what we have come to expect from Hasegawa, with a good amount of detail, especially in the large greenhouse cockpit and what should be a hassle free build. Highly recommended Amerang – Hasegawa Review sample courtesy of UK distributors for
-
Afternoon all. Just finished this one for the FW 190 group build. Finished with Gunze Mr color and Skymodels decals. Cheers Allan
- 11 replies
-
- 20
-

-
Mi-24/35 Mk.III Super Hind released now http://www.hasegawa-model.co.jp/product/02209/ Superhind with superprice for some small resin parts: www.1999.co.jp/eng/10396196 additional PU parts arent visible on photo ant they scanned only old instructions and not new list.
-
Sadly not a full WIP build just wanted to share this quick build in it's current state. Been wanting to do an F-16 ever since I got back into the hobby over the last year and snapped this up on Amazon for £6 recently, never built a Hasegawa kit before so didn't quite know what to expect. It's not a bad kit but does have it's flaws, few fit issues to contend with..especially with the main landing gear! The supplied decals were just awful though! Pretty much unusable so I decided to order Daco's Belgium Air Force 349 Squadron from Hannants just to have something different, two pics below.. ...I'm still very much a novice at all this right now so quite new to after market decals, and certainly had issues with the tail fin! But I'm quite happy with it so far. First time spraying from a can using the blu-tac worm technique too (practicing for the 1/48 Tornado going on at the moment!) which I've just about got the hang of I think. Will post more pics soon, thanks for looking!
-
In an attempt to meet the Macchi scourge over the desert skies of this Group Build, I will attempt to add to Basilisk's Kittyhawk contingent. The plan is to build a couple of James "Eddie" Edwards' Kittyhawks: Kittyhawk IA, FZ-R, of 94 Sqn using the AZ/Legato kit Kittyhawk II (short-tail P-40F), HS-O, of 260 Sqn using the Hasegawa kit and a DB Production resin Merlin nose. The title of the thread is borrowed (stolen) from Procopius' epic Desert Anvils thread. Thanks vppelt68 and thepureness for hosting this one, and thanks Enzo for your oversight of the general BM Group Build goodness.
- 21 replies
-
- 9
-
-
- 1/72
- Kittyhawk IA
- (and 4 more)
-
next new-tool 1/72 kit from Hasegawa is a Draken III: http://hlj.com/product/hsg28/Sci and Bandai already released 1/72 transformable Draken III this month: http://www.1999.co.jp/eng/10394143
-
 Curtiss P-40 wheel set Eduard 1:32 The Hasegawa P-40 kit has been around for quite a while, even in its last incarnation from 2013. Recently Eduard have released a number of etched sets for it, now it’s their Brassin range to have a go. This lovely looking resin set comes encased in their usual clear styrene bubble packaging, and contains the two main wheels, which come with separate inner hubs, and a single piece tailwheel. The resin moulding is well up to the standard we have come to expect from Brassin and includes the makers name and size information on the main tyre side walls, along with the very nicely moulded diamond tread pattern. All the tyres have a slight bulge to give the impression there is weight on them, but not excessively. All the wheels are only attached to the moulding plugs via a small contact point on the bulged area and a couple of webs, so shouldn’t be too hard to remove and clean up. The hubs are a little more awkward, but with care and a sharp blade or saw you should be ok. The hubs will need to have the rear sanded down to thickness so that they fit into the wheel recess correctly. The set also includes a small etched brass sheet. This contains the outer hub covers, one for each main wheel. To complete the set, and make it a lot easier to spray the completed wheels a set of mask, made of kabuki style tape has also been included. Conclusion These resin wheels, with their etched detail parts make a great addition to the completed model. There is a little bit of work to get them off the moulding blocks, but there’s nothing that a moderately competent modeller can’t handle. Highly recommended. Review sample courtesy of
 -
Good afternoon from a cold and damp Middle Earth. Well here t'is after eight months on-and-off the bench, my Hasegawa 1:48 Crusader. Now before I go-on, as I was editing the pics for size, I noticed that I've forgotten to add the IR Sensor on the front windscreen but I know where it is and I'll sort-it next time I'm in the 'cave' !! What can I tell you ?, well construction was no problem throughout although on this kit, some of the detail particularly around the dive-brake area was almost none-existant which I'm guessing points to over-use of the moulds. A few extras but not too many, the build is here: http://www.britmodeller.com/forums/index.php?/topic/234993482-f-8j-crusader/ if anybody wants to check-it-out. Some folks here may know or have heard of Frank Cronin from California, just want to publicly thank Frank for sending me the decals for this build without hesitation when I put out a cry-for-help over at iModeller... Cheers Frank, really appreciate it. That's all the yada, yada, yada for now, here's some photos: Kit - Hasegawa 1:48 Paint - All Tamiya, Humbrol & Xtracolour enamels. Decals - Aeromaster, Microscale stencils, Furball 'Canopy seals' Extras - Cobra Co. resin seat, Quickboost aft intakes, AIM-9D's from Hasegawa Weapons Set 'C'. LTV F-8J Crusader Assigned to Cdr. Paul Stephenson CAG CVW-21 VF-211 'Checkmates' USS Hancock 1972 Thanks for taking the time to look and/or comment, as ever happy to take any criticisms, comments or questions. AFN. Ian.
- 14 replies
-
- 29
-
-
 As my ludicrously long Sea Vixen build finally shows signs of drawing to a close, thoughts turn to what to build next. I always try to have two things on the go at any one time, with the other being my never-ending Ark Royal build - but there is a limit to how much 1/350 scratch building and detailing I can stand at any one time, and I need to have something in 1/48 (my aircraft scale of choice) to keep me going. I thought about a twin Buccaneer build - an Anti-Flash White S1 and an Ark Royal (4) final commission S2D. Those will come at some point, since I have the kits and the necessary conversion materials. But watching the splendid work of Steve (Fritag), Debs (Ascoteer) and others has convinced me that it is high time I built something that I actually flew myself. Sea King or Lynx, Sea King or Lynx... much indecision was finally tilted towards the Queen of the Skies by all the press coverage of its retirement from RN SAR service earlier this year (though the ASaC7 Baggers will soldier on for a while yet), and by markdipXV711's excellent build of an 819 SAR cab which he and I flew in together 20-odd years ago. So, since 819 (my other Sea King squadron) has just been done, I have finally plumped for an aircraft from my first tour. Pull up a bollard and listen to a true dit. 820 Naval Air Squadron, 1988, 18 months into my first front-line tour. We were part of Ark Royal (5)'s CAG (carrier air group) throughout my time on the Squadron, and in July 1988 the ship plus 801 (8 x Sea Harrier FRS1), 849B Flight (3 x Sea King AEW2), a detachment from 845 (2 x Sea King HC4) and 820 (9 x Sea King HAS5) set off for Australia, via Malta, Singapore, Hong Kong, Brunei and Subic Bay (Philippines), and home via Mumbai and Gibraltar. 6 months away, and a bloody good time was had by all... Less than 2 weeks after we sailed, we were taking part in a NATO exercise in the approaches to the Med; basically we were playing the bad guys trying to force a passage through the straits, and a number of RN, USN and Spanish units were trying to stop us... including HM Submarines Torbay, Otter and Opportune. The aim of these exercises is not to be 100% realistic, but to make sure that there is maximum interaction, so occasionally there would be a 2 hour pause where the submarines, having come right inside the screen and "attacked" the hell out of the ships, would withdraw 30 miles and start again. We would knock off tracking them and leave them alone to reposition. In those long distant 1980s Cold War days, ASW was our bread and butter, and on the whole we were pretty good at it. Most of the time we did passive ASW - chucking huge quantities of sonobuoys out of the aircraft and finding submarines that way, often working with our Nimrod and P3C brethren, and often working against USSR boats rather than friendly exercise ones. In my first few weeks on the squadron we rippled 3 (3 cabs airborne 24/7) all the way from Norfolk VA to Harstad in Norway, including several days of tracking 2 Victor IIIs that were taking an interest in our games. It was pretty exhausting, but we could keep it up almost indefinitely. For the guys in the back, passive ASW was often good fun; 3-dimensional chess, and all that. But for the pilots it was skull-shatteringly dull, flying around at 4-5,000' (nosebleed territory for any self-respecting helicopter pilot) and stooging at 70kts for maximum endurance for hour after hour after hour. But on this occasion we were doing active ASW, the task for which the Sea King was originally designed. Active ASW in the daytime is enormous fun for the pilots, especially when you are in contact. At night the aircraft flies the profiles for you, closely monitored by the pilots (since you are down at 40', you want to keep a close eye on things in the pitch black; it can be a tad buttock-clenching at night). In the day, however, you generally fly it all yourself ("manual jumps" as the jargon goes) without any assistance from the AFCS (automatic flight control system), and it's a blast. So there you have the scene. I am 18 months into front line flying, and have reached the dizzy heights of being captain of my own crew. My P2 for this trip is a hugely experienced USN exchange pilot (way more experienced than me, but flying as second pilot while he gets up to speed with RN procedures). We do 45 minutes of active Torbay bashing, but then reach the pre-briefed pause while she repositions. Rather than disrupt the flying programme, we simply keep going, so we have taken a plastic milk float with us (hi tech, I tell you) and are doing some grappling training; chuck the milk float out of the back and practice SAR with it - much harder than it sounds, cos the milk float thrashes around in the down wash, so it is great training for the back seat in conning the aircraft and the front seat in hovering it precisely. A few minutes into the grapple work, with Jim the USN guy on the controls, the port engine stops... or so we thought. The Nr (rotor speed) decays as the good engine runs out of puff (too hot and too heavy to hover on one engine) and we subside rapidly onto the water yelling Mayday and punching the windows out. Phil Smith, the Observer, says he had never seen anyone strap in as fast as poor old BJ Sandoe, the Crewman who had been lying on the floor of the aircraft with his head sticking out, conning Jim onto the milk float, when suddenly the Atlantic Ocean came up to greet him. As I reached up to shut down the No 2 engine (cos you sure as heck don't want to abandon a helicopter while the rotors are still turning) it became apparent that the No 1 engine had not in fact failed, but simply run down to flight idle. The fuel computer had developed a fault and tried to shut the throttle, but there is a physical interlock built into the system for precisely this emergency, called the Flight Idle Stop, which is basically a screw jack that prevents the throttle from closing beyond a certain point - the very last thing you do when starting up is to engage it. So we over-rode the computer and managed the throttle manually, the Nr came back up to where it should be and shot off the surface of the sea like a startled rabbit, downgraded our Mayday to a Pan, and flew back to Mum. A Green Endorsement much later (still on the wall of my loo) and very shaky legs for a few hours afterwards. Well, it has to be this cab, doesn't it? So I present to you ZE419 / 014 / R of 820 Naval Air Squadron in July 1988; a bog standard Sea King HAS5. Dark blue (this was just before the days when everything became grey), black markings. Photos of the real aircraft to follow, I expect, but for now she is one of these in the distance (photo taken the day before we sailed from Pompey, so about 2 weeks before the ditching): The aircraft will be built much as in this photo, actually; folded, included the tail, with engine blanks in. The cabs in the photo have tip socks on, but I will probably build mine with the more robust blade support system known as "Forth Road Bridge" gear (as in this Mk 5 at the Fleet Air Arm Museum): The basis of the model will be the Hasegawa 1/48 Sea King, using the "Ark Royal HAR5" [no such thing; it should be HU5] edition (which for some reason Photobucket refuses to rotate, so turn your head): ...and the excellent Flightpath conversion set, which contains all sorts of goodies important to this build - notably weapons carriers, assorted aerials and a tail rotor much better suited to having a gust lock fitted to it. Herewith statutory sprue shot: ...and pic of the contents of Flightpath box and a couple of other aftermarket goodies: As it happens, I also have a Hasegawa AEW2a kit (acquired before the Mk5 kit was released, as the only game in town for a future Mk5 build). This will also be useful, since it contains a number of applicable bits such as Orange Crop ESM aerials (removed from the HU5). And since all the Hasegawa boxings are variations on the same theme, the kit already contains some parts that I will use - e.g. the HU5 has the sand filter in front of the engine intakes, but in my era we simply had the "barn door"; similarly the HU5 has the sonar removed and a blanking plate fitted. The kit contains both a barn door and a (sort of, -ish) sonar. [i also have a second complete "Ark Royal HAR5", designated eventually to be an 819 SAR aircraft... but not yet]. There will not be much progress for a few days, while I get the Vixen over the line.... Herewith photo of the appropriate log book entry (bottom line:
- 2,565 replies
-
- 34
-
-
- Flightpath
- Hasegawa
- (and 1 more)
-
This is my first post on here but I've been lurking on and off for a few years. I've been building model aircraft for a while but after a few years in which model railways have been my main interest I've returned to aircraft and over the summer I've built a few (finally finished an Airfix Eurofighter, Airfix Boston, Airfix Lightning F2A and an Airfix Vampire T11). I have built very few non-Airfix kits (just a few Revell kits) and this was my first Hasegawa kit. I picked this aircraft for no particular reason other than it looked interesting to build - it was very much an impulse buy. A little research later revealed that this kit is very old and as I discovered is rather poorly detailed. However for only £7.49 I think it was worth it! Overall fit of the parts was OK, except that the locating tabs on the undercarriage doors and weapons pylons didn't 'snap' home as some more recent kits do. The instructions, especially for painting were nowhere near as good as Airfix instructions, although as I have built quite a few kits now they didn't really cause me much trouble. I'm quite happy with the result, it's perhaps not my best paint finish as there are quite significant 'ridges' along the grey-white boundary. But I can cope with that. It was all brush painted and decals were those supplied with the kit. My only change was to replace part of one of the undercarriage assemblies with a piece of a paperclip cut to length because the original fell off or got lost at some other point, I never did quite work out what happened to it. Overall build time was 9 days, one of my fastest ever. Of that, construction probably only took about 4 days, if that. Anyway, on to the pictures: Thanks for looking.
-
Harrier Upgrades/Pods (for Eduard/Hasegawa) 1:48 Eduard Brassin Designed and released to coincide with their limited edition boxing of Hasegawa's 1:48 Harrier GR.7/9 kit, these four sets have been produced to improve further over the already augmented detail of the boxing. If detail is your thing, then these sets might just hit the spot. Upgrade Set (49784) As usual with Eduard's Photo-Etch (PE) sets, this arrives in a flat resealable package, with a white backing card protecting the contents and the instructions that are sandwiched between. It consists of one large sheet of brass, plus a small slip of clear acetate with parts pre-printed on the surface. The set includes skins for the cockpit tub; splitter plates and details for the kit exhaust nozzles; a highly detailed rendition of the protective plates behind the "hot" nozzles; upgrade parts for the landing gear; a more detailed brake surface for under the belly; pylon details; missile exhausts; HUD parts with film for the glass, and a full set of slime-lights with matching decals (not pictured). The Brassin sets arrive in the familiar Brassin clamshell box, with the resin parts safely cocooned on dark grey foam inserts, and the instructions sandwiched between the two halves, doubling as the header card with decals if appropriate. Exhaust Nozzles (648267) Four resin nozzles are included in the box, which are direct replacements for the two part kit nozzles, so not only do you avoid having to fill the seams, but you also get a much better level of detail into the bargain. Sniper ATP for Harrier GR.7/9 (648273) Harrier used this target designation pod extensively, and this set contains all the necessary parts with the adapter rail that is required for attachment to the Harrier. The main body is cut from its pouring plug and the join is covered by a PE part, with an optional "black box" on the aft end, while the movable seeker head and PE lens is fitted into the recess in the front. Then the glazing parts in clear resin are prepared by adding a bevel to their edges as shown in the accompanying diagram, before gluing to the lip around the edges of the window. The adapter rail, sway-braces and pylon are fixed to the top of the pod body, with some small PE parts providing extra detail. If you wanted to pose the pod in its deployed mode, simply turn the seeker head windows to the downward position using your references. TERMA Pod (648266) The TERMA defence pod isn't exclusively used by the Harrier, so it has uses with other aircraft, but it is carried by it, so it has been included here. Inside the box are two resin parts and a small fret of pre-painted PE. The pod is liberated from its casting blocks, then glued together to form the pod body. The PE parts are then affixed to the exterior, which is best done after main painting is completed due to them being pre-printed. Review sample courtesy of
-
 Hello and thanks for your interest, this is my 1/72 Hasegawa B-24J, representing "The Shack" of 458th Bomb Group, 754th Squadron. The model was built using aftermarket parts from Eduard, CMK, Aires, True Details, Scale Aircraft Conversions and Decals from Sky Models Italy. This beast fought me for over 18 months. Most work went into the paint job. It was painted with Alclad lacquers, which require a perfectly smooth surface preparation. Due to the massive weight (90g) I chose to use metal landing gear from Scale Aircraft Conversions. Photographs by Wolfgang Rabel of IGM Cars & Bikes. ... and here is how it all started.... lots of aftermarket items, lots of motivation and optimism! Cockpit interior: Interior detailling underway: Fuselage halves before closing up: Cockpit again: A lot of weight went into the foward area of the fuselage to prevent a tail-sitter: Model primed Gloss Black (Tamiya14) in preparation for Alclad paints: Paint issues all along the way, of course all my own fault: Making the mask for the code letter "E": Final bits and pieces.... Glad I finished this, even if it took some time and a lot of Patience. But have a look here - there's already a "roll-out" queue on my workbench: Thanks for lookin'. See you next time! Best wishes from Vienna Roman
- 39 replies
-
- 56
-
-
 #23/2016 The first of two new opponents is finished. Hasegawa kit with Techmod decals, Gunze and Tamiya acrylics except Azure from Model Master, Eduard seatbelts. The model shows an a/c of the Royal Egyptian Airforce that participated in the Arab-Israel war and was captured by Israeli troops in December 1948.
 -
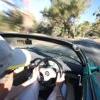
While I wait for the decals to finish my Lotus 88, I've finished (just about!) two kits and started another. I decided to go for a rally car as I haven't made one since I was a kid. This is my first Hasegawa kit and it reminds me of the Fujimi kits I've made recently - nice detail on the body but some poor quality detailing on some parts, like th gearbox and driveshafts on this kit. I am looking forward to this though as 1) it's a Lancia and I owned two Lancias in the past 2) it's in Martini colours! I have the Hasegawa P-E kit for this and will be mostly oob with a few wires.
-
With my Kulula 737 nearing completion, I'm embarking on my next project, which again has an African subject. As part of my overview of the Rhodesia / Zimbabwe air force I wanted to build a Chengu J-7 in Zim colours. Looking for kits I came across the Hasegawa boxing, which contains two kits (quite possibly for the price of two ). I really like the colour scheme of the J-7s in Namibian service, so I decided on that for the second model. Pictured below is the box top, one set of sprues (the box contains two), the decals (from Mavdecal) and my reference material.
- 4 replies
-
- 5
-
-
- Chengdu J-7
- Hasegawa
- (and 2 more)
-
A late entry. I hadn't realised the group build had started, and since I had offered to get involved, back in October 2015, it seems only right that I should try to put in at least one, and try to get it finished by the deadline... I purchased this kit, which I understand dates from 1992, but is based on an older kit, at the Kitswop in Telford last year... Seems a nice enough kit. Here is its entry in Scalemates:- https://www.scalemates.com/kits/132280-hasegawa-51305-focke-wulf-fw190a-8-nacht-jaeger However, while all the parts are there, the decal sheet showed some water damage:- (This is, of course, something that often happens with old kits, including those purchased at the Kitswop) So, I decided to use a set of decals from the stash - this is made by Karaya, and is one of a number illustrating captured FW 190's. The particular set that I have concentrates on US captured versions, which after capture were used as "hacks" by various American airmen. There is the link to the decal set (again from Scalemates):- https://www.scalemates.com/kits/144451-karaya-d7206-captured-butcherbirds-vol-v I intend to use one of the most colourful - a plane in bright red and yellow. While that one is an F-8, there are not too many differences from the A-8 (so far as I can see), so it should be fine.... (I have already done the all-red version, which is an A-8, unfortunately using the "new-tool" Airfix kit, which turned out to be a bit of a disaster as the thing just wouldn't go together too well...a familiar tale, I am told) Anyhow, here are the usual sprue shots for the kit:- I will make a start in the next couple of days Thanks for looking, Philip
-
 OK Guys, After some correspondence (and acceptance) with dazdot I am going to start this model.It will not go into the voting, because it is more than 25% done before it starts. It is a shelf queen and was restarted with the start of this GB. I started this build in a different model site (Large Scale Modeller) and lost interest/time with it until last week when I was searching for a resin seat and found it in this box. It is a 1/32 Hasegawa Fw-190 D9 with a conversion set from Renaissance and a MDC cockpit set. There are some more goodies in the box, but I am not sure if I will need it. Here are some pictures from before the restart. The box. the Renaissance conversion set. This is original for a D-13 conversion, but there is not much difference between the D-11 and D-13 nose. And the decals will be from Eaglecal. This is the scheme I will be building. And here are some pictures of the build then. The new nose on. This was the text used on the other build " I have sawn of the nose and replaced it with the one from the conversion set. The brake was on a panelline and very easy to do with a fine saw. Then came the trouble. because the brake line is on the edge of the firewall, you can't use some plastic plate to strengthen it. Now it's secured with only some super glue. When I will put the fuselage together I will see how to strengten this." Here is a picture of the painted insert for the engine. This gave the nose more strength. Here is a picture of test fitting the rest of the nose parts. And here is the cockpit of MDC. That is a nice piece of resin. Now it was on to the wings and these are different than a D-9. Here is what I said in the other build. "I have made the gun holes in the wings for the MK-108 canons. The ones in the A-8 kit are to small for the fitting of the masters MK-108 gun barrels. So I had to improvise with some plastic tubing." This was the last done before it became a shelf queen. Cheers,
 -
I'm in again, Here goes another Fw-190 GB. Last one I managed to push out two kits from memory but this time likely to only get one done. The kit: The aftermarket. Add in an Ultracast seat too: The decals: Not my first Hasegawa 190 but certainly not my last. Builds nicely with more detail than the Tamiya kit and therefore more complexity in some areas. Expect paint to be applied to the cockpit tomorrow night all going well.
-
Ok so I've finally managed to get this finished, well almost anyway lol. Whilst taking the pics I realised I'd forgotten the add the licence plate decals and the headlight beam ones too Oh well they're easy to add later lol. The WIP can be found here: http://www.britmodeller.com/forums/index.php?/topic/235004250-lancia-hf-stratos-1975-rally-san-remo/ So here she is: And with her sister's on the Ledge of Lusty Lancia's As always comments, questions etc most welcome. TTFN Ashley
-
 This project started last winter as FGR.2 XV436 of No. 6 Squadron. Then I read Aircraft Artificer Lionel A. Smith's "Phantom at sea" from the book "Phantom from the cockpit". It was "hook-up" for the FG.1 and "bolter" for the FGR.2. Lionel Smith was sent ashore to NAS Roosevelt Roads (Puerto Rico) on June 1971 when XT861 was diverted to the island to make some repairs on the "Cab". His style impressed me at once and I started to build my first ever RN aircraft. I built the model using Aires seats, jet pipes, wheels and air scoops. A lot of scratch building was required because I made the keel box and engine air intakes myself. A lot of re-scribing and rivetting was also required. Finally I painted the model with a brush using Humbrol enamels 27 and 34 and when the decals were on (343 of them to be precise) two final coats of Hu 135 was applied with a "Leonard's" brush. Weathering was made with "Caran D'ache" oil baesd crayons. As this was FGR.2 boxing the decals came from Alley Cat, Extra Decal, Hasegawa, Icarus, Impact Models and Model Alliance. It's a shame that no one provides good quality stencils for the British Phantom. Let's see some photos. I hope you like them I add a couple of WIP photos also if they are allowed to show you some details I mentioned about... Here is the home made Keel Box and engines. Intakes made from styrene sheet, Milliput, a pair of surplus tanks and Compressor wheels. The air brakes were closed in parked aircraft but this was too good a detail to miss... Note also the scratch built Auxiliary Air Door. Best Regards, Antti
- 64 replies
-
- 59
-
-
Hello all. It's great seeing the variety of subjects being covered, both in terms of time and geographical coverage. For my entry I'm going with this kit; Hasegawa's 1/200 B738 Yes I know, another 737, not the most original of builds. However, you may have noticed that there were very few decals on display in that picture, and that is because I'm not going for the box scheme. Instead I'm using Draw Decal's offering to build a plane in the colours of everyone's favourite South African low-cost carrier. It's educational too! Not sure when I'll be able to start, but hopefully sometime in the coming week.
- 29 replies
-
- 6
-
-
- Boeing 737
- Kululua
- (and 2 more)
-
This set is to correct air bleed channels shape and jet intake ramps width for the 1/48 Hasegawa F-14 Tomcat. Molded from polyurethane resin. Dry fit is required before installation.
-
 1/48 UK Phantoms from 111 Squadron http://www.1999.co.jp/eng/10402480 Jolly Rogers Overload in 1/72 - Phantom and Super Hornet http://www.1999.co.jp/eng/10402477 , Tomcats http://www.1999.co.jp/eng/10402475 MiG-25PD http://www.1999.co.jp/eng/10402494 From Hasegawa's web site http://www.hasegawa-model.co.jp/month/201609/ Robert