Search the Community
Showing results for tags 'hasegawa'.
-
Hawker Typhoon Mk.Ib (11117) Limited Edition 1:48 Eduard In the design process even before the Hurricane reached squadron service, the Typhoon was initially intended to be a direct replacement of its older stable mate, but with development scope to take advantage of the upcoming 2,000hp piston engines that would be near the limits of propeller powered flight. Initial problems were overcome, and the early razorback design was amended to a bubble canopy that gave the pilot a vastly improved view of the sky around him. A larger, strengthened tail and a change from 12 machine guns to four wing mounted 20mm cannon also improved the aircraft's offensive ability. It was never fully developed into a medium altitude fighter, but it did find a role nearer the ground, especially in countering the Fw.190 that was playing havoc with the Mk.V Spitfires at the time. It was a big stable aircraft with masses of power, which made it ideally suited to low level flight, and that naturally lends itself to ground attack. Fitted with unguided rockets or 1,000lb bombs under each wing, it became a feared sight by enemy ground troops and tankers. Although the rockets were tricky to aim well, they had a massive effect on morale, and played a large part in halting the advances made by German troops in the Battle of the Bulge, flying hundreds of ground attack sorties using rockets, bombs and cannon to great effect. Like any successful aircraft of WWII, the list of improvements is long, but with the Tempest making inroads into solving the Typhoon's shortcomings, it was soon withdrawn after WWII came to a close, lasting only a few months of peacetime. The Kit This limited edition is based upon the Hasegawa plastic, as evidenced by the little slips of paper inside the inner bags that state it was made in Japan and imported by Eduard. It arrives in the usual sized box with a painting of a Tiffie and the words Typhoon writ large in red underneath. Inside everything is bagged together, with the clear parts and some polycaps bagged inside. The full contents includes nine sprues of varying sizes in grey styrene, one in clear, a small sprue of black polycaps, a bag with a bunch of resin parts in it, two sheets of Photo-Etch (PE) one nickel-plated and pre-painted, the other bare brass, a sheet of kabuki-style masks, a sheet of decals and the usual Eduard instruction booklet with the painting guide to the rear. Quite a comprehensive package! Construction begins with the cockpit, replacing the complete instrument panel and side consoles with a highly detailed painted lamination, or using the original part with decals – your choice. The rudder pedals are also replaced, and the seat is tossed in the spare pile to be replaced by a complete PE replica with improved detail and scale fidelity. The Typhoon's cockpit is more-or-less suspended within the main frames, and the kit parts replicating this are augmented with some PE strengthening webs, as well as additional controls and equipment, before they are brought together with the floor and rear bulkhead to create the cockpit, the rear of which has new in-scale PE head armour that fits in the space where the old plastic is cut off. More PE is attached to the interior of the fuselage, and the chin scoop is made up with an additional PE central filter fitted for a couple of the marking options. This is the car-door Tiffie, so when you sandwich the cockpit and chin intake between the fuselage, you also add the appropriate inserts to the top of the fuselage around the cockpit that present you with the correct aperture for the type. The wings are simply made from three parts, with the full-width lower having the main gear bays moulded-in with surprisingly good detail. before closing them up however, you will need to establish which holes (if any) you want to open up for the underwing stores later on. The cannon fairings are moulded into the wing, and for three of the markings options, a small section under the chin will need removing and replacing with a pairing of PE and resin parts. The tail fin is moulded into the fuselage with the rudder, while the new replacement resin elevators are a big improvement on the old parts, with realistic joins between the parts permitting easy placement of them at a suitably deflected angle. The landing gear is pretty much stock kit parts, with the exception of a few small PE stiffening parts applied to the bay doors, at which time there is also a choice of two types of additional PE for the chin intake. A whole host of additional PE and styrene parts are fitted to the underside, as well as landing lights in the leading edge, cannon barrels, and you will then need to fill around the landing lights, as they aren't present on these airframes. A choice of stubby pylons or rocket rails for the underwing storage are supplied, all from kit parts, with different fitments for the various decal options. The resin prop is built up using the accompanying jig, and is then covered with a resin spinner, while the remaining parts such as the gunsight, canopy sliding details, a new PE aerial and the two canopy parts are applied last along with the exhaust stacks and prop. Speaking of the canopy, there is a full set of masks (not pictured) supplied on a sheet of yellow kabuki tape for the canopy, with compound curved handled by using frame hugging masks, while the highly curved gaps are in-filled with either liquid mask or offcuts from the background tape. In addition you get a set of hub/tyre masks for the wheels, allowing you to cut the demarcation perfectly with little effort. Markings As usual with Eduard Limited Edition boxings, you get a good selection of markings, although given the aircraft's relatively short term of service in the late war, it's all based on grey/green over light grey with a variety of tactical and unit markings. From the box you can build one of the following: MN529, flown by F/O Ian Handyside, No. 184 Squadron, No. 129 Wing, RAF Westhampnett, Great Britain, June 1944 MN819, flown by S/Ldr Jack Collins DFC, No. 245 (North Rhodesian) Squadron, No. 121 Wing, RAF Holmsley South, Great Britain, June 1944 RB431, flown by W/Cdr John ‘Zipp' Button DSO, DFC, No. 123 Wing, B.103 Plantlünne, Germany, April 1945 RB207, flown by F/O Bill Beatty, No. 438 (RCAF) Squadron, No. 143 (RCAF) Wing, B.150 Hustedt, Germany, May 1945 MP197, No. 245 (North Rhodesian) Squadron, No. 121 Wing, B.164 Schleswig , Germany, June 1945 SW399, flown by F/O Ronald Sweeting DFC, No. 175 Squadron, No. 121 Wing, B.164 Schleswig, Germany, July 1945 Decals are by Cartograf, which is a guarantee of good registration, sharpness and colour density, with a thin gloss carrier film cut close to the printed areas. Conclusion It's good to see this Limited Edition release, and if you've been wanting one, don't hang around as they have a habit of selling out quickly. Hasegawa plastic with Eduard aftermarket makes for an excellent combination that's likely to sell well. Highly recommended. Review sample courtesy of
-
Morning folk's,my second only build of Hasegawa's Hurricane,first of all many thank's to fellow member Mick who kindly supplied the decal's for this project which I've wanted to do for a long time and the Brit's abroad GB was the perfect excuse,Please have a look at the WIP not for the build but some great photo's from our some of our great member's and info regarding how the Irish aquired this aircraft and the colour's used etc.Thank's for looking in. https://www.britmodeller.com/forums/index.php?/topic/235039526-irish-air-corps-hurricane-mk1/&
-
 I am a big fan of Japanese twin engine bombers and the Nell in particular I think is a great looking aircraft. Build was usual Hasegawa - perfect fit and no dramas to speak of. Paints used were Vallejo Japanese set for top and Mr Color for underside. In the cabinet: With his IJN friends....
 -
My contribution to the GB will start with a pair of Italian Air Force Starfighters, a recce pod-equipped F-104G from 28o Gruppo and an F-104S from 102o Gruppo. Here's a jumble of parts from which I'll build the pair, and the eagle-eyed will spot more than enough bits for two models; with any luck I'll also attempt a third kit in the pile, an F-104J that was started many years ago. At some point in the intervening years I've attempted a refurbishment of the incomplete model, only to put it aside for a rainy day or a F-104 STGB like this... A bit of reference material - and the odd instruction sheet, in case I get confused about what goes where... Thanks for looking. Andrew.
-
Joining you with this kit. To build this option, I've already built the metal option. Here are the parts.
-
Sukhoi SU-27 Flanker (Hasegawa, 1/72)
Filbert_Wang posted a topic in Ready for Inspection - Aircraft
Hi folks, This is a kit I made from Hasegawa. Have enjoyed painting miniatures for some years but this is my first stab at a plastic kit since I was nipper and bodging together Airfix Spitfires and Panzers. I love seeing the Flanker in air displays after first seeing it in the early 90s so after some research on which kit to buy got this one from Hasegawa, and have to say thoroughly enjoyed it. Had quite a few learning moments - hopefully these will get fewer as time goes on! - Variable air pressures: Turns out trying to spray with 60psi isn't for the best, as a snapped off tail fin can attest to! - Don't leave the model in a dusty environment for a month, then do an inadequate job of cleaning it before doing the next coat. - Undercarriage/weapons etc: leave these off until the rest of the build & paint is completed so they don't get in the way (I did learn from my mistakes after re-gluing part of the undercarriage for the 5th time. Any criticism or tips very welcome! After a quick google search on the aircraft number, this is apparently the aircraft that appeared at Farnborough in 1991. -
 Hasegawas LoveLiner Series was quite popular back in the 80s and 90s and they still are today. Sadly Hasegawa has limited their range significantly with only a few airliners remain. The older ones,such as the Airbus A300 have become collector's items and some LL200 airliners change hands a rather silly prices. My stash of Hasegawa airliners grew a lot when I was able to obtain many of those from a colletor who was selling his stocks. Among those kits were a bigger number of A300s,two of which came now off the assambly line. The Thai Airways version is straight out of the box while for the Air Jamaica version I used the excellent decal set from Liveries Unlimited.The coroguard panels are from Liveries Unlimited as well. I had this sheet for many years,but I was never brave enough to use them.I was always unsure if these decals would conform without issues around all curves on the model. But to my surprise they worked superbly.Except the yellow roof,all other colors are decals The builds,like with all Hasegawa airliners,is straight forward without issues.They are nice build for in-between. Hope you like 'em
 -
Can't resist coming in with this. I started basics a while ago alongside building my Airfix P-40B at Christmas but it's well below the 25% rule. I have previous with this kit, in ended in it eventually becoming damaged and binned so I'd like to get this one done and added to my other pair of P-40s.
-
 #15/2018 Only had a Hasegawa Razorback kit in our stash. Sadly it can´t keep up with the Tamiya kit but my dad gave his best and I think it turned out ok Barracuda decals used, Eduard seatbelts, Quickboost gun barrels, EZ Line for aerial. Gunze and Tamyia acrylcics. Build thread here https://www.britmodeller.com/forums/ind ... -fs-usaaf/ The model shows the aircraft of 1st Lt Rhinert Tadych, 386th FS 365th FG, November 1944, Chièvres, Belgium. DSC_0001 by Reinhard Spreitzhofer, auf Flickr DSC_0002 by Reinhard Spreitzhofer, auf Flickr DSC_0003 by Reinhard Spreitzhofer, auf Flickr DSC_0004 by Reinhard Spreitzhofer, auf Flickr DSC_0005 by Reinhard Spreitzhofer, auf Flickr DSC_0006 by Reinhard Spreitzhofer, auf Flickr DSC_0007 by Reinhard Spreitzhofer, auf Flickr DSC_0008 by Reinhard Spreitzhofer, auf Flickr DSC_0009 by Reinhard Spreitzhofer, auf Flickr DSC_0010 by Reinhard Spreitzhofer, auf Flickr DSC_0011 by Reinhard Spreitzhofer, auf Flickr DSC_0012 by Reinhard Spreitzhofer, auf Flickr DSC_0013 by Reinhard Spreitzhofer, auf Flickr DSC_0016 by Reinhard Spreitzhofer, auf Flickr DSC_0018 by Reinhard Spreitzhofer, auf Flickr DSC_0020 by Reinhard Spreitzhofer, auf Flickr DSC_0001 by Reinhard Spreitzhofer, auf Flickr DSC_0002 by Reinhard Spreitzhofer, auf Flickr DSC_0003 by Reinhard Spreitzhofer, auf Flickr
 -
Besides the P-40 my dad started another US subject. Doing a shiny Hell Hawks machine with a Hasegawa kit and Roy Sutherland´s Barracuda decals. DSC_0005 by Reinhard Spreitzhofer, auf Flickr DSC_0006 by Reinhard Spreitzhofer, auf Flickr DSC_0007 by Reinhard Spreitzhofer, auf Flickr
-
Ahoy there, I noticed there's already 2 Phantoms build here, but no 1/72 scale. So, would like to join with my 1/72 Hasegawa F-4S Phantom. No box shot on this one since I left the original box back at home. This actually part of the "Combo" kits which I got for free from a "kit-building" contest held by Lockheed-Martin (Yup... those guys who build F-16) several months ago. So, it explains why almost all of the parts already off from the tree and several parts already partially build. Since I'm currently in almost minimum modelling settings (I'm currently in my 28 day hitch off-shore), this build will be OOB. So....Permission to come aboard...? Cheers, Mario
-
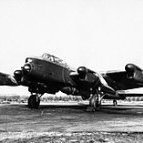
I will be building a PBJ (Patrol Bomber North American) Mitchell for the GB. If I can fine enough markings to replicate them, I will build a Mitchell from VMB-614, my Father-in-Laws group. Although they were the last unit PBJ transfer to theater in WWII, he did spend his entire flying career in the Mitchell as a radio operator/gunner. VMB-614 spent a large amount of it's time stateside working out kinks for the units already transferred to the front. As such he flew in the PBJ with all the different radar positions (4 different spots, I believe), working out the Tiny Tim delivery system and any other "odds and mods" support they needed. A link to their unit history can me found here http://vmb614.com/index.html Greg in OK
-
#13/2018 The first of a quartet of upcoming USAAF machines. This is my dad´s interpretation of the CO aircraft of 78th FS "Bushmasters", stationed on Hawaii in 1942/43. Hasegawa kit mostly oob, added brake lines and seat belts, EZ Line for the antenna wires. Camo was done with Gunze and Tamiya acrylics. Build thread here https://www.britmodeller.com/forums/ind ... -fs-usaaf/ DSC_0001 by Reinhard Spreitzhofer, auf Flickr DSC_0002 by Reinhard Spreitzhofer, auf Flickr DSC_0003 by Reinhard Spreitzhofer, auf Flickr DSC_0003 by Reinhard Spreitzhofer, auf Flickr DSC_0005 by Reinhard Spreitzhofer, auf Flickr DSC_0004 by Reinhard Spreitzhofer, auf Flickr DSC_0007 by Reinhard Spreitzhofer, auf Flickr DSC_0008 by Reinhard Spreitzhofer, auf Flickr DSC_0005 by Reinhard Spreitzhofer, auf Flickr DSC_0010 by Reinhard Spreitzhofer, auf Flickr DSC_0012 by Reinhard Spreitzhofer, auf Flickr DSC_0007 by Reinhard Spreitzhofer, auf Flickr DSC_0001 by Reinhard Spreitzhofer, auf Flickr DSC_0008 by Reinhard Spreitzhofer, auf Flickr DSC_0014 by Reinhard Spreitzhofer, auf Flickr DSC_0015 by Reinhard Spreitzhofer, auf Flickr DSC_0016 by Reinhard Spreitzhofer, auf Flickr DSC_0002 by Reinhard Spreitzhofer, auf Flickr DSC_0018 by Reinhard Spreitzhofer, auf Flickr
-
CF-104 Starfighter 1/72 - Hasegawa (OOB) Here is another of previously finished kits. Old but very nice mold from '91 with many different options and markings for JPN and CAD versions of this plane. Vallejo acrylics.
- 15 replies
-
- 42
-

-

-
- CF-104 Starfighter
- Hasegawa
- (and 1 more)
-
 Hello mates! Hello Martin! This is my model of the member AF 59-0088 of the Competition William Tell 1972, built in November 1978 in 17 days from 4. to 20. (I had a lot of time in my college days and wrote this on the surviving instruction sheet). It comes with Microscale Decals. I dropped the drop tanks, i wanted a fast Dart! There is some ageing, i brushed it up and managed to add some damage to the metal at the rr hot end Cheers, Thomas
 -
We have just received conformation that the new tool Hasegawa 1/72 F-35B is on it way to us! Stock is limited however so don't miss out! Hasegawa 1/72 F-35b
-
Hi, Dora from Hasegawa with few corrections. Fast to build, easy kit. Needs a little bit of fitting but nothing hard to deal with. Side inscription means: "Sell my clothes I'm going to heaven!". List of modifications: - pilot seat - added seatbelts and Yahu IP - modified gunsight - Quickboost exhausts - Eduard Bronze legs from Revell F-8 - gun barrels / pitot tube / bottom antenna from syringe needles - pilot motto - shortened tail wheel - wings crosses from Montex Masks WIP: https://forum.largescaleplanes.com/index.php?showtopic=74576
- 12 replies
-
- 29
-
-
-
After doing only Luftwaffe stuff since the year started, my dad finally turns to different WW2 subjects. Started a Hasegawa kit and doing the attractive snake scheme of the 78th FS. DSC_0007 by Reinhard Spreitzhofer, auf Flickr DSC_0008 by Reinhard Spreitzhofer, auf Flickr DSC_0009 by Reinhard Spreitzhofer, auf Flickr
-
 Fly is to release a 1/72nd Hawker Hurricane Mk.IIa kit - ref. 72043 Reported not to be a new tool kit but a Hasegawa repop. Source: http://www.72news.eu/2018/05/fly-hawker-hurricane-mkii-boxart.html There will be additional resin parts: wheels and a prop as well as a set of paint masks. https://www.hannants.co.uk/product/YLF72043 V.P.
 -

1:48 Bf109 G-2, Black 4, JG52 - Hasegawa
vesthepes posted a topic in Ready for Inspection - Aircraft
Hi chaps Back after a while, it's always nice to post something finally done!! 1:48 Hasegawa Bf109G-2 Black four, Kroat JG52 from the eastern front 41-45 It's not straight out of box, it includes a resin cockpit and Aeromaster decals. I did some riveting too, which is quite easy on a 109. It was a fun and quite quick build, the plan is to make room for the other newer 109s from Eduard and Tamiya, Hasegawa being a bit obsolete... but still in my opinion it still is a nice little kit. Feel free to comment- 11 replies
-
- 29
-
-
Here it is finished. I'm not too happy about the mess I made with filler around the canopy but that's a lesson learnt and something to concentrate on getting right in future. I also have a feeling due to my mix up and indecision with the decals I've put the wrong gun muzzle cover on for this particular aircraft. 😮 Oh well.
-
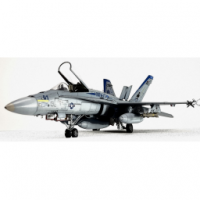
Hi, If permitted and seeing as we've got till mid July, I thought I'd build another US Navy Jet. My second submission is the Hasegawa EA-18G, Growler. I plan to add a few parts to this to spruce up an already great kit. Additions will be:- Avionix cockpit set (although I have to check the layout is the same from the F model to the G) Cutting Edge Seamless intakes. Wolfpack exhausts. Aires Wheel bays. Eduard canopy mask set. Two Bobs decals of the VAQ-132 Scorpions 'Kings of Sting', I used the other part of this set on my EA-6B Prowler build. Here's the obligatory shots of the box and bits.. I'm off now to check my reference for the cockpit and will return soon with an update and hopefully the KoS build will have begun.
-
As I will be going back to work on 17th I've pulled this out of the stash to tide me over for the remaining days of my leave. An old kit, the instructions say 1984 but probably older, a nice simple build (hopefully) so fits the bill for a few days relaxation. My only concern is the decals which look a bit ropey. If the worst comes to the worst and the finished model is worth it I'll get this set to replace them, https://www.hannants.co.uk/product/MPEC72019
-
Hello all ... So Im going to Throw my hat in the Ring for this build. I have a 2nd hand Revell A-6E Intruder from a friend. It will be a straight OOB build with whatever i can scratch together for the cockpit. I will edit and add the sprue shots later tonight when i can. I will build it as an early “E” type in 1972. Markings will be VA-65 Tigers. It will look like this. The A-6 photo’s are from Tailspin turtles excellent blog about the Intruder. Thanks for allowing me to repost these. http://tailspintopics.blogspot.com/2015/09/grumman-6a-vs-6e-intruder.html I only have the standard markings with the kit. It doesn't come with the orange-red chevrons and tail codes of VA-65. I am planning on painting these using home made masks. There was an old Microscale sheet in 1/48 scale from many years ago. I seriously doubt any even exist now, and AOA is actually supposed to be releasing them in 1/32 scale. Now if AOA downsizes the sheet in the near future then I will purchase them.
-
I'm joining the group a little late, but hopefully I'll have enough time to finish. I've chosen to model the NASA F-104N chase plane flown by Joe Walker, who was one of my hero test pilots (along with Scott Crossfield) when I was growing up in the late 50s and early 60s. Sadly, Joe lost his life in the mid-air collision with the XB-70 bomber in 1966. He was only 45 and left a wife and four daughters. NASA originally had three F-104 chase planes with tail numbers 011, 012, and 013. These planes were characterized by a natural metal and Day-Glo orange paint. However, at the time of the accident, 013 had been designated 813 as can be seen in this photo: This is the configuration that I'll be modelling. I found this nice profile artwork on the net: And a very sad, poignant reminder of the dangers faced by men who reach for the stars: For this project, I'll use the Italeri F-104G kit (the F-104N designation was used for the F-104G aircraft delivered to NASA). It looks like a nice, simple kit, which is just what I need after my F-111B conversion. I won't restrict myself to out-of-the-box, as I have some extra goodies - a resin cockpit and photoetch from CMK (which also includes an open radome and radar gear, not sure if I'll add that), nicely done resin tyres from RESkit, and what looks like a superb decal sheet from Rocketeer: The stickers don't have specific markings for 813, but this can be made from the numbers that are there (812 & 013). So that's the project, and as soon as I get my workbench cleaned up I'll have a go at that cockpit. I plan on finishing up the Curtiss XF15C-1 that I started a while ago too, and I think that will be good to fill in the time when the paint is drying on the F-104. Cheers, Bill
- 78 replies
-
- 13
-