Search the Community
Showing results for tags 'hasegawa'.
-
Second one completed of 2019 is the Focke-Wulf Fw190 A5 from Hasegawa, this again (same as the Bf-109 G10) is a great kit, with no issues at all. Painted with Mr Colour paints and thinners (amazing products in my opinion). My choice of aircraft was quite easy as the Stab/Jagd-Erganzungsgruppe aircraft of Ost, Maj Herman Graf was so colourful and different, this was based in France 1943. If anyone can enlighten me on the markings, id be very grateful of the knowledge.
-
This is a Hasegawa 1/32 Bf-109 G-10 and it proved a very easy build, no major fit issues at all (a nice change). I have painted it using MrColour paints to represent an aircraft from 2./JG300 Feldwebel Ederhard Gzik based in Germany, October 1944. I added some photo etch seat belt from Eduard to set the cockpit off, I hope you like 'Rita', I am quite happy with the results.
-
Hi guys. I want to show you my first car model for 5 years, so please be kind with me😉. It´s the Hasagawa kit of the 1971 Safari Ralley Fairlady 240Z. Daniel
-
And another of my dad´s oldies goes into storage. Hasegawa kit built years ago. DSC_0001 by Reinhard Spreitzhofer, auf Flickr DSC_0002 by Reinhard Spreitzhofer, auf Flickr DSC_0003 by Reinhard Spreitzhofer, auf Flickr DSC_0004 by Reinhard Spreitzhofer, auf Flickr DSC_0005 by Reinhard Spreitzhofer, auf Flickr DSC_0006 by Reinhard Spreitzhofer, auf Flickr DSC_0007 by Reinhard Spreitzhofer, auf Flickr DSC_0008 by Reinhard Spreitzhofer, auf Flickr DSC_0009 by Reinhard Spreitzhofer, auf Flickr DSC_0010 by Reinhard Spreitzhofer, auf Flickr DSC_0011 by Reinhard Spreitzhofer, auf Flickr DSC_0012 by Reinhard Spreitzhofer, auf Flickr DSC_0013 by Reinhard Spreitzhofer, auf Flickr DSC_0014 by Reinhard Spreitzhofer, auf Flickr DSC_0015 by Reinhard Spreitzhofer, auf Flickr DSC_0016 by Reinhard Spreitzhofer, auf Flickr DSC_0017 by Reinhard Spreitzhofer, auf Flickr DSC_0018 by Reinhard Spreitzhofer, auf Flickr DSC_0001 by Reinhard Spreitzhofer, auf Flickr
-
Hasegawa pretty much released this little gemstone of a tiddler at the same time that British Airways retired their Trident fleet and took delivery of their first 737-236. The kit carries the same registration as BA's first (G-BGDA) which was delivered by Boeing in December 1981. That makes the kit 38 years old and like most of that age, the decals have had to be re-lacquered. The port side of the fuselage had lost its shape in storage and what looks a simple task, proved very difficult to join and make into a decent continuous profiled tube. Having just completed my 1/200 Hasegawa Negus L1011, I felt it an appropriate time to get this other Negus livery kit put together. That's as far as I have got for the moment. This kit make the Airfix 1/72 BE2 kit look big !
- 12 replies
-
- 7
-

-
- love liner200
- hasegawa
-
(and 1 more)
Tagged with:
-
Hi, Here my Hasegawa kit built with help of Rhino seamless intake, Aires wheel wells, Eduard etch and New Ware canopy masks. Additional weapons for SAM suppression is from Hasegawa's weapon set. Thanks for looking!
- 11 replies
-
- 33
-

-
#7/2019 Here´s my dad´s next "roundeled" 109. Hasegawa kit with Rising Decals, Eduard seatbelts, EZ Line for the antenna wires. Once again shortened the Hasegawa main legs for about 2mm. Gunze and Tamiya acrylics used, AML masks for the Erla zig-zag pattern. Build thread here https://www.britmodeller.com/forums/index.php?/topic/235048259-crossdresser148-messerschmitt-bf109g-4-1-sqn-saaf/ The aircraft was originally assigned to 2.(H)/14, Aufklärungsgruppe 14. Looking at pics of the aircraft we couldn´t tell if it was fitted with a camera or not, my dad built it without one. The plane was captured in July 1943 on Sicily by 1 Sqn SAAF, tested and later most probably scrapped. DSC_0001 by Reinhard Spreitzhofer, auf Flickr DSC_0001 by Reinhard Spreitzhofer, auf Flickr DSC_0002 by Reinhard Spreitzhofer, auf Flickr DSC_0003 by Reinhard Spreitzhofer, auf Flickr DSC_0004 by Reinhard Spreitzhofer, auf Flickr DSC_0005 by Reinhard Spreitzhofer, auf Flickr DSC_0006 by Reinhard Spreitzhofer, auf Flickr DSC_0007 by Reinhard Spreitzhofer, auf Flickr DSC_0008 by Reinhard Spreitzhofer, auf Flickr DSC_0009 by Reinhard Spreitzhofer, auf Flickr DSC_0010 by Reinhard Spreitzhofer, auf Flickr DSC_0011 by Reinhard Spreitzhofer, auf Flickr DSC_0012 by Reinhard Spreitzhofer, auf Flickr DSC_0013 by Reinhard Spreitzhofer, auf Flickr DSC_0014 by Reinhard Spreitzhofer, auf Flickr DSC_0016 by Reinhard Spreitzhofer, auf Flickr DSC_0018 by Reinhard Spreitzhofer, auf Flickr DSC_0020 by Reinhard Spreitzhofer, auf Flickr DSC_0002 by Reinhard Spreitzhofer, auf Flickr DSC_0003 by Reinhard Spreitzhofer, auf Flickr
-
#6/2019 And the next bird rolls out from my dad´s factory. Hasegawa kit with Rising Decals, plastic rods and lead wire for the brake lines, Eduard seatbelts, EZ Line for antenna wires, exhaust flame dampers are PE parts from the Eduard G-10 kit, Gunze, Tamiya, MRP and AK paints used. Shortened the main gear legs for about 2mm to make the aircraft look more realistic. Build thread here https://www.britmodeller.com/forums/index.php?/topic/235048840-crossdresser148-messerschmitt-bf109g-10-regensburg-401-sqn-raf/ The aircraft was a former NJG11 bird and was captured by the Canadians of 401 Sqn RCAF in Faßberg/Germany in April 1945. The fate of this aircraft is unknown. 401 Sqn RCAF was disbanded on July 3rd 1945. DSC_0001 by Reinhard Spreitzhofer, auf Flickr DSC_0002 by Reinhard Spreitzhofer, auf Flickr DSC_0003 by Reinhard Spreitzhofer, auf Flickr DSC_0004 by Reinhard Spreitzhofer, auf Flickr DSC_0005 by Reinhard Spreitzhofer, auf Flickr DSC_0006 by Reinhard Spreitzhofer, auf Flickr DSC_0007 by Reinhard Spreitzhofer, auf Flickr DSC_0008 by Reinhard Spreitzhofer, auf Flickr DSC_0009 by Reinhard Spreitzhofer, auf Flickr DSC_0010 by Reinhard Spreitzhofer, auf Flickr DSC_0011 by Reinhard Spreitzhofer, auf Flickr DSC_0012 by Reinhard Spreitzhofer, auf Flickr DSC_0013 by Reinhard Spreitzhofer, auf Flickr DSC_0014 by Reinhard Spreitzhofer, auf Flickr DSC_0015 by Reinhard Spreitzhofer, auf Flickr DSC_0016 by Reinhard Spreitzhofer, auf Flickr DSC_0017 by Reinhard Spreitzhofer, auf Flickr DSC_0018 by Reinhard Spreitzhofer, auf Flickr DSC_0019 by Reinhard Spreitzhofer, auf Flickr DSC_0020 by Reinhard Spreitzhofer, auf Flickr DSC_0021 by Reinhard Spreitzhofer, auf Flickr
-
Hello All, This one has also been on the 'shelf of doom' for some time. Probably about 4 or 5 years... It's the Hasegawa Ferrari 348 tb. It'll go well with the other Ferraris that I have been working on. What with the 308 having been finished, and the 288 GTO nearly complete, I thought that I would clear the decks of old builds and add this one to the list of 'in progress'. The box. A pretty car, if not quite so beautiful as the 308 & 288... The sprues. It doesn't look a lot, but the engine is already built and almost ready to be put aside. ... and, the instructions. I'm hoping that this Hasegawa kit will be a bit more successful than a couple of others I tried... I tried to construct the 1/24th Ferrari F189, but it went completely pear-shaped on me and the body work would not fit. I binned it! I also tried the 1/24th Jaguar XJR8 (or was it the XJR9?, I can't remember). That was going well, then I managed to split the rather large wind-screen! That ended up as spare parts... On the other hand, the 1/32nd F-16 seems to going rather better. Anyway, more pictures... The body has been painted with Halfords acrylic spray paint. I can't remember the colour. But I don't need any more (unless I screw up with the cement!). If I do, I'm pretty certain that I can mix up the right cocktail of (Tamiya) colours to get a near enough match. The engine, not quite fully assembled. Again, I have added ignition leads. No engine looks right without ignition leads, except a Diesel. Actually, my wife's Meriva is a petrol, and the ignition leads are nowhere to be seen. Each spark-plug is fed by it's own coil in an ignition block that sits on top of them. Anyway, utterly irrelevant in this case, as the 348 has separate leads to each plug, and they go ... somewhere! (More on that later!) The wheels. Matt chrome seems to work on car kits. I always thing the the high-chrome finish looks too toy-like on 1/24th scale! (Actually, I built the Revell 1/8th scale Jag, and the chrome on that looked too bright and toy-like!) The windows, door-mirrors and the engine cover. That's it for the moment. Thanks for looking, Alan.
-
Hello! Here is Hasegawa's 1:72 Focke-Wulf Fw 190D-9 Black 4, of III/JG54, assigned to Commando Nowotony, Luftwaffe, at Acmeer base, Germany, in 1944 which I built back in 2001. This is the old 1970s Hasegawa kit and I built it OOB. It was fully painted by brush and only the varnishes were airbrushed. Looking at it now, I'm not too certain about the tail band as it doesn't conform to any of the known ones (or any I know of). Can anyone shed some light or did Hasegawa get something wrong? All comments are welcome and thanks for looking Miguel
-
I think I want to join in with this; 20181213_173634 by mario binsar 20181213_173644 by mario binsar I took this kit with me when I went on board my current hitch four weeks ago, but haven't got the mojo to start building it... Until I saw this GB. My plan is to scribe it and build it with Twobobs' Santa Tracker decal (well it's a holiday season now, isn't it?). So, premisson to come aboard, gents? Cheers, Mario
-
Because there has always a 109 to be in work, my dad started already a new one after the Czech Avia. Gonna be a G-4 that has been captured by the SAAF on Sicily in 1943. DSC_0009 by Reinhard Spreitzhofer, auf Flickr DSC_0012 by Reinhard Spreitzhofer, auf Flickr DSC_0013 by Reinhard Spreitzhofer, auf Flickr DSC_0010 by Reinhard Spreitzhofer, auf Flickr
-
As I already mentioned in the past, my dad wants to get rid of all the old Hasegawa 109s in our stash by building them, only a few are left now. He decided to use once again the Rising Decals sheet and build, besides the SAAF G-4, a former G-10 of NJG11 that was captured by Canadians of 401 Sqn RAF in April 1945. DSC_0005 by Reinhard Spreitzhofer, auf Flickr DSC_0006 by Reinhard Spreitzhofer, auf Flickr DSC_0007 by Reinhard Spreitzhofer, auf Flickr DSC_0008 by Reinhard Spreitzhofer, auf Flickr
-
Hello, As promised over on the build thread HERE below are the pictures of the old 1/72 Hasegawa boxing of the F-110A (Navy F-4B) Spectre, one of the first two loaned by the Navy to the Air Force for evaluation: I was originally going to make up an F-110A using an old Fujimi F-4B and homemade decals, but since I tracked this kit down, I just took the easy way out. This is an old kit, worth building, but the directions are attrocious, as far as best build order of lots of small details. The build article pointed to above shows several decal and paint marking details probably not readily available to reviewers and builders of this kit years ago. Thanks for looking, Ed
-
Hello everyone! Back for another build, but this time quite unintentional, and sort of comically sad, at least in the beginning. After quite a long time looking, I finely found the last missing piece of my Col. George E. Laven collection, the Hasegawa F-110A boxing of it's venerable F-4, released in many flavors over a few years. This particular variant had looked to be scare as hen's teeth, but I tracked one down after all. I never intended to do a build thread on this, but just to add it to the Laven collection. As soon as it came in, I jumped right to it and and started slathering the glue everywhere, riding off wildly in all directions --- and that was my mistake... Just for reference, this is the kit in question, this one in God's Own One True Scale. (There is another boxing, but because children may lurk on this website, I shall NOT speak of it...): As stated above, I jumped right in, starting with the cockpit. No big deal here, as I couldn't find an aftermarket cockpit in this scale, I built it pretty much (but not quite) stock from the box, using the decals for instruments, etc, as there was no raised detail of any kind. I glued together the front gear bay, and the cockpit tub which sits on atop the other. There were no locating marks, but there was a step, indicating how far forward the cockpit went onto the gear bay. I cruised right along, almost in a Snap-Tite sort of way, until suddenly, I noticed something was seriously wrong: You will notice in the above photo that when the front of the lower wing is nestled correctly against the aircraft nose ("A"), that the is a really serious offset at the rear of the wing ("B"). "What The Flying Flapjacks!", I exclaimed (or words to that effect), "there are some serious errors in this kit"! I thought it odd that no other builder or reviewers from yesteryear had mentioned this fault, but I started to investigate further: Note the distance discrepancies between "A" and "B", side-to-side. Well, I thought finally, if I cut out a little bit where shown at "C", I can glue the front, and when dry, skew the rear of the lower wing over to line up: Well, THAT didn't work too well, referencing "A" and "B" above, but it did point out my other boo-boo, where I glued the lower base part of the rear instrument panel in backwards, which the necessitated shaving a little off the rear edge of the ledge between the seats (arrow) -- defiantly my mistake, but the kit's instructions are not really that informative either, as we shall see later on. Anyway, using more liquid glue (in my case Weld-On #3), I dissolved the glue joint, taking things apart in the reverse order of how I;d built them. When I got the fuse separated from the nose, all became clear: In about the very first step, I'd glued the cockpit floor to the front gear bay against the step, but had allowed the rear of the cockpit to be mounted slightly askew, rather than parallel to, the gear bay. 1.5 mm off here, and suddenly the fuselage is mis-aligned 6 or 8mm at the rear of the wing! (I forgot what what the "N" above was supposed to represent, but just note the side-to-side alignment). As I said earlier, there are NO locating tabs or pins for these parts. Whether this is true for just this kit or all Hasegawa F-4 Phantoms, I don't know, as this is the first I've ever built. All can say I can say is anyone building one needs to assure that the gar bay, lower front fuselage and cockpit tub are all aligned the same, and then you won't look like a dufus like me!! Also, on the dufus theme, I forgot to take a picture of the offending parts for you---Doh! Anyway, at this point I decided to do the build thread, not only to warn others about doing really dumb things, but also to correct what I have found to be incorrect on previous builds and reviews of this model. This is NOT because the builders or reviewers were slackers --- it;s just that far more resources are available now on the internet than there were in 2004 or so. So, I'll share what I THINK I've learned, and if you have a differing opinion, please jump in -- I have VERY thick skin -- just ask my wife....kids....neighbors....dog.... Anyway come along if you dare, and not only will I show you the miraculously finessed (and better aligned) model, but I will deign to Share The Tribal Wisdom (or perhaps just my opinion) with you. Until next time, Ed
-
Hello all, While I've a few Grumman's to build and a Tomcat was really appealing, I never thought I would get it done in time so going for something a bit simpler. You can read more about this design here. Hasegawa Grumman X-29_box by Dermot Moriarty, on Flickr Hasegawa Grumman X-29_contents_1 by Dermot Moriarty, on Flickr Just a couple of small sprues, a clear sprue and the decals and that's it. Hasegawa Grumman X-29_contents_2 by Dermot Moriarty, on Flickr Going OOB on this and trying to get a clean, tidy build. And getting ready for the inevitable "aren't-the-wings-on-backwards" gags 🙄😂 Cheers and good luck with your builds! Dermot
-
I introduced myself over on the new members area earlier so thought I'd get my first WIP thread going. I hadn't done any scale modelling during 2018 and with a some time off over the festive break decided I'd have a go at a Christmas present from 2017. I thought it would be a nice easy build that would last just over 10 days but the top and bottom didn't line up so it's been a good amount of filling and sanding to get to this point. The silver lining is it's done the job and got me well and truly back into modelling. I'm going to do the Tomcatters livery as I've seen the Jolly Rogers done a few times. I'd appreciate any feedback, good or bad. 🙂 Main fuzz Other Parts Complete workbench
-
Out of the box, including decals. Don't know why the Japan Ground Self-Defense Force chose to mimic the 1943 USN camo scheme, but they did.
-
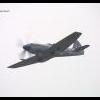
1/48. Some kind of cat. A Hellcat, yes, that's what it'll be.
gingerbob posted a topic in Grumman GB
Place-holder. Probably Wildcat, Hellcat, or Bearcat... Oh, but what about that TF-9J? [Edit: Probably too ambitious for me now, but we'll see...] -
Evening all, here is my entry the A-6E Intruder. I picked this up fairly cheap and thought it would look good in my 1/72 US Navy jets.........however on closer inspection I have decided to turn it into a bit of an experiment to share in this GB. The kit doesn’t seem great and has some large raised panel lines, so first up I’ll try removing and rescribing those🤔😦. Hopefully then I’ll get a chance to fire up the airbrush and try that out too and drift away from the faithful hairy sticks. Hopefully a fun adventure whatever the outcome with a audience full of good advice for two new techniques. Here are the pics...watch this space. Plenty to clean up before the rescribing starts, here is one of many examples may have to fish out “Flight of the Intruder” and a bottle of red for a few evenings of sanding and scribing. Cheers for now Graham
-
Hello all, Going to attempt this in the GB timeframe, though i'll need to complete my Typhoon FGR4 for the RAF GB first, but here it is; 1/48 Hasegawa F/A-18E, BuNo 168912 of VFA-87 'Golden Warriors' during their Operation Inherent Resolve cruise in 2017 (this squadron flew alongside VFA-213). This jet shot down a Syrian Su-22 on the 18th June 2017. Kit: Extras: I'll be using an Aires cockpit (in the bag), Steel Beach FOD covers, Pavla seat, Quickboost ECS pipes, Furball decals and 2x GBU-32s from an Academy F-22. Here's the decal option: Can't find many images of the jet itself during the cruise, but it'll be armed with 2x AIM-9x, 2x AIM-120, 2x GBU-32 and 3x GBU-38. It'll be another heavily weathered jet too Not the jet in question, but here's one from the same squadron with the load out i'm going for (minus one GBU-32): Dave
-
I started this last week but was too lazy to post as due to the Christmas excesses: Its a Telford kit swap purchase which I picked up mainly for the old style Eduard masks it came with. I also realised I have never built a Hasegawa kit and as these 190Ds are highly thought of, why not? It was all there but the decals have seen much better days and are unusable as the carrier film has cracked along with the inks. Thank you fellow IPMS member for not mentioning that on the box... It doesn't bother me as i have alternative markings (replete with stencils) on this Skys sheet and being printed by Cartograf, the decaling should be a joy as per my FW190A. For this, I'll be doing "White 1, on the bottom right as it has a snazzy red spinner. I like red spinners. First job, HG are not fans of the gear up option so the redundant wheels from my Airfix 190A were duly sanded to fit the shallow wells. The gear doors fit beautifully and are exquisitely thin: Now off to sort out that cockpit as I've stalled on my Spitfire racer due to some unforeseen damage. Toodle pip chaps, Anil
-
Here's my Hasegawa 1:72 Supermarine Spitfire HF.VII which I built back in 2002. Sadly, Hasegawa only supplied decals for this machine, MD124, RAF, without any unit markings, the other option being an HF.VIII in desert scheme. It was built mostly OOB and I decided to add the slipper tank but painted grey as I had seen in an illustration of another Mk.VII just to give some interest. The main scheme was airbrushed. Thanks for looking Miguel
-
Hallo again I will start an F-4E Kurnas in 1/48 from Hasegawa. The kit as shown in the photo. My aircraft will be F-4E Kurnas from Hammer squadron #134. Carrying the Popeye air/surface guided missile with data link pod. The a/c will have Hebrew stenciling. It is from the year 1987/1988. My detail sets are very accurate and I hope that this kit will be despite the age still worth to build. By the way: You get soon access to walk around also from the Kurnas If you built already this kit with the Aires cockpit, I would really enjoy to listen to your experience! Happy modelling
-
My entry will be a Hasegawa EA-6B. I have an Eduard? cockpit for an ICAP II bird and Wolfpack folded wing set for the build. Decals will bee from a Cutting Edge sheet for a Marine jet, final scheme to be decided.






.thumb.jpg.0bc57cb4bb3dec8e063e1951db6690c2.jpg)
