Search the Community
Showing results for tags 'harrier'.
-
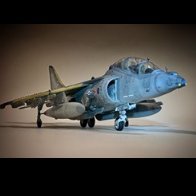
Here's my attempt at the 1/72 Airfix GR.9A (recent tooling). I rather enjoyed building this one! For the most part it went together very nicely indeed and there's a superb range of options and extra parts in the kit - for example, 65% or 100% LERX, different moulded parts for flaps/ailerons up or down, air dam open or closed etc etc. In fact the only slightly odd omission was the main gear doors, which are either closed for flight or open (with gear down) - neither is appropriate to a parked Harrier so I had to tweak the closed ones a bit. I used a bit of aftermarket stuff: Pavla seat and cockpit, Brassin Paveway LGBs and a Sniper ATP pod [purists will spot they're not proper Paveway IVs as I'm still waiting for my set of them to arrive], Eduard 'Remove Before Flight' tags and the chocks are etched Flightline ones. Decals are the excellent 'Retirement Harriers' set by Xtradecal - enough stencils for at least two kits, plus markings for the entire farewell flight! I did stick with the kit nozzles, thinking I could get rid of the join lines, but I think I'll go back to the Pavla resin ones next time - those internal vanes are impossible to fix! Paints were Hataka Red Line acrylic (Dark Sea Grey over Dark Camouflage Grey) with a bit of pre- and post-shading, then a coat of Winsor and Newton Galeria gloss varnish. Weathering was with oils/white spirit and Flory's clay wash before a coat of W&N matt varnish. Thanks for taking a look, I know Harriers seem to be one of the most modelled aircraft around so there's nothing new here!!!
- 42 replies
-
- 76
-

-

-

Eduard AV-8A Update Sets (for Kinetic) 1:48
Mike posted a topic in Aftermarket (updates/conversions)
AV-8A Update Sets (for Kinetic) 1:48 Eduard Kinetic have made a lot of 1:48 modellers very happy by releasing a slew of harrier kits of various versions, including the earliest Harrier to see service with the Americans, under the AV-8A designation. Eduard's new range of sets are here to improve on the kit detail in the usual modular manner. Get what you want for the areas you want to be more of a focal point. As usual with Eduard's Photo-Etch (PE) and Mask sets, they arrive in a flat resealable package, with a white backing card protecting the contents and the instructions that are sandwiched between. Upgrade Set Early (491164) Two frets are included, one nickel plated and pre-painted, the other in bare brass, plus a small piece of clear acetate sheet. A complete set of new layered instrument panels and side consoles are the primary parts on the painted set, with HUD and acetate glazing; new rudder pedals; ejection seat details; coaming instrumentation and canopy internal structure also supplied. There are also pylon mating surface detail skins; wheel bay inserts; airbrake skins; blast deflector plates for the rear exhausts; extra panels and skins for the landing gear doors; new oleo scissor-links; raised panels over the engine “lid”, and a template to assist you with accurate placement of the raft of new vortex generators on the upper wing surfaces. Zoom! Set (FE1164) This set contains a reduced subset of the interior, namely the pre-painted parts that are used to improve on the main aspects of the cockpit, as seen above. Whatever your motivations for wanting this set, it provides a welcome boost to detail, without being concerned with the structural elements. Seatbelts STEEL Early (FE1166) These belts are Photo-Etch (PE) steel, and because of their strength they can be etched from thinner material, which improves realism and flexibility in one sitting. Coupled with the new painting method that adds perceived extra depth to the buckles and other furniture by shading, they are more realistic looking and will drape better than regular brass PE. As well as a set of crew belts for the initial Martin-Baker seat, you also get a set of the pull-handle between the pilot's knees that gets him out of there in case of an emergency. Upgrade Set Late (491165) Two frets are included almost identical for the early version, one nickel plated and pre-painted, the other in bare brass, plus a small piece of clear acetate sheet. A complete set of new and subtly different layered instrument panels and side consoles are the primary parts on the painted set, with HUD and acetate glazing; new rudder pedals; ejection seat details; coaming instrumentation and canopy internal structure also supplied. There are also pylon mating surface detail skins; wheel bay inserts; airbrake skins; blast deflector plates for the rear exhausts; extra panels and skins for the landing gear doors; new oleo scissor-links; raised panels over the engine “lid”, and a template to assist you with accurate placement of the raft of new vortex generators on the upper wing surfaces. Zoom! Set (FE1165) This set contains a reduced subset of the interior, namely the pre-painted parts that are used to improve on the main aspects of the cockpit, as seen above. Whatever your motivations for wanting this set, it provides a welcome boost to detail, without being concerned with the structural elements. Seatbelts STEEL Late (FE1167) These belts are Photo-Etch (PE) steel, and because of their strength they can be etched from thinner material, which improves realism and flexibility in one sitting. Coupled with the new painting method that adds perceived extra depth to the buckles and other furniture by shading, they are more realistic looking and will drape better than regular brass PE. As well as a set of more simplified crew belts for the later Stencel SEU-3/A seat, you also get a set of the pull-handle between the pilot's knees and over the headbox that gets him out of there in case of an emergency. Masks (EX765) Supplied on a sheet of yellow kabuki tape, these pre-cut masks supply you with a full set of masks for the canopy, with compound curved handled by using frame hugging masks, while the highly curved gaps are in-filled with either liquid mask or offcuts from the background tape. In addition, you get a set of hub/tyre masks for all the wheels (including the out-riggers), allowing you to cut the demarcation perfectly with little effort. Masks Tface (EX766) Supplied on a sheet of yellow kabuki tape, these pre-cut masks supply you with everything above, but also give you another set of canopy masks tailored to fit the interior of the glazing so that you can paint the interior and give your model that extra bit of realism. Review sample courtesy of -
Having recently finished the Mig-29, I was looking for something different and a little bigger. After a lot of deliberation I settled on the Trumpeter 1:35 Mi-17 and promptly ordered one before Easter...By Friday all I'd heard was that the order would be shipped when it was complete, which I took to mean they didn't actually have it in stock! The weekend was looking dire weather wise so I was going to go stir crazy with nothing to work on🤨 A lot of model shops shut at 1300 on Saturdays in Germany, but there's a shop in our nearest city(Trier) so having persuaded the missus we needed a couple of hours out we headed over. They're basically a toy shop but do have a reasonable modelling and railway section. I was only really looking for something to keep me busy for a few days and their stock mainly consists of Revell mainstream kits and some Tamiya 1:35 tanks etc. As I'm on a budget due to no guaranteed summer work and very little winter work, 150€ for some of the big kits was a bit much, and even 50-60€ seemed a bit steep for a fill-in project. I then noticed a huge box with a Harrier on it for 30€...A quick look on Scalemates told me it was a very old kit (1972!!) so it was going to be a challenge, but it was cheap😜 You'd think I'd have learnt my lesson with the MiG, but no...🙃 Anyway I bought it, looked in the box and a few swear words passed my lips as I saw how much detail there wasn't...I then started doing some research and thought I might be able to do something with it, after all it was cheap...
-
I've had Hasegawa's 1/48 Harrier GR.7 in the stash for a good few years now, just looking at me and wondering when it will get started. For an aircraft that I - as well as a lot of us on here I'm sure - have such an affection for, I feel bad that I haven't gotten around to it sooner. I feel one of the reasons I haven't started this kit sooner is that I had plans to throw lots of goodies at it in an attempt to get it looking as good as I can manage. I've been collecting AM bits and bobs for a while now, and feel that I have everything now that I need to build an a/c that I will be happy with. I saw a picture of ZG511 in-theater with lots of bits hanging off her pylons, and figured that I'd like to do a fully kitted out Harrier. So the plan is to try and depict her as she was during her last det. to Kandahar in 2009 - loaded with EPW IV, LAU-5003/CRV-7, and with TERMA/DJRP/SNIPER pods underneath. I've been collecting reference materials for longer than I've had the kit, so hopefully I will have half a clue as to what it's supposed to look like at the end... Although part of the reasoning behind doing a WIP was to feed off the wealth of knowledge on here and hopefully identify mistakes and issues before they can't be fixed! Any any recommendations for impulse purchases - ahem - vital reference materials are greatly appreciated! I'll be kicking off with the cockpit to start. I have the Aires GR.7 cockpit - one question before I do start though; I know the Aires cockpit has a couple of issues, especially with the bangseat rails and the actual seat being undersized. I plan to use the Eduard Brassin MB Mk.12 which I prefer the look of over the Aires seat. However the rear bulkhead doesn't much resemble pictures of the real thing at all (minimum effort on the visible bits such as the ground power panel/omission of cabin pressurisation valve etc.), and to be honest, compared to other resin cockpits of theirs that I've used, it does leave a lot to be desired. Has anybody used/compared the CMK offering? Is it any better than the Aires kit, or is the Aires cockpit as good as it gets, and a bit of scratchbuilding here and there will get me through? Cheers, Daryl.
- 37 replies
-
- 10
-

-
I think this might be the next project to start. Not an easy kit to get hold of these days - managed to find it on ebay a couple of years back. Heard some comments in the past about some tricky parts fit? I've also bought aftermarket intakes / nozzles which seems to be this big issue with the Sword kit. It's going to have to be a rattle can paint finish too, so let's see how that works out!!! Will try to update some pics through the build.
-
XV778 was delivered to the RAF in April 1970 as a GR1. It was converted to GR3 standard in the early 70s when it received the updated Mk103 Pegasus engine, before receiving the laser nose and tail RWR by 1977. This Harrier served in Belize and later took part in exercises in Norway during its time with 1 Sqn at Wittering. The Kinetic kit is absolutely fantastic, fitting together well and with great detail and superb decals. I’ve depicted the Harrier as an early GR3 pre laser nose. Huge thanks to @NG899 for the brilliant and very helpful extra info on the kit and the Harrier in general. All comments welcome!
- 20 replies
-
- 42
-

-
I couldn’t wait to start this brilliant new Harrier kit that my dad very kindly bought for my birthday recently! Not only that but he included a set of extra decals too. The kit decals are superb. I like how the fuselage roundels include notches cut out for the intake doors. I’m actually not sure what option to make yet. My favourite Harrier markings are 233 OCU wraparound camo, but I already have the Airfix one in those colours and will be making my Kinetic T4 the same. So I’m thinking No. 1 Sqn for this model. But will it be a pointed nose or laser, wraparound or light grey underneath? I need to decide before starting as there’s lots of optional parts. There’s a lot of plastic. Quite a few pieces are stores I won’t use, and you get two upper wings and various other bits for Sea Harriers/AV-8s that I won’t need. Also included is this little metal etching set. Paints ready!
-
Model Aircraft Extra - Building the Harrier (978191610541) MA Publications There can be no doubt the Harrier is one of Britain's iconic aircraft. The ability to take off and land vertically made it in a league of its own until the new F-35 arrived. While it was used by the Royal Air Force, Royal Navy, US Marine Corps, The Spanish Navy, Indian Navy; and the Italian Navy. It is most famous for it's participation in the Falklands war. As well as this Harriers went on to serve in the Gulf War, over Bosnia, Libya and in Afghanistan. This new magazine style publication from MA publication give us a look at the harrier and 13 builds across the two most popular scales of 1/72 & 1/48. Inter spaced between the builds are articles on the different types of Harrier and their use in the different conflicts they have taken part in; containing many photos which will be of interest, and use to the modeller. There are also 2 pages of 1:72 plans towards the middle of the book. The builds are; First Generation Duo - 1:48 Mongram AV-8A Artic Harrier - 1:48 Eduard Gr.7/9 SHAR School - 1:48 Kinetic T.2/T.4 So Long SHAR - 1:48 Kinetic FA2 Vertical Reality - 1:48 Kinetic FA2 VSTOL Radar Raider - 1:48 Hasegawa AV-8B Falkland Fighter - 1:48 Kinetic FRS.1 Artic Training - 1:48 Kinetic T.2/T.4 Marines Jumper - 1:72 Airfix AV-8A Hover and Out - 1:48 Kinetic FA2 Spanish Matador - 1:72 Airfix GR.1 Harrier in Helmond - 1:72 Airfix GR.7A/GR.9A Step-by-Step SHAR- 1:48 Airfix FA2 One of the good things about this is that is is not a "sponsored" publication. Different kits are used which are readily available, reasonably priced; and in terms of the older kits it is good to see them not forgotten. The different modellers also use difference techniques and products on the various models so its good to be able to see them, and contrast their use. The reader will then be able to try a couple and see what works for them, rather than have the whole publication dedicated to a particular product or technique. Conclusion This is a well put together publication for the modeller thinking of a building a Harrier. There is a good range of kits and techniques on show, as well as scale plans, and photos of the real thing. Highly recommended . Review sample courtesy of
-
Hello fellas! As I was reading the book of Sq. Ld. Jerry Pook and learning more about the almighty mud movers actions during the 'South Atlantic' conflict in 1982, Kinetic released it's long-waited 1/48 Harrier GR.3, so I have no other choice than proceed!! Hahaha... A very very enjoyable kit to build. Definitely -in my opinion- several steps forward on comparison with their previous Harriers. About the ordnance, and discarding the Sidewinders, the RN rocket pods on the outboards pylon and a CBU BL-755 on central pylon appears to be more accurate with some of the Falklands actions. A flight of Harrier GR.3 with rockets made a decisive and fatal blast on the last push on the ground battle for Goose Green. No aftermarkets where used on this kit, but there are only 2 variants to it: the addition of a 1/48 Tamiya pilot (from an old A-10) and a slightly customization of the ADEN 30 mm cannon pods drilling the vent holes. So, enough talking, let the photos show you my tribute to this legend. Next one will be the F-5 Tiger III of the Chilean Air Force (FACH). Best wishes from Chile and happy modelling to all! Cris
- 17 replies
-
- 41
-

-
- Harrier
- Falklands War
-
(and 1 more)
Tagged with:
-
Somewhere in the South Atlantic May 1982... This is my 1/350 build of three of the ships in the RNs Falklands task force, there are two scratch builds, and one minor conversion, plus huge amounts of detail on all three. I don't want to think about the amount of time I've spent over the past 5 1/2 years... Starting with the complete scene: From left to right: HMS Broadsword, HMS Hermes and HMS Yarmouth HMS Hermes and Yarmouth are both scratch built from plans Weathering on both was closely based on photos from the time to get the weather worn look of two of the oldest ships in the fleet. Many of the details are from WEM and Atlantic Models etched brass sets, but I also learnt to etch at home for unique pieces including H's mast, crane, davits and some antenna. Around 230 figures are spread across the 3 ships, mostly on the flight deck HMS Broadsword was a conversion of the OOP WEM HMS Brilliant kit, the main change being the funnel, plus a wealth of detailing. the seascape is modelling clay plus acrylic medium and teased out cotton wool for the foam and spray. The base was lined with plasticard to get a mid-ocean swell adding a bit more interest and action Finally for this post a couple of overhead shots, Broadsword is approaching to start taking on fuel from Hermes' starboard quarter, Yarmouth steaming past on the port-side. Both escorts are really a bit close, but the base is the largest I could fit in my cabinets (to the millimetre) and the navy have been known to bend ships every so often so it's not impossible. Next up some detail shots. If anyone has missed the WiP and would like to see the history on this one, here's the thread: http://www.britmodeller.com/forums/index.php?/topic/234927178-operation-corporate-carrier-battlegroup-1350 Andrew
- 195 replies
-
- 158
-

-

-
- scratch built 1/350
- falklands 1982
-
(and 7 more)
Tagged with:
-
Hi, all, I'm trying to convert the CMK Unimog to an RAF one as used on the RAFG Harrier Force in the mid 1980s. Does anyone know if the hard top Moggy was used on the HF sqns, or were they all soft tops? I have a faint memory that the hard top ones were usually restricted to bomb dumps, but those brain cells are not very reliable. I only have a few pics from 4 Sqn and they all show soft tops, which will need rather more work on the cab. Thanks Tim
-
My latest build 1:48 harrier FA2. Nice model with lots of manufacturing defects (thus the very short body gear)
-
Here's a couple of cheeky pics of my recent build, The Kinetic 1/48 BAe Sea Harrier FRS.1 More pics when I've had chance to take some more.... @NG899 Many thanks for all your help Nick..👍
- 9 replies
-
- 37
-

-
- Kinetic 1/48
- Sea Harrier frs.1
-
(and 1 more)
Tagged with:
-
I'm a bit late to the party here but I have been concentrating on finishing my builds for a couple of other GB's, now that they are safely out of the way I have a 2 week window before my next GB starts so I thought it was about time I joined in the fun here. I had originally planned on doing something else (a Spanish AH-1G) but seeing as how I talked my model club into building things along the theme of test aircraft I thought that I had better start building some myself and what better way than to combine it with the In The Navy GB and I remembered some excellent pictures taken and shared by one of our members ( @Old Viper Tester ) in the aircraft photography section of a USMC Harrier II being used at Edwards AFB for spin and stability control tests which had varying amounts of extra white and red paint on the wings and tail and looks fantastic, well it does to me anyway, so that is what I am going to build in it's later scheme from 1985, there is a link to the pictures below; As for what kit to use I decided to go with the old Monogram 1/48 kit. I built their AV-8A a few years ago and enjoyed it and it is a pretty good kit and accurate so I'm hoping for another enjoyable build here, we shall see. Here are the usual box and contents shots; I have made a very slight start but have only added a few small bits to the fuselage and put one coat of white on some parts so I think I am well below the 25% rule. I will be building her OOTB and using decals from the spares for the markings, not difficult as there are no visible unit markings. Hopefully I will be making a bit more of a start tomorrow. Thanks for looking in and as usual any comments, criticisms and advice are always welcome. Craig.
- 79 replies
-
- 10
-

-
Here's another build from a couple of years ago. This is the Airfix Gr.9 kit in 1/72 scale painted with a brush using Humbrol enamels. The kit went together really well with no issues. This kit is built straight from the box using the kit decals supplied. I love a fully loaded Gr.9, really looks like in means business. Hope you enjoy.
-
Hi all. Im planning on starting a 1/48 Harrier GR9 soon, and was planning on modelling a certain aircraft (ZG511/82) After a quick search, I haven't been able to find a decal sheet that covers this particular Harrier, so I figured I'd make the serials and tail no. off of other sheets. I've gotten by with previous builds in 1/72 with the Xtradecal Letters/Numerals etc. sheets, but for the life of me, I can't find anything in their range that covers what I need! Does anybody know of a sheet either by Xtradecal or another company that offers the right size letters in 1/48 scale? If I'm wrong, please somebody step in and let me know, but I believe it's 6" letters and numerals in Black for the fuselage serials, and 8" numerals in White for the tail number. Any help/advice would be greatly appreciated! Thanks, Daryl
-
I finished this towards the end of last year, but have only just got around to taking some photographs. Swords excellent rendition on a Harrier T.Mk.4. More or less out of the box, but I did open up the upper auxiliary doors on the intakes as the kit parts were moulded in the closed position, which isn't accurate for an aircraft that is parked up. I used Vallejo Model Air paints and kit decals. I picked this scheme as it was the temporary arctic scheme. I painted all the upper surfaces in the usual green and grey, then overpainted the green with white on the areas visible from above. Hope you like it.
- 13 replies
-
- 30
-

-
Hi guys, here are some more of the 'lock down, photos processed' collection, this time from Gillespie Field which is the reserve and storage centre for the San Diego Air & Space Museum. The F-14 stars in the new Top Gun movie and the A-6 cockpit was used in Flight of the Intruder (great film for A-6 fans!) IMG_6507 copy by tony_inkster, on Flickr T-33 Shooting Star by tony_inkster, on Flickr IMG_6481 copy by tony_inkster, on Flickr H-21 Shawnee by tony_inkster, on Flickr F-86 Sabre by tony_inkster, on Flickr F-14 Tomcat by tony_inkster, on Flickr A-6 Intruders by tony_inkster, on Flickr A-7 Corsair II by tony_inkster, on Flickr F-8 Crusader by tony_inkster, on Flickr Mig-15 by tony_inkster, on Flickr F-102 Delta Dart by tony_inkster, on Flickr Mig-21 by tony_inkster, on Flickr Untitled-6 copy by tony_inkster, on Flickr Untitled-3 copy by tony_inkster, on Flickr
-
Harrier GR3, 4 Squadron, Royal Air Force Germany This is the Airfix new tool 1/72 Harrier with CMK resin engine and nozzle set, Freightdog replacement fin, Airwaves RBF pennants and Pavla aftermarket seat; the decals are from the kit. Built and displayed to depict a deployed operations field maintenance task on the Rolls Royce Pegasus engine with MT, GSE and other clutter to recreate a typical scene in RAFG during the 1980’s. The camouflage netting was omitted for clarity and all reference photos showed field maintenance without it anyway. The Bedford MK bowser is the ex-JB models kit modified with scratch built wing mirrors, bonding strap and hessian screen cover. A Wiking 1/87 scale Unimog was repainted and detailed with a Kingfisher miniatures resin trailer load, Bren Gun crew steps, spare decals and scratch built mirrors. All of the other accessories were from Flightpath, various model railway aftermarket suppliers or scratch built while all scenery was from Woodland’s Scenics on expanded polystyrene in a box frame from Hobbycraft. Clutter includes drip trays, floodlights, oil/jerry cans, generator, cables, chocks, toolkits and caddy, fire extinguisher, scaffolding, Houchin and a lineys jacket hanging from one of the pylons. Figures are from Noch, Preiser and Matchbox.
- 14 replies
-
- 44
-

-
Ok I'm calling this one done! Trumpter 1/32 Harrier GR7 Piero's Resin: Nose, Pylons (1A,7A & 4) BOL Rails and AN-ALE40 faring Custom 250gal Resin Tank fronts Tim Perry CBLS 100 Revell Matra 144 SNEB Pods Resin BL755 Cluster bombs Flightpath CBU87 B/B & AIM9L AQN Rounds Eduard Cockpit and External Photoetch Decals from spares box, Airframe or custom printed Resin Wheels, Mk12H Seat Be gentle, first "proper" build after 10 year modelling hiatus! And yes, I did work on the original A/C, now if I could just remember which pilot had his name on the side i could wrap it all up!
- 13 replies
-
- 42
-

-

Hawker Siddeley Harrier GR.1, 1/72, Airfix
Touvdal posted a topic in Ready for Inspection - Aircraft
Just finished this one from Airfix, nice fit joy to build. straight forward one just out of the box. Cheers Jes -
After a lot of help from fellow modellers on this site through this thread I now have enough information to at least start a build. In fact I am going to build two AV-8C's, One as a normal service machine and the other as 719 operated by NASA So let's post an out of focus picture so show what I am starting with Hopefully some progress pictures later today, mayby not as I am not the fastest builder in the world Gondor
-
AV-8B Resin Accessories for Hasegawa Kit 1:72 Brengun Hasegawa's AV-8B Harrier has been around for a good while now. It represents classic Hasegawa in the sense that it provides everything you need to build a high quality Harrier while never going over the top in terms of engineering or detail. The kit has also been re-released by Revell on at least one occasion. Now Brengun have released a swathe of resin goodies to update and upgrade an already impressive kit. AV-8B Nozzles (BRL72183) This set provides nicely detailed hot and cold exhaust nozzles. Aside from the crisp detail, the parts are cast in one piece which will negate the need to spend ages tidying up the two-part kit items. I've used similar sets in the past and found them to be far superior to the kit items, as well as being much easier to use. AV-8B Cockpit (BRL72182) This set contains upgrade parts for the kit's cockpit. Unlike many upgrade sets, which contain a complete replacement cockpit tub, this set is designed to be used alongside the kit parts. Included in the set are sidewall details and consoles, a choice of instrument panels (for Night Attack and... um, Day Attack versions) and a fret of photo etched parts, most of which are upgrade parts for the kit's seat, as well as other bits and bobs. I personally would have preferred a resin seat, but that could still be an option as there are many of those available. AV-8B Night Attack Nose (BRL72184)] If you don't have the Night Attack version of the Hasegawa kit, with the FLIR bump built into the nose cone, then you can simply stick this bad boy on the front and hey presto. The resin is beautifully cast and nicely detailed and, thanks to the design of the Hase kit, you don't even need to saw off the old nose to use it. AV-8B Wheels (BRL72185) This set includes replacement wheels for the kit, including the outrigger wheels, as well as a replacement for the lower part of the nose gear leg. There is a tiny fret of photo etched parts that includes scissor links that can be added to the kit legs as well. The resin is nicely cast and includes fine detail on the tyres that is absent from the kit parts. Conclusion Hasegawa's AV-8B Harrier II is an excellent kit and I'm sure it will remain a popular choice with modellers for quite some time to come. While these sets join a somewhat crowded marketplace, the quality is sufficient for them to be able to hold their own and provide a useful option for modellers looking to upgrade their kit. Recommended. Review sample courtesy of
-
Hi all, I've been looking at the decal sheet on the Italeri web page: https://www.italeri.com/en/product/2854 I cannot see the white "XV741" in white for the nose. has anyone got this kit and would like to comment? The canopy, according to the site, is the best I have seen
-
For a modeling competition last year, I thought about building a Hawker Siddeley Kestrel FGA.1 myself. Because there's nothing on the market that one can buy. If you're interested, I'd be happy to republish the building process here.
- 120 replies
-
- 20
-


