Search the Community
Showing results for tags 'f1'.
-
Here is my first ever Ebbro build. Have to say this really nice kit to build. Only problem that can be mentioned is that the front and engine covers do not fit very well. Tried my best to work out with that problem. Added some details like fire extinguisher that was not in the kit and of course lot of wires and hoses.
- 19 replies
-
- 28
-

-

-

MFH 1/12 Ferrari 312 F1-67 (full detail)
Peter Milgate posted a topic in Work In Progress - Vehicles
Time to stop my avoidant behaviours and start on this little girl. Purchased from Marketplace for a very good price, so no excuses not to get on with it. Several friends are cracking on with their MFH builds, so figured I best get on with one, so chose this from my small stash... I have purchased required items including colour matched paint (from Zero Paints) Etch metal primers, several drill bits (as I am heavy handed and can get through these easily) These items used, will be detailed as and when I use them... These kits come in beautiful boxes, and the contents can seem overwhelming if you don't know what lies ahead of you... I started by checking all the parts are present, and this can be a tedious process but just be methodical and it all gets ticked off on the instruction sheet. Once I was satisfied everything was there, I seperate each section to contain the parts required for that stage of the build. Next step is the start the clean up process. These kits are true multimedia and cionsuist oif resin, white metal, photo etch and various wires, tubes and ancillariy items. It also has several beautifully produced turned items including the wheel rims and carb trumpets. I use a magnetic tumbler to clean up the dirt from the white metal parts. These can be very dirty... And that is where I am at present. Cleaning process can take several hours, changing water and burnishing fluid between each stage. Building will start on next update.- 53 replies
-
- 8
-

-
- Model Factory Hiro
- Formula One
-
(and 1 more)
Tagged with:
-
I'm continuing my history of F1 in 1/20th scale but I skipped the 80's and went right to 1992. After the Tyrrell 003, which I don't think is the most beautiful F1 car, to what is my favourite F1 design of all time, the McLaren MP4/7. The overall shape is so pure - no extra winglets or aerodynamic furniture and one of the most iconic liveries of all time. This was built right out of the box with the exception of the tobacco decals which were the "Museum Collection" set that I ordered from Hobby Link Japan. The Marlboro part of the decals were fine, but the orange parts of the decals were way too light in my opinion. The Tamiya decals had the McLaren logo in the orange/red, so I ended up cutting down the McLaren chevron into the Marlboro flag shape to use alongside the cockpit. The kit went together pretty well for the most part, and I built this as a curbside as I won't be displaying it with the engine cover removed (see below). The engine is in there, but all in semi-gloss black. Issues I did have were mostly related to the side vents. Tamiya molded them as separate pieces, but I found it difficult to glue them in and get a consistent panel line all the way around, especially since you have to fill the edges along the bottom. I ended up pretty much filling the whole thing until the panel line was just visible, but when I cleared over the paint and the decals, it completely disappeared - it looks like one continuous piece instead of the changeable size vent insert that I believe they used that year. I used Tamiya masking tape for curves to paint the red sections and it worked pretty well, although there's a little bit of bleed in the pointy parts where the tape overlapped. Overall, Im happy with the result - just a few nitpicks that I hope I'll improve on with the next model - I'm jumping right up to 2017 with the Tamiya SF70H. I'll go back and fill in a few blanks like the 80's and 2000's after that one. I just got the Tamiya 1986 Williams FW11 that will look good next to this one. The paint is Tamiya white and a custom mix for the orange. After looking at 100 photos online that all looked different, I ended up just trying to match the colour of the original Tamiya decals. Clearcoat was again using Mr. Color GX100 with the levelling thinner although this time I thinned it to 1 part clear to 3 parts thinner. It flowed very nicely, but with the weather being quite cold, it took a while to fully cure. I ended up leaving some of the parts for 10 days before sanding and polishing. I also thought I'd share how I'm displaying the models so far. I've been building shadow boxes out of poplar and then mounting the cars vertically in the frame. I created some graphic panels to sit behind the model with a large year displayed. At the bottom, a technical panel has the manufacturer logo, driver name, car dimensions, engine type and output etc. I thought it was a cool way to see the visual differences in the cars from decade to decade, and to see the changing overall sizes and engine output over time as well. I also like the way they feel like scientific specimens preserved for future generations to learn about. Thanks for looking, comments and critiques always welcome. Martin.
- 29 replies
-
- 41
-

-

-
Taking a break from big scale stuff so had a quick look through the stash and stumbled upon this, Original idea was to do some plastic (I've just finished a MFH 1/12 Ferrari) so wanted a change...so will do two kits together this little metal kit (never made one of these before!!) and a Tamiya Ducati Panigale Martine (because I can't resist a Martini colour scheme) This was purchased off Fleabay on a whim. Paid very little money for it but it looks like a detailed little thing...so, on with the build... As you can see, some holes were already drilled, but it wasn't until later I would realise they were a bit big... A bit of CA glue was used to build up a few sub-asembles...front wing, main chasis and rear wing. This was all done very quickly in an afternoon/evening session. Must be overdue a hiccup surely....Oh yes, the carpet monster claimed a wing mirror...bugger...so small I nearly cried, a quick search on bench (as I heard it ricochet off a jar, but to no avail) so I thought I would try and knock one up from scrap plastic...I tried and it seems okay to me... Parts prepared, polished and ready for a blast of Acid Etch primer. I used Upol No 8 for this, which I had discovered during my MFH build. Worked fine there for metal so figured if it ain't broke...I have ordered some Zero paints pink undercoat, so will lay that down via airbrush as a base for the red, which I have Pre-2004 Rosso Ferrari Formula 1, also Zero paint. This will have a few days to hardened before I start base colours, pink, red then some masking for semi gloss black ready for carbon fibre areas. I'm hoping this will be doable as built up parts, figured it would be better than trying to build front and rear wings from the bits once painted...time will tell. 🤞
- 11 replies
-
- 7
-

-
- F1
- Formula One
-
(and 1 more)
Tagged with:
-
Model Factory Hiro Multimedia 1/12 scale Formula One Ferrarri F2008 Its been a while since I've posted as my photos stopped showing up, I used Village photos and couldn't face uploading them all again...very disheartened. Hoping these are showing and will remain available. In time, I shall transfer old builds if it works. So I now have three MFH in the stash, and befors doing a full detail build, wanted to cut my teeth and get some resin work under my belt... First foray into multimedia building...wish me luck. Needed a few purchases...bought a Magnetic Tumbler to clean white metal (Vevor KT100) which is a wonderful machine, needed burnishing liquid. Not sure what etch primer to use, I had purchased Zero Paints set but saw Mr Bretland used UPol on his so figured I would try that. Also picked up a couple of specific Mr Hobby colours and Zero Paints Ferrari set. So, enough waffle, step one, sellotape it together to get a look!!!! Has to be done...😊😊 Parts then cleaned, white metal in tumbler and resin washed in water and fairey liquid, rinsed and dried. Then parts put in stages as per instructions...ish. Next step will be possibly gluing then etch primer, possible priming/painting then gluing.nNot sure yet but build starts with rear end, rear suspension and wheel hubs... Pretty much all of this needs to be semi gloss black other then brake discs and calipers. This will be final colours or ready for carbon decals. No parts have been filed or sanded yet, just washed.
- 16 replies
-
- 4
-

-
- Formula One
- F1
-
(and 1 more)
Tagged with:
-
Jordan J199 1/20 Modeler's multimedia
modelbautony posted a topic in Ready For Inspection - Vehicles
I enjoy all vehicle and motorsport subjects. I aim not to do the usual. No matter how much I might determine to do a quick and 'out of the box' model every now and again I get involved with research and then find a decal isn't the correct size or is not quite the right typeface or the shaping for a particular race hasn't been taken in to account... a year later and I'm still 'adjusting'. I must be the least prolific model maker, it's not like the end result is perfect by any means but there is considerable satisfaction in having 'struggled' with a tiny element of a model that may not even be visible on completion.- 25 replies
-
- 18
-

-
While taking a break from my 312T4 (in desperate need of purchase a magnifying lamp, as I'm having real trouble focusing on the wiring and tubing) I thought I would make a start on another of my favourite cars the Lotus 102, it wasn't a good car and had a part in Lotus's final demise but what a livery. I hope you enjoy this thread and apologies already for any rambling and pointless photo's taken to describe this build. Shood23 has already built a fine example of the car last year and I just hope this will be half as good as his. While doing my research I bought a build guide from the Modeler Site website by a William Chan which highlighted the changes from the Tamiya 102b kit, I also had a large a number of photo's of the chassis #4 car that was on show during the Classic Car show I visited at the Excel earlier this year so hope I am as primed as I can be. I shall, near as possible be reproducing the chassis #4 car of Derek Warwick, in my opinion one of F1's underrated drivers who never really had the car to challenge for the top. The good lady bought me the Tamiya 102b kit for my birthday and I had already purchased the Studio 27 PE upgrade, Shunko decal sheet and the Camel yellow paint from Zero all from our friends at Hiroboy. There is a Studio 27 white metal brake disk upgrade which I've only seen available from Belgium and I'm still not certain whether it's worth the extra £22, I'll probably wait to see how the car progresses before I make that decision. Also both Shaun/Shood23 and William Chan decided on a roadside kit due to the great difference of the kits Judd engine to the actual 102's Lamborghini engine. I did like the idea of having the rear cowling removable and hope nobody mentions the engine but while having an initial dry fix I noticed how bad the fitting of this section was, I've been working on a Tamiya, Williams FW13 kit and the fitting is much crisper so I may opt for a roadside kit after all but I'll delay this decision until all the alterations have bee completed. Anyway, the main modifications are to the bodywork with a pointed nose and raised section near to the cockpit, a slightly smaller and more angular air box and reduced bodywork around the engine. I also noticed, from my photo's, the rear diffuser was completely different all of which I have decided to alter, William Chan's guide doe's give some good examples of how to do this but as he had a resin nose and used the rear diffuser from a MP4/5, all of which I do not have I had to botch something together using poly sheet and tube. The nose was removed slightly in front of the actual moulded seam, so as to retain the seam line, the replacement nose was made from a rough skeleton of 2mm poly sheet then strips of 0.5mm sheet glues over to give a very basic shape over which I applied a layer of Milliput's fine epoxy putty and began to shape. To the remaining section of the cockpit I capped it off with a section of 2mm poly to get a good fixing surface when attaching the new nose, as you may see I left a small return to the base of the nose to match a similar return in the bodywork near the front suspension. I cut a section of the new nose to accommodate the front wing, then fitted the front wing to the nose with Milliput sandwiched between, left to dry and trimmed off the excess. The nose was attached and it quickly became evident my initial estimate of the size of the replacement nose was underestimated and a lot more filler would be required, that done the process of filing and sanding began. The grooves were made to give me a guide to the amount of filing back needed. Ready for initial prime coat. The addition to the front of the cockpit was from a section of 9mm poly tube cut at an angle, glue and packed with putty the lots of filing down. And I thinks its still slightly to large. Regards John
-
Haven't posted on Ready for Inspection before...be gentle... And that's her done...👍😀
- 8 replies
-
- 18
-

-
- Formula One
- Formula 1
-
(and 1 more)
Tagged with:
-
Hello guys, Time to start a project. About a year ago I decided I enjoyed building F1 cars as they typically show a lot of suspension, and in some cases, plenty of engine too. I went about finding F1 kits that were on sale and buying those that seemed interesting. There are many upsides to this approach including that I built a nice little stash and as I'm not really an F1 fan, don't have any favorite car/team, the kits were generally not too expensive, and the opportunities were relatively abundant. Most of the kits I found (I purchased six kits) were Tamiya and Fujimi, and when available detail kits too. These were the kits you see on web stores that shout out: "Marked Down!!", "only 1 left", "34% off!" etc. This kit was no exception. My sense is that an on-line hobby store was either reducing inventory or ending their sales of auto related kits. The site boldly noted "60% off!!" for a Studio27 PC4....so, it almost didn't matter what it was, it was worth looking at, and finally buying. I assumed this was a good idea because I've used Studio27 detail kits and like them. And, now I'm going to build it. So far, no progress. Only really looked at the parts today and they are pretty nice. Please take a look: Appearances suggest not bad at all for "60% off". The only weird part I've spotted so far is the distributor cap, which is rubber. I've built up some of these Ford heads before, using similar aftermarket rubber ignition wire boots/plugs and remember they were a headache to get the wires through, so I assume the same will be the case with the distributor. I'll worry about that later, and might even just scratch the cap. In the meantime, will get going on cleaning up the engine parts. So, off we go - Stay well, Cheers, Nick
- 121 replies
-
- 6
-

-
- Detailed/Scratrchwork
- F1
-
(and 1 more)
Tagged with:
-
hello everyone, this is my first WIP here. I started building this kit weeks ago, i work very slowly only in short time at night. Never built an F1 bebore, and i can say that is a bit difficult, too many pieces that you don't know if paint bebore or after.. Anyway this is the job done till now:
-
This is the only car i have built, and was made in my first period of modelling about 15 years ago. Recently found the pictures tucked away on an old hard drive. One thing sticks out in my mind about the build and that was that i really enjoyed doing the CF decaling.
-
I was going to call this "Second Build in 15 years" but I'll let that one go. This is me carrying on with a history of F1 in 1/20th scale. I built the Tamiya 1965 Honda RA272 and even though this is only 6 years on, the differences from 1965 to 1971 are pretty amazing. This is the Ebbro Tyrrell 003 kit and is the first Ebbro kit I've built. Overall, I was very impressed. I think the level of detail and crispness of molding rival or surpass Tamiya. I'll admit that the reason I chose this one over the Sports nose model was the very finely crafted mirror mounts which I think look great on the finished model. I don't think this is the most attractive F1 car ever, but I do appreciate the function over form aesthetic of the nose in particular. I built this pretty much out of the box with the only additions being some Model Factory Hiro brown hose for the fuel lines and black wire for the spark plug leads, As well as a Tamiya seat belt kit to replace the inadequate decal that came with the kit. I would say however, that the Tamiya seat belt kit has nice photoetched hardware, but the adhesive vinyl belt materials leave something to be desired. My only complaints about the Ebbro kit would be that compared to Tamiya, it was a bit more fiddly to assemble. I think Tamiya does a good job of making the parts fit together in a very solid way. With this kit, the pieces fit, but there was a lot of glueing and clamping or holding in place because the pins were so small that they didn't align the parts very firmly. I recognize that this is probably the nature of trying to keep everything in scale and as separate pieces. These separate pieces include the headers which are molded as four separate pipes per side - again, a bit fiddly to assemble, but can't be beat for accurate appearance. That's usually my biggest gripe with Tamiya is that pieces are often molded together to make for easier assembly but this often results in a lot of masking if you're trying to airbrush separate colours onto the same part. My complaints must be pretty minor though as I've already bought the Ebbro Lotus 72C and the Lotus 72E. Must finish the MP4/7 first though. A few details on finishes, the blue is just straight Tamiya blue acrylic. I applied the decals and then clearcoated with Mr Color GX100 thinned with their levelling thinner. This is the best clear I've ever used. I tried the Tamiya X22 clear on the Honda and it was okay, but the GX100 was shiny right out of the airbrush, dry to the touch in 10 minutes and polished up very nicely. It did get under one of the decals, I'm guessing that my mist coats weren't heavy enough to actually protect the decals before I did the wet coat but I think this is going to be my clearcoat system moving forward. I've just clearcoated the MP4/7 and it came out better than this one and with no adverse effects on the decals after going a bit heavier with the mist coats. Anyway, thanks for looking, and I've added a few more shots below. Martin.
- 29 replies
-
- 39
-

-

-
Well, I'm back into scale models for the first time in 15 years and I've found it very meditative to sit in a quiet space and slowly work through the pieces and painting - a nice break from a busy work and family life. I had an idea to do a scale model history of Formula 1 in 1:20 scale as there are so many models available to cover the history of engineering and design. I've started with the Tamiya RA272 as I got it for a good price and seemed like it would be a good place to start. Built pretty much out of the box and sprayed with a custom mix for the racing white and then topcoated with Tamiya X22 clear. I want to improve my skills and finished models so please feel free to comment on any tips/tricks/suggestions that you think might help.
- 10 replies
-
- 24
-

-
25th Anniversary "Benetton Ford B194" (05689) 1:24 Revell The Benetton Ford B194 was designed by Rory Byrne for the 1994 F1 season. It was based on the previous B192/3 and was to be powered by a Ford Zetec-R V8 engine produced by Cosworth. The car was very good in the hands of Michael Schumacher who won six of the first races that year. Schumacher commented that the car was hard to drive, and his team mates that season all found it very difficult to drive. Other teams suspected the car was not entirely legal due to its performance. During an investigation by the FIA launch control (which had been banned) was found in the cars software but there was no proof it had been used and the investigation was dropped. The Kit This is a re-release of Revell's 1995 re-released as its now 25 years on from the 1994 season, the kit comes in a bright green plastic presumably in order that it can be built without painting the car if needed, though it is not easy on the eyes! There is a also a set of paints & glue + a fold out A2 poster of the car in the box. Its worth noting that Revell are donating Euro 2.50 per kit sold to the Keep Fighting Foundation. Keep Fighting is a non-profit initiative that is celebrating the attitudes to “Keep Fighting” and “Never Give Up” which are directly inspired by Michael Schumacher. The Foundation is registered in Germany and operates globally through its projects. We have placed a link at the end of the review for people who would like to know more about the foundation. The build starts with the rear subframe/engine area. The engine and frame is added to the rear suspension mounts and the exhausts are added on. The rear axles are added along with their brakes. Then the rest of the engine is built up, with the suspension components being added. This sub assembly can then be mounted into the floor pan. Next up the radiators are assembled. Following this the rear spoiler is also built up. The spoiler and the radiators are then installed on the floor pan as well. We now move to the front top body of the car. The drivers head rest is added in and the front top half of the suspension is added. We then move to the front lower parts. The rest of the front suspension is built up and added along with the drivers tub, dash and steering wheel. The top and lower can then be joined together and the final suspension arms added along with the front brakes. The front aerodynamic wing structure is then constructed and added to the front section. On the sides additional aerodynamic parts are added. The front section can then be joined onto the main floor pan. The drivers wing mirrors are the last parts to be added on the front section. Next up is the rear top body. Additional aerodynamic parts are added and then this too can be added to the main body of the car. Lastly the wheels & tyres are built up with the centre of the rubber wheels being taken out. Decals The decal sheet provide markings for two separate cars for Michael Schumacher, and two from his teammate Jos Verstappen. Due to the rules on Cigarette advertising the Mild Seven decals for the car are not included, but are replaced by the word BENETTON. Conclusion This should make up to a good looking model pf the 1994 car. Recommended. Revell model kits are available from all good toy and model retailers. For further information visit or
-
Hi All, I'm on a roll at the moment. I have really found my enthusiasm again. This is one that I have had for about 35 years, or there abouts. It's been part built for a seriously long time. I have built a few 1/20th Tamiya F1 cars over the years and have found them a challenging but rewarding build. This one has been a bit more challenging the some of them ... The box top: A truly bizarre but quite beautiful car. This was in the days of classic F1 cars, I think. The modern stuff looks a bit anodyne in comparison. I had built the engine and transmission a long time ago, and that's where it stood for quite a while. At some point in the past, the transmission fell off the engine, and disrupted the rear suspension somewhat. Trying to re-assemble that caused a number of head-aches. The springs for example, were attached to the cylinder heads and the bottom suspension arms. I attached the gear-box back on the engine, then attempted to thread the rear springs into the gap. This proved to be a problem, and caused me a bit of a head-ache, but in the end, I managed to get them fitted, Them as I was manipulating the engine about, the stacks kept falling off! The big problem however, was when I tried to attach the engine to the chassis. There is a small screw that taps into the engine block, holding the engine and chassis together, but also at the bottom was a small 'clip' that you had to put the block over and push down to lock it in place. Every time I tried to do that, one or more of the stacks would come off … again and again and again …. again. Eventually, I removed the clip bit of the bottom pin, and araldited the block to the chassis and screwed in the screw on the top. After about 24 hours, the block doesn't seems to be going anywhere, and I can call that bit done. So, this is where we have got: The back looks a bit skew. I'm blaming the camera. I think that the link rot from the anti-roll bar has come adrift yet again. Again, as you can see, one of the stacks has fallen off! I have fixed that. So, on to the body. I had primed that a while back, and have got the initial colour on: I have cut the paint back a bit to remove any inevitable imperfections and it's ready for its second coat of Tyrrell blue. The ever brilliant Zero paints. More to come. Thanks for looking. Cheers, Alan.
-
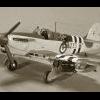
Mirage F-1C "Tiger Meet" [1/72 Special Hobby]
Rémi posted a topic in Ready for Inspection - Aircraft
Hi This is my build of the Mirage F-1C with the Tiger Meet scheme It is the Special Hobby kit. A pleasant kit with no major problem Some other photos at this adress Mirage F-1C "Tiger Meet"- 18 replies
-
- 42
-

-
Decided to get back into modelling as find it quite therapeutic and love making things. This is the first model I have made in over 10 years so taking some time!! Found the Tamiya MP4/8 kit and the S27 Carbon decals on eBay. Also purchased the photo etched kit which I'll use some of, a full set of decals and an old Tamiya driver & engineer set I'll try to incorporate Here are some pics of my progress so far: Managed to add some small valves to the wheels using some cut down rivets from the PE kit Still a lot more carbon work to do on the floor but not looking too bad! Used BMF for the silver detail Totally messed up the paint on engine cover with an orange bleed so currently sanding ready to start again 😥 That's it for now. Just need some spare time to get some more done!
-
Hi All, Here's my entry for this GB. I need to complete my 'Russia GB' entry first so this may be a little late off the grid. I have some aftermarket parts to go with it and depending on how the build progresses, I may hunt for some more Cheers
-
Hi! Kelvin here from Portland, Oregon, USA. Like a lot of the folks here was into modeling as a kid and teenager (ultimate builds for me were the Tamiya large scale Tiger with internal detailing, and the Tamiya 1969 Matra). My 11 year old son just discovered the joys of building but not into it as much as I was, but what his discovery did was to inspire me to get back into the hobby. We just built our house here and I've been doing woodwork and casework building out the interior of the house but I'm hankering to change scale and work on something different. Been holding on to a Tamiya 1/12 Ducati 888 Superbike as a warmup. Got the Lotus 1/12 49b as a project I want to build (reconnecting to my Matra experience as a kid) and just got a hold of the MFH Brough Superior (for my 60th b'day) and looking out for tips here. Does anybody know if there's a way of reconnecting to all the images hosted by third parties and not showing up in the forum boards. I would love to be able to see the pictures in the Brough Superior builds on this site that have been "unhosted". Looking forward to talking to all you folks! Kelvin
- 3 replies
-
- 1
-

-
- MFH
- Brough Superior
-
(and 1 more)
Tagged with:
-
Yet another one started, the wife bought me this for my birthday a few months back, to be honest I only took any notice of the Lotus 88b after the Essex liveried kit was released and knew I had to have the more traditional Lotus JPS liveried kit when launched. Lotus 88b (1) I also went the whole hog and purchased the Studio 27 Carbon Fibre decals & PE parts along with JPS decals, costly but easier when the price of the kit has been offset. Lotus 88b (7) This is the first Ebbro kit and I must say I have been really impressed with the detailing, there’s some very fine parts in this kit and the moulding seems to include parts for the 88, I only noticed after I started glueing the bottom section of the Cosworth engine, fortunately I realised before it set. Lotus 88b (4) Starting with the engine block, I apologise the images start after painting, as I have little patience and couldn’t wait for Zero and Extreme metallic’s to arrive from Hiroboy, I used a mixture of Vallegio paints I bought from a local shop, I find these quite thick but managed to mix a few different shades for Flat Aluminium, Gun Metal and Metalic Grey. Lotus 88b (4) Now that they’re fitted, I’m inclined to cut the fuel hose nozzles off and drill out for passing fuse wire as I find this easier to fit the hose, it still baffles me that anyone can manufacture 0.4mm tubing but I’m still learning and treading 5Amp fuse wire into the hole the best possible solution so far. Lotus 88b I had an issue with the rear suspension, the lower wishbone started to deflect when the wheel hub was fitted, as mentioned previously I have little patience and I very rarely dry fix and this would have helped but managed to resolve this by trimming the hub and section of gear box under the top suspension arm. Lotus 88b ( Began work on the underpan adding the decal and now stumbling on to the chassis. Lotus 88b More photo's to follow, this is only my second posting since switching to Flickr and can't remember how I posted the first time, so please be patient. Thanks for looking. Regards John
-
Hi everyone, Here's a build I finished a while back but neglected to upload photos of. I built Tamiya's wonderful 1/20 Lotus Coventry-Climax 25. I finished it in the livery Jim Clark (in my opinion the greatest racer of all time) won the 1963 South African Grand Prix with. Clark led every single lap, won by over a minute, and lapped every car except Dan Gurney. It was his seventh win of the season - out of nine races. I used Tamiya Racing Green for the body and a combination of Alclad and Vallejo acrylics for everything else. The kit was a joy to build. The only problem is the engine cover doesn't quite fit right, but I'll display with it off anyway. I used IndyCals for much of the build, they were great as always. I'll be checking eBay and my local hobby shop for another one of these, it was a wonderful kit. As always, comments and critiques are appreciated. Thanks for looking, Jake
-
Such is my appetite for modelling at the minute, I don't think the GB's I've entered are going to be enough for me. I've therefore decided to start a WIP for the F2007 which has been calling to me for quite some time now. Just to set expectations, I plan to dip in and out of the build over the coming months and it may even turn out to be a KUTA subject. Anyhow, the kit came with some aftermarket decals and I originally wanted to use the 'Marlboro' wording. However, I've decided to build the Kimi / Brazil configuration which, as many of you will be aware, was the 2007 winning combination in what was a 3-way down-to-the-wire battle for the Championship. Hence, I'll have to settle for the 'bar codes' The decals look like a project of their own!!
-
Here's the Ferrari F2007 that Kimi raced back in 2007 at the British GP. Not a bad build and went together well considering it's a Revell model.
-
Here's the completed Benetton 188 which i bought of ebay that was part done and had a few bits missing from it. I got the green and yellow markings slightly wrong - where the camel logo is, the green should have been a thinner line. Not bad to say i had to dismantle most of it to rebuild it and give it some paint. And there's a slight discolouring on the blue just under the sisley sign.
-
Hi all, Here are some pictures of my latest finished project, Ebbro's MP4/30 midseason version. I was hoping it would be a quick build, but I had quite a few issues. Almost all were fault of the modeller. I added a harness and an aluminum tube for the exhaust. I also cut some brass rod for the driveshafts and did some carbon decalling on the suspension arms. I used TS-40 Metallic Black for the paintwork. As always, comments are welcome, Jake


