
Search the Community
Showing results for tags 'eagle'.
-
 So my pre-order from the US Finally arrived last week and I was pleasantly surprised that I didn't get stung for an idiotic ransom demand from HMRC, but a relatively modest charge! This meant it cost a LOT less than the UK retails are asking for AND it arrived early. So here is the box as it arrived, with Cthulhu showing the excitement that I was feeling! I'm not doing a sprue shot as there are loads of them, you can see them at the bottom of this page http://catacombs.space1999.net/main/merc/vmmer2.html So to start off with the spine needs to be put together. Each side frame comes in two halves which need gluing. These need to be kept flat while drying and sadly have quite a few ejector marks on the inner side. Here you can see them with filler in the ejector marks ready for sanding. Next are the upper frames of the front and rear cages with the brackets that attach to the spine. The brackets have a little bit of flash on the sides. One thing you have to be very careful with on this kit is the sprue gates are quite large, so separating the parts form the sprue needs care to avoid damage. Next comes the command module or "beak". This is well moulded in two halves which goes together without much fuss. There are transparencies for the upper and lower windows, but only the upper ones were actually transparent, hence the masking tape. There isn't a detailed cockpit but there are two pilots in space suits and a detailed rear bulkhead for the cockpit. There are an abundance of reference photos for the cockpit such as this one of the studio set So I've started painting the bulkhead I haven't completely decided how I'm going to light the cockpit - or even if I will bother at all. It shouldn't be too difficult as there is plenty of space either in the beak or in the front body. Speaking of which here they are with one of the 4 "shoulder" pods What is great to see is the very careful recreation of the kitbash parts added to the basic boxes, like those superb lunar lander halves from the Airfix Saturn V kit and what you see here on the sides: There are also the side shelves plus landing leg supports which take some care to assemble to fit properly. Finally, the engine bells have been assembled and I have to say I am very impressed with the care taking in designing these. Rather than use the simple (for the manufacturer) alternative of splitting them in half down the axis, they are split halfway down the "bell" so the joint virtually disappears. These are all being prepared for suitable treatment with Alcad. I'm not prepared to pay MORE that the kit itself for the accessory set which includes real aluminium engine bells! Not when I know how to use Alcad paints!! So in summary, this is a very exciting kit for us fans, but its not an easy kit to build! More to come...
- 52 replies
-
- 13
-

-
- space:1999
- Eagle
- (and 2 more)
-
I have a question about the legendary "Gulf Spirit", mainly what color it was during the Gulf War. I have seen many modellers build it in the ghost gray and the Mod Eagle scheme but clearly it could have only been one during the Gulf War. I am nearly convinced that it is ghost gray but just wanted to confirm. Evidence towards ghost gray - The few pictures of the GW show it as ghost gray looking. However, I have to say that ghost gray and mod eagle look surprisingly similar in many photos, as lighting effects come into play. - Osprey's F-15Cs in Combat has it ghost gray - I have yet to see a GW bird convincingly appearing in mod eagle colors although a number of GW veterans apparently switched that very same summer (like the Bitburg birds) Evindence towards Mod Eagle - Lots of modellers seem to do it in this camo - Hasegawa's boxing has the 1991 version in mod eagle as well as the 2003 commander's aircraft (which I assume is the one in the box photo which is clearly mod eagle). However, the latter is a different airframe. Also, Hasegawa's instructions have the 1991 version with very few stencils which makes me wonder whether it had been hastily painted before the war. I figure someone in this forum has the answer
-
 WUT? test build: http://www.1999.co.jp/eng/blog/160511 parts: http://www.1999.co.jp/eng/10358199
 -
 Forbidden Planet has a pre-order price (for later in May 2016) of £109.99 plus (I think) £7.50 P&P. Does anyone know of a better offer in the UK? (Hannants are out of stock at £129.99)
 -
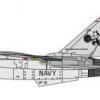
Hello fellow modelers I would like to introduce my latest finished model. It is an F-15E from Revell 1/48. Kit I added resin from the nozzle Aires and RBF from Eduard. Perhaps you will like it
- 36 replies
-
- 38
-
-
So lets try again with a resin kit... I bought this one as an Xmas present to myself earlier this year, not knowing that a couple of months later an injection molded kit of a 22" (ie 1:48 scale) Eagle transporter would be announced by Round 2 for the end of 2015! So, my thinking is if I don't build this NOW, I'll never get round to building it and if I try to re-sell it, I won't get anything like what I paid for it when there is (in theory) a better IM kit available for less! Here we go then This was a very well received kit within the Space :1999 community and builds up into a good representation. There are several AM additions that can be added, including aluminium turned engine bells for the main engines and the vertical thrusters and other extra components available. However these tend to be extremely expensive and this kit cost enough as it is. I reckon I can do a decent enough job with some Alcad paint on the engine bells... Progress so far has been to spend an evening at the sink with a washing up bowl of soapy water giving everything a good wash...
- 34 replies
-
- 4
-
-
- space:1999
- Eagle
- (and 1 more)
-
 All Eagle Keepers, Really looking forward to this. It is my first Group Build and also my first Work in Progress, the standard pics below of the kit and aftermarket zacto goodies (well impressed with these), I may also use Ozmods pilots and will add a pic of them if I decide to use them. Still thorn on what one to do hence the dragon decal sheet, but think it will be the Tigermeet version as I have a serious short fall in spare weapons.
 -
 Here I go again with another bout of madness and over ambition!! I recently picked up the Round2 re-release of the old Airfix/MPC Eagle from Space:1999. Space:1999 is still one of my all time favourite Sci-fi shows and the Eagle is one of my all time favourite craft. This is my third purchase of this model; the first was played with to destruction when I was about 7 or 8. Then the next one was much better looked after and that one came with it's companion: a Mk.XI Hawk. These two were built OK and then a few years later were lightly restored. I still have them both now and in fact I found them in the loft just after I picked up the Round2 kit. Then my head got started.... Thoughts of a Lab-Pod and Spine Booster and a winch pod... 2 Eagles and a Hawk on display with loads of additional goodies. So here we are. The new Round2 Kit - a re-release of the old MPC/Airfix kit. And the remains of my two old kits, both original Airfix releases from the mid to late seventies. Both quite badly finished. My intention is to build/re-build both Eagles simultaneously. The kit is not very accurate out of the box so my intention is to make as many modifications as is possible/sensible to make the kit more accurate whilst still using most of the kit; I've seen others improve this kit and they ended up discarding all of the kit - this is not my intention, just to make what is there a bit better, although I will be doing some scratch building to correct some areas and create the 'walkways' and shelves'. I also intend to build a variety of pods. The standard pod comes out of the box. I can make a lab-pod by modifying the other standard pod and I can scratch build a cargo winch pod. I also want to do the spine booster as seen in the episode 'The Metamorph'. The Hawk is quire accurate out of the box, however I'll clean it up and re-build it using today's modelling skills. I've got some other Space:1999 ideas, but this is enough for now!! Thanks for looking! Karl
- 20 replies
-
- 3
-
-
- space:1999
- eagle
- (and 1 more)
-
F-15J Eagle 1:72 Platz JSDF Aircraft Series Since its introduction into service in 1974, the F-15 Mig Killer has developed a fearsome reputation as an air superiority fighter. With over 100 kills to its name, half of them being with the Israeli Air Force, not a single F-15 has been lost in air-to-air combat. Despite the introduction of more capable aircraft in the 21st century, there is still a place for the proven F-15 on the front lines such was the foresight in its design some 40+ years ago. The need for a replacement to the F-4 was identified in the mid 1960s to counter the threat of existing and new aircraft that were being designed by the Soviet Union. Initially, the request was for an aircraft that had both air and ground capabilities and considerably heavier and faster than the F-4, however this was changed to focus on air superiority in both close and long range scenarios following analysis of air-to-air combat in the US Air Force in the 60s. With 4 manufacturers entering the competition to supply the USAF with an aircraft to meet their F-X requirement, the F-15 won with the decision being made in 1969. Powered by P&W F100 engines, it had a power weight ratio greater than 1, low wing loading to improve manoeuvrability, a radar that could identify low flying targets amongst ground clutter and operate beyond visual range and had all round visibility for the pilot improving visibility significantly compared to the F-4. Not least, one of the lessons learned was that a gun is necessary, so a Vulcan M-61 cannon was installed. With the first flight taking place in 1972 of the F-15A, the first of 483 F-15Cs flew in 1978 benefiting from additional internal fuel, ability to carry the ungainly conformal fuel tanks, the APG-63 PSP radar that could be reprogrammed to suit new weapons, stronger landing gear to cope with a greater maximum weight and new flight systems. In 1985, the F-15s coming off the production lines were to become part of the MSIP (Multi-stage Improvement Programme) that would allow ease of adaptation for developing weapons systems. Whilst the US are the largest operator of the F-15, first blood was achieved with the Israeli Air Force in 1979 developing an enviable reputation against Syrian Migs over Lebanon and went on to use the air-ground capability in the 80s. During the Gulf War, the US followed up this success with their F-15s again in combat with Mig 21s, 23s, 25s and 29s. Of the 39 air-air victories scored by the US Air Force in the Gulf War, the F-15Cs had claimed 34 of them. Over 170 F-15Cs will remain in service for many years to come yet. More recent upgrades to the aircraft are a new AN/APG Radar that link to the helmet mounted sighting system as well as the latest evolutions in armament to ensure that the F-15 remains a potent weapon. As well as Continuing service with the US and Israeli Air Forces, the F-15 also continues to operate with Japan and Saudi Arabia. For the JASDF the first two Eagles were constructed in the US, the rest of the F-15Js were then constructed in Japan under license. Starting in 1982 and ending in 1998 165 Eagles were delivered. In December 2004, the Japanese Government approved a Mid-Term Defence Program (MTDP) to modernize the F-15J to J-MSIPs over five years in accordance with new National Defence Program Guidelines. The upgrade is being implemented in phases, but ultimately the upgrade will include a new ejection seat; replaced IHI-220E engines; more powerful processor; uprated electrical generation and cooling capabilities to support more avionics and the Raytheon AN/APG-63(V)1 radar which has been produced under license by Mitsubishi Electric since 1997. The new radar will support the new AAM-4 missile. The Kit It is good to see this new tool kit from Platz. Following their new tool F-1 & T-2 kits it is good to see the Eagle is up to that standard. In the box you get five main sprues and two smaller sprues of grey plastic, one clear sprues and a decal sheet. Of note straight away is that the wings have a lap type joint to the main fuselage rather than a but fit which should be stronger, and easier to hide the join. The exhausts are 21 parts for each engine which should be enough detail for anyone! Full intakes and exhaust are provided. Intakes can be passed in two positions. There is also an innovative pin support to attach the front fuselage to the main body (typically a weak point in F-15 kits). The panel lines will be to deep for some people but not for the reviewer. Construction starts shockingly in the cockpit area! The ejection seat is a five part affair (but no belts). Once assembled this is placed in the cockpit tub. The rear bulkhead to the electronics bay is added along with separate rudder pedals, control column and instrument panel. The sides for the electronics bay are then added into the appropriate fuselage halves, the cockpit ub added, and the front fuselage can then be closed up. The front coming for the instrument panel is then added along with the nose cone. Platz recommend 3g of weight be added, though I would be tempted to cram in as much as possible. The final part to add to the front fuselage section is the innovative pin which will be used to attach this subassembly to the main fuselage. Construction then moves to the main fuselage. The full length intake/exhaust assembly is then made up. The engine faces and exhaust faces are added in and they can then be closed up. It is probably best to paint the insides before closing them up. The main top/bottom parts of the main fuselage can then be sandwiched around the intakes. Even if you should wish to use intake blanks/exhaust covers you will have to make these parts, not only do other parts attach to them, but the provide rigidity for the main fuselage. Side parts are then added along with front intake parts to complete this sub-assembly. Next the variable intakes are assembled. Here there are a choice of parts depending on whether you wish to mould them drooped or not. The next major step is to attach the forward fuselage to the main one. As mentioned Platz have engineered a pin and hole arrangement here to ensure a sturdy fit between the two. This is further reinforced by the addition of a top part which carries the canopy hinge mechanism. As someone who has suffered a front fuselage detachment on another well know Japanese branded kit, I can appreciate the thinking Platz have done here. To finish up the fuselage the canopy can be fitted in either the open or closed position, as can the air brake (though I suspect most will leave both of these items until last). The next area to be constructed is the exhaust nozzles. Each nozzle consists of a main ring to which five petals are attached. Each petal has three control arms. This makes each exhaust a 21 part affair. No lack of detail here! When complete these can be added to the rear of the main fuselage assembly. The tail parts can be added at this point. Standard ones and upgraded J/APQ-1 parts are included. The modeller will need to check their references on these unless they can read the Japanese text for instructions! The main wings can then be added. While they have upper and lower parts the lower part is more of an insert so the leading/trailing edges are one moulded part and wont suffer from being too thick. The outer flaps are moulded separately. The single part tails, and tail-planes are also added at this point. Next up on our list of sub-assemblies is the landing gear. There is a single part leg for the nose gear, with a single part wheel. The only other items to be added are the landing lights. The main gear is slightly more complicated. Each leg is a four part affair, with the wheel split between the tyre and the hub (which should make painting a lot easier!). Once made up the landing gear can be attached to the fuselage along with gear doors. The last items to be constructed are the underwing stores. Three fuel tanks are included, as are four AMRAAMs and four Japanese AAM-4 missiles. These are attached to the airframe along with a host of antenna and small fuselage fixings which are generally left until last to avoid breaking them off. Decals Decals are provided for six different JSADF Squadrons. 42-8834 201 Sqn. 42-8945 304 Sqn. 22-8931 203 Sqn. 22-8931 306 Sqn. 42-8945 204 Sqn. 42-8834 23 T Sqn. There do seem to be more Squadron insignia on the sheet though than are mentioned in the instructions. Photoetch It should be noted that the photoetch parts DO NOT come with the kit, they are available as a separate item. The parts supplied on here are; underside of the main airbrake, instrument panel, seat belts, inside upper parts of the intake tunnel, front and rear missile launcher faces (if you are not going to use the missiles), HUD; and a variety of blade antennas. Conclusion This is welcome kit from Platz, a great improvement on the older kits available, and a great kit of the new modern JSDF Eagle for those of us who like to model modern Japanese subjects. It is a shame Platz have not included the PE parts in the kit as they will enhance it. Hopefully Platz will bring us some of the more colourful schemes the JASDF apply to their Eagles. Overall Highly Recommended. Review sample courtesy of
-
 65th Squadron Load Crew Competition 1/72 Diorama Moving on from my previous Harrier diorama (link) I started my next project today in earnest. I had originally intended to do an RAF Valley Hawk on or just leaving the flightline on a 6x6 bathroom tile in keeping with the RAF Bathroom tradition; however Ive had an Academy F15C MSIP II sat staring at me from the stash for a long time begging to be built. So, here goes. This project is grounded in my interest in rare and unique camouflage schemes, and the F15 Eagle. The 65th Squadron based at Nellis AFB just outside of Las Vegas maintains a group of F15C and F15D adversary aircraft for use in training operations flown by pilots who are trained to replicate the tactics and manoeuvres of likely-to-be-adversary airforces. Currently, their F15s are painted to represent Russian Flanker aircraft in three camouflage schemes: Desert, Blue and Digital. My current aircraft will be an F15C in Blue, however I intend to build and F15D in Blue and F15C in Desert at some point in the near future. I like dioramas, therefore this build will incorporate some sort of activity around the aircraft on the ground, as such, I thought that a load crew competition may add further interest. USAF squadrons routinely carry out load crew competitions, usually on a quarterly cycle. The competitions consist of four assessed elements including: a written test, an assessment of the dress and appearance of the crew and their toolkit; and the weapons load. The weapons load is assessed by time taken, safety and technique. The current diorama is to represent a crew preparing for or undertaking the load element (I thought it would be more interesting than the classroom setting I had planned for the written test element). Although Im not sure what this will look like yet, it will likely be the crew preparing the aircraft and the weaponry. The Kit(s) Aircraft: Academy 1/72 F15C MSIP II Eagle. Crew and accessories: Hasegawa 1/72. Detailing: Eduard (Big Ed set). Decals: Afterburner. Any questions, comments or suggestions are greatly appreciated. David
 -
F-15C Eagle Hasegawa 1/72 Since its introduction into service in 1974, the F-15 ‘Mig Killer’ has developed a fearsome reputation as an air superiority fighter. With over 100 kills to it’s name, half of them being with the Israeli Air Force, not a single F-15 has been lost in air-to-air combat. Despite the introduction of more capable aircraft in the 21st century, there is still a place for the proven F-15 on the front lines such was the foresight in it’s design some 40+ years ago. The need for a replacement to the F-4 was identified in the mid 1960’s to counter the threat of existing and new aircraft that were being designed by the Soviet Union. Initially, the request was for an aircraft that had both air and ground capabilities and considerably heavier and faster than the F-4, however this was changed to focus on air superiority in both close and long range scenarios following analysis of air-to-air combat in the US Air Force in the 60’s. With 4 manufacturers entering the competition to supply the USAF with an aircraft to meet their F-X requirement, the F-15 won with the decision being made in 1969. Powered by P&W F100 engines, it had a power –weight ratio greater than 1, low wing loading to improve manoeuvrability, a radar that could identify low flying targets amongst ground clutter and operate beyond visual range and had all round visibility for the pilot improving visibility significantly compared to the F-4. Not least, one of the lessons learned was that a gun is necessary, so a Vulcan M-61 cannon was installed. With the first flight taking place in 1972 of the F-15A, the first of 483 F-15C’s flew in 1978 benefiting from additional internal fuel, ability to carry the ungainly conformal fuel tanks, the APG-63 PSP radar that could be reprogrammed to suit new weapons, stronger landing gear to cope with a greater maximum weight and new flight systems. In 1985, the F-15’s coming off the production lines were to become part of the MSIP (Multi-stage Improvement Programme) that would allow ease of adaptation for developing weapons systems. Whilst the US are the largest operator of the F-15, first blood was achieved with the Israeli Air Force in 1979 developing an enviable reputation against Syrian Migs over Lebanon and went on to use the air-ground capability in the 80’s. During the Gulf War, the US followed up this success with their F-15’s again in combat with Mig 21’s, 23’s, 25’s and 29’s. Of the 39 air-air victories scored by the US Air Force in the Gulf War, the F-15C’s had claimed 34 of them. Over 170 F-15C’s will remain in service for many years to come yet. More recent upgrades to the aircraft are a new AN/APG Radar that link to the helmet mounted sighting system as well as the latest evolutions in armanent to ensure that the F-15 remains a potent weapon. As well as Continuing service with the US and Israeli Air Forces, the F-15 also continues to operate with Japan and Saudi Arabia. The kit With several kits on the market representing the F-15C, the later Hasegawa one of which we have here is regarded as the best of the bunch in terms of detail, shape and finesse although more challenging than some of the simpler kits as a result. The kit comes packaged in the usual top opening box with some great artwork representing an aircraft of the 57th Fighter Intercept Squadron USAF. On opening the box, we have 6 light grey sprues and a clear one which is bagged separately containing a total of 138 parts. First impressions are very good. Whilst there is some flash present, this is mainly restricted to the actual sprues with some very small amounts on some of the parts. X2 Assembly starts as per usual with the cockpit. There is some very nice detail in here. The side and main panels all have moulded in switch detail. If painting these doesn’t float your boat, sanding the detail off and using the kit supplied decals or pre-painted etch replacement is an alternative to consider. The avionics bay behind the cockpit has also received a generous dose of detail with the floor and side walls looking quite busy. The seat comes in three parts with a token effort on the seatbelts. This is in my opinion the weakest part of the cockpit so you may want to replace this or add some additional detail. With the tub assembled, the nose bay fits to the bottom and the two halves of the nose fitted together with the assembly inside. The instructions show the cockpit upper rear fairing to be fitted next, however you may decide to fit this later. Dry fitting is probably the best way to determine your preferred assembly sequence here. The intakes come next. Unlike the Academy kit, the intakes are somewhat simplified and stop short of the main wheel bays with incorrect but practical fitment of the front compressor blades too far forwards. With the intakes and ramps fitted, the main fuselage can be joined. Surface finish on the kit is excellent. The panel lines and rivets are recessed and quite restrained yet deep enough to accommodate both airbrushers and hair stick users without losing definition. On comparing the surface detail of the Academy kit and this, Hasegawa’s look much better, particularly where the various grills are represented. Next comes the flying surfaces. Again, the quality of the surface detailing is superb. There’s no option to lower the flaps in the kit, however the simple design on the F-15 mean that this can be easily achieved by cutting them out and repositioning them if you choose. Having reviewed some builds of the Hasegawa kit on the net, care needs to be taken attaching the nose section to the main fuselage. Take care to minimise any misalignment. As I mentioned previously, you may want to add the upper rear cockpit fairing at this point if you haven’t already done so if this helps getting everything lined up better. A similar challenge may be had when attaching the intakes to the fuselage too, so patience and plenty of dry fitting is the order of the day. The burner cans are represented with the feathers showing. Each can has the feathers made up of 5 parts that need to be glued into a circle so get your swear box at the ready ! Both the internal and external detail on the feathers is nicely detailed. For each feather section, there are 3 actuating rods, or 15 per can so being patient here will pay off. Alternatively stop for a while and open a beer if that’s your preferred technique ! The completed exhaust units fit into the rear fuselage, this will help on painting. The undercarriage is typical Hasegawa quality. Nicely detailed gear struts and wheel hubs are complemented by bay doors with interior detailing where they will be on show. There are two ejector marks on the inside faces of the main wheel tyres, however they are quite subtle and positive in profile so should be quite easy to remove. The canopy and airbrake can be positioned opened or closed. The rear canopy panel is fitted into the canopy then can be positioned on the hydraulic jack to show off the detail in the avionics bay. The canopy and windscreen are thinly moulded giving minimal distortion and quite unusually, there is no seam along the canopy centre line that will need sanding off which is a pleasant surprise. Whilst all the pylons and drop tanks are included in the kit, the weapons unfortunately aren’t. I find this disappointing as the kit is already one of the more expensive ones. If you haven’t got some surplus weapons, Hasegawa sell an additional weapons set (X72-9 Set V). Typical load out includes AIM-9 Sidewinder and AIM-120 AMRAAM. Overall, accuracy of the kit looks very good. Whilst I haven’t build the kit myself, there’s enough on the net to see that it looks quite accurate in its outline straight from the box. The decals The decal print is crisp and in perfect register with many sharply detailed stencils to add interest over all that grey !Four schemes are included: Aircraft 80-0033 57th Fighter Intercept Squadron – based in Iceland until deactivated in 1995 Aircraft 78-0518 18th Tactical Fighter Wing Aircraft 79-0027 32nd Tactical Fighter Squadron “Wolfhounds” – based in Netherlands until 1994 Aircraft 80-0021 36th Tactical Fighter Wing Conclusion What is included in this kit is the best 1/72 F-15C on the market if you measure 'best' by accuracy and detail. There's enough detail to build straight from the box for most modellers. If you measure a kit by value for money, it probably slides down the ranking due to the fact that no weapons are included and it has a higher price tag. It can be improved if you so desire by adding some cockpit coloured etch and aftermarket burner cans, but that is a matter of choice and budget. Review sample courtesy of UK distributors forUK distributors for
-
Photos are mine from the aircraft on display out side the American Hanger at Duxford.
-
Hi all, I've been thinking about adding some USAF birds to my stash and was considering a 1/72 65th squadron F15C Eagle in either Flanker or digital camo. I'm interested in trying out some detailing sets to add a bit of depth too. So, you already know what's coming...what kit, detailing sets and decals for this squadron would people recommend? I've seen a few online but thought I'd consult the Britmodeller oracle before I parted with my hard-earned cash! Thanks, David
-
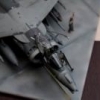
Hi, This is my GWH F-15B/D Eagle finished as an F-15DJ of the J.S.D.A.F. Hiko Kyodotai Agressor Squadron using DXM's excellent decals. I am truly impressed by the 'like a glove' fit on this GWH kit. I have not used any putty at all, only careful gluing and some Mr.Surfacer. It only let me down installing the engines as they for unknown reasons were simply 1 mm to long. Probably due to me not dry fitting them... The gap on the canopy is simply because it is not glued. After some masking...finished with Gunze acrylics and Aclad2, weathered with Ammo and AK. It is an OOB build with just a few scratch build details on the nose, in the cockpit and on the bang-seats, some wires on the landing gears and drilling and plastic card on the weapon pylons. Weapons and ALQ-131 togheter with the slightly modified pilots are Haswgawa. Thanks for looking //Fred
- 26 replies
-
- 32
-
-
- GWHF-15
- Hiko Kyodotai
- (and 1 more)
-
 Stumbled across this today: Cult TV Man has a special limited edition of the Space: 1999 Eagle with Lab pod and booster pack announced. Still the basic Eagle kit will be the same and not a retooled one: http://www.culttvmanshop.com/Space1999-Eagle-DELUXE-Edition-from-Round-2MPC--4995--PREORDER-RESERVATION_p_3004.html Rene
 -
 F-15C Eagle Electronics Boxes 1:72 Quickboost by Aires If building your F-15C with the canopy open, the large avionics bay behind the cockpit is quite visible. To help improve this area Quickboost have brought us the electronics boxes which sit on the left of this area. They are molded as one part which should just drop in. The quality of the molding is excellent and they should do a good job on enhancing this area. They are recommended for the Hasegawa kit, but should kit all 1:72 F-15C Eagles. Highly recommended. Review samples courtesy of distributed in the UK by Hannants Ltd.
 -
I did actually make some kits without putting any lighting in them and this is one of them. Like most of my smaller kits, this was built 'as is' straight from the box. I've also done the Airfix Saturn V and will post some pictures of that once I have worked out how to get it all into one picture.
-
 Hi all, Just thought I'd upload a few pictures of the real space kits I've managed to complete since getting back into kit building. I'm sure everyone's seen them (and probably built them) many times but I enjoyed making them all. They are all mostly out the box with a few modifications here and there (for example I added plume deflectors on the Revell Lunar Module). The Revell kit was the first one I built after finding it on sale in Modelzone. I enjoyed building a Lunar Module so much I followed it with two more from Dragon Models straight away. Then while looking in the Airfix magazine I saw the Hasegawa Shuttle/Hubble kit. . Revell 1/48 LM 01 Revell 1/48 LM 02 Revell 1/48 LM 03 Dragon Models 1/72 First Lunar Landing 01 Dragon Models 1/72 First Lunar Landing 02 Dragon Models 1/72 First Lunar Landing 03 Dragon Models 1/48 LM 01 Dragon Models 1/48 LM 02 Hasegawa 1/200 Shuttle and Hubble Telescope 01 Hasegawa 1/200 Shuttle and Hubble Telescope 02 Hasegawa 1/200 Shuttle and Hubble Telescope 03 Hasegawa 1/200 Shuttle and Hubble Telescope 04 I'm going to upload a few pictures of my completed Sci-Fi kits in a separate post. They can be found here. My current build of Bandai's ISS Space Suit can be found here. Cheers, Stix
 -
Hi, Can anyone tell me if the nose colour of an F-15E Strike Eagle based at Lakenheath is likely to be different from the main fuselage colour? I've looked at lots of pictures and I think that the nose cone is a bit lighter, however I'm not sure if I am seeing an optical illusion or if it is actually the same colour and looks different due to it being a different material or if it really is different to the fuselages Gunship Grey. Any suggestions either way, and if it is different what colour would be suitable? Cheers Karl
-
Hi All, Better late than never, here's the finished F-15C from the 1/32 Tamiya kit. Aftermarket items added (seamless intakes, Black Box cockpit/avionics bay, Eduard exterior and placards, TwoBobs Eifel Eagles decal sheet) Build log is HERE Massive * BIG UP * to Canberra Fan who very kindly donated the kit and aftermarket parts. Also thanks to Stephen for lending me the Lock-On and Squadron Walkround books which were invaluable. All pics courtesy of Farnborough IPMS website - taken by the talented Dr Flangemeister! Alan
- 37 replies
-
- 5
-
-
- Tamiya 1/32
- F-15C
- (and 2 more)
-
1/72 F-14A Tomcat (Tentative) 1/72 F-15E Strike Eagle (Tentative) listed here: http://www.tamiya.co...12THS_index.htm


