Search the Community
Showing results for tags 'c-47'.
-
Can anyone please tell me whether there is, apart from the transfer sheet, any difference between the A08014 C-47 Dakota/Skytrain and the A08015 Douglas Dakota Mk.IV kits? Ie is the plastic the same in both kits? Thanks in advance.
-
Berlin Airlift C-47s 1:72 Iliad Designs It did not take too long after the end of WWII for things to turn sour between the former Allies of East and West. The first real test of the Cold War came in 1948 when the Soviet bloc decided to blockade the former German Capital of Berlin which despite being in the Soviet Zone of occupied Germany was administered jointly between the Soviets, The UK, France and the USA. Road, Rail & Canal access to West Berlin was closed off but not the Air Corridor. In what has been described as the biggest humanitarian airlift in history, air Crews from the US, UK, Canada, New Zealand, Australia & South Africa would operate an Airlift to bring in Supplies to West Berlin. Over 200,000 flights would take place in the space of a year, at the height of the campaign, one plane landed every 45 seconds at Tempelhof Airport. 39 British & 31 American personnel, and 13 German civilians lost their lives in the Berlin Airlift. They are remembered on the Berlin Airlift monument at Tempelhof. The C-47/DC-3 was still at the time available in large numbers and as such saw a lot of service during the Berlin Airlift, this new sheet from ILIAD allows for 4 different aircraft can be built from the sheet; USAF C-47 "Fassberg Flyer". USAF C-47 S/N 315672. S/N 293708 European Air Transport Service. DC-3 from BOAC G-AGIZ . The decals look excellent, well printed, colour dense and with minimal carrier film. Conclusion These decals help commemorate an important part of Cold War history. Highly Recommended. Review sample courtesy of
-
- 1
-

-
- Berlin Airlift
- C-47
- (and 1 more)
-
 RAAF ARDU C-47 Dakota Project INGARA 1:72 Red Roo Models What must be the longest serving transport in the history of the Royal Australian Air Force must be the venerable Douglas C-47. Even after its successors in the form of the Caribou & Hercules were on the scene the C-47 continued to serve with the RAAF's Aircraft Research & Development Unit (ARDU) based at Edinburgh in South Australia. It was finally retired in 1994. The last job of this venerable aircraft was to take part in project INGARA. Ingara is an aboriginal word which mean "long way" Between 1992 and 1994 C-47 A65-86 was modified with a radome under the rear fuselage which housed a synthetic sideways looking radar which had been developed they the Defence Science & Technology Organisation. The project was undertaken to test the design of a radar system capable of producing high resolution ground mapping at long stand off ranges, including target detection of trucks and tanks. 75 hours were flown between 1992 & 1994. Following retirement in 1994 A65-86 is now at the Royal Australian Navy Fleet Air Arm museum at Nowra. The INGARA project did not end with the C-47, the radar was later integrated into a Beach 350 King Air aircraft to test and validate broad area airborne surveillance concepts, as part of Joint Project 129 - airborne surveillance for land operations. The experience of the Ingara team was critical in convincing the US to undertake the Global Hawk project with Australia. Scientists and engineers from what was then DSTO (now DST Group) played an integral part in adding maritime surveillance and dynamic control capability to the Global Hawk system and systematically tested the deployed system against various ISR scenarios. The system was proven in the Gulf War where tactical intelligence was collected at night and through thick oil smoke. The system is now part of the Intelligence, Surveillance and Reconnaissance Test Bed to assess and evaluate multi-sensor ISR issues, and is the only system of its kind in Australia that can collect fully polarimetric radar data. The Conversion This conversion from Red Roo contains the parts and decals to make A65-86 as she was when fitted with the INGARA radome. The parts are the main radome, blanking astrodome mount, VHF antenna, Blade antenna, two etched transponder aerials and a mounting plate for the radome. The instructions are clear about where to fit the parts, the colour scheme and decal placement. The decal sheet designed by Hawkeye models provides all the markings needed including the Blue cheat line. They are in register, well printed and look colour dense. Conclusion This set enables a late use C-47 to built which had an interesting and important job with the RAAF's Aircraft Research & Development Unit. Red Roo continue to bring us interesting conversions with an Australian slant. Highly recommended. Review sample courtesy of
 -
Hi, I'm calling this done. It's the new tool Airfix kit with Rocketeer decals (I didn't get on well with these). Thanks to Paul J for the blister window, though I have come to realise it should be tear drop shaped, please don't chastise me! Finished with Tamiya acrylics. Untitled by bryn robinson, on Flickr Untitled by bryn robinson, on Flickr Untitled by bryn robinson, on Flickr Untitled by bryn robinson, on Flickr Untitled by bryn robinson, on Flickr
- 14 replies
-
- 36
-
-
Pics from Graham James
-
 Combat Models is to release in 2015 a 1/32nd Douglas C-47/DC-3 Skytrain/Dakota vacuform kit Source: http://combatmodels.us/ V.P.
 -
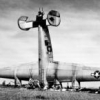
C-47 as used by Pionair Air Charters, pics by Graeme H. This aircraft is now retired to The Ashburton Aviation Museum in New Zealand.
-
Douglas AC-47 Spooky Roden 1:144 The rapid development of jet aircraft in the immediate post-war years seemed to promise the end of the use of piston-engined aircraft in combat. However, the local conflicts of the first decades of the second half of the 20th Century proved that it was too early to send the veterans into retirement. The war in Vietnam presented a number of unpleasant surprises to the US military command, one of which was the so-called "Ho Chi Minh Trail" - an extensive network of trails and small roads in southern Vietnam and Laos, through which there was a continuous supply of weapons for the Army of the National Liberation Front. Attempting to attack it from the air using jet aircraft became a fiasco - the small groups of rebels quickly disappeared, long before the approaching aircraft, and therefore the effectiveness of such missions for the US Air Force was near zero. Perhaps the only positive factor was the weakness of the rebel defense, or indeed the complete lack of it. Initially the old A-26 Invader attack aircraft was used to fight the guerrillas, immediately converted to the B-26K standard. The plane carried effective weapons, but its flight endurance was very limited, even with the use of external fuel tanks. So the idea was born, to equip transport aircraft with weapons to attack ground targets from the air. Transports could stay up in the air for a long time, and their big cargo compartments allowed for the installation of ample armament. The ideal type in every respect to perform such work was the veteran C-47 Dakota / Skytrain. In two of the rear window openings were fitted six-barreled Miniguns, and a third was installed in the space for the side door of the cargo compartment. The new aircraft received the AC-47 designation ('A' denoted that the type belonged to the category of attacking machines). AC-47D is the next modification of this aircraft. The crew consisted of two pilots, three or four gunners, a navigator and an air to ground co-ordinating officer. The first squadron of these aircraft was established in early 1965. Several machines were non-standard modifications, while others had already standardized weapons and gained the call sign 'Spooky', after the mythical ghost that suddenly appeared and fatally struck down their enemies. The first few months of using the AC-47 were quite successful; however, in early 1966 the rebels on the Ho Chi Minh Trail appeared with 37 mm anti-aircraft armament, which offered formidable defense against the gunships. In a short time six of these machines were lost, and in the following months the intensity of their use significantly decreased. The AC-47 gave way to more modern gunships, such as the AC-119 and the AC-123. But with the advent of the mighty giant AC-130 all the earlier gunships were instantly obsolete. They were transferred to the air forces of South Vietnam, Laos and Thailand, where they were used until the early 1970s, when, given the advanced age of the design, they were finally deleted from the inventories of those countries' air forces. Source: Roden Scale Model Kits The Kit This kit, No. 310, is a new issue of Roden's No.308 Douglas C-47 Skytrain; however, this kit has an additional sprue, with parts to build a gunship version; often referred to as the "Spooky". The sprues containing the main components are crisp and well detailed, with finely recessed panel lines etc. Some areas have small amounts of flash around the pieces; however, these can be easily removed with a sharp blade. The engine facia and cowling units are separate items which means that the engine components can each be pre-painted before assembly, thereby avoiding any little overpaint issues. The panel lines on the wings, like the fuselage, are well defined without being overly deep. Elements of flash are more evident here, especially in the undercarriage wheel well but again this comes away cleanly with the use of a sharp bladed craft knife. Sprue C holds one each of the propellers, tailplane and undercarriage assembly. There are two sets of this sprue per kit. As mentioned previously, the engine cylinders are seperate, as in the view below, and they should be able to be painted up nicely with a mix of black and silver etc. If there is an area of concern then that would be where the wheel hub is joined to the tyre. There is an unusually wide gap between the hub and where the tyre fits to it, this can be seen with the wheels on the sprues above and below. As this element would normally be under the full load of the aircraft, then I would expect the tyre to be pressed fully against the rim of the hub. It appears that the hub has not been placed fully into the tyre recess before moulding and this leaves the rim proud on both sides. This next sprue is what differentiates this kit from the earlier C-47 Skytrain kit. It contains an internal half-deck and bulkhead; an additional half-door section, plus three MXU-470/A miniguns and mounts. The half deck is required to sit the miniguns on and the half-door section replaces the double door of the original kit. The Miniguns are quite detailed for such a diminutive size and should look effective when painted up and fitted. The clear spue has the main windscreen, cabin windows and the navigation lights and dome piece. The windscreen is incorporated within a larger piece of the fuselage which should make it easier for masking and painting. Three of the cabin windows on one strip will need to me removed, for fitting on the port side of the model, where the miniguns will protrude out. Decals The AC-47D Spooky carried minimal markings and this is reflected in the decal sheet. Apart from a small national insignia and tail marking, thre is only a nose art decal and propeller danger signage. The decals are clear and look to be register, although they are so small (correctly so) that I had to use a magnifying glass to check them. Conclusion Having checked the wheel hub and tyre setup more closely, I can see that, with a good sharp knife and some application, that the hubs could be cut away, the excess removed and then be replaced to give a more secure fit. All good modelling fun. This looks to be a nice kit and I can envisage lots of different models and dioramas being built of this. They didn't just operate in VIetnam, or only with the U.S., as many other operators used the C-47 as a gunship for their own security situations. Review sample courtesy of UK Distributors for
-
I have a couple of 1:144 aircraft that I would like to paint in Vietnam colours. I would like to know what the colours are for camouflaged F-4E Phantom and a C-47 Skytrain, are they the same colours? I normally use and like Vallejo Air but I need help with identifying the bottle numbers to get for the Vietnam cam of tans and greens. I am also interested to hear If there is a better acrylic paint, which can be easily obtained in UK and, if so, who supplies them. And finally, any recommendations on who retails acrylic paints, such as Vallejo etc. at the most economic prices? Thanks for any assistance with this Mike
-
Here's Roden's new 1/144 C-47. I started building one to complete a theme and then thought it would be rude not to do another at the same time. Really liked the kit and feels that it captures the C-47 lines a bit better than the Minicraft version. Only additions were the home-made decals and the "towel-rail" antenna on the Air Force version. Rhodesian Air Force "7307" This plane ground looped at Rushinga in February 1975 following a brake failure on landing. The landing gear collapsed as a result and the port propeller sheared off and sliced into the fuselage, missing the crew by inches. Air Rhodesia "VP-YNH" Built in 1944 for the USAF, this C-47 somehow ended up flying in the colours of Hunting Clan before being acquired by Central African Airways. CAA eventually became Air Rhodesia (with the break up of the Federation) and the aircraft continued to fly in Zimbabwe until 1983 when it was sold to a Zambian operator. In 1987, the aircraft was eventually written off in an accident while flying for Sunbird Aviation in Kenya. The whole reason for building the C-47 was to complete my collection of Air Rhodesia aircraft in 1/144. Here it is with the Boeing 720 "Mashonaland" Well, that's it ! Time to fire up the old engines for another flight : Thanks for looking. mike
- 28 replies
-
- 10
-
-
This is my build straight out of the box of the old Esci kit, which is very easy to build, although it probably has its critics is still a nice model, although the panel lines are quite evident, I used aftermarket decals, anyway hope you like, needed something simple to keep my mojo going
- 15 replies
-
- 25
-
-
 Etch Douglas C-47 Updates (for Airfix) 1:72 Eduard Having built the Airfix C-47 last year as a diorama, I was impressed with the kit. It went together very well and the detail was certainly good from the box. That said, us modellers know that we can always take it one step further when we build a favourite aircraft. Eduard provide the solutions to do this in their familiar etch 'flat pack's and Brassin resin. Both the interior and exterior are catered for. Brassin Resin C-47 Wheels (672 046) The kit wheels are well defined, but these resin replacements are superb with more accurate looking hubs. They are single piece direct replacements and include paint masks to make life easier. Like the kit parts, they are modelled in a weighted configuration too for a more realistic look. C-47 Interior (73513) The interior of the kit is well detailed, although naturally, the limitations of injection moulding present some opportunities for etch enhancement. This set give some nice touches to the cockpit area including self adhesive pre-painted main panel, control wheels, seatbelts and side panels. The cockpit floor gets a replacement surface too. A nice touch for the cabin are some inserts to fill the ejector pin marks left from the moulding process. A complete front door is included with hinges for the open position and the rear door gets etch handles too which if in the open position are prominent features. C-47 Interior (Zoom SS513) This set provides the self adhesive pre-painted fret included in the above set for a budget alternative just focussing on the cockpit area. C-47 Exterior (72587) A single sheet here provides a mix of noticeable and subtle improvements for the exterior of the kit. The gear legs get several enhancements including the 'X' struts and brake lines that feed up the drag link. A 3 dimensional boarding ladder for the rear access is included too. The engines are treated to the plug leads, oil cooler mesh's (front & rear) and exhaust support brackets offering a great improvement. The gear bays benefit from a number of surface panels and straps for the oil tanks.Finally, windscreen wipers, landing light apertures and aerials are included too. C-47 Surface Panels (72590) Given the small size of these sheets, it would of been good to see this one included in the exterior set rather than being an additional set to purchase. This set provides pretty much what it says on the pack. Included are window frames for the cabin windows & astrodome. You also get the wing joint reinforcement struts that are prominent on both the upper and lower surfaces with pleasant subtle riveting detail, but you will of course need to sand the raised areas from the kit parts to use these. Further 'toothed' surfaces are included for the reinforcement strips immediately outboard of the engines on the lower wings. Finally, several small panels for the fuselage and wings make up the rest of the set. C-47 Landing flaps (72588) One of the great things about the new Airfix kits is the regular inclusion of separate flaps so you can have them in the lowered position and the C-47 is one of these kits. The kit parts are OK, but this set will provide a much more scale accurate rendition of the lattice work on the inner surfaces as you would expect. However, they can be a fiddly affair in my experience with lots of folding of intricate parts, so have the swear box emptied before you start! C-47 Cargo Seatbelts (73514) The cabin seats are pretty basic with no seatbelts included, so this simple set is a great enhancement. I used masking tape on mine, but these would of provided a much improved look. If you have the rear doors open, they will be noticeable. A great benefit is the fact that they are pre-painted, so they can be added after painting your interior. C-47 Die Cut Window Masks (CX401) I'm a big fan of these, whilst the windows on the C-47 are simple shapes, this set will take the sting out of masking prior to painting. Conclusion There are a lot of sets provided for the C-47, and it would add up to a significant amount of money if you used them all. However, I've no doubt that using a few of the sets would much improve the look of your finished build. At some point I would like to build a civilian 'Dak' when released so will be intending to use several of these sets on it. Review sample courtesy of
 -
Hello there, I am looking for RAF 512 Squadron C-47 paint scheme layout and colors. Circa 1944. KG330. If anyone has any links or any info that would me much appreciated! I have found one picture but of not the whole aircraft. http://www.vintagewings.ca/Portals/0/Vintage_Stories/News%20Stories%20K/Twice%20Lucky/TwiceLucky36.jpg It will be used for a 1/32 Guillows kit
-
I reviewed this kit quite recently and as with most of Airfix's recent releases, they're just crying out 'BUILD ME' !! So the initial plan is to pretty much just build it out of the box and have some fun, but there's some temptation to add some ground stuff in too and make a diorama. Depending how things go, it might evolve as it progresses. After spending half an hour or so, most of the interior is pretty much assembled, so I'll leave it all to set before getting some primer and paint on. I'll get some pictures over the weekend of the progress. So far, very impressed with the kit, a quick dry fit of the fuelage halves reveals no issues....fingers crossed!
-
Gday All What a great GB for all us modellers of all things RAAF. I just had to join in and what better day to start than ANZAC day here in Australia where we remember all our dead from all conflicts past and ongoing that Australia has been involved in . Lest We Forget Onto my chosen kit. The Trumpeter 1/48 C-47A Dakota. Australia used C47B's not sure what the differences are yet, hopefully research will turn them up, anyway onto the required box and sprue shots and this last one shows the multi media parts included in the kit, those being rubber tyres, metal landing gear and some PE, also shown are the quick boost corrected rudder,some resin corrected cowlings and Voyager aerials I am awaiting some further Eduard sets from Hannants Regards Bruce
- 48 replies
-
- 4
-
-
- trumpeter 1/48
- RAAF
- (and 3 more)
-
 Hi, After Ford Trimotor I would like to show another impossed to army airliner. The most popular one in whole history - Douglas C-47 Dakota. I know that C-47 was specially produced (not impossed) for army, and it was opposide - the civiled C-47 made huge progress in air transport after WWII - anyway, originally Dakota was an airliner. Without war it would not be so successfull. Model is Italeri, 1/72 almost OOB (I did some work inside, but not seen now). Markings are from D-Day, USAF, 436th TCG, 81 TCS. The original "Buzz-Buggy" C-47 survived war and was used after WWII in Urugway as civil a/c and was scraped in 1951, after an accident I think. Another C-47 is painted and exposed as "Buzz-Buggy" in Le Bourget Museum of Aviation and Space in Paris. Both sides nose arts and sorties "info table" on fuselage are hand painted on decals, other decals from drawer. Comments welcome Regards Jerzy-Wojtek
 -
This Dakota is actually KP208, a C-47B built in 1946, this was one of the last two to serve with the RAF in 1970. It had been on display at the Airborne Forces Museum at Browning Barracks in Aldershot, Hampshire until the museum closed in December 2007. It is now at Merville Barracks in Colchester. KP208 represents KG374, a D-Day veteran that was shot down during Operation Market Garden at Arnhem on September 19, 1944. The pilot, Flt Lt David Lord, won a posthumous Victoria Cross - KG374 was hit twice by anti-aircraft fire with one engine on fire. Lord managed to drop most of his supplies on the drop run, but two containers remained. Despite the damage to his aircraft, Lord made a second run before ordering his crew to bale out. A few seconds later the Dakota crashed before Lord could escape. The Dakota fund is currently trying to fully restore this aircraft, if anyone feels they can help pls contact me for details. many thanks to Ruari for these pictures. Exterior Shots;
-
Gday All Completed this one for the recent Korean War GB that finished up last month, somewhat embarrassingly, my first completion for the year after a few false starts The kit used was the Trumpeter 1/48 C-47A, which, as far as I can tell, makes up onto a C-47B from the box, due to having the longer carb intakes I found it a very enjoyable build with good fit and excellent detail It is let down in the accuracy dept. by wrongly shaped cowls,metal rudder and a sit that sees it sitting too low to the ground, the cowls and rudder are fixed with Quickboost replacements, whilst I added spacers to the landing gear struts to give the model the correct nose up attitude as seen in photos of RAAF Daks The finish is airbrushed Xtraclour Aluminium as the RAAF's Daks were painted silver. All markings were painted on using masks prepared by Miracle Masks. If you have not used masks before I can highly recommend them. This was the first time I had used them, and had no problems, thanks in no small part To Mal Mayfield's thorough step by step instructions. The model represents A65-121 which saw service with 77 SQN supporting their Mustangs by flying ordnance and personnel from Japan during the war. A big thanks to Ryan and Peter from the Aussie Modeller forum who helped with photos of the actual machine Thanks for looking Bruce
- 18 replies
-
- 15
-
-
The plan was to finish this within the D-Day GB timescale, but for want of a better excuse, I forgot the deadline and missed it! Anyway, this is the new Airfix C-47 kit and strangely, the first of the newer breed of Airfix kits I've got round to making following the review I did in June this year. It certainly won't be the last as it was largely a joy to build. Big thanks to Alistair (Mottlemaster) and Andy (Sgt Squarehead) for sending me some figures to use and pointing me in the direction to get some more. Also thanks to TonyOT for helping out on research for some of the finer details that I would of otherwise missed. I'm still planning to get some of the new figures that Dan Taylor is releasing to busy up the diorama more with Para's waiting to board Kilroy. You can see the build HERE, but the kit is largely out of the box, just a few inner details added such as seatbelts. Thanks for looking Neil
- 32 replies
-
- 20
-
-
Douglas C-47 Skytrain Airfix 1/72 Famed for its part in the D-Day assault into Northern France and folklore status in civil aviation history, the C-47 first flew in civilian guise in 1935 as the DST on the request of a sleeper aircraft for American Airlines based on the successful DC-2. The primary purpose for the aircraft was to provide East-West flights across the US in less than 24 hours. The DST became more famously known as the DC-3 when the sleeper arrangement was replaced by seats. Only one year later, KLM were taking the DC-3 from Amsterdam to Sydney, Australia to replace its DC-2’s on that route. Production of the DC-3 surprisingly ended in 1942 with only 600 airframes; however the demand for the aircraft was overtaken by the military for the transport role due to its excellent capacity and cabin uninterrupted by the wing spar due to the low wing layout. Only minor modifications were made to the C-47 including a reinforced floor and cargo door allowing wider loads to be carried. It could carry 6000lb of load such as a Jeep, a 37mm cannon, 28 fully loaded soldiers or 14 stretchers and medical staff. With this incredible flexibility, over 10,000 C-47 & C-53’s were built with production ending in 1945. Attempts were made later on to introduce a Super C-47, but the huge number of ex-military aircraft after the war meant that there were affordable alternatives for the airlines to purchase. To summarise the incredible career of this aircraft that still flies today, over 50 versions were built and it’s been operated by around 100 hundred nations in every corner of globe. The kit (Build review HERE) With the recent 70th anniversary of D-Day, the release of a new kit in D-Day guise is no accident. Whilst the aircraft has been tooled before by ESCI and Italeri and boxing’s of these by ESCI, Airfix, Italeri and Revell, this is the first new tooling since the early 1980’s and most welcome it is. Packed in the new style sturdy red box with stunning digital artwork by Alan Tooby, first impressions are very pleasing. There are 5 light grey sprues, a clear one obviously and an impressive instruction sheet that really adds to the quality presentation. Panel lines are of the recessed design and whilst heavier than your typical Hasegawa or Tamiya kit, aren’t as excessive as recent concerns led me to believe and there is virtually no evidence of flash or sink marks Assembly starts with the interior as you’d probably expect. The cockpit and rear cabin interior are very nicely detailed with pilot and co-pilot figures included too. There is room for improvement which will no doubt come from the aftermarket community in due course, such as the cockpit seats which look rather clunky when compared to what can be provided in etch format. The instrument panel only has a decal option for the instruments, although I’m guessing that not much will be seen once assembled anyway. The diagrams in the instructions are excellently drawn using colour to assist in clarifying assembly stages. The rear cabin is fitted out with bench type seats as an option, however you may choose to have a stripped out cargo area by omitting those. There are ejector marks on the interior surface, however I suspect that they won't be that visible once the kit has been put together. Assembly of the interior looks to be very straight forwards, with the whole assembled section being sandwiched between the fuselage halves. My first impressions of the fuselage made me question the profile by comparing it to drawings in the Squadron Signal publication. Whilst I accept that there is a risk of the drawings being incorrect or even my aligning the part against an image on the screen, they indicate that the fuselage profile is a little thin with the upper section being about 1.5mm under nourished which affects the profile above the windscreen. That sounds like I’m being critical of the kit, but I’m not, I’m just trying to be open with my observations. Obviously this is open to debate due to my unscientific approach and I’m happy to be corrected. Surface of the fuselage is catered for by a mixture of recessed panel lines and some raised surfaces which look like either reinforcing or armour plates. You may want to tone the panel lines down slightly, a few coats of primer or paint should address this. I will also add some evidence of rivet lines when I build this too as a personal preference. With the fuselage joined up, the lower wing mid section is fixed in place with a spar to reinforce the wing structure. There are a few strange assembly steps in this kit which caught my attention. The first being separate upper wing roots that need fitting before the upper wings are attached. I’m not sure why they aren’t just moulded as part of the fuselage. A nice little touch is the addition of oil tanks inside the nacelles that will be on show when looking in to the main gear bays and detailed rear engine bulkhead for the same reason. Detailing across the wing surface is predominantly represented with recessed panel lines with various raise details such as the wing kink reinforcing plates. Whilst these are obviously not scale accurate, they give a good representation of the panelling. The fabric effect on the ailerons and tail feathers is well moulded giving a good contrast to the metallic surfaces. The engine detail is quite well dealt with; the only thing that lets them down is lack of texture to represent the ribbed air cooling surfaces of the cylinders, similar to those found on the Lancaster B.II. Both banks of cylinders and the gearbox come as separate components that are to be mounted between the two nacelle halves. The undercarriage can be positioned in the raised or lowered position and of course has the option for skids if you choose the MATS scheme. The intricacies of the gear legs is well represented with no less than 6 parts making up each main gear leg excluding the skis which are made up of another 5 parts! All the doors are provided as separate parts. Whilst there is no internal detail on the front door near the cockpit, the cargo door has pleasing detail to enable you to have these in the open position. With this in mind, there is a great opportunity to detail the rear cabin and admire your handy work afterwards! The cabin windows are fitted from the outside which is good for assembly purposes, no pushing them in by mistake. The second feature that I find a bit unusual is the fact that the windscreen is made up of 3 parts; side windows and front section. Given that this is always a tricky part to avoid getting glue on, particularly for novice builders, a one piece windscreen or even a moulded section for the upper cockpit area could of made assembly and prevention of glue marks easier. Assembly finishes with the props and various aerials. Two types of prop blades are provided, both paddle and needle type. Decals The decal sheet is somewhat lacking in colour due to the liveries provided, however the register and crispness is superb. A large collection of stencils is included on the sheet and despite the very small size, eyesight permitting are actually readable! Markings provided are: C-47A-65-DL 41-2100521 “Kilroy is HERE”, 92nd Troop Carrier Sqn/439th TCG, Operation Overlord operating from Upottery, Devon 6th June 1944 C47D 43-16062 Military Air Transport Service (MATS), Isachsen airstrip, North West Territory, Canada, 1949 Conclusion This is an eagerly anticipated kit for many including myself. There are some things I’ve criticised, including the profile above the cockpit and the panel lines may be regarded as deeper than necessary, but be in no doubt, it is a kit that won’t disappoint. Assembly on the whole looks fairly straight forwards and the level of detail is enough of a balance to satisfy both novice and experienced builders alike. With over 50 versions of the aircraft in the history books, I should imagine there will be plenty of options from the aftermarket industry in the pipeline to use this kit as a base model for modification too. Review sample courtesy of
-
Hello! I'm hoping this is the correct place for this post because there isn't a section that I thought worked better but never mind. I am building Airfix's C-47 as a present for my great uncle who jumped out of them during his time serving in the SAS in Malaya and Borneo but I need some help! I have no idea as to what paint scheme the dakotas were in when operated by the SAS during the conflicts in Malaya and Borneo, would anybody on here happen to know? I've done lots of searching in books and on the internet but to no avail. Thank you very much, Ben.
-
Hi everyone, here are some shots from the excellent Lyon Air Museum in Orange County. It's a great collection of classic aircraft, military vehicles and classic cars, and they all work! More pics here: http://www.hanger51.org/aircraft-museums/us-museums-collections/lyon-air-museum-ca/ B-17G Flying Fortress by tony_inkster, on Flickr B-25J Mitchell by tony_inkster, on Flickr B-17G Flying Fortress by tony_inkster, on Flickr A-26B Invader by tony_inkster, on Flickr DC-3 Dakota by tony_inkster, on Flickr Cessna O-1E by tony_inkster, on Flickr A-26B Invader by tony_inkster, on Flickr
-
Gentlemen, 'Kilroy is Here' of the 79th TCS of the 436th TCG and delivered part of the 377th PFA (Parachute Field Artillery) Battalion of the 101st AB Division on the dawn of D-Day. It was ship #38 of serial #10 and flown by 1st Lt. William K. Watson. I hope you like her!