
Search the Community
Showing results for tags 'bf 109'.
-
 Hello guys, After building the small Airfix Spitfire Mk.Ia in 72nd, I decided to go back to one of my favourite scales, 1:32. This time it's the turn for the Revell 1:32 Bf 109G-6. Markings will come from different sources: The heart with Ursula's name, so distinctive on each of Hartmann's aircraft, will be from the Academy 1:48 Ta 183. Lower wing crosses will be from the Hasegawa Bf 109G-6 (the ones with the black outline). The chevrons are from the kit decals. Tulips and yellow markings will have to be painted. Real life photo of the aircraft: Here are the first in-progress photos: Propeller done:
- 8 replies
-
- 5
-

-
- Erich Hartmann
- Bf 109
- (and 1 more)
-
The story so far: In order to keep it as at least a neutral country, the Third Reich offered Argentina a batch of 10 brand new Bf 109F-4s. These aircraft were numbered from I-101 to I-110. In order to improve the aircraft's performance, the Argentinian Air Force asked Messerschmitt to leave the 109s in bare metal, the only areas receiving some sort of "camouflage" being the fabric covered control surfaces. The Argentinian flag was painted in the rudder. The 10 aircraft were then given to the newly created Grupo 5 de Caza (5th Fighter Group) based at the Moròn Air Base in Buenos Aires. After the war, the ten 109s were scrapped. No remains were left. Footnote: This is a what if story, don't do as the Argentinian modellers did by believing it. Grupo 5 de Caza was also based at Villa Reynolds (San Luís, Argentina), and was established in 1966. They used the A-4 Skyhawks. I was inspired to make this what if after seeing a profile of an Fw 190A-4 in bare metal and with Argentinian colours. The kit chosen for this was the Weekend Edition of the Eduard 1:48 Bf 109F-4. Some fit issues, the instrument panel had to be trimmed so the fuselage halves could close properly. And the forward parts of the wheelwells needed to be sanded down so the upper wings could mate with the lower wings. Decals came from my spares box.
-
Had Argentina officially sided with the Axis during 1942/43, which aircraft would the FAA had used: Bf 109F-4 or Fw 190A-2 (1942)/Fw 190A-5 (1943). Don't want a political discussion in the comments, just want to know which aircraft could have been used by Argentina.
-
 Messerschmitt Bf 109E-1 J/88 Legion Condor (SH72443) 1:72 Special Hobby The BF 109 has inherited quite a legendary status and when you look into its service career, it's certainly obvious why. Viewing the design in retrospect, it looks just like a typical fighter of the WWII era, but it was more than that, it was the very platform that the single seat fighter format was born from. Powerful engine, monocoque airframe, all metal construction, enclosed cockpit and retractable gear this was unheard of before hand, it was radical, not typical in the 1930's. Its birth wasn't perfect however, to achieve its performance, some sacrifices were made, particularly in the landing gear arrangement and high wing loading having a negative effect on landing speeds compared to the competition at the time. This inherent design issue was never fully cured and it's estimated that at least 10% of all 109's were lost in take off accidents. Early models (A-D) were powered by the Junkers jumo engine with outputs of around 700hp. The aircraft was first used in combat during the Spanish Civil War where many lessons were learned and these would be later put to good use in battles over France and Britain. The E or Emil model broke the mould in 109 development by changing to the more powerful Daimler Benz DB 601 engine of around 1080hp, a significant step in performance and also in armament due to the introduction of 20mm cannon. By 1939, all earlier variants had been replaced in frontline service. As the variants progressed, so did the level of armour protection for the pilot. Another critical element to improve survivability was the use of twin radiators with cut off valves meaning that if one radiator was damaged, the other could be used to keep it airborne. The Emil was the primary Luftwaffe fighter until 1941 when the F model became widely available with more powerful engine although a few managed to see combat in the Battle of Britain. For an aircraft that broke the mould with fighter technology and performance in the mid 30's, it's evolution meant that whilst it's design had exhausted improvement capability towards the end of the war, it stayed in operational use until 1965 in Europe in the guise of the Spanish licence built HA 1112 using the Merlin power plant. During its 30 year career, more than 33,000 were built, a record that will probably never be beaten. The Kit This is a brand new tool for 2020 from Special Hobby, in collaboration with Eduard. The quality is first class with crisp moulding and fine engraved panel lines. Given the small size of the real aircraft, in 1/72 the model is quite diminutive, but seems well detailed. Construction starts with the cockpit. The rear bulkhead attaches to the floor with the rudder pedals going in as well. The front lower bulkhead is made up and installed onto the floor followed by the instruments panel and the coaming in front of it. The instruments being provided as decals. Into the cockpit go the flight controls and flap wheel, followed by the seat. The belts being provided as decals also. If the modeller is going to display the cover for the guns in front of the cockpit open then full guns are included, if you are doing this closed then only partial ones need to be added. Next up the engine is assembled which seems quite detailed for the scale, the bearers attached and it fitted to the firewall. Inside the main fuselage halves the exhausts are fitted along with the tail wheel and then the whole thing can be closed up. Separate engine and gun covers can be added, or left off as needed. After the tail surfaces are attached to the main fuselage then we can move onto the wings. The lower wing is a single part with left and right uppers. The wheel wells are all boxed in on the lower. To the middle of the lower wing the radiator is first added. The top wings can then go on. All the wing control surfaces are separate parts. To finish the wing the under wing radiators are added. The wing can then be joined with the fuselage. The canopy parts can then be added, with different types of head armour being provided for the different decal options. The slats can then be added to the main wing in either the open or closed position as needed. At the front the prop and spinner goes on. Last up for the main parts, the main landing gear is made up and added. A few detail parts now can be added to finish of the kit, the aerial mast, pitot tubes, balance horns,; and even an engine starting handle if you wish to install it. Markings The glossy decal sheet is printed in house and looks sharp and in register. There are three decal options available from the decal sheet; 6-123 - J/88 Legion Condor. Olbt Hans Schmoller-Haldy, Spain 1939 6-121 - J/88 Legion Condor, Lt Karl-Wolfgang Radish, Spain 1938/39 6-119 - J.88 Legion Condor, Hptm Siebelt Reents, Spain 1938/39 Conclusion It is good to see a new tool out of this most famous aircraft. I am no 109 expert but it looks to be a well detailed and engineered kit. Highly recommended. Review samples courtesy of
 -
 I just finished these 11 models for the BF 109 Group build. Enjoy, Cheers Jes
 -
Hello guys, here are the photos of my most recent model, Revell's 109G-10 Erla in 32nd.
- 2 replies
-
- 16
-
-

-
- Bf 109
- Erich Hartmann
- (and 1 more)
-
Hello guys! I just received a notification from a domestic seller that my Bf 109G-10 Erla in 32nd scale from Revell is on its way to my local post office. The kit has markings for two versions: Erich Hartmann's last Messerschmitt, and Yellow 7. I'll be building it as Hartmann's machine and put it alongside his G-6 from Hasegawa. I learnt a lot from the G-6 Late & Early (from Revell too), and will apply my findings (such as loose landing gear struts and fragile tailwheel strut) into play with this model. I hope I don't slash the tailwheel strut with my hand this time. The model should be arriving next week if everything goes according to the delivery schedule. Until that, here's a downloaded photo from Google of the kit's boxart.
- 9 replies
-
- 2
-
-
- Erich Hartmann
- Bf 109
- (and 1 more)
-
Camouflage & Decals Messerschmitt Bf 109 A-F (9788366673212) Kagero Publishing via Casemate UK The Messerschmitt Bf 109 is one of the iconic aircraft of WWII. It origins were from before WWII where it was first used in the Spanish Civil War by the German Air Force working on the side of the Spanish Fascists in what would prove to be training for WWII. The Bf 109 served through WWII going through many changes of the design including fighters and fighter bombers. The book is primarily colour profiles of the various different marks of the 109. There are 39 pages of profiles and a page listing model paints for the German RLM colours. These are listed in FS number, Humbrol, Gunze, Pactra, Aeromaster, Testors, Xtracolor and Lifecolor brands. As well as the Book there is an accompanying decal sheet. While the book contains the profiles there is no information accompanying the profiles as to the colours used on that aircraft. By Kagero's own admission in the preface the profiles used in the first 5 of these books have been previously published by them before. Future books will feature new material. Decals There is n the book a sheet of decals in both 1/72 & 1/48. The decals look well printed, glossy with minimal carrier film. I was surprised and disappointed to find out these only contained the national markings for Germany & Spain. I was expecting maybe a decal sheets to supply some of the markings to build a few of the aircraft in the profiles. As it is if you dont have these already in the spares box or decal stash then you will have to source these separately. Conclusion Sorry but a combination of recycled profiles along with a decal sheet only containing National Markings does not make me want to rush out for more of the same. Recommended only if you are a die hard 109 fan and must have this publication. I feel Kagero are riding on the coat tails of some excellent publications they have done in the past with this volume. Review sample courtesy of
-
Messerschmitt Bf 109E-1 Emil (05-07) 1:48 Wingsy Kits The BF 109 has inherited quite a legendary status, and when you look into its service career, it's certainly obvious why. Viewing the design in retrospect, it looks just like a typical fighter of the WWII era, but it was more than that, it was the very platform that the single seat fighter format was born from. Powerful engine, monocoque airframe, all metal construction, enclosed cockpit and retractable gear this was unheard of before hand, it was radical, not typical in the 1930's. Its birth wasn't perfect however, to achieve its performance, some sacrifices were made, particularly in the landing gear arrangement and high wing loading having a negative effect on landing speeds compared to the competition at the time. This inherent design issue was never fully cured and it's estimated that at least 10% of all 109's were lost in take off accidents. Early models (A-D) were powered by the Junkers jumo engine with outputs of around 700hp. The aircraft was first used in combat during the Spanish Civil War where many lessons were learned and these would be later put to good use in battles over France and Britain. The E or Emil model broke the mould in 109 development by changing to the more powerful Daimler Benz DB 601 engine of around 1080hp, a significant step in performance and also in armament due to the introduction of the 20mm cannon. By 1939, all earlier variants had been replaced in frontline service. As the variants progressed, so did the level of armour protection for the pilot. Another critical element to improve survivability was the use of twin radiators with cut off valves meaning that if one radiator was damaged, the other could be used to keep it airborne. The Emil was the primary Luftwaffe fighter until 1941 when the F model became widely available with more powerful engine although a few managed to see combat in the Battle of Britain. For an aircraft that broke the mould with fighter technology and performance in the mid 30's, it's evolution meant that whilst it's design had exhausted improvement capability towards the end of the war, it stayed in operational use until 1965 in Europe in the guise of the Spanish licence built HA 1112 using the Merlin power plant. During its 30 year career, more than 33,000 were built, a record that will probably never be beaten. The Kit This is a brand new tool form Wingsy. It is a shorter run kit in that the production run is not as large as other companies and the sprues themselves are smaller, and there are not as many tiny parts as some kits. The qality of the moulding is first rate though, better in fact than some other 109s in my stash. Construction starts with the cockpit. The rudder pedals are built up and added to the cockpit floor, followed by the seat complete with PE belts. The trim wheels, control column and oxygen regulator are then fitted. The front bulkhead complete with oil tank is fitted. To both side panels detail parts are added. The instrument panel has the gunsight fitted. All instruments are provided as decals. The complete cockpit can now be assembled, Next up a few subassemblies of the propeller, prop boss and main landing gear are built up. The fuselage can then be closed up with the cockpit going between the two sides, the rear deck for the cockpit then going on, the rudder and tail wheel part fitting at the rear, and at the front an engine block, and the front top deck with the two machine guns behind it. At the front the boss for the prop is fitted. The last item to be added here is the engine air intake. We now move onto the wing. There is a single part lower wing, with left/right uppers. Before closing the wings up the wheel wells need to be built up. Once assembled the wing tips can be glued on. The wings can the be fitted along with the front under engine cowling and its oil cooler. The tailplanes are fitted at the rear, and the radiators are fitted to the wings. At the front the engine exhaust stubs are fitted to either side. All of the flying control surfaces are now added with the flaps, slats, ailerons and tail control surfaces being separate parts that the modeller can fit as they want. To finish off the wheels are put on their axles, along with the canopies (the pilots head armour being added from PE and plastic parts), aerials, pitot tubes and balance horns go on, they lastly at the front, the propeller. Markings The glossy decal sheet is printed by Decograf and looks sharp and in register. There are four decal options available from the decal sheet; Stab I./JG51 - Josef "Pips" Priller. Speyer, Germany 1939 WNr. 3356, I./JG51 Heinz "Pritzl" Priller Bar, Early Battle of France, 1939. II./JG26 Staffelkaptin Fritz Losigkeit Werl, Germany 1940. WNr 3413, 5./JG26 Lt Hans Krug, Marquise, France 1940. Conclusion It is good to see a new tool of this most famous aircraft, which should do well for Wingsy. I'm not a 109 experten, but it looks to be a well detailed and engineered kit. Highly recommended. Review samples courtesy of
-
While I wait for the decals for my Ju 88C-6b from ICM to arrive (I haven't even cut plastic), I've decided to buy and build this kit. I've been looking up and down for it, and finally got it at a good price. I'll be painting it as Franz Dörr's Bf 109G-6 Late. This aircraft was stationed at Gossen in Norway until the end of WW2 in Europe in May 1945. As it's a common thing with Revell Germany models, the kit doesn't come with Swastikas, so I may have to source them from somewhere else (if I decide to put them when the decalling starts). Speaking of decals, they're printed "in Italy for Revell," so I assume that's Cartograf. I'll begin the kit tomorrow after coming back home from my Covid vaccination trip.
- 15 replies
-
- 6
-
-
- messerschmitt
- Bf 109
- (and 1 more)
-
Messerschmitt Bf 109E-3 (SH72443) 1:72 Special Hobby The BF 109 has inherited quite a legendary status and when you look into its service career, it's certainly obvious why. Viewing the design in retrospect, it looks just like a typical fighter of the WWII era, but it was more than that, it was the very platform that the single seat fighter format was born from. Powerful engine, monocoque airframe, all metal construction, enclosed cockpit and retractable gear this was unheard of before hand, it was radical, not typical in the 1930's. Its birth wasn't perfect however, to achieve its performance, some sacrifices were made, particularly in the landing gear arrangement and high wing loading having a negative effect on landing speeds compared to the competition at the time. This inherent design issue was never fully cured and it's estimated that at least 10% of all 109's were lost in take off accidents. Early models (A-D) were powered by the Junkers jumo engine with outputs of around 700hp. The aircraft was first used in combat during the Spanish Civil War where many lessons were learned and these would be later put to good use in battles over France and Britain. The E or Emil model broke the mould in 109 development by changing to the more powerful Daimler Benz DB 601 engine of around 1080hp, a significant step in performance and also in armament due to the introduction of 20mm cannon. By 1939, all earlier variants had been replaced in frontline service. As the variants progressed, so did the level of armour protection for the pilot. Another critical element to improve survivability was the use of twin radiators with cut off valves meaning that if one radiator was damaged, the other could be used to keep it airborne. The Emil was the primary Luftwaffe fighter until 1941 when the F model became widely available with more powerful engine although a few managed to see combat in the Battle of Britain. For an aircraft that broke the mould with fighter technology and performance in the mid 30's, it's evolution meant that whilst it's design had exhausted improvement capability towards the end of the war, it stayed in operational use until 1965 in Europe in the guise of the Spanish licence built HA 1112 using the Merlin power plant. During its 30 year career, more than 33,000 were built, a record that will probably never be beaten. The Kit This is a brand new tool for 2020 from Special Hobby, in collaboration with Eduard. The quality is first class with crisp moulding and fine engraved panel lines. Given the small size of the real aircraft, in 1/72 the model is quite diminutive, but seems well detailed. Construction starts with the cockpit. The rear bulkhead attaches to the floor with the rudder pedals going in as well. The front lower bulkhead is made up and installed onto the floor followed by the instruments panel and the coaming in front of it. The instruments being provided as decals. Into the cockpit go the flight controls and flap wheel, followed by the seat. The belts being provided as decals also. If the modeller is going to display the cover for the guns in front of the cockpit open then full guns are included, if you are doing this closed then only partial ones need to be added. Next up the engine is assembled which seems quite detailed for the scale, the bearers attached and it fitted to the firewall. Inside the main fuselage halves the exhausts are fitted along with the tail wheel and then the whole thing can be closed up. Separate engine and gun covers can be added, or left off as needed. After the tail surfaces are attached to the main fuselage then we can move onto the wings. The lower wing is a single part with left and right uppers. The wheel wells are all boxed in on the lower. To the middle of the lower wing the radiator is first added. The top wings can then go on. All the wing control surfaces are separate parts. To finish the wing the under wing radiators are added. The wing can then be joined with the fuselage. The canopy parts can then be added, with different types of head armour being provided for the different decal options. The slats can then be added to the main wing in either the open or closed position as needed. At the front the prop and spinner goes on. Last up for the main parts, the main landing gear is made up and added. A few detail parts now can be added to finish of the kit, the aerial mast, pitot tubes, balance horns,; and even an engine starting handle if you wish to install it. Markings The glossy decal sheet is printed in house and looks sharp and in register. There are four decal options available from the decal sheet; Grupenkommander Werner Molders, III./JG53 France June 1940 Yellow 15, Uffz Karl Wolff 2./JG52 France August 1940 Yellow 1, Staffelkaptain Oblt Joesf Priller 6./JG51 France July-Oct 1940 Black 4, Ofw Anton Hackl, 5./JG77 Norway Summer 1940 White 13, Heinz Bar, 1./JG51 France Summer 1940 Masks Special Hobby also do masks for the kit. The masks are for the canopies and wheels. Conclusion It is good to see a new tool out of this most famous aircraft. I am no 109 expert but it looks to be a well detailed and engineered kit. Highly recommended. Review samples courtesy of
-
I`ve built this in parallel to my Tamiya based 1940 Romanian 109E-3. It represents the Yugoslav L-31 as it appared at the time of the Axis invasion of Yugoslavia. The RLM 70 - RLM 65 scheme with minimalistic markings may seem dull to some, but I find it beautiful. On the other hand, I think the lighting conditions have not been ideal for this photoshoot of a dark camo aircraft. A few years ago I`ve written a review for the book beneath the model, here on britmodeller: https://www.britmodeller.com/forums/index.php?/topic/235036842-messerschmitt-bf-109-the-yugoslav-story-volume-i-book-review/ It`s an awesome title and - I think - THE reference on the Yugoslav Emils of the April 1941 war. And three more shots when the sun came out of the clouds: I`ve used the ICM kit (72131) which is very similar to the Tamiya. It fixes some (not all) of the Tamiys issues, such as the width of the fussalge rings (not my photo): http://www.cartula.ro/forum/index.php?app=core&module=attach§ion=attach&attach_rel_module=post&attach_id=148777 but also introduces several of its own. All in all, the details are less crisp and it requires more man hours. I`ve made two so far and I think I`ve learned to live with the short fusselage of the Tamiya which is a joy to asssemble. I`ve replaced the undersized tailwheel with an aftermarket from Quickboost (QB 72 324) and I`ve added PE seatbelts from Eduard (SS 582). The Yugoslav Emils used the Oerlikon FF cannon and this looked noticeably different from the Ikaria made MG-FF/M that is present in the box. The solution was to replace them with the brass ones from Master (AM-72-017). They represent Japanese Type 99 20mm Mark 2 cannons, but look about the same. I took the MG 17 barrels from a FW 190 Master set (AM-72-013). I`ve also used the canopy masks from Montex (SM 72072) which worked well on the early, rounded E3 canopy. The decals are from the Lift Here! 708-LH “Emils” sheet. They are very thin, the colours are opaque, they conform beautifully to the model`s sourface and seem to react nicely to Micro Set and Sol. On the other hand, there is only one spot where you should place them and that is the correct one. They aren`t fragile and you could work with them, but they conform imediately and it`s a whole trouble to move the large ones around. Lift Here! instructions recommend using standard German stencils. There actually is a sheet from HM Decals (HMD72136) that contains Yugoslav 109E-3 stencils, but they seemed somewhat oversized and bolded to me so I`ve used the standard ones from Techmod (72055), apart from their nicht betreten lines which are a nightmare to keep intact. I`ve replaced these with some taken from a Matho Models decal sheet (80005 - Decal Solid Lines black) which are a pleasure to work with. All artwork I`ve seen shows these lines to be red, but on the L-61 wreck they are black. The consensus among Serb modellers, decal makers and book and magazine authors seems to be that the upperside of the Yugoslav Emils was painted in RLM 70. I`m not sure on what this belief is ultimately based because when you ask this question they start quoting each other. There are photos with the wreck of L-61 which the Germans never delivered to Yugoslavia and the green seems more like a RLM 71: https://www.jagdgeschwader4.de/index.php/flugwerft-hauptraum/jaeger/messerschmitt-bf-109/e-3a-l-61 The other standard is that the air intake cover was natural metal. The only colour photo (possibly colorized, though) of Yugoslav Emils, published in the book that my model seats on, shows these to be blue. I mentioned this on the forums here a few years ago and a whole discussion resulted from this: https://www.britmodeller.com/forums/index.php?/topic/235037073-bf-109e-blue-air-intake-cover/&tab=comments#comment-3014882 Anyway, I chose to follow the conventional wisdom and went for RLM 70 uppersides, RLM 65 undesides and natural metal air intake cover. The Paints used are mainly Lifecolor: RLM-65 - LifeColor UA 503 RLM-70 - LifeColor UA 501 RLM-02 - LifeColor UA 071 RLM-66 - LifeColor UA 133 Here it is together with its Tamiya, Romanian cousin:
-
Hello guys, here's a kit I built in 2020, but was finished "properly" yesterday. It's Revell's Bf 109G-10 with markings for Green 2, based at Stendal in 1945. The only thing I did to finish the kit was to add some mottling to the fuselage sides.
- 5 replies
-
- 17
-
-
- messerschmitt
- Me 109
- (and 1 more)
-
 I`ve started this build three years ago and it`s finally done! The model represents the no.1 Bf 109 E-3 in Romanian service, as it appeared during the second half of 1940. I had long wanted a Romanian Emil in national/neutrality markings, but the earliest photos I could find were from the early 1941, when their cowling was already painted yellow to conform to the Axis identification markings. Then this beautiful photo appeared in a German language book who`s authors thought they were looking at a French captured Messerschmitt: http://www.cartula.ro/forum/index.php?app=core&module=attach§ion=attach&attach_rel_module=post&attach_id=142957 It actually shows the Romanian Emil yellow 1 next to the Hurricane yellow 1. Romania bought 50 Bf 109 E-3 in December 1939, but only one was flown in at the date of the contract signing. The Germans repeatedly delayed the delivery of the rest. Ten more aircraft arrived in crates during May-June 1940 and were assembled during the next two months. The rest were delivered until february 1941, but after Romania got dragged into the Axis sphere. That first batch of 11 aircraft was formed into the 57 squadron and together with the 53 squadron equipped with Romania`s 12 Hurricanes Mk.I it formed the newly constituted 7th Fighter Group. The no.1 aircraft, flown by the 57 squadron commander, Dumitru Popescu, was destroyed on 4 December 1940 in a tragic accident in which the pilot lost his life. During formation training it collided with a German 109 and the canopy failed to jettison properly. Popescu was an aerobatic champion and one the most appreciated military pilots. The subsequent enquiry found that both the squadrons` pilots and ground crew were unaware at that time that the canopy jettison lever was fited with a safety device. I started the model based on the photo and became aware of its history only after buying the book on top of which its seats, which I have thought to review here, on britmodeller: https://www.britmodeller.com/forums/index.php?/topic/235093077-messerschmitt-bf-109-e-3e-4e-7-vol4-of-the-illustrated-history-of-romanian-aeronautics/ Unfortunately, the photo on which I`ve based the model does not show the right wing. Many (but not all) of the Romanian aircraft of that time had the national markings placed assymetrically (Poland also did this) and unlike the Hurricanes, there doesn`t seem to be any rule for the assymetry on the 109 wings. I`ve painted the left wing stripe and cocard as they apear in the photo and I`ve extrapolated from a photo of no.24 for the right wing: https://www.asisbiz.com/il2/Bf-109E/FARR/pages/Messerschmitt-Bf-109E3-FARR-7-Grupul-Yellow-24-1941-01.html I`ve used the Tamiya kit (60750) with the correction tailwheel from Quickboost (QB 72 324) as the one from the kit is apparently undersized (left-Tamiya, right QB): http://www.cartula.ro/forum/index.php?app=core&module=attach§ion=attach&attach_rel_module=post&attach_id=148815 The Romanian 109 E-3 used the Oerlikon MG-FF wing cannons and the Tamiya kit (as well as all the other ones in this scale that I am aware of) only includes the Ikaria MG-FF/M. The Oerlikon FF cannon was also standard on the Yugoslav Emils and you can see it clearly on this Swiss plane:http://2.bp.blogspot.com/-f5CrYmAZft0/TnJVnW9ZOlI/AAAAAAAAAYo/XJjfpxHpaI0/s1600/bf-109+3+copy.jpg The solution was to use the Japanese Type 99 20mm Mark 2 cannon barrels made by Master (AM-72-017). They`re pretty much the same. For the sake of consistency, I`ve removed the kit`s cowling mounted MG 17 and replaced them with the brass ones from the dedicated 109 set from Master (AM-72-009). I`ve also added Eduard`s PE seatbelts (SS 582). The roundels (with the large blue dot) come from a RB Production decal sheet (RB-D72014). They`re not thin and they proved pretty resistent to Micro Sol. I took the 1 number from another one of their decals (RB-D72013). The stencils are from Techmod (72055). They seem very much to scale (as opposed to the large and bolded ones that you generally find in 109 kits) and are also thin, but they also stick to the model immediately and are very fragile. I had to paint over some of them and start over. Their nicht betreten lines on the wings in particular have been a nightmare to place and I just gave up. Perhaps using Decal Film might help, but otherwise I think it`s impossible to place them correctly without breaking them in many pieces. My solution was to buy a decal sheet from Matho Models (80005 - Decal Solid Lines black) that contains nothing but black lines of various thickness and cut those to size. It says Printed by BEGEMOT on their sheet and the decals are awesome! They are both thin and very resistent. With enough Decal Set/Water, you can move them for ever until you are happy and then they conform beautifully. By the way, I chose to have the wing lines black and not red as is popular with model makers because that`s how they appear on the Swiss J-355 (supposedly correctly restored) and the wreck of the Yugoslav L-61, both of which are export E-3s from about the same period. I`ve pieced together the Me 109 E stencil on the vertical stabilizer (barely visible on the original photograph and in my photos) from Kora`s Yugoslav 109 decal sheet (KORDEC7234). The painting was done by brush, mainly with LifeColor paints: underside - RLM-65 - UA 503 upperside - RLM-71 - UA 502 propeller - RLM-70 - UA 501 interior, wheels bay and main landing gear - RLM-02 - UA 071 control panel - RLM-66 - UA 133 The yellow for the stripes, tricolor and propeller cone is the LifeColor UA 042. It was recommended by some of the RB Productions instructions as a good match for the accompanying decals, but it doesn`t seem identical to me. It was also hard to brush and after so many layers I lost some details. I am aware that my build has several issues, most of which are unforced errors. Hopefully I`ll do better next time.
 -
Messerschmitt Bf 109 E-3/E-4/E-7 (vol.4 of the Illustrated History of Romanian Aeronautics) by Horia Stoica and Vasile Radu I`d like to point out - to those that haven`t found it yet - the publication of another title in the Illustrated History of Romanian Aeronautics series, this time dedicated to the Messerschmitt Bf 109 E in Romanian service. Much like the Hurricane title that I have reviewed here: https://www.britmodeller.com/forums/index.php?/topic/235031176-hawker-hurricane-voli-of-the-illustrated-history-of-romanian-aeronautics/ this volume is also largelly an album, but with more text devoted to the subject and, this time, accompanied by several colour profiles. The book is bilingual (in Romanian and English). Romania bought its first Messerschmitt Bf 109E at the end of 1939 and the various versions (E-3, E-4 and E-7) served from 1940 until the end of the war. In total, there were 69 machines so, unlike the Hurricane volume which was structured around each individual aircraft (of which there were only 15), this title has its chapters arranged chronologically (Before June 1941; June 1941 - September 1944; After August 1944), followed by chapters dedicated to the pilots and their personal emblems and one of various details (guns, gunsight, control sticks and several shots from repair shops). Towards the end of the book there are 3 tables (one listing the Romanian ranks and corresponding English equivalents, another of all aircraft numbers and their respective Werk Nr and the third, dedicated to the 6 machines modified into E-4 after August 1943). These are followed by a recollection by Lieutenant Ioan Galea describing a mission from May 1944 against a large formation of American B-17 bombers and their accompanying Lightnings, while flying the BF 109 E-7 no.65. The Romanian text of this section is spread on five and a half pages, but unfortunately, it is not translated. Instead, there is a brief (less than half a page) description of it in English. All in all, there are 160 pages with - by my count - 75 black and white photos showing the aircraft, pilots and technicians, 3 priceless contemporary color photos of the Emil in Romanian service (that stir lively debates on Romanian modelling forums regarding the yellow paint used), 38 colour photos of various documents (the text of these is mostly in Romanian and is not translated, but there is an English caption explaining their contents) and 3 colour photos depicting a contemporaneous drawing of the famous 7th Fighter Group`s Donald Duck emblem, the text on that photo`s back and the original drawing on which the emblem was based. There are also 5 colour profiles plus top and bottom views of a Romanian 109 E by Teodor Liviu Morosanu (you might be familiar with his work from the Romanian Fighter Colors 1941-1945 title published by MMP). In conclusion, this is a very useful book for anyone wanting to model the Bf 109E and get a sense of its service in the Romanian Airforce. The series has a facebook page (noted in my review of the Hurricane title) where you could try to get in touch with one of the authors (Horia Stoica), but I see it`s available from various international sites and scale model shops so there`s no longer a need to give any directions of where it can be acquired from. To be clear, I bought mine a couple of years ago at an airshow and paid full price for it. I should note that, in the meantime, two more titles have appeared in this series, dedicated to the Henschel HS-129 B-2 and the Bloch M.B.210 in Romanian service. I`ll end with a couple exemplificative shots of the Messerschmitt volume:
-
- 2
-
-
- book review
- Bf 109
- (and 1 more)
-
 This is representation of Erla-built Bf 109G-14 "Black 13" from15./JG5 at Kjevik, Norway in 1945. All A.M.U.R. Reaver sets, such as spinner & airscrew, cowling and oil cooler fairing with radiator mesh were used. The plane had late-war finish with several shades of RLM76 on lower surfaces and 75/82 on top.
- 38 replies
-
- 55
-
-
- messerschmitt
- Bf 109
- (and 4 more)
-
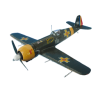
I would like to enter this GB with this Bf 109, that flew over the Agäis December 1943. Cheers Jes
- 10 replies
-
- 10
-
-
Here is my initial entry to the GB, Airfix 1/72 B P Defiant Mk 1 & Bf 109E dogfight double, so to speak. I am building them in flight and will make a display stand with the 109 bearing down on the Daffy. The Defiant will be in the markings of 141 Squadron and the 109 will be from III/JG51. These two squadrons were involved in a very brief engagement on 19 July 1940 and was a clear indication that the Germans had got over the surprise of the Defiants sting in the tail. I will add a bit more info as the build progresses. This is a placeholder for the time being as i have two other projects ongoing in other GB's. A couple of pics....... TFL, Cheers Greg
- 44 replies
-
- 15
-
-
Hello guys, this is my seventeenth and final build of the quarentine (I've run out of models to build).
-
Hello guys, here's my latest aircraft, a Strike Witches themed plane. This time it's Erica Hartmann's Bf 109G-14. Kit is from Hasegawa in 1:72.
-
- 5
-
-
- Bf 109
- messerschmitt
- (and 1 more)
-
Hello everyone, I've started another model after finishing my Ki 84. This time is the Strike Witches themed Erica Hartmann's Bf 109G-14.
-
Hi, Here is my Airfix Bf 109 in Romainian markings. Totally brush painted using Revell & Humbrol acrylics. Markings are OOTB as is the build. I think it makes a nice change from the Luftwaffe options, and looks good beside my other "regular" 109's. I had to scratch build the Armour windscreen as the front canopy in the kit didn't have it for this version. Thanks for looking, Cheers, Greg
- 14 replies
-
- 26
-
-
-
Hi mates! For those that haven't been following the WIP, here is my first model of the iconic Messerschmitt Bf 109. That's right, my very first in nearly 50 years of modelling military aircraft. Why did I wait so long? I don't know - I haven't built a Fw 190 or Me 262 either! Project: Messerschmitt Bf 109E-4 Kit: Airfix Messerschmitt Bf 109E-4 (kit number A01008) Scale: 1:72 (because I don't want my thumbs to turn into sausages!) Decals: From the kit, representing the aircraft flown into a field in Love's Farm, Marden, Kent by Oberleutnant Franz von Werra, Gruppen-Adjutant I/JG 3, September 5, 1940. Also, swastikas from Techmod sheet 72101. Photoetch: Eduard Detail Set No. 73 453 Masks: Eduard Set CX 331 Resin: BarracudaCast BR72091 Messerschmitt B,C,D,E Main Wheels Paint: Gunze H70 RLM02, H67 RLM65, H64 RLM71, H65 RLM70, H416 RLM66, H90 Clear Red, H94 Clear Green; Tamiya XF-69 NATO Black, XF-2 Flat White; Testors 1180 Flat Steel,1149 Flat Black, 1790 Silver FS17178, 1795 Jet Exhaust; Floquil 110004 Crystal-Cote; Future; Alclad Klear Kote Flat Weathering: All weathering was done with pastel chalk dust, and is sealed underneath the top coat of flat varnish. No panel line wash was done externally; a light burnt umber wash was used in the cockpit. Improvements/Corrections Applied the Eduard PE set to the cockpit, including the canopy retention cable. PE hand holds on front windscreen. Eduard PE used for both main wheel wells and landing gear doors. Replaced kit wheels with resin set from Barracuda Studios. Lowered the ailerons by 11 degrees to match typical landing configuration (leading edge slats were previously stowed by der Erksters). Scratch built the starboard wing fairing attachment plate (to match the detail that Airfix forgot, even though it was properly moulded on the port side). Radio mast from kit was broken; replacement part from Academy kit was shortened and its profile altered. Added antenna and lead-in wires with 0.005" diameter Nitinol wire. Build thread: Link What a sweet little kit! I only encountered a few areas that were strange - for example I had to remove the alignment pegs from the wings in order to get the top and bottom halves to line up properly. Once I did that, the alignment was very good, and the wing assembly joined the main fuselage with the proper dihedral. I also had to remove an alignment peg from one of the tailplane struts so I could mount it in the correct position. The propeller can be mounted either way - you have to be careful to make sure that the straighter edges of the prop blades are the leading edges. Very little putty was used on this kit. Some of the small parts were quite difficult to remove from the sprues (I was using a new #11 blade to carefully cut through the sprue gate). I only broke one part, namely the aerial mast which I replaced with an altered piece from an Academy kit. All told, I really enjoyed putting this little guy together! By the way - no attempt was made to "fill" the panel lines with anything other than the normal amount of paint that I used in airbrushing the camouflage scheme. The next time you read someone saying this kit has "trenches" please direct them to this build, give them a light tap on the head, and tell them to stop believing all the nonsense you find on the Internet. Except for this thread, of course. The paint scheme and markings are of course from the famous 109 shot down over Kent. I think I represented the aircraft with the proper colours and weathering, at least based on current research. A fellow Britmodeller sent me a copy of the crash report which included descriptions of some of the colours; for instance the black and white spinner and the fact that this aircraft had no armor protection in the canopy. Enough of all this stuff - here are the pictures! Enjoy! Edit - My fellow modellers pointed out some errors in my build, which I quickly corrected. Updated pictures on further down the thread. Thanks mates! Cheers, Bill (who can never decide what to build next...)
- 60 replies
-
- 62
-
-
BODENPLATTE Fw 190D-9 & Bf 109G-6/14 1:48 Eduard Limited Edition For this limited edition boxing the kits are focused on German aircraft that participated in the Operation Bodenplatte on January 1, 1945. This was an attempt by the Luftwaffe to gain air superiority over the stalled Ardennes battlefield. The operation achieved surprise and initial success, however it ultimately failed. While many allied aircraft were destroyed on the ground actual aircrew casualties were light and most of the losses of aircraft were easily replaced. This would be the last strategic operation mounted by the Luftwaffe in WWII. This boxing contains two full kits, PE and masks (not shown). BF 109G-14A/S This edition from Eduard is the very very first release of Bf 109G-14/AS version in this scale. The G variant of the 109, colloquially known as the Gustav was one of the primary fighters available to the Luftwaffe during the closing years of WWII, and saw extensive active service, all the while being upgraded to combat the increasing Allied superiority in the air. Happily for the Allies, the supply of experienced pilots was fast running out, so as good as the upgrades were, they couldn't make an appreciable difference to the outcome. The G-14 was brought into service at a crucial time for the Axis forces, as the Allies pushed inland from the beachhead at Normandy, and it had an improved water injection system that gave the engine extra performance, plus the new clear-vision Erla-Haube canopy as standard. It was also an attempt to standardise the design to ease the job of construction, which had become decentralised due to the ferocity of the bombardment of the industrial areas by the Allied bombers at that stage of the war. As a result, few sub-variants were made of the G-14 even though over 5,000 were built, with command fighters and high-altitude variants the main exceptions, but the U4 had a high powered 30mm MK108 cannon fitted through the engine and firing through the centre of the prop. At the start of the build the modeller will need to decide to build the G-14 or the G-14/AS as two different fuselage sprues are in the box for both aircraft. Once the is done construction starts in the cockpit, which has a number of PE controls added to the floor, and a full set of PE instruments that are ready to add to the painted cockpit, as well as the fuel line part that is supplied on the clear sprue because it has a glass section as it runs through the cockpit to allow the pilot easy access for checking if there's fuel getting to the engine. A choice of humps between the pilots knees cater for the cannon fitted U4 sub-variants, and a full set of painted crew belts are supplied on the PE fret, plus rudder pedals for good measure. More PE is attached to the cockpit sidewalls, and with all that glued and painted you can close up the fuselage around it, not forgetting the retractable tail wheel used in one of the decal options, with a spinner back-plate fitted to the front of the fuselage, and the exhaust stubs with their slide-moulded hollow tips inserted from inside into their slots. The nose cannon insert, supercharger intake and cannon bulges in front of the windscreen fit into their respective areas, and a set of flame deflectors made from PE are added over the exhaust stacks to prevent blinding the pilot in low light flying. The G-14 had a couple of options for the tail fin, with the increased use of non-strategic wood, so the fin base is moulded to the fuselage, while the tip is one of two separate choices, with a straight rudder hinge, or the more familiar cranked hinge-line. The fixed tail wheel for four of the decal options is fitted to a recess under the tail at this point too. The wings are full span underneath, and depending on your decal choice you may need to open up some holes for a centre-line rack and on the port wing for the forward-raked antenna carried by most decal options. The wheel bay sides are modular and mate with the inner surface of the upper wings to give an excellent level of detail once finished. A small pair of rectangular panel lines are scribed into the fuselage just in front of the windscreen using a PE template that is provided on the sheet, and a pair of teardrop masks are supplied for the wingtip lights, which are moulded into the wing, but can easily be replaced by cutting out the area and fitting some clear acrylic sheet of a suitable thickness, then sanding it to shape and polishing it back to clarity. A depression depicting the bulb can be drilled in the clear part before gluing to further enhance the look if you feel minded. Separate leading-edge slats, ailerons and flaps are supplied, with the latter fitting around the radiator bays under the wing, which have PE grilles front and rear. A scrap diagram shows the correct orientation of the parts to ensure that both layers align correctly as per the real thing. The narrow-track landing gear consists of a single strut with moulded-in oleo scissor, a captive cover that glues against it, and the two-part tyre with separate hubs on each side. A choice of radial or smooth tread is offered with no decal options suggested for each, so check your references, or just make a random choice. The legs fit to scokets in the wheel bays, and horn balances are fitted to the ailerons, the antennae under the wing are added, and a small PE access panel is glued under the fuselage behind the wing trailing edge. Before fitting the canopy, the clear gunsight must be partially painted and fitted to the top of the instrument panel, and a pair of PE grab handles are attached to the inside of the windscreen, which should be partially painted RLM66 inside or outside before the exterior colours. The canopy opener also has PE parts added plus the pilot's head armour and an aerial on the rear, with a PE retaining wire included for posing the canopy open. A manual starter handle is also present in case you wanted to show your G-14 in a more candid pose on the ground. The prop is a single part and is sandwiched by the back plate and spinner before being inserted into the hole in the front of the fuselage. Two styles of additional fuel tank are supplied, one with a flat bottom edge for ground clearance, and the other with a smoother exterior. These fit on a rack that sits on the centreline for two of the markings options, a rudder trim actuator is fitted to three of the options, and a small twig antennae is fitted to all options with a tiny circular base, both of which are made of PE. . Conclusion These are superb kits from Eduard, and they are priced well, considering the detail and markings options included. They don't bother with novelties such as magnets to hold cowlings in place, but if you should perchance want to show off your engine, you can get a superbly detailed resin one separately and those that don't want to show off their engines don't have to pay for parts they aren't going to use. The G is my personal favourite, so I'm more than happy to see another one from Eduard. Very highly recommended. Review sample courtesy of Fw 190D-9 This edition from Eduard is a reboxing of their original kit from 2011, and depicts a late airframe, and in this boxing the aircraft have been fitted with Ta.152 tails, which is suggested by some to be due to a shortage of the correct Dora tail. It is noticeable because it has a more sloped leading edge and less square profile. Construction starts with the cockpit, and here the majority of the PE is used to upgrade the instrument panel and side consoles. The styrene parts have detail on already, which must be removed if you use the PE, and the areas to be removed are helpfully marked in red on the instructions. The instructions are typical Eduard style, leaving no vagaries as to the location of parts. Forward of the cockpit is the nose machine gun bay, which can be detailed with a large number of parts if it is to be left open, or with the omission of the MGs and their ammo boxes, the bay can be closed up with the use of a pair of MG stubs that glue into the bay cover. As the engine ancillary units (including the super-charger and engine mounts) are in the same bay as the MGs, leaving it open also shows off the nicely detailed parts. The main part of the engine is not depicted in this kit, but the exhaust stacks are mounted from the inside of the fuselage in their own recesses, and are held in place by the front bulkhead of the MG bay. The detailer will want to open up the exhaust stubs to add a little realism here, or stump up a few shekels for the resin parts that are available from Eduard. Once these are installed, the modeller can close up the fuselage after choosing which type of tail wheel to use, depending on which tail unit the fuselage has. Eduard are helpful in providing a key to which type to use based upon the paint schemes. The wing underside is a single piece unit, with a long spar running along the back of the landing gear bay, to which additional ribs are added to detail the gear bays themselves. The wing mounted cannons go through the bays here, and must be added at this point due to their tapering shape. It may be wise to chop off the last section and replace it later in the build with a piece of fine tubing if you are a tad clumsy like this reviewer. The upper halves of the wings can have the cannon bays left open to expose the breeches of the 151/20 cannons, or if left closed, a blanking section can be substituted. The flaps are moulded integrally, but the flying surfaces can be posed at an angle to give a little extra visual interest, and are added after the wing halves are joined. The whole wing is then offered up to the underside of the fuselage, so test fit before applying glue. The rear empennage is standard, irrespective of which tail you have opted for, and the rudder for both tails is poseable, while the elevators fit to the fuselage with a large attachment tab, so should stay horizontal, but check anyway. The landing gear on the 190 is long and canted in slightly, which is shown by the helpful diagram, and the modeller has a choice of two wheel types here with either smooth or treaded tyres. The wheels themselves should be installed at an 8o angle to the oleo strut, which would be fun to measure if it weren't for the 1:1 scale drawing that is provided. The retraction jacks fix within the bay to large contact points, so a strong landing gear should be the result. The modeller can choose to pose the cowling flaps open or closed, which are provided as separate rings that slot in behind the main cowling onto a large cylindrical spacer. The super-charger intake is installed at this point, as are the gun troughs on the forward fuselage. The nose gun bay cover is installed, along with the wing mounted gun bay covers, which if modelled closed, receive a nice set of PE piano type hinges once installed. Although the clear sprue includes four canopies, only two are actually used, with the choice being open or closed. The head-rest & armour is installed in the canopy, as well as a tiny PE grab handle, and a standard windscreen mounts over the coaming to complete construction, other than choosing to mount a bomb or fuel tank on the centreline pylon. Decals This really is the main reason to get this boxing (along with the first AS kit release), with 8 decal options. There are 4 for the 109 and 4 for the 190.There are also a sheet of stencils for each aircraft. Decals are in house fro Eduard and should pose no problems. Bf 109 G-14/AS, W. Nr. 784986, flown by Ofw. Paul Schwerdtfeger, 11./JG 6 Bissel, Germany, January 1st, 1945 Bf 109G-14/AS, W. Nr. 784993, flown by Uffz. Herbert Maxis, 13./JG 53, Stuttgart - Echterdingen, Germany, January 1st, 1945 Bf 109G-14, W. Nr. 781183, flown by Uffz. Werner Zetzschke, 4./JG 4, Darmstadt - Griesheim, Germany, January 1st, 1945 Bf 109 G-14/U4, W. Nr. 512335, flown by Othmar Heberling, 2./JG 77, Dortmund, Germany, January 1st, 1945 Fw 190D-9, W. Nr. 600161, flown by Gefr. Hans-Karl Götz, 7./JG 26, Plantlünne, Germany, January 1st, 1945 Fw 190D-9, W. Nr. 500093, flown by Ogefr. Dieter Kragelöh, 3./JG 26, Fürstenau, Germany, January 1st, 1945 Fw 190D-9, W. Nr.210194, Fw. Werner Hohenberg, Stab I./JG 2, Merzhausen, Germany January 1st, 1945 Fw 190D-9, W. Nr. 210079, flown by Lt. Theo Nibel, 10./JG 54, Varrelbusch, Germany, January 1st, 1945 Conclusion This is a welcome release from Eduard for those who like the aircraft which flew in the last major operation of the Luftwaffe brought together in one boxing. Review sample courtesy of
-
Decided to start a new project as a way to restore my lost "mojo," as most of you call the desire to build models. It'll be Airfix's Bf 109E, which will be done as Franz von Werra's machine. I already have one of this models but painted as Adolf Galland's aircraft. The main difference between the two is that this one will have the flaps and slats down. More progress to follow soon, my side project is Revell's huge Ju 88 in 32nd.

