Search the Community
Showing results for tags 'afv club'.
-
This was supposed to go in the "build one day" pile, somewhere near the bottom to give those kits I purchased months/years/decades ago a chance of being built. Guess what? it didn't. Some poor quality shots with my mobile, but should give you the idea of what this looks like. Coat of primer on, ready for base layer of SSC2. Tim
-
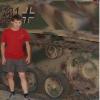
Here's my entry... And it will be built to represent this machine from 26 Regiment RE More, as and when.
-
Hi all, There is a comprehensive review of AFV Club's AEC Matador now on PMMS. What a good looking truck it was. I might have to get a kit or two. Kind regards, Adam
-
German EMC Naval Mines 1:35 AFV Club During WWII the Schnellboots of the Kreigsmarine were used to drop mines into the shiplanes where more ponderous mine layers couldn't dare to go because of their larger size, slow speed and vulnerability to enemy fast boats and air attack. The mines were loaded onto the back of the S-100 boats with their weighted bases and a reel of cable to allow the mine to float free once dropped and reach a depth beneath the surface suitable to detonate when a passing ship nudged against it. The Kit Arriving in a thick-set figure sized box, this set of injection moulded parts is designed to complement the big Italeri S-100 boat released to much enthusiasm some years back. It could also be part of a large scale dock diorama, sitting on the dockside waiting to be picked up and taken out to sea. Inside the box are four sprues with chunky runners in an olive drab shade of styrene in a ziplok bag, a heat sealed bag containing four smaller ziplok bags with a small fret of Photo-Etch (PE) brass inside, a length of string, and a small decal sheet for good measure. From this you can build four identical mine assemblies, and decal your S-Boot with a German flag (with 2-part swastika) and the correct codes for the mine laying vessels. The instructions are printed on the back of the box, and involves building up the roll os cable from PE and styrene parts, with a roll of the supplied string portraying the cable, which is added to the winch gear on one side of the base, followed by the rest of the base plus fixtures and fittings. The base is sat on a shallow tray with four small wheels to enable it to roll overboard, and then the mine itself is built up from two hemispheres split along the same axis as the real thing (no seam hiding needed here!), plus the sensor prongs dotted about the upper half, and fuse plugs on the bottom half. The mines can then be optionally mounted vertically on a central bracket, or at an angle, with additional tie-downs in PE and styrene. Painting is straight forward - a choice of German Grey, with colour codes provided for Gunze, Humbrol, Revell and Lifecolor, to give you plenty of choices. Conclusion These simple mines give the aft deck of your S-Boot added visual interest, and give it some individuality. They are well detailed, and easy to construct, although initially the instructions look a little daunting due to being close together and covered with red arrows. Highly recommended. Review sample courtesy of
-
Hello all. Please may I add an armour model kit. I saw this announced at the IPMS UK Nationals. Rumour of a AEC Matador artillary tractor. I see now this is released by AFV Club. It is the early version and would have prefered the late version however a kit most wanted I am sure. I see the RRP tag though is £49.99. I wil certainly have one. Then what about conversion to late and even an RAF refueller. !!!! Thanks for looking.
-
 AFV Club's Centurion Mk 5/1 Almost out of the box, just with some stowage added ( J-Work's ration boxes were nice and cheap ). Weathered with oils and pigments. Fun build, but the vinyl tracks were a bit of a problem, which is why the idler wheels are too far forward to get enough tension to stop the track twisting. Peter
 -
Started today - Centurion Mk 5/1 Construction starts with the working suspension gear, a little fiddly but not too bad Then on with the Road wheels - needed a little dab of filler on the end to sort out a sink mark Fit the suspension gear to the hull sides The return rollers were next - nasty things with very small contact surface for glueing. Next up is the towing bar and cable shackles The Rear decking was next Then finally for the day, completed the decking Peter
-
M109A6 Paladin Self-Propelled Howitzer 1:35 AFV Club First fielded in the 60s, the M109 has evolved to a capable system for providing indirect fire support with a range today of over double the original platform was capable of. It's current guise is the A6 variant depicted in this kit, and its successor was cancelled because it couldn't provide sufficient improvement in capabilities to justify the additional cost of replacement, which is a testament to the M109's robustness and fighting qualities. The A6 is crewed by 6 and carries the improved M284 155m cannon, with a turret mounted M2 machine gun on a pintle mount for close protection. It now carries an increased 39 round with separate bagged charges, has improved protection in the shape of Kevlar armour, and due to the almost 50 years of experience in repairing and maintaining (RAM), has a substantially improved mean time between failures. The Kit This is AFV Club's newly tooled take on the M109, and a shrewd one to produce the latest variant that is currently in service in the Middle East. It comes in a glossy white box with a painting of the howitzer on the lid and plenty inside. There are thirteen sprues in an olive green styrene, turret halves in the same styrene, one small sprue of clear parts, a run of poly-caps, small fret of Photo-Etch (PE), a spring, turned aluminium barrel with brass tube sheath, a length of braided nylon cord, a small sprue of flexible styrene in black, two black flexible styrene track runs, a sheet of translucent self-adhesive film, decal sheet and of course the instruction booklet. Quite an impressive package all-told. The lower hull and suspension are made up first, with the hull built from a number of flat panels that must be aligned properly to ensure a good fit, so take your time here, as each side of the hull is built from three parts at right angles to their neighbour. If you install one side and the T-shaped rear bulkhead, you should be able to get everything lined up, then repeated for the other side. Suspension is installed next, and this uses the correct torsion bar method, with moulded in swing-arms. They key into blocks added to the inner floor, holding them to the right angle, with a little flex due to the styrene. The rearmost road-wheel axles have suspension struts mounted externally, while the drive sprockets mount on final drive housings that project forward of the lower glacis plate. The paired road-wheels trap a poly-cap between them, and have separate outer rims with half of the rubber tyre moulded in, so there's no easy method of painting them other than by hand or by creating your own masks. The idler wheels are built from four parts and again trap a poly-cap between the halves, as do the drive sprockets, which are made up of two halves. All 14 road-wheels, 2 idlers and 2 drive sprockets can then be installed and uninstalled at whim for painting or to fit the supplied tracks later in the build. The upper hull is also built from slabs that drop into the already extant lower hull, so shouldn't require any fancy footwork or multiple hands to keep square. The flat rear deck supports the turret ring, while the power-pack is mounted to the right side with a louvered part standing proud of the deck. The glacis in front of the driver's location is perforated with four holes that are later covered with access-panels. For this variant, a number of panels on the front are covered with an anti-slip coating that is not present on the kit parts as moulded. A novel approach has been taken by the folks at AFV club, and they have included a sheet of translucent plastic film that is pre-cut to shape, apart from one part that will need a little adjustment. It's difficult to imagine what this would look like under paint, but at least they've made an effort. You could apply some pumice powder onto a bed of strong PVA if you don't think the plastic will do the trick, or at least try it first to see whether it meets your needs. The forward light clusters are applied to the front of the vehicle together with their clear lenses, covers and towing hitches dotted around the area. The rest of the engine deck is a large louvered panel, and can be made to hinge to the rear if you are careful with the glue, but as there is nothing inside on the base kit, you'll need to source or build a suitable engine and bulkheads to do it justice. The driver's hatch swivels to the left, and has additional armour applied to the lid, plus a pair of handles. He also has three clear vision blocks with covers that can be posed open or closed. Because of the rear mounted turret and length of the gun, the travel-lock is situated at the front, and is a substantial piece of equipment that is built up from a surprisingly large number of parts before being attached to the glacis plate via three slots that are opened up from the inside earlier – unless you forgot! The rear bulkhead has a large access door that is often opened during firing to clear fumes, allow the crew access to the firing crew to communicate, pass ammo etc., and this again is capable of being left to swing, but again there is nothing inside to see, so it is of questionable value unless you fancy scratch building the interior. The idler wheels actually project past the rear of the vehicle, and are added on large brackets at this stage, with a suspension strut damping their movement. The ground anchors are built up next, and with careful gluing can be left to rotate around their hinge-points, depicted deployed or stowed upright for travel. A set of large fenders project aft over the idler wheel and protect the rear light cluster from dirt and debris. Now for the tracks. I'll state my partiality to individual links at the outset, and with this kit we have a set of "rubber-band" style tracks that simply glue together and slip around the road-wheels. They are nicely detailed, and will suit most modellers, but if they don't suit you, there is an aftermarket set made by AFV Club themselves and coded 35S23 that provides you with workable styrene tracks that should fit just perfectly. More work, but worth it in my estimation. The turret of the Paladin is a large part of the build, and it starts with the improved M182A1 mount for the big M284 cannon breech. A curved back-plate receives a number of recuperator tubes, plus a central ring, into which the supplied brass barrel sleeve fits. This part is boxed in and ancillary parts are added before the turned aluminium barrel is installed, complete with a small recoil spring that is of little real value unless you want to play with your model afterward. I suppose it would give the barrel a little shock protection in the event of accidental impact, but I'm guessing there. The aluminium barrel has a pair of tapered grooves milled into the top, and the instructions advise not to paint a short 6mm section to mimic the real thing. Once in place, a pair of styrene shrouds lock it in place at the rear, and additional detail is glued around the barrel and locked in place on a cut-out, before the muzzle brake is added, with an internal end-cap, plus two side parts that will need their seams removing. Again the part locks in place by interfacing with a groove on the top of the barrel, but a little CA wouldn't go amiss just in case. The rest of the breach is then built up, including a large curved upper and lower mantlet, mount detail and of course the breach block, which is very well detailed with the interfering threaded segments that lock the block in place. It can be left to swing freely, but probably won't be seen again, which is a shame. The gun's mounting brackets are added to the sides, with two more poly-caps holding the barrel still at any inclination, after which it is mounted in the floor of the turret. The upper turret is a single basic part to which all the detailing is added in the shape of inserts, raised edges of the mantlet, ammo storage at the rear of the turret bustle, and the various hatches on the top deck and sloping sides. The commander's cupola is built up and the pintle mounted M2 machine gun, with slide moulded hollow barrel is attached to the front, with the hatch cover to the rear, again able to move if you glue it neatly. The detail present on the M2 is really rather nice, and includes the shortened cooling jacket, plus an open ammo can with link visible on top. Spare ammo is stowed on the turret in front of the hatch, with one in easy reach and another three further forward on the right side. A large armoured periscope is added to the left front of the top deck, with a hood around it and armoured glass front protecting it from small arms fire. A set of pioneer tools are attached around the front of the turret, and additional jerry cans are strapped to the sides on small ledges, with even more ammunition behind the periscope, and more pioneer tools, plus barrel cleaning kit on the right side of the turret. Aft of the bustle are two large stowage bins that hang off the rear, with mesh sides that are made up from the PE sheet included with the kit. A short towing cable is made up from styrene towing eyes and an 11cm length of the nylon string, which is painted a metallic colour and draped over the top of the turret bustle. The final act is to add a 7cm aerial from stretched styrene (a method is given in a couple of scrap diagrams), although I usually replace these with some 0.28mm carbon rod that is available from various sources. Markings There are five schemes provided on the modest decal sheet, which is printed local to AFV Club in Taiwan, and is adequate for the job, but suffers from a little off-register printing of one of the two colours used, resulting in some name-plates being off-centre, and in one case the letter L of Linnich is actually off the edge of the pale yellow/brown backing. Three vehicles are painted in the three-tone Brown/Green/Black NATO scheme, while two are painted in the current sand scheme for desert operations. Unknown US Army unit - NATO camo. Field Artillery Training Centre, Fort Sill, Oklahoma - NATO camo, FATC A37 "Linnich". 1st ID 1-6 Artillery NATO camo B-13 "Santiago" (incorrectly labelled as "Linnich" on the instructions. 4th ID 3-29 Artillery – Desert sand, B16 "Battle Up". 1st Cavalry Division 1-82 Artillery – Desert sand, B-12, "Bass Master". Conclusion A very nicely detailed kit that is most decidedly an improvement over what has gone before, but with a few niggles such as the quality of the decals and the decision to include rubber tracks that might upset the serious modellers unless they remember to purchase the available tracks at the time. Nothing too difficult to remedy however, and the inclusion of a turned metal barrel, PE and a flexible styrene mudguard/mantlet dust cover more than makes up for these. It will doubtless be the first choice for this modeller when building an M109. Very highly recommended. Available soon from all good model shops. Review sample courtesy of
-
Hello ! I show you my halftracks from AFV Club !! SDKFZ 251/22 Austria 1945 [/url] [ [/url] Thanks for watching!
-
British Churchill MkVI Eduard 1:35 The Churchill was a heavy British infantry tank used in the Second World War, best known for its heavy armour, large longitudinal chassis with all-around tracks with multiple bogies, and its use as the basis of many specialist vehicles. It was one of the heaviest Allied tanks of the war. The origins of the design lay in the expectation that war in Europe might be fought under similar conditions to that of the First World War and emphasized ability to cross difficult ground. The Churchill was rushed into production in order to build up British defences against a possible German invasion and the first vehicles built had flaws that had to be overcome before the Churchill was accepted for wide use. The Mark VI was only produced in small numbers as the better armoured Mark VII was close to being released for service. The set, for the AFV Club kit, comes in Eduards standard poly sleeve with the adhesive flap at one end. Inside there are two small sheets of relief etched brass. The etching is up to the standard we have come to expect from Eduard with very fine parts and details. As is usual, some of the kits moulded details have to be removed before the etched parts are attached. The brass is quite thin and easily folded so annealing before use shouldn’t be required. The two sheets contain new engine intake grilles, bustle storage lid, front mud flaps extensions, lots of new fittings for the rear decking, straps and grab handles and cradles for the fuel tins on the rear of the tank. There are also new tie downs for the engineers tools complete with small details right down to the wing nuts, as well as strengthening straps for various areas around the tank. There are several items that are not provided in the kit. These include new storage boxes. There are a couple of items that I cannot identify or even see where they are used on the rather poor instructions, an area which Eduard really need to sort out. Conclusion The AFV Club kit is very nicely detailed out of the box, but as is the case with most injection moulded kits some parts cannot be moulded with the finesse that etched brass items can give. Thus this set will lift the kit to a new level of fine detail. Recommended. &listtype=search&searchparam=36233'> Review sample courtesy of http://www.eduard.com'>
-
LVT-4 Water Buffalo Update Sets (for AFV Club) 1:35 Eduard The Water Buffalo was the main amphibious troop carrier for the Allies in the Pacific during WWII, and the LVT-4 was the third version into service that gave the 20 troops it could carry the option of dismounting from the rear if under fire. The AFV Club kit has been with us a while now, and is well regarded. Improving the detail with Photo-Etch (PE) parts is always an option however, and that is exactly what Eduard have done with these four sets. Although the ammo box sets could easily be used with any Allied AFV, they have been targeted at this vehicle because it had significant visible stowage for the bow mounted 0.50cal and .303 turrets ammunition, and this isn't provided with the kit. LVT-4 Interior (36240) Comprising two sheets of PE brass measuring 9cm x 6.4cm and 9.7cm x 7cm, this set contains fixtures and fittings for the crew area of the Buffalo, including seatbelts, pedals for the driver, brackets for the radio and other parts within the crew cab. Grab handles and detail for the vision blocks are incorporated, as are straps for the air-boxes on the rear engine bulkhead. crew vision blocks are also improved, and the crew weapons are given PE cooling jackets, and ammo box holders and one unpainted box for the 0.50cal. Stowage boxes to the right of the drivers are improved with more detailed handles, and the top row are replaced entirely with posable doors and detailed equipment boxes that nestle inside them. In the passenger compartment, the missing racks for 0.50cal and 0.303cal ammo boxes are added, with a few simple folds and bracing for the smaller rack that attaches to the sidewall. These are installed on both sides, and make a big difference to the look of the finished vehicle, especially once stocked with plenty of ammo cans, as found below. LVT-4 Exterior (36234) The exterior set is larger, consisting of two sheets measuring 14cm x 7cm of bare PE brass. It includes some sizeable parts to replace the front fenders and add detail to the front of the hull in the shape of clasps, retaining lugs and clips for the bow-wave panel. Mesh panels for the upper hull sides are provided, and the opening stowage boxes build into the hull sides are supplied with new laminated lids, dividers and securing stays. The four gun mounts are improved with brackets for the ammo boxes, and the two 0.50cals get new cooling jackets and iron sights. The front mounted 0.50cals can have one of three different types of bullet-shield, from a straight panel to a curved shield that afford better side protection, and finally a tapering box that gives the gunner best protection with flared bullet splash protectors at the sides. All of these options are supplied in the set, with the easiest being the flat panel, then the folded box. The curved shield will require some careful rolling, as it tapers and needs to be symmetrical, so some care will be needed. Each type has all the necessary brackets to secure them to the gun mount, and each of the guns is upgraded with a short cooling jacket, sights and dual grips, for which you will need some short lengths of 0.8mm styrene rod unless you re-use the kit grips. LVT-4 0.50cal & 0.303cal Ammo Boxes (36248 & 36247) Both sets come on the same 11.8cm x 7cm sheet size, and are pre-painted in olive green, with stencilling in yellow, containing 20 boxes in an un-folded state. Each box has a pre-etched recess on the rear that is used to trace over with a biro to give the front side the familiar strengthening ribs, so there will be plenty of work before you can begin folding them. The boxes themselves are made from one cruciform shaped piece which makes up the box and the lid, to which a top handle is added, and a tie-down loop on one end of the larger 0.50cal boxes or on the sides of the smaller 0.303cal boxes. You can choose to build the boxes open or closed, but they will need painting inside, as they weren't made from brass but cheap metal, suitable for stamping and bending to shape much like these scale replicas. The latches are built into the smaller box's lids, and on the side of the larger boxes, to be folded over when posed closed. 0.50cal - 36248 0.303cal - 36247 Review sample courtesy of
-
 F-5 Tiger II Gun Bay & Electronics Bay (for AFV Club) 1:48 Aires These two sets are for different variants (E and F) of the same basic aircraft available from AFV Club, and provide resin bay details and replacement door panels for the sections of the fuselage that will be removed. Both sets arrive in Aires branded blister packs, and have short instruction booklets sandwiched between the card backing and the protective foam insert. F-5F Tiger II Gun Bay (4554) This set is essentially a drop-in replacement for under a separate panel on the nose of this aircraft, to depict the contents of the single gun bay underneath. The kit's nose already has the cut-out there, which is normally covered by the panel part M16, but instead, you insert the bay part, which on rough testing using my kit simply drops in, and detail the rest of the bay with the gun breech, ammo feeder-guide frame, and other internal parts. The detail is excellent, and the replacement bay panel has ribbing and rivet detail on the reverse, an improvement on the kit part. You aren't provided with any colour call-outs, but the colours shouldn't be hard to track down with some help from walkarounds on the internet. F-5E Tiger II Electronics Bay(4563) The E has a pair of electronics bays in the nose, accessed by a set of panels that hinge downward. On the kit these are depicted as flush panels, but this set fills those bays with two single piece resin inserts that bristle with detail. The doors are also provided, with ribbing detail on the inside, as well as a pair of delicate hinges on the bottom edge. The majority of these were sadly broken off on my set, but if you have a chance to peruse before buying, you can check for yourself that they are intact. In fairness to Aires, they are very delicate, so not entirely unexpected. You will need to be careful during construction, as the gun bay insert panel makes the port-side nose quite delicate, and once those extra panels are removed it will be very flexible. The E has a different shaped gun-bay, so the F's bay won't be compatible, sadly, but a separate set is available if you want to cram them both in. Conclusion Great detailing sets that require only a little plastic butchery, and will bring the detail level up on your model in a very visible way, whichever option you choose. The gun bay is especially tempting due to the fact that there is little or no cutting of the kit parts. Highly recommended. Review samples courtesy of distributed in the UK by Hannants Ltd.
 -
I finished this Alconbury F-5E almost a year ago but I only got to photograph it today. It's the AFV Club kit with TwoBobs decals. Paints are from Xtracolor. Jens
-
Hi all this is my first AFV Club kit. I've had it for ages and didn't realise how good it was. I've added fruil tracks and brass Besas. Bit of scratch building for the tool tie downs, springs etc, but mostly OOB. the suspension is fully workable and sprung by the way! Going for a small dio base as well. Ikea picture frame, foam, plaster, static grass, bit of PE etc Thanks for looking Nick