Search the Community
Showing results for tags 'academy'.
-
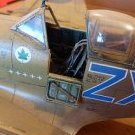
 Hi everybody; back wit an AC build after some figure painting. This time is the Academy 1/48 Me Bf109 G6, which is actually a Hobbycraft reboxing. The main goal of this build is practicing for German Mottle camo painting - first time for me - as I Have a Eduard FW190 in my stash but don't want to risk a messy painting on that, rather do it on this cheap kit. For this reason, I'll try to make a quick and simple build ... (I'll try, I promise ... ) On with the pics: boxart that is also the scheme I'll be doing, Hartmann's Yellow 1. Sprues: Not much of a detail, and definitely no riveting at all. Decals: I'll try to avoid them as much as possible, masking and painting for the most part - but we'll see. So, after the box inspection, I started removing the main parts from the sprues to clean them up with my trusty Electrical Toothbrush Sander and doing some dryfit Wings assembly: panel lines line up properly, no gaps whatsoever. Fuselage assembly shows a couple of issues, as you can see in the above pics, but nothing that some filler and some TLC couldn't sort out. Before test fitting the two halves, I've also inserted the instruments panel and the main part of the cockpit, no trouble there. Also for the fuselage, panel lines match properly. After a bit of sanding, the wing assembly goes in pretty well Some refining needed in the wing root area, and at the trailing edges close tho the roots Gun cowl: this is, so far, the part that I like less There is some shape issue, plus I don't like how the gun barrel (sort of) looks like when in place. I think I'll have to rework that area a little, still trying to figure out how. In the meantime, I decided to glue the barrel to a steel rod: Tail planes: port side one cliks in, the starboard side is loose ... Canopy: the three pieces are transparent enough for me, but do have some minor fit issues. The windshield also has a little stress line, another thing I'll have to figure out how to fix That's it for now. Comments, tips, suggestions, criticism welcome, as usual Ciao
- 334 replies
-
- 5
-

-
- academy
- messerschmitt
- (and 2 more)
-
Hi, here's a recently (today) completed kit that I started years ago (was put off masking the canopy). Nice Academy kit with a scratch built attempt at an exhaust, and excellent Freightdog decals for a 500 Sqn machine from 1952. Used the new AK Extreme metal for the silver (polished aluminium shade) and Xtracrylix for the yellow. Weathering limited to that caused by my own grimy fingers and a Flory Models dark wash. It's nowhere near perfect but I quite like the look of it. Vampire T.11 next! Thanks for looking. NA Harvard T.2B 500 Sqn RAF 1952 by bryn robinson, on Flickr NA Harvard T.2B 500 Sqn RAF 1952 by bryn robinson, on Flickr NA Harvard T.2B 500 Sqn RAF by bryn robinson, on Flickr
- 7 replies
-
- 23
-
-
- NA Harvard
- 1/72
- (and 2 more)
-
 Academy is to re-release its 1/48th two-seats Flanker kit into a limited edition Sukhoi Su-30M(K)2 "Flanker-C" - ref.12301 Source: http://www.academy.co.kr/eng/6q/frmBoardView.asp?pMenuId=BOARD00012&pCode=6690 V.P.
 -
M60A2 Patton "Starship" 1:35 Academy The M60A2 was named the "Starship" due to the then modern technology fitted to the tank. It was designed as a force multiplier to operate alongside M60A1 tanks. Development began in the 1960s with them entering service in 1972. The Starship featured a new different turret from other tanks of the time. The main turret had quite a low profile which was offset somewhat by a large commanders copula on top. This featured a sighting system and a co-axial 50 cal machine gun. The idea was for the commander to find the target and lock on the main armament and then be searching for the next target while the gunner engaged the current one. The turret was fitted with M48 152mm gun / launcher. This was the same gun fitted to the M551 Sheridan. This could fire conventional ammunition to a range of 1.5km and the MGM-51 Shillelagh anti-tank guided missile with an effective range of 3km. A groove as cut into the barrel to allow the missile to fire. The US Army at this time had spent a considerable amount of money on the MGM-51 system. One of the major problems with the missile for its time was its technological advancements which made it unreliable. The missile did not come into sight of the gunner until it was over 700m from the tank and with an effective range of 2km (later extended to 3km) it had a limited envelop of operations. Over 88000 missiles were purchased with the only reported use being a dozen or so fired at bunkers by Sheridans in the Gulf war of 1991. In the end the Starship proved to be a bit of a disaster. The main gun range had already been exceeded by other tanks and the missile system was unreliable. In addition a closed breech scavenger system), which used pressurised air to clear the breech after each shot lead to a slow rate of fire. It was also found that the missile was not as good at penetrating armour as was required. The Starships were phased out by the early 1980s with the hulls being converted to M60A3 tanks, or in some cases armoured bridge layers. If anyone is interested in seeing the Starship in operation there is a training film available here on YouTube. The Kit This is a not a new kit per se from Academy, some of the main parts are from other kits; however the parts for the Starship, and the tracks are new to this boxing. It should be noted that as the main hull is from a kit which features added reactive armour there are some markings on the front of the kit scored in for placement of this armour. The modeller will need to remove them for this kit, which should not be difficult. The addition of photo etched parts for the turret stowage bins, and other small fittings is a nice touch. Construction starts with the lower hull. Fittings for the rear drive and front idler sprockets are added along with suspension components. These are followed by upper parts of the lower hull which house the idler wheels. The main torsion bar suspension parts are then added along with the two part idler wheels, followed by the 3 part main wheels, and five part drive sprockets (these all feature central poly caps so the can be pushed on at any stage of construction). Construction then moves onto the upper hull. The first item to be installed is the drivers hatch, this is installed from underneath. On the top the various stowage bins are added to both sides along with various hull fittings such as light, lifting eyes and protective bars. A few small photo etched parts are used at this stage. Construction then moves to the turret. The first item to be made up is the side mounted searchlight. This a complex affair with 10 smallish parts, some photo etch and a clear plastic cover which the modeller has to cut to size from a small sheet of acetate supplied. The main gun parts are then added along with the barrel, this in one part but there will be the mould line to remove. The commanders copula (a main part of this build) is then built up and added to the turret. Various hull fittings are added along with the turret bins. The mesh for the bis is supplied as photo-etched parts. The last parts to be added are the tracks. These are not rubber band, or individual links. They are short lengths of moulded track which are connected by individual links where they go around the sprockets and bend at the bottom Though better than the rubber band type they will still not sit correctly where they run over the idler wheels so I suspect they will be replaced by many modellers. Luckily they are standard M60 tracks so replacements are readily available. Decals There is a small decal sheet with markings for one tank from the US Army. Conclusion This is an unusual and short lived Main Battle tank, and part of the M60 Patton MBT line. It should make a great addition to a collection of cold war Armour. It is good to see companies bringing us this type of kit. Highly Recommended. Review sample courtesy of UK Distributors for
-
March 1974, the Vietnam Conflict was still raging and while the USAF, USN & USMC had air superiority over the Vietnamese, the ground war is a different story. Between them they had an impressive line up of strike and bomber aircraft, but since the USAF retired their A-1 Skyraiders two years previously, only the USMC had fixed wing aircraft capable of COIN missions. The USAF needed to fill this gap in their inventory and fill it fast. Rather than go through the lengthy process of commissioning an aircraft from scratch they decided to look a suitable airframes from their inventory that could be adapted or converted for use in this role. The obvious choice was the OV-10 Bronco, all three services were using them to good effect and the airframe had plenty of potential. The main downfalls of the Bronco were it's lack of speed and weapon load, these were the main factors that would have to be addressed if a successful aircraft was to be produced. In 1970 the USMC had trialled the YOV-10D in Vietnam and although the design was eventually changed for the production OV-10D it was of great interest to the USAF as a way forward for their project. Addressing the speed issue, it was decided to dispense with the twin turboprops and install a small turbofan engine on the centreline in place of the cargo hold, this would enable additional wing points to be installed and used for forward firing munitions now there were no props to worry about. The intake for the engine was dorsal mounted to reduce the risk of FOD ingestion and damage from ground fire, this configuration also enabled hot turnarounds without the risk of ground crew being ingested. The YOV-10D had a FLIR turret mounted in a lengthened nose, no side sponsons and a ventral turret mounting a three barrelled 20mm rotary cannon. The USAF decided not to use the turret instead they kept the sponsons but replaced the four 7.62mm guns with two 20mm cannons. It was decided that the aircraft would be single seat only due to the fact that this was successful with the A-1, the additional space achieved through this would be utilised for fuel storage as would the space once occupied by the turboprop engines. All existing OV-10 avionics were moved to the lengthened nose and given protective armour, this would allow the entire avionics pack to be detached and replaced within minutes. The system could then be worked on independent of the airframe, this would greatly reduce the maintenance downtime of each aircraft. The FLIR system would be retained but as a revolutionary "split-system" installation on the front of the two booms., this allowed for greater coverage during maneuvering including inverted flight. The hard point count was increased to 11, while it was not able to carry the same weapon loads as the Skyraider, it was never the less a very capable aircraft. Trials started September 1974, in January 1975 three evaluation aircraft were sent to Vietnam, within weeks it was obvious that this aircraft was what they were looking for. In March 1975 full production was approved and by June operational units began to receive their aircraft. Because the designation A-10 was already in use with Thunderbolt II (in development) the obvious change from OV-10 to A-10 could not be made. Because it had undergone such radical changes it was decide to rename the aircraft completely, and so the A-11A Courser (they wanted to keep the horse reference) was born. Well that's the "little" bit of background info I've come up with. The kit will be Academy's 1/72 OV-10D, I originally bought it just for the props as I need them for my Grumman Goose, I've also robbed it of some rocket pod bits for my AH-1G. This group will save it just sitting in my stash forever and should be fun to build.
-
A few pics of a Blackhawk, a bit of artistic licence at play. Eduard Interior and Exterior PE used.
- 11 replies
-
- 10
-
-
Hi, I should have started a thread in the KUTA GB but forgot, and now I am not too far away from completion! Anyway here's an old neglected Academy kit that I have used to try out the new AK Extreme Metal paints, using Freightdog decals. There's probably all sorts of detail issues but I'm quite happy how it's turning out! Thanks for looking. FF Harvard
-
 Hawker Hunter Flaps & Airbrake (for Academy PE4809) 1:48 AMUR Reaver Another not-new set from AMUR, but it's one we thought that the members would be interested in to update and improve the Academy kit's flaps with some realistic detail. The set arrives in a small ziplok bag and paper header, with two large sheets of Photo-Etch (PE) brass, plus a tiny one with a few extra parts on. The instructions are folded to double as the backing card, and walk you through the construction process. The kit's flaps are separate parts, which removes some of the prep-work that's normally associated with flap sets, but a little test-fitting and fettling is bound to be needed to get the trailing edge of the wing to a pleasing fineness. The first thing to note is that this set is suitable for all marks of Hunter, which had varying flap shapes to accommodate the hang-over of the various sizes of drop-tanks. If you are building an F.58 or FGA.9, you will need to place part 22 up against the flaps parts to remove a small section of PE from the flap skin, which would be best done roughly inside the line to begin with, then getting it just right with various shaped files, taking care not to bend the skin. With those done, your flaps will now clear the drop-tanks, and the template part forms the panel between flaps and ailerons, with scale thickness as a bonus. The bay skin glues into the upper wing, and the flap skin should be used to trim 2mm off the lower wing to obtain the correct depth before construction. Once the plastic is prepared the flap skin is detailed with rib and stringer parts, plus four hinge-points, and a stengthener along the trailing edge. The end of the flap with the cut-out needs different strengtheners and the substitution of some ribs for different shapes, all of which is included in the set. Finally, a small angled panel is added on the underside of the inboard flap to correspond with the diagonal rivet line on the inner side. As a bonus there are a number of parts dedicated to giving the ventral air-brake a more realistic look, as the styrene part is too thick and the detail soft. This is done by cutting off all but the hinge area of the brake piece (D8), and replacing it with an outer skin, four ribs, two stringers and an inner skin, which runs over the top of the ribs and stringers. A small folded hinge-point can then be added to the centre, improving the look immensely if you plan to have it open. Finally, there is a replacement hub for the nose wheel, although it looks like you need to drill out the original hub to add this finely etched six-part replacement that should give you a see-thru hub, as per the real thing. Conclusion A nice set that made me scratch my head for a bit until I got my head round the flap cut-outs, but once I'd got that was straight, it's a highly detailed and accurate replacement for the toy-like kit parts. Highly recommended. Review sample courtesy of
 -
I've been going through my models getting some ready for Telford, and realised I hadn't shared these completed builds with you. 1/72nd scale A-Model Mil Mi6: DSC_0110 by Thomas Probert, on Flickr DSC_0111 by Thomas Probert, on Flickr 1/72nd scale RVHP Beriev Be12: DSC_0134 by Thomas Probert, on Flickr DSC_0137 by Thomas Probert, on Flickr 1/72nd scale A-Model Ilyushin Il-18: DSC_0124 by Thomas Probert, on Flickr DSC_0130 by Thomas Probert, on Flickr and finally Academy's 1/72nd scale B-29 converted to a Tu-4 'Bull' - or more specifically the Chinese's first attempt at an AWACs aircraft known as the KJ-1. This used the Cutting Edge conversion which provided resin Al-20K turboprop engines and the Type 843 Rotodome radar dish: DSC_0116 by Thomas Probert, on Flickr DSC_0120 by Thomas Probert, on Flickr These will all be making the trip to the Nationals, and hopefully I'll see a few of you there. Rob
- 34 replies
-
- 67
-
-
- Academy
- Cutting Edge
- (and 2 more)
-
This set intended for 1/48 Academy Hunter. This set suitable for all F and FGA Hunter mods. There are flaps, airbrake, nose wheel hub details in the set. Model flaps are narrower, then should be. The etched flaps have precise dimentions and fix the original parts sizes error.
-
The kit is intended to simulate louvres and meshes on aircraft models Su-27 (and based of its conversions Su-33 and Su-35) in 1/48 scale produced by Academy. All parts have scale precise dimentions, so some modifications of existing models may be necessary. Check the photo reference before applying this set. Made of steel with a thickness of 0.05 mm.
-
 #35/2015 Like the US Navy, also the USAAC tested different experimental camos, like in this case. Each aircraft of the 27th PS was painted in a different camo and presented at the Reno Air Races in 1939. Academy boxing of the Hobbycraft kit, seat mount, forward canopy rails and underbelly vent are scratch, painted with Gunze and Tamiya acrylics in white/olive drab 2 and a flesh-sand mix. Decals came from H-Models, engine from Quickboost. btw, the races were in Cleveland, not Reno, my mistake :-) Cheers, Franz and Reinhard in this vid you see a short sequence with the 27th PS at 3:45 https://www.youtube.com/watch?v=k_NlDKohGfU&list=PLTf-R3S7wNT0R6C5RDAA5RLBajN_Biktt
 -
Hello again, Now it’s time for my Tomcat. Similarly to Su-27SM, this is mostly out of the box. I added details in the landing gear bays, there are metal pitot tube and angle of attack probe. I also corrected the opening for the gun (it was closed) and IR sensor under the nose. Painted mostly with gunze H315 and model master metalizers. Overall it looks nice, there are some mistakes – with few decals in wrong places and canopy not fitting properly (I attached it once everything was painted so wasn’t any room for corrections – and the Academy set is far from great, decals are terrible). I am aware that the sparrows are not fitted properly – when I found out how to do it, it was to late J Enjoy and thanks for watching!
-
Hello everyone, I would like to make a few contributions to this Group Build (if time permits) and this is the first. It reflects a longstanding desire to complete a French Navy Crusader in their final service scheme and to the upgraded 'Prolonge' standard. Luckily, the Academy kit is a wonderful palette on which to work and it gives you the parts and decals to build one. I seem to have lost the instructions for the F-8P boxing, but I'm sure I can muddle through with those from Academy's F-8J kit. The sprues as of this afternoon, post-wash (and still drying judging by the damp spots on the background): I'm keen to start on this in the very near future. cheers, Andrew.
-
Hello all, Here is my next project. A couple of 1/48 Flankers. Thought i'd add them to one thread instead of starting 2. I've always liked the Su-27 family, and much like other aircraft (F/A-18, F-16, F-15) I think it looks better in it's two-seater guise! So here are the 2 I plan to build. First up, Su-27UBM2 of the Kazakhstan Air Force: To look like this: (photo from airliners.net) Aftermarket includes a Neomega cockpit, Quickboost nose cone, Master pitot tube, Aerobonus KAB-500 bombs, Eduard Brassin rocket pods, Quickboost F-14 FOD guards (modified to fit) and decals from an Eduard Su-27UB. I'll also be adding a Hasegawa Litening pod to this jet. I also picked up some AKAN paints: Next up is a Su-30MK2 of the Vietnamese Air Force: To look like this: (net photo) Aftermarket includes Wolfpack Su-30 Cockpit set, Wolfpack Su-30 update set, Quickboost nose cone, Quickboost F-14 FOD covers (modified to fit), Master pitot tube, Begemot decals and Aerobonus CH-25 missiles. I'd also planned to add a Venezuelan Su-30MK2 but can't seem to find 1/48 decals for that nation. Hopefully make a start soon. Dave
- 73 replies
-
- 8
-
-
- Kazakhstan
- Vietnam
- (and 2 more)
-
Russian T-34/85 Berlin 1945 Number 183 Factory 1:35 Academy The T-34 was Stalin's mainstay medium tank that was produced in incredible volume by extremely crude methods, and thrown into the fray against the numerically inferior German tanks on the Eastern Front. The designers combined a number of important advances in design such as sloped frontal armour, wide tracks to spread the load, and the ability to cope with the harsh Russian winters without grinding to a halt, which was a problem that affected the Germans badly after the successes in the summer of Operation Barbarossa. The part count and cost of the tank was continuously reduced during production, with plants turning out up to 1,300 per month at the height of WWII. The initial welded turret was replaced by a cast turret with more room, and the 76mm gun was replaced by a more powerful 85mm main gun, giving even the Tiger pause for thought. The 1945 model /85 had a number of upgrades over previous editions, with electrically powered turret traverse, smoke canister system, and squared off fenders. Crews often added in-the-field modifications such as the famous bed-spring armour, where they burned mattresses and attached the remaining metal springs to the armour to pre-detonate the German Panzerfaust, thereby weakening the effect of the weapon's shaped charge. Bed frames were also used, as they had a heavy-gauge mesh that usually supported the mattress on top. The Kit This edition of the kit has been launched as a special edition that includes bed-frame armour, and features specific to Factory 183 (UTZ) facility at Nizhniy Tagil, where it was made. It isn't an amazingly high-tech tooling with all the bells and whistles, but it is a solid kit of the T-34/85 and doesn't indulge in over-complication of parts in order to add extra miniscule detail. It arrives in a pleasantly simple box with a side-view of the subject, and an overall white theme that seems to be their new look for armour kits. Inside are sixteen sprues in Academy's familiar green/grey styrene, two more sprues in black styrene, a sheet of Photo-Etch (PE) brass for the bed-frame armour, a small decal sheet, instruction booklet, and lastly the painting guide with sprue diagrams on the rear. As usual with many armour kits, you'll have a number of parts left on the sprues after construction, as some of the sprues are multi-purpose. The build isn't complex, as already mentioned, and begins with the construction of the lower hull from a floor panel and sponson sides with overhangs. To these are added the suspension arms in their shafts, and you'll need to take care to ensure the enclosures are sloped in the correct directions. A central bulkhead adds a little strength to the assembly, as does the rear bulkhead, after which the suspension swing-arms are added to their mounting holes. The wheels are made up in pairs with separate hub-caps, and have rubber road tyres moulded in. Some later T-34s were fitted with sprung road-wheels to save strategically important rubber stocks, but having seen some pictures of the decal options provided with the kit, these plain hubs with large bolted rims would seem to be correct. The drive sprockets and idler wheels build up in the same way, and all are added to the stub axles ready to accept the tracks. The tracks provided in the kit are link and length, with the long top and bottom runs moulded as one part, while the sections wrapping around the ends of the run are individual links, giving a realistic look without the work involved in preparing and adding a whole run of individual links. The top run has the characteristic sag moulded in, so all you have to do is put them together and paint them sympathetically. The upper hull is built up next, with the usual light clusters, towing eyes and pioneer tools scattered around the surface. The engine deck is completed with a hatch, two louvers and radiator box, which has a PE grille added, with PE stiffeners around the edges, and across the shortest distance. The rear bulkhead has an insert that has the exhausts and their armoured covers, plus a circular access panel added, after which the rear mud-flaps can be installed. At the front the bow machine-gun is added in its own armoured cover, and a length of spare track-links are added in the centre of the glacis plate. At the front the driver's hatch can be posed open or closed, although I don't see much point in the opened option unless you can find a suitably large driver figure to obscure the fact that there's no interior. The join between the upper and lower glacis is finished off by adding a triangular section beam long the front. Now for the turret, which always seems like the fun bit to me, but maybe I'm just easily pleased? The turret comes in two halves, split around its widest part horizontally. There is a deeply contoured casting texture moulded in that looks a little fierce on first inspection. These turrets were incredibly rough-cast however, and under paint it should look about right, but if you wanted to rough it up a little more and vary the depth, you could attack it with a stiff brush and some Mr Surfacer. Check your references and our Walk Around section if you need some additional pointers. You'll need to do a little work to hide the join anyway, but sometimes there were heavy lines around this area anyway, so see your references again. The commander's cupola is raised and has a number of vision blocks around its sides, with a two-part clamshell hatch that is atypical of the variant. It is however correct according to photographic evidence. The mantlet is set on a pivoting block, with a pair of cheek inserts added to hold it all together. The gun is a single part with a slide-moulded hollow muzzle, and slots into the mantlet from the front, while the cupola drops onto the top. A number of grab handles, lifting lugs, mushroom vents and the simple gunner's hatch are also added, completing the turret assembly, which locks into the hull via a bayonet fitting on the turret ring. At this point you'll have to decide how best to proceed regarding the bed-frame armour, as installing it now will make painting and decaling much harder. Personally, I'd build up the frames and their supports and paint them separately, adding them after main painting and decaling has been completed. The turret receives six panels, which have folded angle-iron sides, while the hull has an asymmetrical set, with the starboard side fully protected with four frames, and the port side protected only along the rear half by two frames, which is as it should be according to photographic evidence. The vulnerable engine deck also has a frame attached over its air intake grilles, and all have stand-off brackets attached to the ends and sometimes the middle frames. The front fenders are the last styrene parts to be installed, although these are probably best done before painting. Markings Two decal options have been included in the box, and there are a number of pictures available online that will assist you with verifying the details of your build. Both have the same white identification bands around their turrets and an overall green scheme. From the box you can build one of the following: 11th Tank Corps. K235. Berlin, May 1945. 11th Tank Corps. K238. Berlin, May 1945. The decals are all white, but with red identification numbers that makes finding each one that bit easier. They are printed in Korea, And have good sharpness and colour density, but as they are one colour there should be no need for registration concerns. However, the white has been double-printed with a small offset, as can be seen under magnification when looking at the kit data at the bottom of the sheet. This could well mean that there is a little ghosting of the numerals when applied to the dark green model, so be aware, and touch-in with white paint if necessary. These numbers were roughly hand-painted, so a few wobbles here and there shouldn't matter. Conclusion There are plenty of T-34 kits out there, and while this couldn't be described as an Überkit, it is certainly of good quality, and keeps the detail, whilst retaining simplicity for ease of building. The only parts that might tax your skills are the bed frames, but as long as you have a reliable straight-edge and some patience, it shouldn't be too tricky. Even if your bends aren't perfect, it won't matter at all, as these frames had to content with tank-riding soldiers all the time, so must have got pretty badly beaten up over time. Highly recommended. Review sample courtesy of UK Distributors for
-
KAI T-50 Golden Eagle 1:72 Academy - Multi Color Part The T-50 Golden Eagle is an indigenous Korean built supersonic advanced trainer which was developed by Korean Aerospace Industries. As such it is the countries first supersonic aircraft. Design follows the F-16 type model and is similar to the Japanese F-2 in shape. Development of the aircraft began back in the late 1990s with a first flight in 2005. The aircraft has developed onto training and fighter versions. It is currently only used by the Korean Air Force, most notably by their Aerobatic Display team. Export orders have been found with the Philippines ordering 12 aircraft. In partnership with Lockheed Martin the aircraft is being offered for the USAF advanced trainer or T-X programme. The Kit The reviewer was hoping that as this is billed as a "Multi Color Parts" kit, that it would be the same standard as the recently released F-4J as it would be great to get a new tool T-50 in 1.72 scale, following Academy's excellent 1.48 scale kits. However on opening the box it is evident that this kit is more toy like than model kit. The parts are limited; there is a limited cockpit and no landing gear at all. The model is to be posed on an included stand; however there are no pilots supplied for this "in flight" mode. No decals are included in this release only stickers. The kit is on two sprues of white plastic and two of black plastic; one of these is the stand. The parts feature some nice engraved detail on the outside. Construction which can all be done without glue starts with an insert for the underside of the top body. Following this the two part ejection seats and instrument panels are added tot he single part cockpit tub. This can then be placed into the lower fuselage half. The two halves can then be joined together. The tail planes are then added along with the engine exhaust nozzle. The two one part intakes are added and the centre line fuel tank made up and added (this has its own integral pylon). The main one part fin & rudder is added along with the cockpit canopy. This then finishes the aircraft. A display stand is included as the kit comes with no landing gear. The stand consists of a base, and a moving pivot arm. The top of the arm fits into the kit exhaust. Decals There are no decals provided with the kit, only stickers. The F-4J offered both but this kit only offers the stickers. Stickers are provided for on aircraft only. Conclusion This will appeal to modellers with younger children. As it is an easy kit with push together parts and stickers it should be fairly easy for them to assemble. It should be pointed out that I suspect in order to conform to EU regulations it is only advertised for sale for 14+, this label covers a Korean label which says not suitable for under 3's. There is scope for modellers to incorporate landing gear etc from another kit but it would be a lot of effort. Review sample courtesy of UK Distributors for
-
 MPM will release 1/72 P-47M-1 European Theatre sprues from Academy new box and decals ref MPM 72004 Like older P-38 this kit is from MPM s.r.o (MPMSHOP , MPM Prodejny). This is local retailer and official Czech distributor of Hasegawa, Airfix, Academy etc. http://www.mpmshop.cz/ https://www.facebook.com/pages/MPM-prodejny/556674341063606?fref=photo ( Not to be confused with MPM Productions (aka Special Hobby) kits producer. Company was divided long time ago and they still use almost same "MPM" logo for some products. Produce company using http://www.mpmkits.com/, http://www.cmkkits.com/ and http://www.aeromodel.eu/ websites. )
 -
This has been a bit of a workbench squatter, somehow if it could have gone wrong it did. I lost a sprue with some vital bits on which as you can see did eventually turn up. Once assembled I got horrendous paint runs which necessitated stripping it down, then the second bottle of paint I had in stock turned out to be an old empty one and no one had it in stock in the UK. Any road up her she is, not my finest work but at least finished. The kit itself is very cleverly moulded in different colours but in turn that makes it harder to assemble and pretty pointless as it is going to be painted anyway. I had no real issues in assembly and used Hypersonics Tailplanes and ejection seats. The Caracal decals were great to apply and conformed really well. I went for a nice clean machine as that was how it looked on the photos I found on t'interweb. I guess that as Guard machines they would have been well looked after. Thanks for looking.
-
At Wonderland Models we have four new plastic model kits due in this September from Academy! These great new releases include: The 1/72 KAI T-50 ROKAF Advanced Trainer Jet, a 1/35 US M4A3 Sherman Calliope, the 1/35 Soviet T-34/85 183 Factory Berlin 1945 and a 1/35 US M60A2 Patton with M162 152mm Gun. For full details, please see our newsletter here.
-
 So, it looks a bit like the F-8 are a bit en vogue these days. Well, I just finished mine, and would like to show it. The build was very straightforward, except of the flaps, which needed some sanding to fit beside the fuselage. Apparently, it's a common problem with this kit. And on the approach for landing, with the backgound my daughter painted... Thanks for watching, if there are any questions, I'm happy to answer! Alex
- 27 replies
-
- 46
-
-
 Welcome in my first WiP on this forum ! I'm going to build this MiG-29 In this model i'm using some extras, here is the list of them. Eduard PE set (interrior) Eduard Exhaust for MiG-29 Pitot Tube from Master Correct Nose from Quickboost Masks from Eduard Some of my scratch (cables inside wheel bay, hand-made antenna IFF) Some parts from Eduard MiG-21PFM Decals from CaracalDecals and White Eagle And that will be all . Now photo. Here are exhaust from eduard And some Rockets with stencils from MiG-21 (I know they aren't 100% realistic, but they looks better with stencils) MiG-29 after mr.Surfacer 1000, now i see, i must fill some places. I hope you enjoy, i want to apologize for my english and photo's. I'm still learning !
 -
Encore Models has just released a limited edition from the Academy's 1/72nd Cessna A-37B Dragonfly as '2 Kit Combo' - ref. EC72104 Source: http://www.squadron.com/Encore-1-72-A-37B-Dragonfly-2-Kit-Combo-EC7210-p/ec72104.htm V.P.
-
 On April 14 1945, on a dark and foggy morning, a Consolidated B-24H Liberator named the 'Hookem Cow' took off from Horsham St. Faith in Norfolk and headed for France. Shortly after take-off the number 2 engine caught fire and the plane struggled to maintain altitude. Near the village of Hainford it hit a power line and crashed, killing 5 of the crew and injuring the remaining two. The 'Hookem Cow' belonged to the 458th Bomb Group, 754th squadron of the USAAF. The men killed in action were the last of their unit to lose their lives in the air war over Europe. During the past two years I have lived in Hainford, unaware of the fate of the 'Hookem Cow'. I did know that East Anglia used to be home to what the locals still call 'the friendly invasion', the deployment of thousands of Americans to quiet Norfolk and Suffolk to risk their lives over occupied Europe. Many of the airfields are still around. I've used the basis of the ‘Hookem Cow’ many times myself; it’s now known as Norwich International Airport. Many of the concrete bomber dispersals are still there, and you see them passing by your airliner window on your way to or from the runway. The place must have looked quite different all those years ago. Being a modeller, I often thought about building some of the planes that used to be based here, but somehow I didn’t get round to it. So when I read in the parish news that there was to be a memorial erected in the village hall to remember the crew of this plane, it all came together. This was a great opportunity to do something for the village my wife and I love so much, to share my enthusiasm for model building with others, to build something with a story behind it and to make a contribution to a memorial which honors some of the men that paid the ultimate price for our freedom. I wrote to the editor, offering to build a model of the 'Hookem Cow' to be displayed next to the memorial. She kindly put me in touch with Ed and Kevin, the chairman and treasurer of the village hall, and we discussed the project. They were very enthusiastic and in turn pointed me toward the man whose initiative this was, Trevor Hewitt. It turned out that I lived not a mile away from one of the most wonderful aviation museums I've ever visited, the New Farm Aviation Heritage Collection, which Trevor runs. I met him at the museum and I was stunned to see the vast collection of items he had collected over the years from aircraft that had crashed in the area, as well as many other great memorabilia and aviation items. If you are ever in the area, please visit! Trevor provided me with lots of information on the 'Hookem Cow', and combined with my own internet research and some really useful comments from the folks here on Britmodeller in a number of B-24 topics that I temporarily hijacked, the project was underway. As is often the case when you start doing research, you find out that things are not as clear cut as you'd hoped. First of all, there were of course no decal sets available that covered the 'Hookem Cow'. The plane had nose art on both sides, but luckily, some good photographic material was available. I sent this off to my father, who has expanded his modelling hobby by creating his own custom decals. Being as enthusiastic about the project as I was, he wasted no time to reproduce the nose art and other 'Cow'-specific decals for me. The second challenge was that the 'Hookem Cow' was a Ford-built B-24H, and the nose section is not available in model form as far as I could determine. I was going to use the Academy B-24J kit, which I already had in my stash, but this kit omitted the bulged navigator windows, the slanted bombardiers window and the correct A-15 front turret. Since I had the kit earmarked for another build anyway, I decided to shell out the cash for the Hasegawa B-24 as its replacement in the stash - this kit has the bulged windows and an additional A-15 turret, which I both pilfered from the box. This solved two out of three issues. The most difficult one was the slanted window. I decided to try plunge moulding for the first time to make this, using the standard vertical-ending window as the mould, so this was faired in using some filler and superglue, and I made about a dozen casts using some clear plastic sheet from Squadron intended for this purpose. The results were a bit mixed, most of the casts came out rather cloudy, but I selected the best one and cut it to shape. To make the Hasegawa turret fit the kit, a lot of excess material from both the turret and the nose area needed to be removed, in fact almost all of it without actually cutting it away completely. The Ford 'S curve' in the nose I made with a file in about two minutes - though this was after I made it in the wrong place first and had to fill the hole with plastic card, CA glue and sand it back to normal! The rest of the kit is a relatively straightforward build; wings benefit from some thinning at the trailing edges, and the nacelle areas on the wing parts require some filler. The panel lines at the top of the fuselage don't line up at all and require rescribing. The horizontal tail surface has major gaps with the fuselage on the underside, but it's easily filled. I used Eduard masks for the Academy glazing and Montex masks for the Hasegawa clear parts. After priming the kit with Tamiya fine primer, I sprayed it with Humbrol Metalcote Polished Aluminum from a rattle can. I like the finish this gives but it does require a coat of Future before masking it and doing other areas like the anti-glare, de-icer boots and moving surfaces. I used a combination of the printed Cow-specific decals, which worked great, and the generic Hasegawa decals which, though they are the newer kind, didn’t budge even after applying DACO medium setting solution. A coat of Future sealed everything in. Before I fit the fuselage halves together, I had filed out two holes in the bottom and glued in two nuts; Trevor had told me the kit was to be presented in a wooden display case, and would have to hang on the wall vertically. I drilled holes in the base plate, and used two long bolts to secure the plane to it, adding pieces of dark green-sprayed plastic tubing to hide the threads. This worked out very well and it is invisible due to the way the kit is presented. I managed to finish the kit the night before the unveiling of the memorial. We fitted it into a very nice and solid display case and it was installed between the two main cases of the memorial; one containing parts of the plane and metal items from the crew's equipment, and the other containing photographs of the crew. I really like the way Trevor designed the memorial; the parts are carefully selected and despite their small size bring the plane and its crew back to life. The ceremony itself was quite impressive; there was a huge turnout and the village hall was full. After a reading of accounts of the accident from surviving crew members, a letter was read from one of their family members back in the States. The names of the crew were read out, followed by the poem 'Epic of the 458th'. After the memorial was blessed and prayers were said, a number of floral tributes were laid, followed by The Exhortation and the Kohima Address. I had not experienced a ceremony such as this before, and I found it quite moving. I think it’s very important to remember the loss of these men’s lives, who fought for our liberty so long ago. We should never forget what happened, and memorials such as this in places that are used by everyone and are seen daily help us doing that. I’m very grateful to Trevor, Kevin and Ed to allow me to be a part of this. I hope I'll have another opportunity to do it again somewhere.
- 25 replies
-
- 48
-
-
- consolidated
- liberator
- (and 2 more)
-
Hi everyone This was one of those projects stretched out to the max over the years. Back then there was no GWH 29s and the Academy MiG was the only game in town. To make it a 9-13 version - the humpback I used a Neomega conversion (cockpit and the spine). In terms of accuracy it is debatable as the hump is not quite correct. Well nevertheless it is OK imho.. If any of you did the Academy 29 you all know it's quite a pain. The kit itself is nice, but needs some add ons to look better (exhausts, nose cone, armament). I had to cut the original spine and replace it with the resin one. Tons of putty were used in the process...Also there was some panel scribing and riveting.. I've used Fru Fru R-27 R and Eduard MiG-21's R-60. I really wouldn't know if that is accurate but I guess it looks good. I have a few photos of the red 24 and in some it appears to lack the front LG mud guard, yet on some other photos it is there... Decals are Begemot and the paints used are by Akan shades for Fulcrum I hope you like it.... Thanks for watching, please check my blog for more photos and info cheers