Search the Community
Showing results for tags 'Zero'.
-
Greetings all, this is my first WIP thread so please bear with me! I've got here the Tamiya A6M5c in 1/48, picked this up on eBay and I can't wait to get started on it. I haven't decided what scheme I'll be doing yet, there are decals for 6 different planes so I'll be spoiled for choice! Mandatory sprue photos: Also, a nice little guide on adding a bit of scratch building to the flaps and engine The kit doesn't have too many parts as you can see for a 1/48, I believe this is a kit from the 80's/90's but it'll be great for me as I'm new to building larger scale models. The guy I bought it from also threw in an Eduard masking kit which is always nice to have. As I'm still rather inexperienced with modelling, I would love useful tips from you guys so please give me constructive criticism! Thanks for looking Ben
-
Hi folks,as a second entry I would like to do Airfix,s recent Zero.I have had this kit over a year and cut everything of the sprues and just never got any further,I have been looking around for reference photos etc and on this very site found navy birds superb build with yellow undersides so may go that route but be warned I intend an over the top wear and tear finish which many will reel back in horror from!
-
Well thids is my second entry for the GB as I have finished my FW190. I picked this up when home in Newcastle at the start of the month, from Fenwicks (which was the place the first ever model I made when I was a boy was purchased from)
- 40 replies
-
- 3
-

-
- Airfiz Starter Set
- 1/72
- (and 1 more)
-
Hi, Not put anything on for a while and the stuff on the bench is going slow as we're decorating, so here's one I finished a few months ago. Hope you like it! For reference, its in 1/48.
-
Hello all, this is my first build on the forum. Just a little Airfix zero built OOB. Sorry about the bad photos. my lights are a-bit broken.
- 13 replies
-
- 12
-
-
Hi All, This is my first post on here after lurking for a long time. Here is my most recent kit i finished. This is the Tamiya A6M5 in 1/72. The kits is completely OTB. Painted with Alclad II and Vallejo Model Air paints. Used the kit decals for 652 Kokutai from the Junyo carrier. Hopefully I have done the kit justice as its just a well layed out kit. Enjoy Jason
-
Here are two 1/144 A6M2b Zeros from Sweet's Yokosuka Flying Group boxing: To be honest, I bought this of all the Sweet Zero kits (and, subsequently, Nick Millman's excellent guide on painting the early Zero) only because of the exotic colour schemes. On the painting instructions, Sweet do say that all the camouflage patterns are conjectural, allowing for some 'artist's impressions' by moi. The first of the two Zeros is Yo-107, painted in an experimental splinter camouflage dated December 1941: The kit was painted in overall J3 and dark green D1 on the upper surfaces and fuselage sides from mixtures of Humbrol enamels (for the J3) and Lifecolor acrylics (D1). The cowling is supposed to be blue-black, but my attempts to correct for scale haven't worked. The propeller stripe decals were extremely uncooperative and I painted them on two of the three propeller blades, and Humbrol Clear decided to eat into the LifeColor during the gloss coat, probably because I hadn't waited long enough for it to cure. I free-handed the splinter camouflage after going slightly mad trying to cut enough Tamiya tape to mask the parts and doing so in reverse. Several thinned coats of dark green were laid on an overall J3 finish for this effect. Next is aircraft Yo-151, painted in M1 over J3. When painting this one, I tried not to go for a colour that matched M1 according to Nick Millman's guide but instead tried to match the light green on the painting instructions; what I ended up with is a tad duller than that. The J3 I used for the undersides is paler and more yellow than for the model above. I left this plane in a gloss finish for fun (and also because I was too lazy to matt coat it). Thanks for looking! Comments are welcome.
-
Mitsubishi A6M2b Zero Type 21 ‘Rabaul’ 1:48 Hasegawa History The first A6M1 prototype was completed in March 1939, powered by the 580 kW (780 hp) Mitsubishi Zuisei 13 engine with a two-blade propeller. It first flew on 1 April, and passed testing in a remarkably short period of time. By September, it had already been accepted for navy testing as the A6M1 Type 0 Carrier Fighter, with the only notable change being a switch to a three-bladed propeller to cure a vibration problem. After the delivery of only 65 aircraft by November 1940, a further change was worked into the production lines, which introduced folding wingtips to allow them to fit on aircraft carriers. The resulting Model 21 would become one of the most produced versions early in the war. A feature was the improved range with 520lt wing tank and 320lt drop tank. When the lines switched to updated models, 740 Model 21s had been completed by Mitsubishi, and another 800 by Nakajima. The Model The first Hasegawa A6M2b Type 21 was released in 1996 and has been released at least six times before this one, so they are really getting their monies worth out of the moulds. That said, the medium grey styrene is still well moulded with no flash and only a few moulding pips on the three main sprues, whilst the parts on the clear sprues are still remarkably transparent. There appears to be no sign of any imperfections on the review sample and it looks to be another well designed Hasegawa kit. The details are cleanly moulded and still well defined both internally and externally. Unlike most of the other kits of Japanese aircraft from Hasegawa reviewed recently, this one doesn’t come with a pilot, so the build goes straight to the cockpit. The floor pan is fitted with the joystick, rudder pedals, rear bulkhead and instrument panel. The seat is fitted to a block on the floor and the seat adjustment handle is attached to the rear bulkhead on the starboard side. To the instrument panel the two upper machine gun breeches are attached along with the gunsight. To finish off the cockpit the two side walls are attached with the port side having a separate instrument shelf fitted, thus making an enclosed tub. The completed cockpit tub is then fitted to one half of the fuselage, which is then closed up. The foreward upper fuselage panel is then attached and fitted with the two machine gun barrels. The Sakae engine consists of engine mount, the two cylinder banks and the crankcase with connecting rods. When assembled it is fitted the fuselage and covered with the single piece cowling. The engine exhausts are then attached as are the horizontal tailplanes. The two upper wing sections are glued to the lower single piece item before the aileron trim tab panel lines are filled and sanded as per the instructions. A number of location holes in the lower wing also need filling and the trim tab actuating rods need to be removed. The completed wing is then fitted to the fuselage, followed by the lower engine fairing, with oil cooler, the pilots’ headrest. The separate navigation light lenses are also fitted at this point, as are the aileron control horns. The main undercarriage consists of single piece wheels/tyres, oleo and outer bay doors, which can be left off as these were often removed to save weight. The undercarriage is then fitted into position and the outer doors attached. The single centreline drop tank is made up of two halves, and includes the mounting pylon, which, when joined together can be fitted between the main wheel wells. With the model now standing on its undercarriage the three piece canopy arrangement attached. It is possible to pose the cockpits canopy open and the aerial mast is fitted to the fixed aft section. Lastly, the three individual propeller blades are assembled to the back plate, the spinner is then added and the completed propeller is fitted to the aircraft. The build is now complete. Decals The decals are as well printed as those I’ve seen in previous reviews. Although there seems to be quite a bit more carrier film visible on this sheet, but nothing that a good gloss coat of paint and some Kleer/Future/Aqua Gloss won’t be able to sort out. Opacity is good as is the register. The sheet provides markings for three aircraft, all based in Rabaul the first two are painted in Mitsubishi Green, (more like white, or at least light grey to my eyes), and the last one in Nakajima, (IJN) Green, which at least looks green. They aircraft are:- Tainan Naval Flying Group, Lt. Hideki Shingho, 1942 advanced party Tainan Naval Flying Group, 1942 201st Naval Flying Group, 1943 Conclusion Hasegawa are really on a re-release trip at the moment, but then the kits are still very nice, not only to look at, but also to build. A more cynical mind would like them to actually produce some new moulds, but whilst these ones keep producing nice, easy to build kits, I can see why they keep knocking them out with just a change of decals. The included detail is nice, but there are always areas which can be improved if the modeller so wishes. But for a nice, easy weekend build you might content yourself with just the addition of some seat belts, job done. Highly recommended. Review sample courtesy of UK distributors for
-
21st Kokusho A6M2-K Zero Fighter Trainer 1:48 Hasegawa History Whilst the Japanese Zero naval fighter is known the world over, it’s not so well known that there was a 2 seat trainer variant. The A6M2-K was designed and built at the 21st Naval Depot at Sasebo Naval Arsenal and was also built at the Hitachi plant in Chiba. The design was based on either a standard Model 21 or Model 22 A6M Zero. The conversion required the front cockpit be moved forward, and the new cockpit for the instructor to be fitted behind. This included a full instrument panel, and full dual controls. The instructor had a full sliding canopy, but the students cockpit was open with only small doors either side to aid accessibility easier. Two strakes were fitted either side of the rear fuselage to assist in spin recovery. The type served as a transitional trainer from the beginning of 1944 and were also utilised as target tugs trailing streamer type targets from pods beneath the outer wings. The A6M2-K used a larger fixed tailwheel than the standard aircraft and also had the outer gear doors removed to save weight. The Model Originally released in 2011this kit is still fairly new so naturally the moulding is very good. The finesse on the details such as rivets and panel lines is very nice indeed. There is no sign of flash and only a few moulding pips, plus no sign of imperfections on the review example. The instructions are well printed, clear and easy to read. Rather unusually the kit comes with two complete fuselages. The first is a single seater, and shares the sprue with the standard engine, cowling and propellers, whilst the second is the twin seater and subject of this build along with the interior required to build the trainer version. In fact you will end up with a lot of parts for the spares box once the kit has been built. The build begins with the assembly of the two pilot figures, each with separate torso, (with head attached), legs and arms. Next up is the cockpit or cockpits in this case. The single piece floor is fitted with a bulkhead, seat, seat supports, rudder pedals, joystick and instrument panel for each pilot. On the trainees’ instrument panel the gunsight and upper machine gun breeches are attached. As is usual with this type of kit from Hasegawa the sidewalls are separate and go to form a cockpit tub when joined to the bulkheads and floor. Before fitting the port sidewall though, two consoles need to be fitted, one for each cockpit. The completed cockpit assembly is then fitted to one half of the fuselage along with the tail wheel bulkhead and single piece tail wheel/oleo. The fuselage is then closed up and the upper forward decking attached and fitted with the machine gun barrels, whilst the rear decking is attached aft of the rear cockpit. The Sakae engine consists of engine mount, the two cylinder banks and the crankcase with connecting rods. When assembled it is fitted the fuselage and covered with the single piece cowling. The engine exhausts are then attached as are the horizontal tailplanes. There are optional tail cones, the normal solid type and an open tubular affair, which looks like it should be part of an anti-spin chute arrangement. The two upper wing sections are glued to the lower single piece item before the aileron trim tab panel lines are filled and sanded as per the instructions. A number of location holes in the lower wing also need filling and the trim tab actuating rods need to be removed. The completed wing is then fitted to the fuselage, followed by the lower engine fairing, with oil cooler, the cockpit role over bars and anti-spin strakes. The separate navigation light lenses are also fitted at this point, as are the aileron control horns. The main undercarriage consists of single piece wheels/tyres, oleo and outer bay doors, which can be left off as these were often removed to save weight. The undercarriage is then fitted into position and the outer doors attached, again these can be left off if required. The target streaming units, which look like rocket launchers in reverse, are made up of the two halves of the tube and capped off either end. They are fitted to the pylon, which is complete with separate sway braces and attached to the outer wings. With the model now standing on its undercarriage the pilots can be fitted and the four piece canopy arrangement attached. It is possible to pose the rear cockpits canopy open and the aerial mast is fitted to the fixed centre section. Lastly, the three individual propeller blades are assembled to the back plate, the spinner is then added and the completed propeller is fitted to the aircraft. Other than painting and decaling, the build is complete. Decals The decals from the latest batch of Japanese aircraft kits from Hasegawa have been pretty good, and it’s no different with this kit. Well printed, with thin carrier film, they are in good register and nicely opaque. Only the walkways on both wings and the identification numbers have any significant visible film, but on a nice glossy finish this shouldn’t silver too much. There are three aircraft for which markings are provided. All are from the Tsukuba Flying Group and both are in the distinctive and very colourful orange and black scheme, and are aircraft numbers 401. 407 and 415. Conclusion This is certainly an oddity I hadn’t heard of before receiving the kit and researching for the review. It will look great amongst a collection of Japanese aircraft, and in such a bright scheme it will certainly stand out. This will make a nice mojo lifter or weekend kit to while the hours away, and should turn out to be a fun build. Highly recommended Review sample courtesy of UK distributors for
-
 I picked up this kit in a garage sale for the princely sum of $5.00 (US). It is the 1978 release by Revell of an AGM5a Model 52 Zero in 1/32 scale. At least that is what the instructions say. It was released to capitalize on the popularity of the Robert Conrad TV series loosely (and I mean very loosely) based upon the exploits of the VMF 214 (Black Sheep Squadron) based in the Solomon Islands in WWII. Pappy Boyington served as a technical advisor on the series but always claimed the series was fiction based a bit on reality. Most of the actual squadron members were not happy with the show and how the squadron was portrayed. I suspect the price was low as this was the bad guy plane in the series and not the desired hero Pappy Boyington plane, the Corsair. I have no idea if all the parts are in the kit. But the instructions are there and so are the decals. Both are a bit weathered and worse for wear. As far as actual combat scenes go, the series was creative and “appropriated” some scenes from the Battle of Britain movie and didn’t even attempt to change the markings from German to Japanese, let alone modify the planes. However, Corsairs were used used in the series and were actual Corsairs. But the Zeros used were modified AT-6 Texans left over from the movie Tora, Tora, Tora. So, this kit is a representation of the “Zeros” used in the series which were representations of the Zeros flown during WWII. So, any of you accuracy guys out there want to question how accurate this model is, remember what you have to compare it to. I thought about using an old Revell AT-6 Texan and putting Japanese markings on it for this project. I have reviewed the instructions and notice there is not one single color call out in the entire instructions. Not one. The decals instructions are not separate but are contained in the final 2 construction phases. I would assume from the lack of detail in the instructions, this kit was aimed at a kid to put together in an afternoon, no paint and have it by his/her side for that evening’s episode. So, I will be looking to some other sources as to what gets painted what and may even take a bit of artistic license and just guess. Oops, just looked at the box top and found this very helpful paint guide: “If you wish to paint this model kit, the following colors are recommended. Flat Black, Flat Olive Green, Flat Light Grey and Silver.” How can I go wrong now. Good luck kiddies, just guess what goes where. Next update the actual building commences.
 -

1/72 Airfix A6M2b Zero, Balikpapan defense
Wolwe82 posted a topic in Ready for Inspection - Aircraft
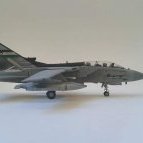
Hey everyone, today i finished my next build, A6M2b zero from the great Airfix 1/72 kit. From aftermarket i used awesome Marabu PE set, a bit of Eduards PE, obviously Eduard canopy masks, CMK barrells for guns and nice Rising decals. Whole surface got new rivets (not sure how much accurate it is, i had only one reference drawing). I did some scratchbuilding too, for those interested (and who doesnt want to go through whole WIP:) ) i did add: - some bits to the cockpit (other than the PE - lever on canopy, headrest, MGs, oil/fuel? tank and more) - bottles behind bulkhead - completely new wheel bays - enhanced engine + new exhaust tubes (not much of that is visible though) - new cowling flaps + intake on cowling - enhanced tail wheel + new hook holding (hook from eduard PE) - new balancing weights on ailerons - gear position indicators and some more details here and there For those who wants to check more, here is WIP link http://www.britmodeller.com/forums/index.php?/topic/234954406-finished-a6m2b-another-airfix/ By the way, big thank to everyone who looked at the WIP and helped and supported me in any way there At first i would like to show some pics of the stuff you cannt see much on the overall photos (when i already gave it the time, it would be sad to not show it ) the engine was enhanced just slightly, most of the stuff you cannt see anyway no matter how hard you try I had few disasters during the build, most of these because of lack of knowledge (how to do this and this), lack of skill and some just bad luck - like the trailing edge of the wing, the chipping there was not planned but bcause of accident, i had to do it.. All in all, here is the finished kit The folded wing tips ll be replaced once i get another airfix zero, so these are just placeholders for now One note to the camouflage/marking. It should be aircraft, used during Balikpapan defense operation and the grey areas on wings/ruder top side were painted additionaly as far as i know, so this kit represents the aircraft shortly after these were painted, thats why there are almost no scratches. Thanks for watching guys and i ll be happy if you leave any kind of comments or criticism- 48 replies
-
- 11
-
-
Hi folks,another under a tenner GB entry,now I know the weathering is completely over the top but I wanted to give it the look of a wars end clapped out machine and try out maskol in the process. WIP in the relevant section.thanks for looking.
-
 Last one of the year, Thought I'd do a quick 24hr build and share with you, a strict out of the box build using nothing but whats in the box parts, glue, paint and brush. Allowed myself 1 tool, a scalpel! Heres the kit an airfix Zero starter set. Paints included HU11,29,85 & 90 Off to a good start with the control column breaking whilst taking it off the sprue, plastic in this kit seems quite brittle, an undercarriage door was to break later too. Stuck with the instructions and the cockpit built up and the fuselage closed up, the kit includes a whole pot of HU29 brown, but the only place the instructions say to use it is on the headrest bit of a waste IMHO. Some nice instrument panel decals included. Engine was painted silver and then dry brushed black, cowling got a coat of black too. Wings tail and rudder next, reasonably good fit Undercarriage bays got a coat of silver then dry brushed black. Thought I had taken some pics of assembling the undercarriage legs and prop, but could not find them in the camera so obviously not - sorry, legs and prop were painted silver with black on the rear of the blades. Prop, pitot, tail wheel, aileron balances, canopy and mast were all fitted then painted HU90 sky, canopy frames were done freehand with the no.2 brush that the kit came with, don't have much experience with acrylic but found any blemishes and smudges on the canopy could be gently scraped off with the scalpel. Decals next had to accept the silvering as its a strict OOB so no gloss coat, The exhaust was painted with a mix of the black brown & silver. Dry brushed black downstream of the guns, exhaust and wheels along with some brown for the wheels. And we are done ! (actually took 27 hours including sleep) Thanks for looking Mark
 -
Pearl Harbour Trio Zeros from Akagi, Zuikaku and Hiryu A few days late I know but I thought I build something based on the anniversary of the Japanese attack on the American fleet anchored at Pearl Harbour on Sunday 7th December 1941 A6M2b Zero 1st Sqn 1st Sec 1st Aircraft Lt Saburo Sindo Akagi Build from the Airfix kit but using Hasegawa decals A6M2b Zero 2nd Section First Aircraft 1/C Tetsuzo Iwamoto Zuikaku Built from the Hasegawa kit and decals A6M2b Zero PO1C Shigenori Nishikaichi Hiryu Build from the Hasegawa kit and decals And a shot of all three together Thanks for looking
-
I'm glad to show my last finished job : Mitsubishi Zero type 52 it's an easy hobby boss. pics are a mix with & without flash imagenes gratis
-
Hi everybody, Below is my first ever model aircraft to be shown in public and third airplane finished in 23 years. I have started in the hobby over again a few years ago and normally build AFV's in braille scale, but recently I decided to refresh my hobby. So, this is a new airfix Zero. A very nice kit as far as I can judge, built completely out of the box. So, here it is:
-
Well, spring has sprung, the grass has ris enough to be mowed, so must be time for a very silly modelling project. So check this puppy out, the venerable Tamiya 1/32nd Zero! Impressive eh? no? OK then.. There's another box INSIDE the box! wow. Still not impressed? OK.. There's some resin and tin bits as well! OK, I'm not impressed either. That's because this is the impressive bit. This is the other Zero. Now you're impressed aren't you? No you're not because you don't know what's inside the box. It's this. Basically it's all the pieces of metal you need to make a very small real aeroplane. Why two kits you say? Watch. Nick
-
Hasegawa have announced a couple of new kits for this year (so far), as follows: HA2032 1:72 F4U-1A Corsair Combo (2 kits in the box) HJT07332 1:48 Arado Ar234C-3 W/BT700 "Anti-Shipping Attacker" HJT07333 1:48 Mitsubishi A6M2b Zero Fighter Type 21 "Junyo Fighter Group" I'll be looking forward to the 234, as that is a legendary kit IMHO, but you can't have too many Zeroes. In the smaller scale, the Corsair was one of the longest serving piston engined fighters, and was always a favourite of mine and many others. Of course, we'll have to wait and see what the UK prices will be, and although they're going to be high because of the fact that they've been imported from outside the EU, Hasegawa have a reputation for producing good quality kits. So - let's not get bogged down moaning about the prices, or I'll make you all go on car forums and complain incessantly because you can't afford a Bentley (or whatever - you get the jist).