Search the Community
Showing results for tags 'ZERO'.
-
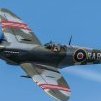
Hopefully my last question on the subject as the build is now coming along nicely but a bit confused by the arrestor hook in the Airfix 72nd scale kit as the hooked part hardly seems to extend beyond its cover at all and is only just visible. I'm therefore wondering if the hook shaft extended when the arrestor gear was deployed so that it would then be long enough to catch the deck wires but I can't seem to find any photos of a Zero coming in for a deck landing only ones of them taking off. If this is the case did it then automatically retract after landing as again I can't find any photos of a Zero where the arrestor hook is deployed whilst on the deck? Any clues please? Regards Colin.
-
Hopefully the last question on my latest build, fingers crossed. I have seen period pictures and also scale plans of the A6M2b which definitely show both wings having aileron balances even though they are not included in the Airfix kit. However I've also seen period pics and other scale plans of the type where they are completely absent so wondering why. Presumably it means that I can opt either to include or exclude them, unless there is a particular reason for this apparent variation such as Mitsubishi versus Nakajima or something else? Regards Colin.
-
Having just finished my Zvezda Bf109F-2 as an F-4/Trop at long last (see Ready For Inspection) I'm now finally starting on my Airfix 72nd scale Zero armed with information from Nicholas Millman and the wonderful feedback from my earlier post on the Zero's engine. However I have a quick question regarding decals as the kit ones do not contain any of the stencil details, including the red bands for the prop blades. I've looked on Hannants and there are a number of options/manufacturers who cover the earlier overall Grey schemes but wondered if anyone can suggest those that are really good quality as my own experience of Print Scale decals with my Bf109F was not great (over scale too and fiddly to apply). The Techmod ones seem to be good value and comprehensive but I've never used this company before hence my question. Regards Colin.
-
My next project is the Airfix A6M2b Zero and I have all the correct colours for a Mitsubishi built version, courtesy of Colourcoats, but have just one small question. I've read the previous posts regarding P&W radial engine colours but can't find any similar reference/post confirming what colours would be correct for Japanese radials so can anyone help please? Regards Colin.
-
One of my next projects that I'm preparing for is the Airfix 72nd scale A6M2b 'Zero' using the kit decals for the Pearl Harbour example flown from the Akagi, so overall grey with black (black/blue?) cowling. My one question is regarding the correct colour of the prop blades as the instructions say silver at the front and black on the reverse but I've also seen references to blades on the Zero being painted brown. Having never built any WW2 Japanese aircraft before I just want to check which is correct , and if it is the former then what if any logic was there for this? I've discovered that Lifecolor still produce the Aotake metallic blue for the internal structures/wheel wells so this is now on order but in terms of enamels, Humbrol/Xtracolor/Colourcoats, can anyone please suggest the best grey to use? I know Xtracolor do an IJN Grey and Colourcoats do Hairyokushoku IJA Grey but they seem to be distinctly different shades, and Humbrol have no specific grey labelled as being appropriate for WW2 IJN aircraft. Regards Colin.
-
Here is the gear detail and some other details of the A6M5a Zero. 零式艦上戦闘機 , rei-shiki kanjō sentōki, Typ zero carrierbased fighter, Rei-sen or Zero-sen. Again from the Mitsubishi museum close to Nagoya. With support from Arawasi and Mitsubishi company! Just to show you all important details for modelling. Happy modelling
-
A6M5c | Hobby Boss | 1/72 W.O. Takeo Tanimizu, Pilot, Imperial Japanese Navy, 203rd Flying Group, 1945 I finished this on 10/13/2020. This is the Hobby Boss A6M5c, which I built to replace the Hasegawa boxing of Tanimizu's aircraft which I built in late High School and whose molds date to 1972 (according to scalemates). I love the double cannons in the wings, it just looks dangerous! Although in reality the extra weight without a more powerful engine made it a dog. But it looked cool. Of the 1/72 offerings of the 5c, the Hobby Boss was the one that had very few negative comments. As is typical with Hobby Boss there are some glaring omissions. I found they forgot a headrest, which I had to fabricate, the loop antenna in the cockpit, and missed the fourth exhaust stack on the starboard side. The exhaust stack I noticed in the 11th hour, but was able to make a new one that is reasonable. HB provided a cut out in the cowling for a 4th stack, except they provided it on both sides. If I'd noticed earlier, I would've tried to fix that. On the plus side, this was one of the better HB kits I've done in terms of fit and also had very few raised mold lines to sand off. Comparing it with the Hasegawa, the wing guns are longer, the pitot tube is shorter and the canopy doesn't stick up as high. All of these are not very noticeable when the model is sitting by itself. Takeo Tanimizu had 18 victories. He is known for his regrets later in life, praying nightly at his in-home Buddhist altar for the men he killed. He is equally known for an incident where he flew low over a US pilot he downed in the sea to throw him his life preserver. He lived through the war and into the late 1990s. Paints: Mr. Color C15 (Top) > Mr. Color C35 (bottom) > cowl was Hataka RLM 66 (black gray) dusted with black until it looked about right > aotake in wheel wells was 3 parts Testors Model Master metallic blue with 1 part Testors green. Decals: Kit decals WIP is here. The cockpit had more detail than typical HB kits, but it was pretty inaccurate. I tried to make it at least a little more accurate, even though it is very hard to see through the somewhat opaque canopy. Here's the headrest I made and the loop antenna, which I later painted silver: And here it is next to the Hasegawa I made a long time ago: As always, questions, comments and constructive criticism welcomed!
- 13 replies
-
- 20
-

-
I decided I needed to get out of my rut of Spitfire/Bf-109/Fw-190... I was set to do yet another FW, but decided to head to the Pacific instead. I've only done 2 Zeros in my life; the first was a 1/32 Revell that I snatched from my Dad's stash when I was 13 (Sorry!), and the second was a Hasegawa 1/72 A6M5c that is still on my shelf and seen below: You know you're in trouble when spiders are nesting in your landing gear wells (sorry for the bad pic) My guess is that I did this in late High School. I hadn't learned to do weathering yet, nor how to do decals properly. I was paying more attention to my painting (being more careful), and decals (getting them straight). This is after I gave up on the Badger 150 but before my Dad got our first Aztek, so I'm pretty sure this is late High School. So, this build is going to be a replacement build. About a year ago I did some research to find a more modern kit of the A6M5c. I love the double cannons in the wings, it just looks dangerous! Although in reality the extra weight without a more powerful engine made it a dog. But it looked cool. Of the 1/72 offerings of the 5c, the Hobby Boss was the one that had very few negative comments. Plus it had Takeo Tanimizu's marking, which I really wanted to do anyway. I did some reading and one resource said that all the 5c's were made by Mitsubishi. The aviation of Japan website shows the Mitsubishi cockpit color to be darker than I thought and the closest match I could find was Model master enamel FS34087 (Olive Green). The cockpit has more detail than many other Hobby Boss kits, and probably more than my original Hasegawa. The seat is wrong, however, so I will start by trying to make it look a little more accurate. Although, I'm not sure how much effort to put in it because the Hobby Boss canopies are usually a little opaque, making it hard to see details! More later...
-
This is the Hasegawa A6M5 1/48 kit with some Eduard etch seat belts with the decals from Rising Decals Dying Sun sets. The kit itself was rescued from the shelf of doom, I can't remember why it was put there as the model itself isn't bad. The decals are also top notch. ATAIU-SEA stands for Allied Technical Air Intelligence Unit -South East Asia and a number of Japanese aircraft wore these markings post war while being the subject of evaluation by the RAF. I believe that the centre section of this aircraft is now in the Imperial War Museum and the only section of the ATAIU's aircraft to survive.
- 14 replies
-
- 52
-
-

-
A reasonable person might thing that the imposition of 'working from home' would be an ideal opportunity for starting one of those big modelling projects. No travelling time? Lunch breaks at the workbench. At least for me, its turned out to be the opposite. It seems to take far longer to get work things done than it used to, and I'm now in need of a new laptop battery. But, a few minutes here and there have enabled be to finish a couple of things that were being overlooked, including Tamiya's original A6M2 from the best part of half a century ago. It says a lot for the quality of the model when first released that it holds up quite well these days. This one has a True Details cockpit set, obtained very cheaply at a show, substituted for the somewhat hypothetical Tamiya offering. Its meant for the Hasegawa version, but fits the Tamiya one with minimal modification. Decals by Eagle Strike (wot no data panel?), over Nick Millman's recipe of a mix 50% each of Gunze Sangyo H70 RLM02 and H336 Hemp Village Photos deny the existence of my account, so first use of Microsoft One Drive for photo posting. Let's see how well it works
-
The first of last week's "isolation" projects completed is Su-25, the Peruvian Air Force. About the model itself I will not waste the words, quite poor but easy to assemble and does not require some major waste of time. They said aftermarket, everything else out of the box. Here's the picture. Regards to the next project, probably tomorrow.
-
-
As discussed in my A5M4 thread I thought I might do another Japanese fighter. As I had a detail set for a Zero, that's what I'll do. I have several sweet Zero, including a floater but the individual packs annoyingly don't have hinomaru, so the only option was the boxed A6M3 in the grey/green scheme. As is sensible tradition I start with the office.. The Griffon photo etch set works wonders and speeds up/looks better than what I normally spend days scratching.
-
One of my favourite YT channels for naval history Drachinifel just featured a slightly longer than the standard 5 minute guide - at two and a half hours - about the A6M Zero. During the originally for 30 minutes planned talk, a well researched picture is created dealing with common misconceptions and myths, used tactics, development and more. Research drawn from known good sources such as Nick Millman and Richard Dunn, but also many more. A list of sources is included in the comment section, well worth the time!
-
Hello All Seems like Fine Molds will finally release their 1/72 A6M Zero as a stand alone kit https://www.1999.co.jp/eng/10605699
-
Best I can do with my phone camera for the pictures my friends but here she is in flight mode. What a dream of a kit to build. If you can see it the cowling is black alclad gloss primer mixed with a tint of tamiya blue. I will post on ground shots tomorrow. Thanks for the hints and tips. Joel
- 10 replies
-
- 18
-
-
Greetings this is my A6M3 Zero Tamiya 1/48 straight from the box.
- 16 replies
-
- 37
-
-
 Doyusha is to re-release three Mitsubishi A6M2 Zero Type 21 kits - ref.40247 - Mitsubishi A6M2 Zero Type 21 Source: https://hlj.com/1-32-scale-mitsubishi-a6m2-zero-type-21-dys40247 - ref. 40248 - Mitsubishi A6M2 Zero Type 21 bomber Source: https://hlj.com/1-32-scale-mitsubishi-a6m2-zero-type-21-bombing-dys40248 - ref. 40249 - Mitsubishi A6M2 Zero Type 21 Pearl Harbor attacker Source: https://hlj.com/1-32-scale-mitsubishi-a6m2-zero-type-21-pearl-harbor-attacker-dys40249 V.P.
 -
 A model that should be replaced by a new tool soon by Tamiya, their A6M2 Type 21 in 1:48, because the top left wing was short shot and had to be filled. Brushpainted with Revell acrylics in RLM 02. I used the kit decals and sunk them in hot water so they would conform into the panel lines. The blue tailbands were painted.
- 4 replies
-
- 12
-
-
- a6m2
- saburo sakai
- (and 1 more)
-
This is not a kit for the beginner, which is a shame as I don't know of any other small scale 2 seat zero kits around. The injected molded parts suffer from severe mold misalignment to the point where manufacturers had to include resin tail plane and other small pieces as the injected parts were junk. What they should have done was retooled the kit and made sure the parts were molded better. I built this model for a friend and fortunately he didn't want the aircraft in a target towing set up, because much of the tow gear was so badly molded it was unusable. Even so, the rear fuselage insert doesn't fit and that was built up with super glue and sprue. The nose and cowling are a mess, but I managed to carve out something that looks like a zero nose from the globs of plastic. The photo etch for the gear bays had to be trimmed to fit, but it wasn't too bad. Fortunately the vac formed canopy is nicely done and the decals are quite good. If you really want a 2 seat Zero in 1/72, I would suggest buying this kit and taking out the canopy, second cockpit, decals and if you must some of the towing and winch gear and grafting it onto the Airfix Zero. That said, I'm quite pleased with the end result of my hacking and sanding!
-
I hereby post my second build as a Britmodeller: The Tamiya A6M2b Zero, a straight OOB build. A great little kit, lovely detailed, fits together like a dream. Paints: Tamiya XF-12 IJN Grey, Vallejo Model Air Interior Green. For the aotoke in the engine(which cannot be seen in the pictures anyway), I used Sotek Green from Citadel mixed with Vallejo silver. Gloss and matt varnish from Vallejo. Micro Set for decals. Canopy is handpainted, not too happy about it. I need to find a way to mask canopies for airbrushing, really don't want to buy masks online for every build. (Got a Heinkel from Revell in my stash, the canopy is the only thing putting me off building it.) For the wash, I used light grey pastel chalk in odorless turpentine. Paint chips were done with Vallejo aluminum paint on a small sponge, powder marks with black pastels. Great cockpit deal, almost a shame to have to cover it up.. As I am new to this, I would greatly appreciate any helphul hints, tips and constructive criticism. Best wishes for a happy, paint fume filled, Easter!
- 10 replies
-
- 18
-
-
This is not my latest build. But I didn't show it here before. Hope you like it.
-
December the 7th. With 1/72 Tamiya's Zero and Airfix P-40 available (plus Starfighter "Pearl Harbor Defenders" decals), I decided to assemble the most known fighter types during the attack (still waiting for a suitable P-36 in this scale), and as they are quite small, thought that they would look better if shown together on a single base. Tamiya's A6M-2b was assembled out of the box, using the kit decals and paint instructions. It represents E11-137, Liut. Masao Sato, Carrier Division 5 Air Superiority Force, 2nd Strike Unit, aircraft carrier Zuikaku. The Airfix P-40 (I used the Curtiss Hawk 81-A2 kit, same thing) got the benefit of a small PE fret, and represents Liut. George Welch's fighter, 47th PS, 15th PG, buzz number 160, as far as information is available. Bot kits received some additional detail like brake lines and the correction of the wheel wells with simulated canvas in the case of the P-40. A map of Pearl Harbor was painted on a wooden base, a simulatedJapaneseaircraft carrier deck was built for the Zero and a dirt strip for the P-40. both pilot figures came from the Hasegawa WWII Pilots kits, and I guess that tuxedo pants and shoes color for Liut. Welch is ok. Marco
- 8 replies
-
- 11
-
-
- Pearl Harbor
- Zero
- (and 1 more)
-
Evening guys Been spraying a bit of zero paints primer this evening, as we know this stuff gives off a fair kick. I used a mask for spraying but nowhere near good enough, so my question is what masks do you guys recommend when spraying? All the best Matt
-
Here is my latest completion: it's the new-ish tool Airfix 1/72 A6M2 Zero from the original release boxing. I took some liberties with the camo scheme, painting it like an A6M5; since this aircraft was from a training squadron later in the war, I figured that was reasonable. I am aware that the underside colour should probably be trainer orange yellow, but went with Gunze IJN Grey anyway. Paint chipping was accomplished with a silver pencil. It's the first time I've tried this and, while my technique still needs some work, I'm happy with this as my first attempt. It is easier than trying to dab random blobs of silver paint. Hope you like it! Airfix A6M2 Zero in 1/72 by Russell Taylor, on Flickr Airfix A6M2 Zero in 1/72 by Russell Taylor, on Flickr Airfix A6M2 Zero in 1/72 by Russell Taylor, on Flickr Airfix A6M2 Zero in 1/72 by Russell Taylor, on Flickr Airfix A6M2 Zero in 1/72 by Russell Taylor, on Flickr Airfix A6M2 Zero in 1/72 by Russell Taylor, on Flickr Airfix A6M2 Zero in 1/72 by Russell Taylor, on Flickr Airfix A6M2 Zero in 1/72 by Russell Taylor, on Flickr Airfix A6M2 Zero in 1/72 by Russell Taylor, on Flickr Airfix A6M2 Zero in 1/72 by Russell Taylor, on Flickr


(510x640)-Copy(95x120).thumb.jpg.33073138e01aa81779639a845926753e.jpg)