Search the Community
Showing results for tags 'Wyvern'.
Found 12 results
-
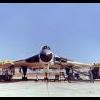
 Update: Mutation from the original HpH Wyvern resin project into an injected kit under the newly established Infinity Models label. http://infinitymodels.cz/ ----------------------------------------------------------------------- HpH (http://www.hphmodels.cz/hph/) is reported having a 1/32nd Westland Wyvern resin kit in design. Sources: http://www.modelforum.cz/viewtopic.php?f=1&t=105045&start=405 https://www.modelforum.cz/viewtopic.php?f=1&t=105045&p=2142698#p2142698 Box art - https://cdn.myshoptet.com/usr/www.infinitymodels.cz/user/shop/big/78-7_snimek-obrazovky-2021-11-14-v--9-46-38.png V.P.
- 11 replies
-
- 1
-

-
- Wyvern
- Infinity Models
- (and 1 more)
-
Hi all, for this GB I'm finally going to be building my favourite plane- the Westland Wyvern. This is the Trumpeter kit in 1/48 and its some size- I'm also planning on getting a photoetch cockpit set for the build. The kit comes with Suez markings for Operation Musketeer, but I'm leaning toward building this kit as one from 813 Squadron aboard HMS Eagle. Very much looking forward to this build and can't wait to see what everyone else produces, thanks for looking in!
-
 Hello, Sorry to say but I've gone lost concerning greys, or to be more exact Dark Sea Grey vs Extra Dark Sea Grey. And now I don't knew what to believe concerning what aircraft I can paint with wich grays. What I understand Extra Dark Sea Grey goes for NAA aircrafts and Dark Sea Grey for RAF aircrafts... ? And what about "Ocean Grey" ? Is it just for RAF wartime aircraft such as Spitfire and Tempest? Westland Wyvern S.4 Extra Dark Sea Grey over Sky... Hawker Sea Fury Extra Dark Sea Grey over Sky... Sea Harrier FRS 1 No. 801 NAS Extra Dark Sea Grey / White No. 899 NAS Extra Dark Sea Grey overall (HMS Hermes 1982). Sea Harrier FA/2 No. 800 NAS Overall Medium Sea Grey (HMS Ark Royal 2004) but with the nose in Dark Sea Grey or Extra Dark Sea Grey? Harrier T-10 No. 20 RS Dark Sea Grey / Medium Sea Grey (Wittering 1999). Harrier GR.3 Dark Sea Grey / Dark Green Supermarine Swift FR.5 Dark Sea grey / Dark Green / PRU Blue (?) And what about the upcoming FG-1 Phantom from Airfix? Sheers / André
 -
TRUMPETER WESTLAND WYVERN 1/48 I have previously posted a couple of completed FAA models on BM but this is my first WIP - I only decided to do a WIP when I was part way through this build - there have been quite a few nice builds of the Wyvern on BM since its release and my main interest was in improving the wing fold detail to make it more realistic plus a couple of other refinements. I think this is a nice kit of the Wyvern that captures the feel of this heavy turboprop aircraft. REFERENCES I used the 4 PLUS book and the From the Cockpit publication on the Wyvern as well as some photos I took of the TF1 prototype at the Fleet Air Arm Museum at Yeovilton in 2006 – also found some clear walk around photos of the TF1 on the Prime Portal website. After a lot of searching in books and on the internet I found it almost impossible to find "in service" Wyvern close up photos showing wing fold details – there are Pilots Notes available but I could not find any maintenance manuals that are available for some aircraft like the Sea Fury and Spitfire. I scaled up the 1/72 plans 150% to 1/48 scale on my scanner THE BUILD SO FAR I used the Wolfpack WW48014 resin cockpit & Eduard air brake etches - still deciding on how much detail to add to the wheel bays as the inner u/c doors will be closed - brake lines were added to the undercarriage legs. The exhausts for the engine were replaced by K&S aluminium tubing I also reshaped the end of the inner flap fairings by adding plastic to the bottom of the fairing as they looked too pointed to me WINGFOLD BREAK The wing fold details are therefore based on the TF1 which I assume is basically the same on production aircraft but there are some detail variations particularly on the outer wing flap – the main aim was to get rid of the over scale parts (E21 B25 & B29) representing the hinges. I used the kits aerofoil sections for the wing break (parts D14, D15 & D16 &D17) as I think they give a quite accurate cross section of the aerofoil – I also missed out seeing parts E12 & E13 that provide detail at the wing break which could have saved me a job making them. To give the wing fold strength I used brass strip and wire incorporated into the wing hinges which were fabricated from plastic card and strip – jury struts were made from K&S brass wire and tube so the plastic hinges only needed to be cosmetic and don’t carry any load. Once this basic structure was sorted it was just a matter of bit by bit of scratch building the detail at the wing break with plastic strip & rod, solder wire, copper wire from electrical cable etc until it looked busy enough from a viewing distance of about 18 inches (450mm approx.) SOME EXTRA PHOTOS OF HINGE DETAILS Brass wire and strip reinforcing the hinges holes drilled for the brass pins and cut away area around hinges to accommodate the fold sketches of estimated shapes hinges and wire reinforcing Photos I took of hinges on the TF1 Wyvern at Yeovilton 2006 Hydraulic lines are made from lengths of copper wire twisted and soldered each end to make it easier to handle - the photo below shows prepared copper wire to represent hydraulic lines to go into three different holes in the outer wing The thicker cable is from solder wire Photo below shows some hydraulic lines installed in an outer wing panel - the brass etched pieces are from an old Airwaves wingfold etch for the Wyvern - I have no idea what the flap looks like at the wing break at the so used this piece from the etch - the flap on the out wing panel differs between the prototype and production Wyverns. I think the wing fold is just about done except for tidying up & final fitting out once the angles are checked and the wings go on permanently. thanks for looking CJP
- 34 replies
-
- 15
-
-
Morning all! It's only taken approximately three years to get to this stage, but my Dynavector Wyvern is finally finished. This was my first venture into the world of Vacform kits, and Dynavector did not disappoint. I chose this as by all accounts it is one of the best kits to use as an introduction to vac kits. The fit of the parts is absolutely superb, and once the necessary surface prep was done in order to get parts to match up, this went together with far less hassle than a lot of the injection moulded kits I've built. My build is by no means perfect, in terms of improvements I could've removed the aircraft lights and replaced them with appropriately coloured clear plastic. I deliberately chose not to overly detail the undercarriage bays as this build was more about testing my ability to build a vacform not my ability to superdetail. I've also missed off the windscreen wiper as my attempt to scratchbuild one looked a bit too 'agricultural' for my liking, so some room for improvement there certainly. Lastly the decals from Berna were a bit of a nightmare, many of them are grossly oversized and they refused to conform to the model without masses of Mr Hobby Setter and Softer. In terms of lessons learned from the build, first and foremost is that Vacform kits are not hard! Picking a good brand such as Dynavector or Aeroclub helps no end, but they are no more difficult than many injection kits (stand fast Tamiya shake and bake kits...) so really ought to hold no fear for anyone! After all if I can manage it, I'm certain anyone can! As always, constructive criticism is more than welcome, without it I'll never improve. So without too much further ado... Kit: Dynavector 1/48 Westland Wyvern Decals: Berna Decals - Wyverns Extras: Compass Rose Resin - Cockpit Tub + Airscale Instrument Decals, CMK Wyvern wheels & Pavla Martin Baker Mk.2 Seat Paints: Xtracolor EDSG & Sky, Humbrol Roundel Red and various shades of Alclad (undercarriage and undercarriage bays) To all those that looked in on the build (as glacial as it was in terms of progress) thank you for all the words of encouragement! Now it's just a case of deciding what to tackle next... Scimitar? Swift? Thanks for looking in folks, Regards, Nik
- 29 replies
-
- 34
-
-
- Vacform
- Dynavector
- (and 5 more)
-
 Evening all! Inspired by the awesome work on here by Tom Probert on his magnificent Shackleton and then the Superfortress and Rich's B-17 I thought that I ought to take the plunge and have a go at the dark art that is a vacform kit. Armed with a bit of knowledge gleaned from t'interweb I decided to start on something fairly straight forward and having heard Dynavector are up there among the Rolls Royce of vacforms and the Wyvern is one of the easier of their kits to build, when one came up cheap on eBay it was a golden opportunity. By the way, apologies for the photos, they were taken on my iPad, so may not be the greatest. A rather pleasant little surprise came in the form of a resin cockpit tub, which looks to me like it may be part of the Compass Rose resin set for this kit (I could be completely wrong of course, but I've not been able to find any other details of resin sets for this kit). Sadly it was just the tub itself and not the full set, but beggars can't be choosers I suppose. No shots of the cutting process, but following John Aero's vacform guide which is on the site somewhere, the parts were drawn around with a felt pen, scored with a new scalpel and snapped from the backing plastic. Definitely one of the scariest parts of vacform building, but not too bad once you've practised on a few corners of scrap backing sheet. A little bit of Tamiya NATO Black for the cockpit and some drybrushing really brought the detail in the resin tub out quite nicely. Because I only had the tub itself from the resin set, the IP is the Dynavector metal part with some Airscale instrument decals from the RAF WWII and Early Allied Jets sheets, just to give it a little more interest. The metal seat supplied with the kit is pretty crude... Since my scratchbuilding skills are nowhere near on a par with Tom or Rich I took the easy option and grabbed an ejector seat from Pavla to replace the kit part. Once all the appropriate prep work for the parts had been done (LOTS of sanding!) construction of the main fuselage and wings went together really quite quickly after a fair bit of dry-fitting to make sure I'd sanded to the correct line and thinned the trailing edges of the wings enough (which still look a little clunky, but it's my first attempt at a vacform kit so don't be too harsh on me! :-) ) The plastic itself is quite soft, so it responds well to Plastic Weld, which has really helped in avoiding seam lines between the fuselage halves and other parts. The detail in the undercarriage bays is a little soft so I added a couple of strips of evergreen to sharpen it up a little bit. Thankfully the inner halves of the u/c doors remain shut, so I didn't have to do too much, just a little bit of wire to add some visual interest and the two ribs. I decided not to go too nuts with adding wires and detail to the u/c bays, as this was mainly to try out the techniques involved in constructing the kit itself and not an exercise in super detailing. Here it is, taped together just to make sure everything fits. The join underneath the fuselage between the wings and the fuselage itself required a bit of fettling, I took too much plastic off of the fuselage halves so had to add some off-cuts into the gap I'd created and smother it in glue in an attempt to get it even. I'm currently working on the tailplane (both have been cut-out and glued together and push fitted onto the spar supplied with the kit to get the angle right. They just need some shaping where they meet the fuselage and then attached and filled and then I think the back of this will have been broken. Well there it is, nowhere near up to the standards seen elsewhere here, but I'm quite pleased with it so far, and hopefully posting a build on here will work as a bit of motivation to actually keep making progress on it. Any tips or constructive criticism would be greatly appreciated though guys, these are unknown waters for me and while I'm enjoying it very much, I'm eager to learn from those of you who know better! Cheers! Nik
- 40 replies
-
- 1
-
-
- Dynavector
- Vacform
- (and 2 more)
-
Westland Wyvern S.4 No. 830 Squadron FAA H.M.S Eagle, Suez Campaign 1956, Operation Buccaneer Frog 1/72 kit (~45 years old) Built pretty much OOB, sanded off and rescribed most of the raised panel lines, drilled out the exhausts and replaced with modified "drinking straws, boxed in the undercart openings. Drilled out the fuselage "camera ports" (?) and created windows with Klearfix. Overall fit was excellent, and original decals performed flawlessly, although had to double up the wing roundels as they were somewhat translucent. Painted entirely with Humbrol paints (Sky, EDSG) and final Vallejo Model Air matt coat. Thoroughly enjoyable build.
- 25 replies
-
- 34
-
-
Hello All, I'm going to be building the Frog Westland Wyvern: The kit has side consoles, floor, seat (or throne?), stick, instrument panel, nice wheels and detail on the inside of the undercarriage doors - pretty fancy for a kit from 1970! However, Trumpeter did a newer and more detailed version recently and the rules is the rules... I am intending to detail the cockpit and wheel wells, do some light scribing and possibly drop the flaps. My main objective is to do a decent paint job and make the Sky/EDSG scheme look less slab-like than it normally does in my hands. The decals are a tad yellowed and I don't think I will see much full sunlight in the next few months, so I may re-print some of the letters and numbers. Well, can't sit here typing - there's modelling to do! Thanks for looking, Adrian
-
This is my Trumpeter 1/48 Westland Wyvern S.4 built for the FAA GB, but since I rarely build an aircraft I thought I'd post it here too. Nice build with few problems that weren't made by me. WIP HERE
- 20 replies
-
- 10
-
-
Well, I hope to build this kit for the GB, inbetween reviews etc. It's the Trumpeter Westland Wyvern S.4 and I will be using some, if not all of the accessories shown below, which are the Pavla cockpit set, Pavla camera bay set and the Eduard etched interior set. Since I don't have a lot of room here, she will be built with wings folded.
-
Here's all the modelling I've done so far for 2012, minus a few binned failures (AZ Spitfire Vb with horribly askew landing gear, some others) and a Whif (USN Sea Hawk). I expect to finish a Merlin and hopefully a fast jet before the arrival of the new year, but this is probably pretty representative of my work as a whole. Please excuse the quality of the photos, I use my phone camera, and please excuse the quality of the models as well.