Search the Community
Showing results for tags 'Warhammer'.
-
Whilst waiting for the final delivery of parts for my safari diorama to arrive I have dug out my old Har Ganeth Executioners, which I never got around to finishing twenty-five or so years ago. They are the last regiment I need to finally finish the army I started in 1996-7, oh my so long ago, last century in fact!! Also have a couple of characters to do as well. So I made a start today. They've only been primed for twenty-five years so hopefully the primer is dry. Here are the first few in various stages. The chap on the right is the Champion and he was started prior to today so just started on the flesh on his face. His mail is supposed to be bloodstained, hence the red shading. More to follow as we progress. A bit more progress on the regiment and a start on the sorceress and Hag Queen. Executioner regiment is complete, except maybe some tinkering with the banner once the red (blood) dries. It is supposed to represent the Blood Banner in the game where it starts running with blood once they get into combat.
-
 Or as I prefer to call them, Trolls. They are nasty lifeforms made of rocks and malice. This one I started yesterday and finished this morning. His name is Fe. Can you guess why? His weapon of choice is several tons of statuary which provides a nice contrast with the living rock of the troll himself. How the weapon is deployed. The other figure was finished before Christmas. His name is Cu. Guess why? My best bit on Cu is the crystal cudgel The highlighting came out just right I think. Best bit on Fe is that claw which I managed to wet blend. Of course, magnified, it looks rubbish . 😲 I spent more time on their rock crusted rear views than the front. Great fun to paint, brilliantly designed. I think they are the best Warhammer models I've done so far, certainly in terms of enjoyment.
- 1 reply
-
- 8
-

-
- Warhammer
- Age of Sigmar
- (and 1 more)
-
 Okay so basically my shed is too cold and needs a bit of a tidy so I haven't been working on my STAP build, but once it warms up a bit I'll be back on it. So in the meantime so I've got something to do (in the warm!) I decided to start on the Tau sculpture I've been wanting to do since finishing the last one below I know very little about the T'au or warhammer in general to be honest, always wanted to dip my toe in with miniatures but in all honesty I just dont have the patience for that kind of careful brushwork. So I had the idea of making a large sculpture of my favourite warhammer race, the T'au. I really like the idea of making a huge version of something thats only available in small scale, and in actual fact although I stated this as being 1/6 its actually a bit bigger than that, my measurements of the face where "eyeballed" and after measuring and scaling it up based on an eight head high figure it will be a little over 40cm high so I'll have to do the torso and legs separate so I can get it in my oven! Well anyway I just thought what the hell and watched a few sculpting vids on youtube as a refresher and then grabbed the tools and my block of super sculpey firm. IMG_20210207_132738 by Nick Frost, on Flickr I had some clay left over in a bag that you can see in this pic but I failed to bring it back from the dead so just chucked it and grabbed the new block, dont want to chance it going crumbly on me when I need to blend facial features smoothly. Started by making a rough armature from stiff wire with a tight ball of foil which was then wrapped around with thin flexible armature wire IMG_20210207_133041 by Nick Frost, on Flickr IMG_20210207_133131 by Nick Frost, on Flickr IMG_20210207_134042 by Nick Frost, on Flickr Then I rolled some flat sheets of sculpey which was pressed very firmly around the armature to ensure no gaps and plenty of stability for when I'm working on it. IMG_20210207_134529 by Nick Frost, on Flickr IMG_20210207_134622 by Nick Frost, on Flickr IMG_20210207_135214 by Nick Frost, on Flickr IMG_20210207_135850 by Nick Frost, on Flickr Then I started to think more about the shape of the head and began to add a bit of form to work towards making a basic head shape as a blank canvas to work on IMG_20210207_141053 by Nick Frost, on Flickr IMG_20210207_141609 by Nick Frost, on Flickr IMG_20210207_142001 by Nick Frost, on Flickr IMG_20210207_142007 by Nick Frost, on Flickr Then it was time to mark out the features and to correct the symmetry here and there by building up areas and then smoothing. IMG_20210207_143909 by Nick Frost, on Flickr IMG_20210207_144039 by Nick Frost, on Flickr IMG_20210207_145215 by Nick Frost, on Flickr Head was looking a little too round so I trimmed the sides a bit IMG_20210207_145507 by Nick Frost, on Flickr And building up more of the shape here and there IMG_20210207_150902 by Nick Frost, on Flickr Pretty happy at this stage, its looking like a blank head IMG_20210207_151944 by Nick Frost, on Flickr IMG_20210207_151944 by Nick Frost, on Flickr IMG_20210207_152139 by Nick Frost, on Flickr Got my marks back in place after reshaping a bit, and then began to think about features and shape of the face IMG_20210207_154023 by Nick Frost, on Flickr IMG_20210207_200613 by Nick Frost, on Flickr Now at this point, I lost my confidence a bit and started to feel a bit lost, and that maybe the first sculpt was a fluke and maybe I cant do this. Then I realised that in the first one I was a lot more "devil may care" and was just going for it a bit more without getting to hung up on the big picture and just working through one bit a time. So decided I was just going to get stuck right in because at the end of the day you cant do anything that you cant easily undo or tweak until your happy with it (which is basically what sculpting is) So I threw myself into the next session and cut out the basic eye recesses and shaping the head and face to the shape I was after by working on the chin jaw and mouth and overall tweaks here and there. IMG_20210207_202220 by Nick Frost, on Flickr IMG_20210207_203604 by Nick Frost, on Flickr IMG_20210208_190056 by Nick Frost, on Flickr IMG_20210208_190103 by Nick Frost, on Flickr IMG_20210208_190259 by Nick Frost, on Flickr IMG_20210208_190809 by Nick Frost, on Flickr IMG_20210208_190821 by Nick Frost, on Flickr IMG_20210208_190958 by Nick Frost, on Flickr IMG_20210208_191059 by Nick Frost, on Flickr IMG_20210208_191132 by Nick Frost, on Flickr IMG_20210208_191439 by Nick Frost, on Flickr IMG_20210208_191603 by Nick Frost, on Flickr IMG_20210208_191920 by Nick Frost, on Flickr IMG_20210208_191924 by Nick Frost, on Flickr IMG_20210208_192240 by Nick Frost, on Flickr IMG_20210208_192247 by Nick Frost, on Flickr I increased the eye sockets a bit, all of this will be covered over when I build up the brow later, I just need to bare in mind the eye socket shape and where I'm going to put the eyeballs. IMG_20210208_192725 by Nick Frost, on Flickr IMG_20210208_192731 by Nick Frost, on Flickr IMG_20210208_192744 by Nick Frost, on Flickr Right, I'll leave it there for now, Im on my lunch break at work and need to get back. Later on this evening I'll update more progress from last nights sculpt session, in real-time I'm up to the bit where I've done his basic eyes so more to follow soon. Been so pleased with this start, last time the thing that seemed to hold me up most was the non sculpted elements and the crazy posing chanllenges, so with this one its nothing crazy or complicated, just a T'au soldier with no helmet on in a standing pose and everything is being sculpted in clay. I already feel like I'm getting this done much quicker the second time around! Thanks for looking, more soon
- 196 replies
-
- 14
-
-
First time delving into Warhammer. Needed a break from aircraft, and after falling down the YouTube rabbit hole ended up watching painting videos of the newish Primaris Marines and thought I'd give them try. Thoroughly enjoyed building this guy, don't think it turned out too bad, using the citadel contrast paints thinned with some medium as a wash at the end think it gave a pretty good effect. Base is made up of some old sprue and lead wire, definitely an area i need to work on. Base coat of Macarrge Blue, dry brushed with temple guard blue, Laviathon Blue contrast thinned with medium as a wash and then dry brushed to pick up the edges with temple guard again.
- 3 replies
-
- 11
-
-
- Warhammer
- Gamesworkshop
- (and 1 more)
-
I was surprised with this gift for my birthday. My son had ordered the conversion set for the Iron Wolf as I have a preference for the Space Wolves Space Marines chapter. So I have this: And after a day and a half I've gotten this far: It'll be my interpretation of an Iron Wolf Titan, so please bear with me, if it isn't totally by the codex! Cheers Hans J
-
I'm calling this one for done! The WIP: It was fun! Cheers Hans J
-
Is anyone here buying the new partwork series Warhammer Mortal Realms? https://www.fauxhammer.com/news/warhammer-mortal-realms-magazine-issues-1-12-content-confirmed/ I picked up the first issue for £2.99...well 2 copies; one for me, and one for my daughter. It comes with 13 Age of Sigmar minis, as well as bits to learn the game. £35 worth of stuff. The plastic minis seem really well sculpted and cast. We are both looking forward to doing them. I will be picking up occasional issues e.g Thorns of the Briar Queen in issue 6. £7 vs £15 for a GW exclusive set?! Easy choice.
-
Ive been reading through this forum and loving the figures and dioramas on display. So much so, i decided to have a shot at some figures myself with the aim of making a small diorama also. Ive only built wooden boats before, no painting involved, so this is a learning process. I always had an interest in Warhammer 40k when younger, Imperial guards mostly but never got around to it. So i bought some Imperial guards and some Tyranids along with the paints etc required. Following along to a youtube video on how to paint Imperial Guard and what colors to use. Definitely not as easy as it looked in the video ! My first soldier. I was actually quite happy with him after the base colours and washes, untill i started on the highlights and then it got a bit messy. Still need to do some more to him. Started on the Sergeant next. Started to paint over the brown uniform with light yellow, but i think the brown looks a bit better so im not sure yet whether to continue with the yellow. Got those 3 to that stage and some more primered.... this is gonna take me ages. I though ship building was a slow process I also need to work out how to get better pictures.
-
Here's one of my 40k models from a while ago. My Chaos Knight Armiger of Tzeentch. Figured this is the best place for it. Edit: Doh!!!! Supposed to be in RFI. Need an admin to move it pls
- 15 replies
-
- 12
-
-
Greetings and salutations fine folk of Britmodellerland. A very Happy New year to one and all. With the arrival of 2018 I'm trying to re-kindle a bit of modelling mojo. I've braved the chill cold of the model room/mancave and managed to have a bit of a play. The victim of this renewed vigour is the plastic Imperial Knight kit from Games Workshop. I've already cut my teeth on one of these in the dim and distant past and thoroughly enjoyed it. The previous iteration was built largely from the box and a lovely model it was too (the kit I mean, not my particular rendition..). This time I'm aiming to have a bit of fun by tweaking one or two things along the way. Some of you may have built this one and if so, you'll know that the legs are fixed in a purposeful stance. I think these could be altered but for this model I opted to simply give a bit more life to the toes by cutting and re-positioning the joints a smidge then using "green stuff" to fill in the resultant gaps. The sculptors at Games Workshop have stuck hoses around the various pistons but I've plumped for adding even more. I wanted to give a similar look to the hydraulics on plant and machinery where flexible hoses are supplemented by hard lines and connectors. I shall also be adding chains from the various tow hooks and eyes that festoon the model since they are begging to be decorated in that manner. Finally before I bombard you with images let me explain that I've chosen to give these components quite a beaten up appearance. This may be contentious but it fits in with how I imagine these ancient machines fought. Stomping through the enemy, kicking and smashing man and machine alike. If that is the case then the paintwork would certainly have lost some of it's lustre would it not? Well, that's the way I see it and the beauty of this type of modelling is that no-one can tell you it's not correct! Lol Anyhoo, on to some pics. The plastic was primed first with GW whizz can primer before I used some rust coloured enamel paints splodged on in a random pattern. These were given a nice coat of hairspray once they'd cured with some salt thrown in for good measure. The next layer was an acrylic turquoise blue from Citadel which in my mind was the primer of the beast. Another coat of hairspray and salt before the final topcoat of white. In my mind these components make up the chassis of the walker and as such are constructed from cheaper, more readily available materials which is why they are rusty. The armour plates that adorn the Knight will be given a different finish to represent a tougher and probably much more rare, exotic metal or alloy. Here's a closer look at how the weathering is turning out. The way I achieved this effect was by removing the salt and gently attacking the painted surface with a few rudimentary tools. An old toothbrush, toothpick and the back of a scalpel blade were all pressed into service. Stippling, scraping and rubbing gives a varied result in different areas. Since the feet were what ought to take the hardest bashing I concentrated my efforts there leaving very little paint on the metalwork. I also used a blade to scuff up and scar the surfaces as if the Knight had been wading through jagged remnants of the broken and smashed enemy. Further up the legs I was more judicious with the chipping and scraping. Large areas at the front of the limbs will be covered by armour plates so these would be less damaged in theory. The uppermost portion of the leg where it attaches at the hip might get quite a bit of chipping since it is exposed but at that height it should be less severe than on the foot. Hopefully the weathering suggests that? The final treatment was some staining which was applied once the paintwork had been sealed using a coat of future. I used artist's oil paints predominantly as these are easier to work for streaking As it turns out, much of the flexible hosing at the front of the leg is hidden by the largest armour plate but hey ho, it was fun anyway. I've commenced some work on the armour plates so more of that next time round. Hope you enjoy the pics. If you feel like commenting then please go ahead. Good or bad it would be great to hear any feedback and if anyone has any questions relating to what I'm doing here I'll certainly do my best to answer them. cheers.
- 18 replies
-
- 7
-
-

-
- 40K
- Imperial Knight
- (and 1 more)
-
 Hi folk, Here's a look at the Warhammer plastic Imperial Knight model kit. This is not a cheap model at around the £95 mark but it does contain alot of parts. The version I treated myself to includes the Knight Warden parts for carapace mounted weaponry. I'm not a gamer but I do think this version looks cool. My model will be fitted out with the gatling cannon, Thunderstrike gauntlet and a rocket/missile pod along with the usual heavy stubber and flamers. There is a neat decal sheet in the box which carries markings for some of the noble houses and Knights featured in the Codex but I suspect my version will be more of a "Freeblade" where the builder is free to make things up as they go along. I have n't found a huge number of on-line builds so thought I'd pop a few photos up as I go along to give everyone an idea of how it looks. I'm following the build sequence which begins with the feet and legs. I'm employing a whole range of techniques on this project and letting my imagination run riot which is alot of fun. Almost all of the Knights that I've seen have natural metal undrecarriage with some painted accents on the toes. I have chosen to paint the leg/feet assembly and adopt some armour modelling weathering techniques to give this build more of alternative style. The plastic is well detailled and fits together beautifully. This is a new release so there is virtually no flash and little seam clean-up so far. Some of these workings will be hidden by the add-on armour panels but even so, I opted to perform some extra work. All of those pistons and rams are crying out for real chrome so I wrapped them in kitchen foil with the shiny side out. This had a wash over it to give that glossy oiled effect. Cheers.
- 34 replies
-
- 12
-
-
-
- Imperial Knight
- Warhammer 40000
- (and 1 more)
-
 Hi All, here's a Warhammer Vampire Counts Necromancer figure that I painted a while ago. I really liked the creepy pose of this figure and I always enjoy painting these little skulls that seem to be everywhere in both the WH and 40K universe. I painted him in the classic Vampire Counts red and black scheme using Vallejo acrylics.
- 4 replies
-
- 14
-
-
- Warhammer
- Vampire Counts
- (and 1 more)
-
Continuing with the Nazgob miniature. It is becoming less ...😉👉
-
Hi All, here's a WIP of an Empire Standard Bearer that I built and painted a while back. I used an Empire Captain (who now seems to have been promoted to 'Freeguild General' !!) as the basis, with a little bit of cusomisation to get the appearance of a battle-hardened campaigner grimly defending his banner. The pose of the figure lent itself to standing on steps - I decided to represent the figure on part of a spiral stone staircase. I decided to scratchbuild the base around the figure, keeping with the Empire/Freeguild theme of castles and the like. As the figure was for display I felt that the kit cloak was too thick and I wanted a large banner that I could paint a freehand design onto. I chose to make both of these from copper foil - it would also be easier to paint freehand onto a flat banner and add folds later. I cut away the body of the cloak and made a foil replacement, using the original plastic part as a template, pressing the foil onto it to transfer the folds. I used cyanoacrylate to join the foil to the plastic. I then made a square banner with tabs to form loops around the pole; here it is in a prototype mock-up and after priming. I ceated folds by wrapping around a brush handle although flattened them back out prior to painting. I cut the figures left arm off at the elbow to make painting easier and to reposition it later. Traces of red paint from a previous abandoned project with this figure are still visible on the left foot. More to follow...... Thanks for looking, Andrew
-
Hi All, here are some images of a Warhammer Dark Elves Sorceress that I completed a while ago. I have also posted a work in progress thread of this figure. Thanks for looking, Andrew
- 2 replies
-
- 10
-
-
- Warhammer
- Dark Elves
- (and 1 more)
-
Hi all!!! The last thing I'm painting. A miniature of Nazgob, orc shaman of Warhammer. I painted it for the first time some 20 years ago and now I am repainting it, I hope you like it and advise changes or improvements that can be made. Thank you!!!
-
Hi all, The new Age of Sigmar (nee Warhammer Fantasy Battle) starter box came out a week or so ago, and I've been spending my evenings since then building the (many!) models contained within. All in all there are 52 miniatures in the box, split about 3/5 between the "Nighthaunt", i.e. spooky ghosts, and 2/5 "Stormcast Eternals" who are seven foot tall superhuman foot knights. I'm intending to paint the ghosts first as they're really cool, a blend of previous Warhammer ghosts and quite a lot of Peter Jackson & co's take on the Ringwraiths. Here are the ghosts in question: (click for bigger) I've cleaned up all the parts, assembled them and filled the (minimal) seams, plus made a start on basing so many of them are ready for primer. I need to pin a spindly arm that I broke on the tall thin one, otherwise they were a pleasure to build. Some of the duplicate models (the big horde of 20 little ghosts in the background) have been converted a little, I'll take some pics to show that when I get to them. I also added a signpost to the executioner's base (the one with the gibbet) since it was rather "boingy" held up by one strand of plastic ectoplasm. Their opponents are also made up, these are the Stormcast Eternals in their fetching robes as they're now more magical than ever before. The guy on the griffon is particularly good, as is the woman with the outstretched arm. They're quite big next to the ghosts, they're mostly on 40mm bases, whereas the ghosts with scythes and polearms above are on 32mm. As appears to be the new norm for GW starter sets they're all fixed-pose models, generally with 1-4 parts each. That can mean things look a bit flat, but I think they've mostly avoided that although on the Stormcast there are some filled-in undercuts. I've opened some of these but not been too zealous about it. I also picked up some very cool extra ghost supplies - more of the sinister polearm ghosts (Glaivewraith Stalkers) plus some excellent floaty Banshees: These have lovely moulded bases with lots of appropriate graveyard-ey details, past efforts from GW in that regard have been excellent: Oh yes, and I can't forget the box of ambulatory predator spells which I failed to resist - there are quite a few of those: some of which are really quite big: Cleaning up all the mould lines (in GW's slightly harder "scenery made in China" plastic) on all the trailing magical stuff was quite an exercise but I did get it all done in the end. So that's where I'm at at the moment. In terms of colour schemes, I think I'd like the ghosts to pick up the ones I painted a few years ago: but with bases that fit with my skeletons: I'm intending to re-base the existing ghosts onto appropriate rounds since I think they look a lot better than the old WHFB square bases. Hopefully I can clip them into shape, glue to rounds and re-scenic the edges of the new bases to match the rest of the models. Hopefully get some priming and painting happening this weekend, depending on how the basing progress goes! Cheers, Will
- 68 replies
-
- 14
-
-
- Warhammer
- Games Workshop
- (and 1 more)
-
Hi All Here is something I have just finished. The Troggoth Hag from Forgeworld for Warhammer. This was a commission for a friend. It is a lovely figure and tremendous fun to paint. There are so many little details that you don't notice until you are actually painting it. I would show you the Octopus in the net or the snotling hiding in the staff but I forgot to photograph them before It was collected. It took about 6 weeks to do complete. Hope you like it! Thanks for looking Simon
- 8 replies
-
- 13
-
-
- Warhammer
- Age of Sigmar
- (and 1 more)
-
 I recently got given some GM Warhammer 40K kits to build and paint. Apart from a general request on the colour scheme (black with yellow highlights, to go with the donor's other 40K models) I was given free rein to weather them to my heart's content. I don't normally do armour but it's something I want to give a try, so this was a chance to have a go on a kit where real-life accuracy wasn't so much of a concern. GM kits are certainly a bit odd if you're used to more conventional models. There's only detail where you can see it (the underside is plain and the track wheels are just moulded semicircles), and the plastic is both soft and very thick. That said it fitted together fairly well (save for some awkward joins) and was simple to assemble, and in a nice touch the kit came with multiple options as to weaponry and whether the crew were buttoned down or heads out. I was provided with the yellow paint (GM's own Citadel range) which sprays nicely but do clean your airbrush immediately - it sets like bakelite very fast. The rest is Tamiya NATO Black for the most part, with Flat Black for the underside of the turret, and a misting of NATO Black lightened with a small amount of white on top. Shell dents were made with a soldering iron, and were either highlighted with metallic paint to simulate fresh hits or rust to represent older ones. Vallejo Metal Color Gunmetal was used for (surprisingly enough!) the gun barrels. Weathering was mainly via Lifecolor dry pigments (the rust set) and liquid pigments (the detail emphasiser and rain/dust sets). Soot was added via Tamiya Smoke or Humbruol dark modelling powder. The build isn't perfect; there are several places where lots of filling and sculpting would be needed to deal with seams, so I'm just going to say that that's where they'd be on the real thing. The rear ramp folds down so I painted and weathered the interior as well. The interior, before assembly: ...and after: Top view. Certainly an interesting learning experience in terms of trying out weathering techniques. Now I'm tempted to make a suitable display base...
 -
Haven't done any warhammer / gamesworkshop for about 20 odd years. However recently I decided I wanted to try myhand at painting miniatures again. This was the free model from the September edition of white dwarf. I also picked up a start collecting spacemarines box and a couple of vehicle which I will be knocking together over the next few months. Here is my finished slaughterpriest. The base is suppose to represent a lava stream, chaos and lava seemed a good combo. I modeled that from scracth using a plain round 40mm gamesworkshop base. Model is pinned to the base using paperclip pins superglued into drilled holes. For my first outing back into warhammer I am overall happy with the result. Painting was done mostly with vallejo game colour paints and a few citadel ones where I couldn't get the colour I was looking for out of vallejo. Slaughter Priest 6 by OCUK Wildman, on Flickr Slaughter Priest 5 by OCUK Wildman, on Flickr Slaughter Priest 4 by OCUK Wildman, on Flickr Slaughter Priest 3 by OCUK Wildman, on Flickr Slaughter Priest 2 by OCUK Wildman, on Flickr Slaughter Priest 1 by OCUK Wildman, on Flickr
-
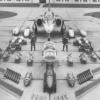
Hello Everyone, So I mention in Wills great thread about buying a Tau army. I only have a few things to make/play with right now. But as I start playing I am sure it will grow. Right now all I have is : 2 x Hammerheads (Skyray's with the parts). 1 x Devilfish. 1 x Piranha. 2 x Firewarrior Teams. 2 x XV-8 Crisis Teams. 1 x Ethereal. 1 x Pathfinder Team. 1 x Tau Commander Countless drones. I have kinda started on a Crisis Team and the Hammerhead/Skyray's (they where second hand). I've started painting the Devilfish/Hammerheads... I'm going to go with a sorta Gundam/Russian scheme. I know what I am doing I am really impressed with the orange dayglow tho. Even my GF commented on how bright it was. So I have decided to work on the Tau Commander first and then go from there... this will most likely be a slow build but I will try to update when I can. I have been looking for ages for the "Coldstar" variant of the Crisis suit... never realised that it was the commanders one. I might buy three more of these at a later date and make the "Enforcer" version. See how I get on first. The sprues are not much to write home about really. Not sure on the thrusters, I will have a look at them and see what I can come up with Other bits... This is my first time painting a base that I can remember. I think I have dry brushed it a little too heavily... it will do tho. More to come sometime this year As always, recommendations/tips are most welcome. Kind Regards, Dazz
-
Hi folks, After the Flesh Hound I painted one of the angels - these are probably the reason I bought the box - it's crazy that you can have something so big and airborne suspended on a skinny bit of plastic scrollwork. Latest bit of this project is the Flesh Hound of Khorne: I've been doing mainly figure modelling since we moved house - my office (and modelling room) is really too cold with the window open at night to paint comfortably. So instead I've been either cleaning up parts or painting things I'd already primed while sat in front of the TV. I posted some of this in another work-in-progress thread, but I've just finished five of the rank-and-file (or perhaps unruly mob) Chaos infantry from Games Workshop's new Age of Sigmar box. Lots of new things to try on these - painting big areas of skin, the furry boots and cuffs, lacquered armour etc. I also highlighted the metals with Vallejo Liquid Gold + Silver, which are surprisingly bright and bling-ey. I think after this I might be allowed to paint one of the characters or something else a bit less repetitive as a break. Was fun though, and they've only taken a week and a bit of evenings which for me is pretty quick. I think they came out well although I ought to try harder with the helmets, and this guy's eyes are a bit suspect: The reason I bought the box (which initially looked a bit off in pictures) was that I got a free figure with the GW magazine (well, bought the magazine for the figure...) and thought it was fun to paint and a bit of a change. Doing more of the same seemed like a good idea Cheers, Will
- 58 replies
-
- 14
-
-
- Games Workshop
- Warhammer
- (and 1 more)
-
 Hi all, managed to spend some time recently working on my second Imperial Guard force, so broke out the Citadel paints and did these. They're sprayed with Zandri Dust, washed predominantly in the panels with Agrax Earthshade and drybrushed heavily with bleached bone. Quite happy with how they turned out. A Squadron, 1st Company, Cadian 30th Armoured Regt Hope you like them! -Flash
 -
Wayne England 1961-2016 You may not recognise the name but you might well recognise the style of work displayed above. Wayne England, a prolific and prodigiously talented artist with many, many credits to his name, sadly passed away this morning. He Is survived by his wife Victoria and children Harry and Millie. TTFN Wyne, the gaming world has become less a colourful place today.
-
This is my first WH40K figure in my modelling history I like Ork's nature and how they work with their rusty equipment. Honestly, I feel my work is still leak of some pattern decorations compare with others. I may give myself this challenge next time. The figure is completed on few months ago and painted by Vallejo acrylic, plus little MIG AMMO dusty weathering on feet.
- 8 replies
-
- 8
-
-
-
- Warhammer
- Warhammer 40K
- (and 1 more)