Search the Community
Showing results for tags 'WWII'.
-
Wehrmacht Off-Road Cars (DS3503) Stoewer Kfz.1, Horch 108 & DB L1500A 1:35 ICM via Hannants Ltd. War takes place over almost any kind of terrain which is why many military softskins are all-wheel drive with low-ratio gutsy transmission that trade top speed for terrain handling grunt. During WWII the Nazis had a plethora of such vehicles, some home-brewed while others were taken from their conquests and pressed into service. Stoewer, Horch and Daimler Benz were German companies that produced such vehicles seeing action in many theatres carrying staff, troops to and from the front lines, as well as arms, ammunition and stores from place to place. The Kit This is another of ICM's reboxings of existing kits in useful groups that would often be seen together, or used on the battlefield in close proximity. This set includes three personnel vehicles in the one box, and as well as the convenience, there's a decent saving on buying them all separately. The various kits are all recent releases with excellent detail throughout, but for the ease of description we'll handle them separately. They arrive in a newly themed box with each kit/set in its own resealable bag and separate instruction booklets and decals for each one. le.gl.Einheits - Pkw (Kfz.1) German Personnel Car (35581) Made mostly by three German companies, this all-wheel drive staff car designed by Stoewer was produced with different bodies during the early war, the most prevalent being the four seat staff car depicted here. It was however complicated and unreliable, so was eventually replaced by the ubiquitous Kubelwagen. The bag contains four sprues in grey styrene plus a single clear sprue and decal sheet, not forgetting the instructions with integral painting guide at the rear. The chassis is first to be built up with dual springs supporting independent suspension and a driveshaft linking the two transfer boxes, plus the steering linkage front and rear. Fuel tank and stowage are placed to either side of the chassis rails and an exhaust pipe is threaded through to the engine compartment, which is filled with a full rendering of its 4 cylinder 2 litre Stoewer power plant over the front axle. The floor of the cab is built up and added to the chassis, then the three part styrene wheels with moulded-in tread are fitted to each corner along with the radiator at the front. The firewall and rear passenger bulkhead are installed next with the former having instruments and transmission tunnel moulded in and pedals attached to the floor. The cab sides, boot/trunk cover, engine cowling and gear shifter are all put in place before the seats are built up from base, cushion and curved back at the front, with a bench seat at the rear of a similar construction that has just enough room down the sides for two Kar98 rifles to be stowed in shackles. Two more rifle points are attached to the front bulkhead, bumpers/fenders and doors are all added with steering wheel and windscreen also made up. The rear light cluster is fitted to racks for additional fuel on the rear quarters with a spare wheel in between them, and the folded canvas roof above. Front lights, jerry cans and pioneer tools are attached to the fenders, and windscreen wipers are fitted into the depressions on the frame, with wiper-motor boxes moulded into the frame for completeness. The lights and windscreen all have clear parts so the passengers don't get bugs in their teeth. Markings There are four theatre specific options included in the box with early war Panzer Grey the colour of choice. From the bag you can build one of the following: WH-102 360 16 Pz.D, Don area, June 1942 WH-240 663 11 Pz.D, Ukraine, July 1941 WH-307 582 Panzergruppe 1 Kleist, Ukraine, July 1941 WL-22662 I./JG51 Stary Bykhov (Belorussia), July 1941 Horch 108 Type 40 (35505) This is a relatively new tooling from ICM, dating from 2015, with nine sprues in grey styrene, plus a clear sprue, a floppy sprue of black flexible tyres, a small decal sheet and the aforementioned instruction booklet. The model is built up on its ladder chassis, including the engine, transmission, suspension with nicely moulded springs, plus body supports, brake hoses and exhaust system. Overall it's a very neatly detailed underside, with the engine being the focal-point. The hubs are split between inner and outer halves, which facilitates easy painting of the wheels and tyres separately, and installation of the tyres on the hubs without struggle. The coachwork is assembled on the floor plate, which has the rear wheel arches moulded in and stops at the firewall, with spaces for the driver's pedals in the left foot well. The body sides are added, with moulded-in framework, and the dashboard is fitted between them to stabilise the assembly. The dash has a decal for the instruments, a handgrip for the co-driver, heater ducting and a lever beneath the steering column, which is added later. The front inner arches are glued to the underside of the body, and a rear load cover with moulded-in seatback is applied over the rear arches, after which the two rear doors and their handles are installed. A delicate (in this scale) framework is fitted between the rear seats and the driver's area, with the fifth wheel behind the driver, and two bench seats facing each other in the rear compartment, which also have delicate framework under their cushions. The front seats are individual, but of similar construction, and have space for the supplied KAR98 rifles between them, with two more pairs fitted in the rear compartment. The windscreen is of the flip-down type, and has two separate panes added to the frame, with no windows supplied for the sides as it is modelled with the hood down. The doors can be fitted opened or closed, with their own separate handles inside and out. Once the chassis and body are mated, more of the underpinnings are added, and the radiator with cooling fan are attached along with the louvered bonnet and front bumper irons. At the rear the hood is constructed from four parts, sitting on top of the load cover in a folded state, as there isn't an option for a raised hood on this variant. Wing mirrors, pioneer tools, front headlights with clear lenses, and number plates are dotted around to finish off the build. Markings Four decal options are supplied on the small sheet, with unit, number plate and tyre pressure stencils being about all that is to be seen. All options are from the Eastern front, with three shown in Panzer Grey, and one in the Sand Yellow scheme used later in the war. From the box you can build one of the following: 8.Pz.Div, Soviet Baltic, 1941 – grey Russia, Summer 1942 – grey Russian, Autumn, 1942 – grey KG 51, Russia, Summer 1943 – Dark Yellow '43 L1500 (Kfs.70) WWII German Personnel Car (35525) This is the larger of the three vehicles manufactured by Mercedes Benz in a predominantly personnel role, but it was also built as a truck in small quantities. There are three sprues in grey styrene, plus one of clear parts, and the black and white instruction booklet with decal sheet slipped inside. It is a full-detail kit that includes a chassis and engine compartment, together with all the associated underpinnings. Construction begins with the chassis-rails, leaf-spring suspension and crew-steps attached to the outer edges, joined together by a number of perforated cross-braces plus the front bumper and rear towing bracket. The drive train and axles are assembled along with the three-part styrene wheels separate from the chassis, but it may be prudent to at least test-fit them to the chassis before the glue sets so that they retain the correct shapes. The transfer box is at the centre of the assembly with drive-shafts leading to the axles, and it is added to the chassis with the exhaust between them, and at the front a well-detailed engine is installed, built from 16 parts. The body is then begun with the firewall which has the dashboard, driver controls and steering wheel attached along with the two-pane windscreen with clear panels added from behind. The crew seats are assembled on a raised box and a rear compartment, the boot/trunk if you like, is built up to be incorporated into the body. The bodywork begins with the tread-plated floor, onto which the rear wheel wells are fitted, then the side body panels with cut-outs for their separate doors, rear panel with moulded-in doors and the already-assembled firewall with windscreen. Next are the gearstick, seats, spare wheel and frame that helps keep the spare wheel in place and supports the front bench seat, which faces the rear seats so the troops can stare at each other while they travel. The canvas hood is supplied as a four-part folded assembly and rests over the top of the trunk area, leaving much of it exposed as a kind of "parcel shelf". The body is joined to the chassis and the engine compartment is cowled in either the opened or closed position along with the distinctive Mercedes 3-pointed star on the grille. The front mudguards are also installed and are decorated with headlights with clear lenses, convoy light and width indicators plus side mirrors, door handles and a rear-view mirror inside the screen. Underneath, two stowage areas are added between the front and rear wheels, one boxed in, the other a framework. Rear number plate and lights finish off the build. Markings As often is the case with ICM, there are four decal options included in various patterns and colours but as the side profiles are in black and white it's hard to tell without referencing the table on the opposite side of the page. Looking on the bright side, the constant flipping back and forth will help create a draught to keep you cool. Grossdeutchland Division, Ukraine, Summer 1942 Grossdeutchland Division, Kharkov, Summer 1942 North Africa, Summer 1942 Italy, Summer 1944 The decals are printed on a strange lavender coloured paper, but are otherwise identical in registration, sharpness and colour density to their usual fare, so well up to the task. There are instrument decals included for the instrument panel, which is always nice. Conclusion If you want some WWII German Personnel cars for your collection/stash or for a diorama or two, then these are just the ticket, with lots of good quality detail and decal options that give the modeller plenty of choice of finishes. Very highly recommended. Available in the UK from Importers, H G Hannants, Ltd. Review sample courtesy of
-
Russian Tank Crew (84411) 1:35 Hobby Boss via Creative Models Ltd. This is new reboxing of this Tristar figure set, consisting of seven figures either in whole or in part for two of them who are legless and suitable for insertion into tight hatches of their tanks. The set arrives in a figure-sized box and inside are two sprues in tan styrene, one larger than the other. The parts for each figure are grouped together with a letter prefix identifying them as part of one figure without having to refer to the instructions, which are printed on the rear of the box in the usual fashion. Four of the crew are wearing overalls and two are wearing leather tankers' jackets that bear a passing resemblance to more modern biker jackets. The final figure is a female tanker in the standing position, as the Soviets were ahead of most other WWII combatants in allowing women to serve on the front line, decades before the other Western powers. Two of the male figures have alternative heads so you can build them wearing either the tankers' helmet or a fitted cap. You can see the various poses below in the instruction picture. Sculpting is good with the helmeted characters having three sections to their heads consisting of a narrow section with their faces and two side parts that include hanging straps that bulk out the head. The alternative capped heads have the usual seamline running down the backs of their ears, as does the female with her seam running down the front of her short bobbed hair. The table below the instructions shows the colours visually as well as in words, plus Mr. Hobby, Acrysion, Vallejo, Model Master, Tamiya and Humbrol codes for our ease. These are called out side-by-side with the part number on the instructions as you can see. Conclusion Quite a large set for a competitive price with good moulding that can be used to crew up a number of projects if you use them wisely. Highly recommended. Review sample courtesy of
-
German Officers (84406) 1:35 Hobby Boss via Creative Models Officers and their meetings. They happen a lot, and if there aren't any comfy seats you can even get them to stand up whilst discussing whatever it is they feel the urge to talk about. This set was originally released by Tristar (no, I don't remember either) in 2001, it is now reboxed under the Hobby Boss brand, and arrives in a shrink-wrapped figure box with one sprue in sand coloured styrene and a tiny fret of Photo-Etch (PE) brass. To be honest time has been kind to the sprue, and there appears to be no damage or flash, good detail, even extending to coat tails, emblems and handles on document cases. There are four figures on the sprue, all dressed differently and of different ranks and parts of the military, even down to a Lieutenant carrying a case and documents for the General to his side. The tanker is in the SS as can be seen from his collar mounted death's head emblems (D'ya think we might be the baddies?), and while it's difficult to see, the gentleman in the great coat may well be a Major. The PE parts are two pairs of glasses with round lenses of the type worn by the Lieutenant on the right of the boxtop photo. The instructions are printed on the rear of the box, and at the bottom there is a small section detailing how to make maps for the officers to carry and/or examine. Where are these maps? If you check the first drawing of the four you'll find a map on each of the four side tabs that help close up the box lid. You're told to cut them off, soak them in water and then peel off the top printed layer from the card and cut your map from that once it has dried. Very clever! Two of the maps show coloured terrain as well as roads and building, while the other two are black and white showing larger scale details. Conclusion A useful set of officers, including the pudgy General and with good detail that belies the set's age. The addition of the PE spectacles and maps add extra value to what is already a well-priced figure set. Highly recommended. Review sample courtesy of
-
HELP....... Sorry guys need help. In the middle of an Airfix 1/48 Mustang. Have managed to scrape through the build so far with the last scraps of a pot of Humbrol 226 (interior green) for the cockpit etc. However, according to Humbrol site, no longer available in acrylic and not in the new style/formulation. So I need to replace. Would like to try Vallejo, but need a supplier where I can physically go and buy it rather than use online as I need it urgently to finish the build. Has to be acrylic - cannot use enamel for health reasons for myself or the wife (both have asthma!). Also don't like mixing as either have to mix a large batch, and then have it sit around for a long time between appropriate builds, or, have to mix fresh batch if not mixed enough and then not getting the same shade as not matching the exact same mixing quantities again. Any ideas? Milton Keynes or surrounding areas.
-
.thumb.jpg.d17ff607fc7e89ed057e63fcb6f2a888.jpg) Howdy everyone, Just put the finishing touches on my latest effort: HobbyBoss`s 1/48 FM-1 Wildcat kit, masquerading as a Martlet Mk V Finished to represent an aircraft with 733 NAS, Trincomalee, Ceylon, 1945 Built pretty much from the box contents, with only seat belts, engine wiring, brake pipes and aerials added Decals from Xtradecals set X48104 `Yanks with Roundels Part 2` Had to copy the camo` from pictures on the internet as the image on the instruction sheet was too dark to make out...... ...but I couldn`t find a photo of the actual aircraft. Apparently it was a non operational unit so didn`t weather it too much. Hope you enjoy, thanks for looking Cheers Russ
Howdy everyone, Just put the finishing touches on my latest effort: HobbyBoss`s 1/48 FM-1 Wildcat kit, masquerading as a Martlet Mk V Finished to represent an aircraft with 733 NAS, Trincomalee, Ceylon, 1945 Built pretty much from the box contents, with only seat belts, engine wiring, brake pipes and aerials added Decals from Xtradecals set X48104 `Yanks with Roundels Part 2` Had to copy the camo` from pictures on the internet as the image on the instruction sheet was too dark to make out...... ...but I couldn`t find a photo of the actual aircraft. Apparently it was a non operational unit so didn`t weather it too much. Hope you enjoy, thanks for looking Cheers Russ- 32 replies
-
- 49
-

-
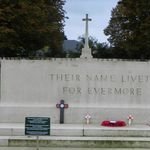
From Leningrad to Narva (9786155583186) Peko Publishing After the horrific siege of Leningrad was broken and the remaining Germans that could escape retreated back toward Nazi held territory using the tactics of collapsing retreat to delay the inevitable, then holding the pre-invasion line around Narva, which they managed to hold for some time. During this period there were numerous battles, offensives and counter offensives with significant casualties on both sides, and it is this process that this book documents in detail, including lots of photos. Bound in a hardback cover in landscape format, the book contains 80 pages of printed material, plus two fly-leaves inside. It arrives in a shrink-wrap cover to keep it in good shape and the pages nice and crisp. The text is in English by author Kamen Nevenkin, and is interspersed with some impressive and poignant pictures of damaged vehicles and at times the crews and soldiers that died with them. The photos are all black and white, which adds to the desolate feeling they evoke, with the information in the captions adding to it, as well as pointing out interesting points that may have slipped your attention on first glance. It is broken down into chapters according to the timeline, as follows: Chapter 1 Page 3: The siege of Leningrad Chapter 2 Page 13: The Leningrad-Novgorod Offensive, January 1944 Chapter 3 Page 33: The Raid of the 16th Tank Brigade Chapter 4 Page 45: The First Battle of Narva, February – April 1944 Chapter 5 Page 66: The Fall of Narva and the German Evacuation of Estonia, July – September 1944 Sources Page 80 The book begins with the German siege of Leningrad and continues to document the initial Soviet attempts to break the deadlock, which was eventually successful in the early part of 1944 once the lake had frozen over. The Germans withdrew to the Estonian border, which was where the original Barbarosa offensive had begun years earlier, with Narva being an important centre of operations. It took the Russians a long hard battle to cross the river's frozen surface, and further hardships to secure the bridgehead that eventually led to the German forces withdrawing and eventually opening the floodgates for the final assault on Berlin in 1945. Conclusion With a broad variety of photos spread throughout the book and informative text around it, this makes for an interesting read, as well as a treat for the eyes, which will doubtless inspire some diorama opportunities. Review sample courtesy of
-
I’ve always loved GHQ’s ‘Micronaut’ line of 1/2400 scale warships. Intended to be used as wargame counters, these models are simple to assemble and ridiculously tiny, but the detail on them is first rate! This one is one of the Japanese navy’s ill-fated light aircraft carriers, the IJN Ryujo. I started by cleaning up an old Nichimo 1/200 U-Boat stand. Taking a sheet of high quality artist’s drawing paper intended for watercolors, I traced and cut out an outline of the ship. After gently rolling the paper over a pen to create a lightly undulating “sea”, I lightly attached it to the base with dots of cyanoacrylate (super glue). Once I was happy with the positioning, the whole paper got a soaking with the cyano. This fixed it securely in place and made it rock hard. Then I trimmed the paper and sanded the sides smooth to integrate the sea seamlessly onto the base. The sea base was painted with a coat of Tamiya Royal Blue (X-3) acrylic with enamel paints for the wake. The sides were then shot with Tamiya Desert Yellow (XF-59) acrylic followed with a streaky coating of Winsor & Newton Burnt Sienna artist’s oil (with just a touch of Burnt Umber) to simulate the look of a wood base. Now back to the ship! To depict the Ryujo as she appeared at the time of her loss at the Battle of the Eastern Solomons on August 24, 1942, the model was painted in Tamiya Kure Naval Arsenal Gray acrylic (XF-75). Then I applied the decal to the previously glossed flight deck. The end result is quite effective – and SO much easier than painting all this would have been! To complete the paint job, I added small details on the boats and funnels followed by a thin dark gray oil wash over the gray acrylic to outline details and deepen recesses. The ship was then attached to the ocean base with Soft Gel Medium, a clear viscous polymer used by artists as a thickener for acrylic paints. It works great as an adhesive, too. As with all Imperial Japanese Navy aircraft carriers, the Ryujo carried multiple masts to support communication antenna wires. These masts rotated down to horizontal during combat or flight operations. Matching the dimensions of a scaled down drawing of the vessel, I cut the three smaller units from brass wire and attached them to the ship with polyvinyl acetate (PVA) glue. To replicate the main mast’s lattice structure, I repurposed a type 13 radar from a 1/700 scale Japanese destroyer photoetch set, cutting the piece down and attaching it to a wire cut to the appropriate length along with a yard and antennae spreaders. As a final step, I installed copper wire rigging taken from an old coil. This stuff is about as fine as human hair, but even so it is fairly heavy for 1/2400 scale. I added just a representative sampling of the ship’s rig to keep from overwhelming the little model. The tiny IJN Battle Ensign is a Peddinghaus decal from their 1/1250 scale “Marineflaggen Japan” set. And done!
-
ADP MASTER modell 1/72 Iljuschin IL-4 W.I.P. by Andrii Dzhuran. Dedicate to Benedikt (thank you for an interesting idea and good recommendation) Hi folks! The display stand for the RA-5C VIGGI is dries after painting now and I have a bit spare time for the start of new one "work in progress". So. Ilyushin IL-4 Bomber As early as beginning of the thirties, a group of desiners of the Central Desigh Office, headed by S.W. Ilyushin, started developing a twin - engine long - range bomber. Finally, the prototype of ZKB-26 was built as a mixes construction and equipped with the M-85 engines. This bomber started on its maiden flight already in 1935. Only a few month later, the modified version of type ZKB-30 was completed as all-metal construction. The IL-4 flew in the formations of the soviet airforce as long - range bomber, torpedo bomber and as long-range reconnaissance plane and towing airplane for transport gliders untill 1946. Although four prototypes had been constructed no serial production was started. Thus, the IL-4 remained the last bomber Ilyushin had developed with piston engines.
- 113 replies
-
- 1
-
-
- IL-4 ADP 1/72
- bomber
- (and 1 more)
-
German Panzergrenadiers (35248) 1:35 MiniArt via Creative Models Panzer Grenadier was a term that was coined during WWII to describe troops that supported armour, or motorised infantry. They wore pink piping on their uniforms, with an S that stood for Shützen, or Protect to differentiate them from gun or other armoured crew. If they weren't riding on a tank, they would often travel in trucks, or if they were really lucky, a half-track such as an Sd.kfz.251. This figure set from MiniArt contains a group of Panzer Grenadiers sat in various poses on a vehicle. It arrives in a standard end-opening box, with four sprues of grey styrene inside. The painting and main construction diagrams are printed on the rear of the box, with colours called out in a large number of brands of paint for your ease. From the box you can build four figures, each having separate arms, legs head and torso, plus seven standard German helmets. They are all seated in differing poses, with most of them nursing Kar98s rifles, while one shows off his MP40, which has a separate folding stock. Each of them has the usual complement of pouches, gas mask canister, entrenching tool and water bottle, with ammo pouches to match their personal weapons. There are two weapons and one accessory sprues, each of the weapon sprues providing two Kar98s and MP40s, bayonets, a pistol and flare pistol, plus holsters in the open and closed positions, along with first aid kit, map case, binoculars and ammo pouches to personalise the crew or diorama with. The painting guide covers Vallejo, Mr. Color, LifeColor, Tamiya, Testors, AK Real Color, Humbrol, Revell, and Mission Models, with the names of the colours given in English and Ukrainian. Conclusion MiniArt's figures are excellent, and these gentlemen can be used to give your truck, half-track or tank a little human scale, or even just a squad sitting around on a wall or some ruins. Highly recommended. Review sample courtesy of
-
 Trumpeter are releasing a very exciting item later this year: A massive 1/48 German WWII U-Boat Type VIIC U-552 Kit! Included with this model will be a transparent Starboard side to display all the interior detailing, and 48 submariner figures! With over 1100 parts this models is sure to get enthusiasts talking. Pre orders will be open sometime in the next few weeks, so watch this space! For full details, please see our newsletter.
 -
Ki-43-IIa "Oscar" | Hasegawa | 1/72 Japan -- 50th Sentai, 3rd Chutai -- Satoru Anabuki, Pilot 1943 Finished this one on Feburary 3rd, 2019. It was done completely on impulse. After reading a complementary review of the old Hasegawa Oscar kit, I pulled that same kit out of my stash and started working on it. The reviewer was pleased with how the kit just fell together, which was mostly true for me, except for the port wing which had some interference keeping it from making a snug fit -- never figured it out and had to do a little filling to compensate. When I looked closely at a build log of this same kit, I couldn't see that person had the same problem, so I guess I'm just lucky. The Ki-43 Oscar was the Imperial Japanese Army's primary fighter until mid- to late-1943 when better types were introduced. It is often mistaken for the Zero by non-enthusiasts, but the Zero was a superior fighter to the Oscar. The Oscar was nimble and in the right hands could be a potent adversary. I like to think of it kind of like our P-40: It was a workhorse that served through the entire conflict and was "good enough". This particular aircraft was flown by Sgt. Satoru Anabuki, who ended WWII with 51 claimed victories (39 officially recognized). After the war he flew helicopters for the Japanese defense force, retiring as a Lt. Colonel in 1971. He went on to fly for Japan airlines, retiring from there in 1984. He passed away in 2005. Finishing: Seams filled with CA (superglue), port wing root seam filled with Apoxie Sculpt epoxy putty. Paints: no primer > Tamiya TS30 Silver Leaf (decanted into airbrush) > Some panels painted with Mr. Color Super metallic stainless steel (darker) > some panels painted with Alclad White Aluminum (lighter) > Dark aluminum used for faint shading > Mottling is a mix of Mr. Color greens to replicate Tamiya IJA green > Tamiya IJA gray for control surfaces > sealed with Testors Metallizer sealer Decals: Kit decals Kinda wish I knew how to make the bottom a little dirtier. It looks a little too clean, but will be OK sitting on a shelf. One thing I noticed in the historical reference photos I have is that the nose cone on most (not all...) Oscars was really chewed up! Sometimes it was the most worn part of the plane. I wonder if it's because of the Hucks starter they used? Backing the starter truck up can't be easy -- maybe they bunged up the nose that way? Anyway, I used salt chipping on the nose and front of the cowl to match the look of the historical photos I had. Painted the engine black, and then went over it with a pencil -- new technique for me, but it worked really well! I treated this build like a full NMF build, even though it might have been completely covered by mottling. This gave me the opportunity to practice a bit more with the Silver Leaf. I found that adding a little Mr. Color leveling thinner and then spraying it so that it wet makes for a much more reflective surface than on my previous build I used it on (Jian Ji-2). Build notes: The Hasegawa kit practically fell together. I was apprehensive about the raised panel lines, but I think they look OK. The eye can be tricked into thinking they are recessed. I think I may be more comfortable with NMF and raised panel lines since this one came out OK, which means there might be a Airfix P-80 on my bench soon! Mottling on the empanage was Tamiya IJA green, but I found that it scratched off very easily! Not easily enough to take it off though, so I switched to Mr. Color for the rest. I found that scratched off fairly easily, but not nearly as easily as the Tamiya acrylic. I'm still not sure about the durability of acrylics, although the slickness of the NMF may partially to blame here. I had the worst time trying to decide how to do the mottling. There aren't many good quality historical photos of the Oscar, and those that are there seem to have mottling styles that are all over the place. Same with models I've seen, some are like mine, some are a fine scribble. I couldn't find any reference photos of Anabuki's plane, so in the end I used the Hasegawa studio model as a reference, hoping they'd done their homework! Thanks for looking! Comments, questions and constructive criticism always welcome!
- 17 replies
-
- 36
-
-
 Here's what I consider my latest completion for 2017, even if we are already into 2018: KIT: Hasegawa 1:48 Macchi C205 VELTRO AIRFRAME: AerMacchi built Macchi C205 VELTRO Serie I, 360sima squadriglia, 150° gruppo, 51° stormo MARKINGS: the wing insignia ("fasci alari"), tail crosses and code numbers were airbrushed using self produced masks; the Savoia emblems inside the tail crosses and the red alignment arrows for the variable incidence tail planes were custom printed on transparent decal film and kindly donated by Eugenio @72linerlover , the rest of decals are from the kit PAINTS: mainly Lifecolor acrylics (including the dedicated set for Italian WWII fighters), airbrushed, with the addition of Model Master Metallizer Titanium for the exhausts and Tamiya acrylics for the white bands and crosses, the codes and a few other details. The smoke ring camo is airbrushed as well, thinning the relevant paint with Vallejo Glaze Medium and spraying at a very low pressure, removing the airbrush protective cap. Many thanks to @Giorgio N for the advice on Vallejo Glazing Medium WEATHERING: mostly with tempera washes, various hues Aftermarkets: - SBS Models resin/PE cockpit set - Quickboost exhaust stacks Scratchbuilding: - Resin ailerons; my first attempt at resin casting, pretty happy with that - Supercharger intake butterfly valve, using plastic card - Oil radiators grid covers, from PE leftovers - Main U/C bay sand covers, plounge molded over gum masters (actually nade cutting them out from a Staedler pencil eraser) - Main U/C bay inner doors, from some beer can cutouts and 0.5mm styrene sheet - Undercarriage actuator arms, from steel pipe and rod - Pitot tube, using a prescription needle and steel rod - Fuel tank vent, from brass pipe - The tail plane fairings were removed from the fuselage and I molded a milliput copy to be applied directly onto the kit tail planes, because on the real aircraft they had variable incidence, so there's a gap between the fairings and the fuselage - Main wheels brake lines, using various tin and copper wires - Wing navigation lights, again plounge modling clear plastic, using the model wing as master - and stretched clear sprue to reproduce the lamps and a few other minor things. This model is the second of a double build, which involved a C202 Folgore (completed in August 2017), again from Hasegawa; here's the WIP thread, in case you're interested A huge thank you to everybody participated in the WIP thread with suggestions, encouragement, advice and even supplying stuff . Enough blah-blah, on with the pics: All comments welcome Ciao Edit: here are some family pics with the other subject of the double build
- 38 replies
-
- 55
-
-
- WWII
- Italian Fighter
- (and 1 more)
-
Pz.Kpfw.III Ausf.D/B (36402 for MiniArt) 1:35 Eduard MiniArt's new and growing range of Panzer III models in 1:35 gets the Eduard treatment with this new set that's designed to augment the detail already there. As usual with Eduard's Photo-Etch (PE) and Mask sets, they arrive in a flat resealable package, with a white backing card protecting the contents and the instructions that are sandwiched between. A single brass fret contains all the parts needed, which starts with a new set of fenders with workable hinges that depend upon lengths of 0.3mm wire that you must provide, and result in a highly realistic finished item. At the rear a set of detailed mesh panels are folded and fixed to the cooling vents under the rear apron. The kit jack block is replaced by an all-new three-section PE assembly that replicates the wood grain, and is held together by a frame each end and a carry-handle. This is fitted into a new bracket on the fender, and is accompanied by new shackles for the pioneer tools such as the axe, fire extinguisher, jack itself, pry-bar and the S-shaped track-tool. The moulded-in cleats must be removed from the tools first of course, and the area made good. Review sample courtesy of
-
I'm interested in doing a few figures in 1/48 scale from the North Africa theatre in WWII, but aside from the Tamiya Afrika Korps set, I'm not finding too much out there. Anyone have any suggestions for nice Afrika Korps and/or 8th Army infantry figures in this scale? Metal would be great, but resin or plastic works, too. 40mm scale wargaming figures would probably also work. Any ideas? Thanks.
-
Hi all,just finished Hasegawas 1/48 P-40e, which I`ve done as 1st Lt, Richard Vodras `Squirlbate` used in the South West Pacific Theatre Decals came from a Superscale sheet which depicts a P-40n as the aircraft but from what i can find out Vodras `N` was O/D N/G scheme with the chequered tail other wise it`s pretty much OOB with just seatbelts, brake pipes, fuel tank breather and antenna added Got to do some more Hasegawa `49ers to replace my dodgy Revell ones as there a really wide variety of schemes and markings. thought whilst I was here I`d also show you my previous Hasegawa P-40 builds P-40k, done as 1st Lt, Ed Nollmeyers White 255, 51st FG which was used in the CBI and unusually has no eyes to go with the sharkmouth and finally P-40n, done as White 55, of 2nd Lt, Herbert Doughty with the 80th FG kit was actually the Finnish M boxing but with Cutting Edge decals used which is another CBI Warhawk Hope you enjoy, thanks for looking Cheers Russ
- 15 replies
-
- 7
-
-
- WWII
- WWII Pacific
- (and 1 more)
-
This is my completed Pegaso bust of a Kamikaze pilot during World War II, he has been expertly sculpted in his final dive, The determined but frightened (?) expression on his face has been superbly captured. the clothing detail is very sharp, overall a very enjoyable couple of months spent getting him from a few pieces of grey resin to this final point. Face was painted with Andrea flesh set and the rest with various Tamiya, Mig, AK and vallejo colours, on with the photos;
-
Hi everyone,I have a personal mini sig of my own, I want to build a 1/72 model (apart from the Vulcan which will be 1/144) of every aircraft flown by 617sqn RAF. This build is going to be the start of that personal quest!!So for the build it will be straight oob part from the decals for which I will be using Xtradecals Dambusters set. It will be depicted as Wing Commander L. Cheshire's North American Mustang III, based a RAF Woodhall Spa in the Summer of 1944.Here are the box, sprue, instructions and kit decals:Hobby Boss 1/72 P-51C Mustang by Neal, on FlickrOverview of what is inside. by Neal, on FlickrInstructions cover. by Neal, on FlickrA 2 step build, really? by Neal, on FlickrUntitled by Neal, on FlickrDecal sheet. by Neal, on FlickrSprue inside the box. by Neal, on FlickrFuselage in one part. by Neal, on FlickrNice detail for an easy assembly kit! by Neal, on FlickrOne piece wing, upper view. by Neal, on FlickrOne piece wing, underside. Nice detail in the wheel wells! by Neal, on FlickrSprue A1. by Neal, on FlickrSprue A2. by Neal, on FlickrLower fuselage cover. by Neal, on FlickrMetal shaft for the prop. by Neal, on FlickrSprue D. by Neal, on FlickrSprue C. by Neal, on FlickrAnd now the aftermarket bits:A really big sheet of decals for only two serial numbers:Xtradecal X72093 No 617 San Dambusters Decals. by Neal, on FlickrDecals instructions. by Neal, on FlickrI took these photos a while ago but hadn't got round to posting them. I have also made a start on the build and will get an update here soonish. I need to do some research about Wg. Cdr Chesire's Mustang as I do not know if it carried external tanks or not, also the radio antenna looks different to the kits.That is all for now.
-
Although I know the question I'm about to ask is impossible to answer conclusively, I would be grateful for and educated or informed 'best guess'. One of my granddads was stationed somewhere near Scapa Flow for most of WWII (when he talked about his wartime experience, my dad used to say, “Harold, the war was in the other direction”). As we are about to visit Orkney, I thought I might go to see where he was stationed. As it's a small island, I assumed that there were only one or two airfields, but last night I had a look and found this lot: RAF Grimsetter (now Kirkwall airport), RAF Skeabrae, RAF Netherbutton (radar station), HMS Sparrowhawk/ RNAS Hatston HMS Tern / RNAS Twatt (Sorry Mike, but that really was its name). As he was in the RAF military police, I assume the last two can be discounted. Would he be stationed at a particular site and if so, which is the more likely, or is it more probable that he would have moved around to all the RAF bases on Orkney, so looking for a particular site would be pointless? Thanks for taking the time to look in. Gorby
-
Hello Everyone, I've been looking forward to building this kit for a little while but until now have been putting it off because I am sure it is going to offer a few challenges along the way. The kit is limited in detail so I intend to do some scratch building, especially in the cockpit and I have also bought some upgrade parts including exhausts and wheels.
-
 Dear All, Here is my rendition of Italeri's 1/72 Dornier Do-24T1, in the colours of Luftwaffe's 3/Seenotgruppe, 1942 (in a unidentified operational theatre, though it could be the Black Sea, due to the yellow underwing tips). This build started life as my entry to the Flying Boats and Floatplanes GB, which I hosted in late 2017 till mid-January 2018. As usual, I didn't manage to finish in time but I was using this build as a test bed for seaplane weathering techniques, so it would be difficult to finish in time anyway. In fact, it took me an additional 4 and a half months past the GB deadline to finish it... First a few words on the kit itself: Fit is generally good, but I had to fill in the joins between the wing sections and between the sponsons and fuselage. The really worst part, in terms of fit is glueing the wing to the struts and these to the fuselage, as there are almost no location holes to ensure proper alignment. Good detail in the cockpit and engines, the machine guns are not bad either (for plastic parts) There's a lot of surface detail: a mix of recessed panel lines, raised panel lines and rivets. I'm sure there will be people who won't like it but it didn't bother me. In fact, it seems that a lot more panel lines could be seen in real pictures. The kit comes with a PE fret but the instrument panel has no detail for the instruments (it's not a multi-layer panel, like Eduard's current approach, or a metal part + acetate with instruments; there's no decal for instruments either). However, this is a minor point, as the instrument panel can't really be seen through the cockpit windows. The PE walkways are very difficult to bend on the edges (there should be a slight bend, delimiting the walkways laterally) The transparent parts for the side windows are really bad but, again, there's nothing to look at inside and the gun turrets are a bit thick. The transparent part for the cockpit windows is very clear and distortion free but didn't fit perfectly on the fuselage. The instructions are reasonably good but some details are a bit vague (ex: installation of the rear turret, demarcation of the camouflage in the German versions) and there was an error on the decal scheme of the German versions (decals nº 9 should be nº 10 and vice-versa) The decals are very good (Cartograph) Regarding the build itself, some noteworthy points: The kit was built completely out of the box. No after-market or scratch building has been added, with the exception of rigging and antenna wires. I used Gunze Aquous and Tamiya acrylic paints (XF-26 and XF-27 for RLM72 and RLM73, respectively) airbrushed The most important part of the build was the weathering (based as much as possible on period pictures): a lot of chipping was applied on walk-on areas and areas subject to friction or spray of sea water chipping was applied in several layers: aluminium - chipping fluid - primer colour (RLM02) - chipping - chipping fluid - camouflage colour - chipping salt accumulations on the top surfaces simulated with a misty layer of "rain streaks" product, which was then removed almost totally with a brush water line mark created with AMMO Mig's "Nature Effects Dark Slime" grime accumulation and staining of panel lines and panels on the undersides (hull, tail, tailplane) with several AMMO Mig Oilbrusher colours (Dark Brown, Ochre, Olive Gree, Rust) panel lines on "above the water" surfaces were enhanced with a dark brown wash oil leaks on engine nacelles with a "Fresh Engine Oil" product fuel leaks on top of wing with diluted transparent yellow exhaust stains on top of wing using black pastels As a first try with sea plane weathering techniques I'm very pleased with the results. The WIP can be found here. Here are the final pictures. 1. Overall views IMAG5519 IMAG5520 IMAG5526 IMAG5527 IMAG5531 IMAG5532 IMAG5535 IMAG5499 IMAG5503 IMAG5506 IMAG5539 IMAG5521 IMAG5534 2. Details of gun turrets and cockpit Front turret IMAG5522 Cockpit barely seen through the windows IMAG5523 Mid-ship turret IMAG5515 Tail turret: IMAG5516 3. Rigging, antennas and engine detail Rigging between the lateral struts, done with elastic fishing wire, brushpainted RLM65, antenna wires done with AMMO 0,3 mm rigging thread: IMAG5524 Details of engine nacelles and propellers, showing engine oil spills: IMAG5525 IMAG5537 IMAG5538 Some chipping on the propellers, done with a silver pencil: IMAG5536 4. Weathering on the upper surface of the wing Chipping on the walk-on surfaces, chipped paint on nacelles, oil spills, fuel spills, exhaust stains: IMAG5528 Detail of starboard side, showing also some accumulation of salt: IMAG5529 The same for the port side: IMAG5530 5. Weathering on the under surfaces of the wing and tail plane Accumulations of salt and grime and general staining of the starboard underside of the wing: IMAG5540 The same for the port side: IMAG5540 Underside of the tail plane, weathered differently, since it was subject to sea water spills: IMAG5542 6. Weathering of the hull and sponsons The weathering of the hull and sponsons includes: chipping of the paint, showing primer (RLM02) or metal, water line mark, accumulation of grime on panel lines and panel staining and spots of rust: IMAG5543 IMAG5544 IMAG5545 IMAG5546 IMAG5547 IMAG5549 7. Interior detail The following series of pictures shows the finished cockpit before closing the fuselage. It's been weathered with dry brush and wash techniques: IMAG5141 IMAG5142 IMAG5144 IMAG5145 IMAG5146 IMAG5147 IMAG5148 8. Pictures of real weathered aircraft (for comparison) Just for comparison of my weathering efforts with real weathered aircraft, here are period pictures of Luftwaffe Do24s: I hope you like it. All comments are welcome. Thanks for looking. Jaime Cheers
 -
Dear friends I'd like to share with you my work on this Matchbox kit. First of all my thanks to Vulcanicity for his 2017 topic who guided me through my work. A very important guide I used his topic, the Mushroom book and the G.A.G. Cox precious (precious, my precious......) profile. He gave me the courage to face the challenge. I post only the final result of the interiors before closing because the step by step would be only a copy and paste of Vulcanicity big work. The only difference is that I preferred to detail the bomber position using the profile. Actually I have to complete only the cockpit. Next step will be find te desired profile. Now i'm thinking to the MB version code BN based at Stanraer but i have one doubt about the lower surface colour. On the MB box (i lose the instructions .....) it seems gray or light blue nut in the Mushroom profile it is declared as bare metal. It may be because at the beginning these planes were not painted. If someone has some interesting profile it would be very very appreciated
-
So I have recently joined Britmodeller and decided I should share what I am currently building at the moment.. Unfortunately I am due to deploy so I won't have much done for a few months but I hope to come back and get this finished. Will be my first model in a very long time (Family )
- 4 replies
-
- 12
-
-
- Beaufighter
- WWII
- (and 1 more)
-
Hi to all,My main hobby is mount tanks 1/35. On each kit there are several leftover pieces. One day I imagined mount something with those pieces and this is the result. https://www.youtube.com/watch?v=mS_XDiluZs4
-
Hello Everyone, Although I am quite near to the completion of this build, as a new member with Britmodeller I wanted to post my first "Work In Progress" topic for my current project the Eduard 1/48 Fleet Air Arm Hellcat Mk.I. This is the first Eduard kit I have build and have really enjoyed building it, the detail is very good and the kit went together really easily. Sorry in advance for the number of photos.
-
Some pics of a Horten 229 I recently completed; Revell kit in 1:72 scale. https://pin.it/dp52f7pdj5zs3k https://pin.it/mxetygke6jgp4n https://pin.it/eyfp37i3nviqh2