Search the Community
Showing results for tags 'Victor'.
-
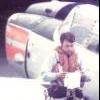
Handley Page Victor K2 Tanker XM231 "Lusty Lindy". Pictures mine taken at The Yorkshire Air Museum, Elvington. Thanks to Andre Tempest and the Team which keep this aircraft alive for access to take some of the pictures.
-
Hello, first post on this forum! I liked to build (very bad) scale models as a kid, and after a 15-20 year sabbatical I decided to pick up the hobby again. I have been lurking around without registering for quite a while now, and I figured it's time to sign up and post something. I've always thought British cold war bombers are really cool, so I wanted to start out on those. I already built the Avro Vulcan in Operation Black Buck camo scheme, so I thought I'd go for Operation Desert Storm for the Victor. I was actually going to build Airfix's new Victor model, but It hadn't come out yet by the time I finished my Vulcan so I got Revell's old tool model. I'm aware of aftermarket improvements but decided to build this one OOB. The fuselage halves and intakes were a PITA, but rest of the airframe went together quite nicely. I rescribed the panel lines, but left in some of the raised details that were too tricky for me to scribe. I sprayed on two layers of grey Vallejo primer (rattlecan). The topside was meant to be "hemp" in colour, but I couldn't find the shade from Vallejo (I really like their paints ) so I consulted the guy at the local hobby store, and we decided on German camouflage beige WWII which is really close but lacks some red. Underside is Vallejo light grey. Weathering was done with acrylic wash and a bit of Tamiya weathering master, I'm worried I overdid it a bit.. Lastly a coat of Vallejo satin varnish from a rattlecan and I called her done! I forgot to glue in the stairs before I took the pictures, oooops. It's my second build, be kind
- 23 replies
-
- 36
-

-
Excellent, well researched, deep enough but not too intense to be enjoyable. A very good book about aeroplanes. And who doesn't like a good book about aeroplanes?
-
 A friend wanted me to build this kit for his dad's Christmas present, I have never built this scale before it was a great little kit which went together really well. It took longer to do the paintwork than actually build the kit.
- 14 replies
-
- 30
-
-
- 1/144
- Great Wall Hobby
- (and 1 more)
-
 Pitot and Refuelling Probes 1:32/1:48/1:72/1:144 Master Having released the Sukhoi collection, Master Models have also recently released several sets for Western aircraft, with particular emphasis on the three V Bombers in both 1:72 and 1:144. [AM-32-090] – This pack contains two parts to build up the pitot probe and fairing for the Italeri 1:32 Mirage II. Rather than brass, the two parts have been turned in alluminium and is a simple direct replacement for the kit part. [AM-48-118] – Another simple replacement pitot probe, this time for the Airfix 1:48 BAC TSR-2, it may have been along time in coming, but it is, nevertheless, a very welcome addition. [AM-72-097/AM-144-009] – These two sets have been designed for the Airfix 1:72 and any of the 1:144 kits from the likes of Micro-Mir, Anigrand or Welsh Models. Each set contains two very fine pitot probes to replace the slightly clunky kit items. [AM-72-098/AM-144-010] – These sets contain only one item, the prominent refuelling probe. The 1:72 for he Airfix kit and the 1:144 for either the Anigrand or Great Wall Hobby kits. Unfortunately even though they are meant to be different scales the review samples re exactly he same size, so do check when you buy your 1:144 as it would be absolutely massive when compared to even the kit part. In each case though, you will need to cut the kit part where it joins the nose fairing, drill out the hole then fit the metal part before adding to the model. [AM-72-099/AM-144-011] – The last of the V bomber sets is naturally for the Victor, either the Matchbox/Revell 1:72 kit or the Anigrand/Welsh Models kits. Whilst he 1:72 set contains the two wing tip mounted pitot probes and the probe end piece for the refuelling probe, the 1:144 set does provide the whole refuelling probe as well as the pitot probes. Conclusion Five more very useful additions to the Master Models range. If you thought the 1:72 scale stuff was small, you really should check out the 1:144 scale parts. I would love to know how they produce such small items, with such finesse of detail. Very highly recommended Review sample courtesy of Piotr at
 -
XM715 Victor Tanker K.2 at Bruntingthorpe. aircraft is kept operational and fast taxis. Pics thanks to Martin.
-
Hello! This is the first 'proper' build i've done for a few years, I'm rusty but back with vengeance. Far from perfect re: paint job, but it's a notorious kit to build. I've neatened up the cockpit and airbrake since I took these pics too. Can't wait to get my hands on the new tool Airfix kit! Up next: 1/200 Vulcan in anti flash. If anyone can tell me what image extensions i can use here, i'd be grateful. They all reject for me! In the meantime, pics here: http://postimg.cc/gallery/2lgjzw3xg/31c2f0a1/ Chris
-
Hi All, I've picked up a 1/200 Vulcan and have finally decided to go anti flash white (I chickened out of doing it on my last Victor...) I want to do this with spray cans. What are the best (ideally cheapest) primer and white gloss products for the job? I don't know whether to go primer > matt white > clear gloss primer > gloss white enamel vs. acrylic etc Any help to make sure this just works first time would be highly appreciated! Ta, Chris
-
 1/72 scale Victor K Mk2 XL163 RAF Marham History, Construction number HP80/66 Awaiting collection 15/05/1961, delivery date 07/02/1962, to Handley-Page Ltd 14/01/1969 then Hawker Siddeley 20/05/1970 for conversion to K2 standard, l/f? 01/07/1986 to St Athan store, to St Athan 29/09/1986 for Battle Damage Repair Training as 8916M, scrapped during 12/1991 by Hanningfield Metals, Stock, Essex "An order was also sent out to the remaining Vulcan Squadron to go on to a War Footing and in a show of force 4 Vulcans were deployed to Wide-awake Airfield at Ascension Island and from there the then longest bombing missions took place. Code named Black Buck, their mission was to deny the Argentinians the use of Port Stanley Airport to their Mirage Fighter jets with 21.000LB's of bombs. One sole Vulcan XM607 Piloted by Sqn Leader Martin withers which was the standby aircraft for the first mission after its sister aircraft XM598 piloted by John Reeve suffered a ruptured windscreen seal in flight and couldn't pressurize. The first raid was successful and placed a bomb right in the centre of the runway. The missions themselves would not have happened if it wasn't for the Victors of 55 and 57 sqn refueling the Vulcan on its route as well as refueling the Victors its self, one specific Victor XL189 piloted by Bob Tuxford gave most of his fuel to XM607 and left with the bare minimum fuel to get back with." The Vulcan was over its normal maximum take-off weighteach carried, as well as extra equipment like the DASH 10 and a chemical toilet, a highly experienced Air to Air Refuelling Instructor (AARI) from the Victor tanker force who would fly the Vulcan during refuellingand fuel usage was higher than expected. As a result of the fuel demand and problems in flight with refuelling, two of the Victors had to fly further south than planned, eating into their own reserves, and one of these, the last Victor to refuel the Vulcan, was past the last refuelling bracket before turning home. Tankers had to be sent south to refuel these Victors so they could reach Ascension. A total of 11 Victors were used to support Black Buck One: XH669, XH672, XL162, XL163, XL188, XL189, XL192, XL232, XL511, XL513 and XM717 XL163, 57 Sqdn, with two wing roundels (copyright prevents posting) ( http://www.57-630sqnassoc.org.uk/forum/viewtopic.php?f=7&t=8353 ) On ascension (copyright prevents posting) ( http://www.abpic.co.uk/photo/1402175/ ) This kit was a "pig" all bent and distorted, raised panel lines etc. etc. I can't scribe but I can sand and boy did this kit need sanding AND filling, the wing needed steaming, it needed heavy duty clamps (carpenters type clamp, that's what I used them for originally! ) to pull the fuselage halves together, everything went up a few notches for tooling to build this thing. I learnt loads while building this, I am used to 1/72 fighters this thing would dwarf most 1/48th kits and even some in 1/32, the wing span is close to a 1/24 spitfire. All techniques I know for assembly went out of the window on this! I used tamiya green/grey and humbrol acrylic white as the tamiya pot looked a bit empty for this job! First go with humbrol acrylic, I must say this, I painted the white before I steamed the wing, the paint held up. The only things I added were a couple of vanes/fins on the fuselage, the centreline one just aft of the cockpit was replaced as it was severely damaged during sanding, otherwise it's out of the box. It's a simple finish but it wasn't without a great deal of effort. Decals, standard format onto gloss with 50:50 Matt/Satin humbrol topcoat, revell decal soft. Box option. This is the first of my V bomber fleet, hopefully I will be able to achieve the remaining aircraft to complete the line up. This type truly has a remarkable history.
- 41 replies
-
- 31
-
-
Hi All, i'm building the Revell Victor, and haven't got the cash to splash on the detail kit to deal with the intakes. As I was going to build it on the ground i'll go for FOD covers. in the past I've done this with cut out paper, but it always looks naff. Any ideas/advice/tips on how to make really realistic and stable red FOD covers for the intakes? A la: http://thumbsnap.com/s/nwp4X5Nc.png Chris
-
Afternoon all, Sorry to trouble you with another quwey regarding the Blue Steel missile When viewing photographs of the Blue Steel missile being loaded onto the Vulcan and Victor, the upper tail surface appears to be missing from a few of those. So my questions are as follows: Was this fin removeable? When carried in the recessed bomb bay of the Vulcan and Victor, was the tail surface kept vertical and fitted into a recess or was it folded down? Thanks, Sam
-
Good morning all! I am just wondering whether anyone knows how the Blue Steel missile was attached to the V-bombers, specifically the Avro Vulcan. I have seen a Pathe film of Blue Steel showing the ground crew "winding" the missile up into the bomb bay of the Valiant, I am not sure whether this would be the same with the Vulcan? On a related note, having been to Cosford and seen their Blue Steel far too many times for it to be deemed normal behaviour (only kidding, Cosford is a wonderful place) I noticed that on the horizontal "wing/winglets" at the rear of the missile, there are two cylinder shaped attachments which are attached just above these wings. I don't think that the Cosford Blue Steel was a test vehicle so I don't think it could be carrying any sort of flare to mark its location (if the test vehicles ever used such a setup), however I suspect that it has something to do with its suspension from the V-bombers??? I also tried obtaining an estimate for how much it would cost to copy some Blue Steel technical drawings from the national archives and the answer came back- £350!!! So a dead end there... Anyway, thanks for reading my verbal ramblings, Sam
-
Handley Page Victor K. Mk.2 Revell (ex Matchbox) 1:72 The Victor was probably most famous for it's introduction in to the RAF as part of the V Force in the strategic bomber role or more specifically to operate as a nuclear deterrent, however it's career as an in-flight refuelling aircraft is where it cemented it's place in RAF history with around 30 years service in this role. First flown at the end of 1952, the B.1 entered operational service with 10 & 15 squadrons in 1958. Whilst the B.1 was designed to operate at high level, the improved B.2 was primarily designed to deliver stand-off missiles from low level to avoid Soviet radar. This unfortunately was the undoing of the Victor in a bombing capacity. Operation at low level had led to fatigue cracks within the wing structure, so the B.2's were 'retired' by the end of 1968 with only 6 years in service. With an increased need for in-flight refuelling, the RAF sought to modify the B.2's and put them back in to service in this role. Apart from the obvious fitment of refuelling equipment, the wingspan was shortened to reduce wing bending stress which would alleviate the fatigue issues. In 1982, the Victor played it's role in several of the most famous missions in RAF history, known as Operation Black Buck, although it's part has been largely ignored by the media who instead preferred to focus on the Avro Vulcan that delivered the bombs. No less than 11 Victors were required to provide the complex refuelling pattern for the long return trip by a solitary Vulcan. Not only required to refuel the Vulcan, but they had to refuel each other with critical timing that was aggravated by the higher payload and subsequent fuel burn of the Vulcan as a result of the additional kit required for such a mission. The B.Mk.2 Victor was finally retired from its distinguished refuelling service in 1993 as it handed the reigns over to the VC-10's and Tristars. The kit Well, I'm guessing that many are already familiar with this kit as it has been around since the 1980's, firstly in the 3 colour plastic that Matchbox were famous for. This is the 3rd re-release by Revell. Packed in their usual end opening blue box which I'm not a fan on, not least due to the box tending to collapse in the stash, fortunately, the artwork makes up for this somewhat. Inside the box is a great decal sheet and 3 light grey plastic sprues. The moulding quality is typical Matchbox. Chunky detail parts and a mixture of fine raised panel lines and quite deep recessed lines in places. Flash is surprisingly sparse, however there are some prominent sink marks that will need dealing with. It really is showing it's age, but judging by the high prices on Ebay for Victor kits prior to this release, there clearly is still a demand from us wacky modellers as it's the only option currently on the market to produce a 1/72 Victor. Assembly starts with the cockpit interior. This is....well crude, with only the tub, seats and crew members included. We quickly move on to the flying surfaces and fuel tanks. The wings have been heavily criticised from my research. A recommended improvement is the Flightpath resign intakes to improve this quite prominent feature that is difficult to correct using scratch building skills. Another issue is the lack of washout along the wing which should reduce in incidence by about 13 degrees at the wing tip. This has knock on implications such as the alignment of the refuelling pods with the fuselage. This can be dealt with from what I've read. See this thread here: http://www.britmodeller.com/forums/index.php?/topic/34608-handley-page-victor/ As you will see from the photographs below, there are some pronounced sink marks that will need to be filled around the rear engine nacelles. Attention then moves to bringing the fuselage halves together. The surface is largely of raised detail with some quite deep recessed areas underneath, so a re-scribe may be a suitable option. The airbrake can be positioned open or closed which is a nice touch, but again, aftermarket PE with significantly improve this area if you open it as the plastic is all a bit vague and quite chunky. Next comes the undercarriage assembly. This is another area to be aware of. The kit sits tail heavy, so a good solution is to cut about 2mm out of the main wheel bogies to address this. The aircraft should sit with the fuselage level to the ground. The kit can be built with the gear up or down and the same too with the flaps, however in the effort to standardise the parts, there is a step on the flaps that shouldn't be there if you build them in the lowered position. There is a great tutorial by the late and great Ted Taylor HERE on how to tackle this. The remainder of the build tackles the various protruding parts that are included including an option for a boarding ladder and open access door. The decals As mentioned earlier, the decal sheet is a very fine copy indeed with beautifully fine and sharp stencilling, something of a contrast to the plastic! Cockpit instrument decals are included to enhance the rather plain kit offerings and the register looks spot to too. Two schemes are included: XH672 - 55 Sqn on deployment from RAF Marham during Operation 'Desert Storm' 1991 XL163 - 57 Sqn RAF Marham 1983 in the green/grey & white camouflage scheme Conclusion There is no doubt that this is a basic kit by 21st century standards, but at the moment, it is Hobsons choice if you want to build one so we can be thankful to Revell for making it available again. Fortunately, there is aftermarket out there to address some of the worst offending areas, and from builds I've seen, it's certainly possible to produce a gorgeous rendition of this historic yet futuristic icon of British aviation. Given that copies were previously going on Ebay for over £50, if you want one, now is a good time to add one to your stash as the price is under £25. Review sample courtesy of
-
- 3
-
-
- victor
- handley page
- (and 4 more)
-
Pics thanks to Rick, taken in 1993 at the press day for retirement.
-
Hello So first post...and my god I feel so happy with this. So I've always loved the V-Force. Cliche I know, but I do love them. I already have a Valiant and Vulcan at home (both Airfix kits). I got a Victor a few years back too, the Matchbox one. I got it complete on eBay for the stellar price of £8 and P&P. Bargin. I haven't realy started it...ok I did but the paintwork is awful and when I get my airbrush/compressor set I'll do some practice models and move onto it. So here's the pretty box...(please don't judge my need-copious-amounts-of-cleaning carpet) So I haven't really explored my local area before...and I said to my partner after work one day I wanted to see a few shops. I know we have a web based store here that lets you purchase from it's warehouse directly but I wanted to see a more traditional one like I'm used to in Swindon - you know the sort, walls of models and too much choice? So as I said I had one Victor already. Well there was one sat there in the second hand section. I grabbed it and checked it was complete - one thing missing off the sprue but rolling around in the box. I couldn't resist - I've seen these sell for £50 on eBay now and it was only £30...so I got it. I had to. So I now have 2 Victors...and maybe 2 Vulcan kits soon too. Somebody help me xD Also, isn't that artwork just glorious?
-
Afternoon all Some more classic pics from a friend across the ocean. Taken at RCAF Station Rockcliffe Ottawa on 6th June 1664 the pics show Vulcan B2 XM646 with IFR Probe and probably XM647. 6th June is the date of the third National Air Force Day at Rockcliffe. The 40th Anniversary of the RCAF" was the theme and an RAF Vulcan was scheduled to display. The nose shot shows the markings of the Coningsby Wing with 9, 12 and 35 Sqn markings along with the Coningsby Crest although the castle on the crest looks a bit thick. The pilot’s name on the crew access door is AVM AHC boxer who was SASO at Bomber Command The Victor B2 pic was taken non 11 June 1964 but the date on the pic file gives no location. XL233 carries the tail marking of the Wittering Wing which comprised 100 and 139 Sqns. Any further info, corrections and the like would be very welcome - Hope they are of interest All photographs are courtesy Canadian Forces Joint Imagery Centre, Ottawa via Steve S Regards Frank
-
Hi all, Just putting the finishing touches to this monster, in fact its a nut & bolt restoration job, I originally built it 5 or so years ago and it resided in my boys bedroom until a near fatal accident reduced it to a pile of bits. Its sat in a box in the garage since gathering dust, but its such an iconic aircraft I just had to re-do it. It was originally brush painted so its been sanded down, partially re-scribed, stuck back together and given a nice lick of paint in 57 Squadron colours. The decals are from the newer Revell re-box and theyre terrible, most have disintegrated, I had to spray the hi-viz marking on the wing tips. Its far from perfect, couldn't do away with the seam on the fuselage and the fit is poor in places, and I need to finish the intake covers properly. Anyway, i'm chuffed to with it, 57 was one of my dads old squadrons when he was on the V-force before the Victors were converted to tanker duty, he'd have liked this I think! cheers Simon
- 24 replies
-
- 15
-