Search the Community
Showing results for tags 'Trainer'.
-
Greetings Fellow Modellers! I submit for your perusal a pair of small, so terribly small Gnats . Both models are Airfix's newish Gnat T.1 in 1:72 scale. They represent my return to the hobby, in that on these models I let loose every experiment from which I could learn. I initially wanted to build them OOB, but I ended up using quite a bit of aftermarket stuff: the pitot tubes are Albion Alloy Micro Brass Tubes and the nose wheels are from a nice wheel update set from the Hungarian company SBS. The nose wheels make an improvement over airfix's ones which are a little bit too small. The main wheels are from the kit, and the examples left over from the SBS set will be used later for a hangar diorama. The canopy was cut with a Revell precision saw to enable it to be posed open. The interior of the canopy was lightly detailed with thin plastic card and stretched sprue. For canopy work I mostly used bookbinder's glue, which is a strong PVA type. The windscreen was made flush with the fuselage with the aid of Gunze Mr. Dissovled Putty and then Mr Surfacer 500. Same story for smoothing the side walls of the nose wheel wells. Cockpit and ejection seats were detailed with plastic card of different thicknesses, stretched sprue and very occasionally thin brass wire. Paint was basically Gunze Sangyo Mr Hobby, except Vallejo for detail work and Citadel Runefang Steel for the silver. I had lots of trouble with the H1 gloss white, which I applies much too thickly and as a result wouldn't cure well. Thanks to tips from the Tools&Tips section (thanks DuncanB ) I learned some new skills. First matt white, a coat or two, then one coat of gloss. Works beautifully. Decals were from all over the place: lots of stuff from S&M models' sheet, wing stencils came from the home printer, and the rest was basically scavenged. Please forgive the format of some of the photos, I liked the idea of imitating 1970s film, so I edited the model's images accordingly. gnat2-7 by J Goat, on Flickr gnat2-9 by J Goat, on Flickr gnat2-13 by J Goat, on Flickr gnat2-1 by J Goat, on Flickr gnat2-3 by J Goat, on Flickr gnat2-15 by J Goat, on Flickr gnat2-4 by J Goat, on Flickr gnat2-5 by J Goat, on Flickr gnat2-2 by J Goat, on Flickr gnat2-14 by J Goat, on Flickr Thanks for looking! Jay
- 40 replies
-
- 44
-

-
- Hawker Siddeley
- 1:72
-
(and 8 more)
Tagged with:
-
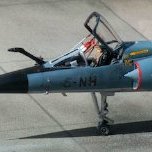
I have a Heller Magister taking up shelf space, however I have a big reluctance to build it OOB because it's hardly inspirational as such... Option 1: Patrouille De France 1978, could there be a more colourful scheme? Or a more common combination...(tied perhaps with a Red Arrow Hawk) Option 2: All silver West Germany WS50 19966. Could this be the most boring Heller scheme? So without buying an AM decal sheet what could I come up with? 1. Put it back on the shelf 2. Build but don't paint/decal 3. Spend more money on decals, and blowing apart the idea of cheap + cheerful. 4. Wiff... Which do you think won? ********** Edit: Just found an old Matchbox G91Y in deep storage so now I have to wonder what a mix-n-match would result in...
-
As I have 3 Japanese trainers in the stash I may as well tackle one as a practice run once I return to the fold properly. However I will need the correct paint (or near enough as I can make it factory fresh or faded). Emptying boxes I found I have Revell #30 but am unsure about it's suitability. Is it passable or is there a Humbrol or Tamiya option as ideally I don't want to get into mixing %s or special ordering (preferably available in Antics) I know the it's been discussed before as I've read similar requests at least once, but as usual Murphy's law says if I want a specific thread I won't be able to find it... Even delving elsewhere on the webosphere simply brings up mixes, technical specs etc as opposed to a simple 'use paint X' .... Thx in advance. - or alternative schemes for a Dinah trainer is another option (the Willow is much easier!)
- 6 replies
-
- Japanese
- Mitsubishi
- (and 5 more)
-
Good morning all! When going to my local model shop the other day to add to my newly acquired taste (not literally-tasting paint wouldn't be very good for your health ) of Vallejo paints, I stumbled across this kit. In regards to the paints it is a major turning point for me, I have been used to the Humbrol Enamel paints since I first began modelling about 10 years ago and since my "revival" in the hobby about 3 years ago and I have found that the Vallejo paints are less resilient but provide a better coating I believe in terms of the aesthetic appearance. In addition to this, they can be dilluted with water (saving a lot of money on thinners and being better for my general health too). Anyway the kit, it was about £5 I seem to recall which is not bad at all for a newly tooled kit and dare I say, what a pleasure it was to build too! I did make a bit of a mess of it in places and I suppose it was more of an experiment piece to test different techniques and different finishes (my first time using the vallejo silver and the fluorescent red), but nevertheless I believe this is not too bad a model-if I do say so myself. So, without further rambling, here we are: Thanks for looking, Sam
-
Only one more build till my dozen and I can stop bothering everyone with my counting. Modelling time was getting short after my IDF Spitfire, so I decided to bang out a no-nonsense, OOB build of a shake and bake kit with no added extras that I could do as quickly as possible. The new mold Airfix Vampire seemed to fit the bill. In this case, although spread out over two weeks, time expended could certainly fill a long weekend for me. The only thing to slow me down (related to modelling), was the application of the Humbrol acrylic 205 Fluorescent orange, which had to be spayed on in multiple very thin coats. Done as a reasonably clean bird, and here she is, with a friend in the last picture which is my Build 2 from last year, the Airfix Gnat. You've seen billions of these things on here, so maybe for my build 12, I'll find something a bit more esoteric, and in 1/72nd scale of course. Like my old eyes aren't complaining or anything. So check her out.. go ho hum, and move on to something more interesting. Like beer. Vampire_111014_01 by IrritableRabbit, on Flickr Vampire_111014_02 by IrritableRabbit, on Flickr Vampire_111014_03 by IrritableRabbit, on Flickr Vampire_111014_07 by IrritableRabbit, on Flickr Vampire_111014_06 by IrritableRabbit, on Flickr Vampire_111014_04 by IrritableRabbit, on Flickr Vampire_111014_09 by IrritableRabbit, on Flickr
- 20 replies
-
- 25
-

-
It spent 74 years beneath the surface of freshwater Lake Muskoka in the middle of Ontario, Canada, about a 2.5 hour drive from Toronto. The Nomad's tail was raised yesterday (October 28, 2014) but it was originally found in July of 2010 after an approximately 3 year search. (http://www.thestar.com/news/gta/2011/07/24/71_years_later_missing_plane_found.html ) Associated articles from today's news: http://www.thestar.com/news/canada/2014/10/28/downed_second_world_war_plane_recovered_from_lake_muskoka.html and background information from the RCAF website from September of 2013: http://www.rcaf-arc.forces.gc.ca/en/news-template-standard.page?doc=the-northrop-a-17-nomad-3521/hlouaj92 It may not be as thrilling as finding a Halifax but I believe this is another good find and it allowed the airmen to "come home" after 70 long years. Cheers, Dave
-
Images sent to Julien to post in walkarounds. Regards,
-
Coming soon (a couple of months being the latest prediction) from our friends at KittyHawk is the 2-seat trainer variant of the SEPECAT Jaguar in 1:48 , which will be the first injection moulded 2-seater in this scale. The boxart is available to view now, and if you look over in the Mig-25 thread, you might be lucky enough to see a pic of a part-built kit in the foreground. Roll on Christmas!
-
Here's a few pics of my completed Vampire; brush-painted and finished by hand...I'm quite pleased with how it has turned out. It's only my 4th build. I will take a few more photos of the Vampire tomorrow:
- 10 replies
-
- 9
-

-
- airfix
- de vavilland
-
(and 3 more)
Tagged with:
-
I have had a bit of a break from modelling, but thought It was time to have a go at another kit; I have two kits that I bought last year but haven't found time to start yet. This time, I will be building the De Havilland Vampire T.11 from Airfix: I have read good things about this kit, and seen some great results on forums so far. I'm looking forward to building it. The kit has 3 main sprues and a clear sprue: The instructions and decal sheet: As with my other builds, I will be doing things by hand, all brush-painted and finished manually. I will be making the kit in the Vampire Preservation Group colours; the yellow training scheme as on the box artwork. Such a great-looking aircraft, I hope I can see it someday at an airshow. OK, on with the build...first stage is the cockpit...
-
21st Kokusho A6M2-K Zero Fighter Trainer 1:48 Hasegawa History Whilst the Japanese Zero naval fighter is known the world over, it’s not so well known that there was a 2 seat trainer variant. The A6M2-K was designed and built at the 21st Naval Depot at Sasebo Naval Arsenal and was also built at the Hitachi plant in Chiba. The design was based on either a standard Model 21 or Model 22 A6M Zero. The conversion required the front cockpit be moved forward, and the new cockpit for the instructor to be fitted behind. This included a full instrument panel, and full dual controls. The instructor had a full sliding canopy, but the students cockpit was open with only small doors either side to aid accessibility easier. Two strakes were fitted either side of the rear fuselage to assist in spin recovery. The type served as a transitional trainer from the beginning of 1944 and were also utilised as target tugs trailing streamer type targets from pods beneath the outer wings. The A6M2-K used a larger fixed tailwheel than the standard aircraft and also had the outer gear doors removed to save weight. The Model Originally released in 2011this kit is still fairly new so naturally the moulding is very good. The finesse on the details such as rivets and panel lines is very nice indeed. There is no sign of flash and only a few moulding pips, plus no sign of imperfections on the review example. The instructions are well printed, clear and easy to read. Rather unusually the kit comes with two complete fuselages. The first is a single seater, and shares the sprue with the standard engine, cowling and propellers, whilst the second is the twin seater and subject of this build along with the interior required to build the trainer version. In fact you will end up with a lot of parts for the spares box once the kit has been built. The build begins with the assembly of the two pilot figures, each with separate torso, (with head attached), legs and arms. Next up is the cockpit or cockpits in this case. The single piece floor is fitted with a bulkhead, seat, seat supports, rudder pedals, joystick and instrument panel for each pilot. On the trainees’ instrument panel the gunsight and upper machine gun breeches are attached. As is usual with this type of kit from Hasegawa the sidewalls are separate and go to form a cockpit tub when joined to the bulkheads and floor. Before fitting the port sidewall though, two consoles need to be fitted, one for each cockpit. The completed cockpit assembly is then fitted to one half of the fuselage along with the tail wheel bulkhead and single piece tail wheel/oleo. The fuselage is then closed up and the upper forward decking attached and fitted with the machine gun barrels, whilst the rear decking is attached aft of the rear cockpit. The Sakae engine consists of engine mount, the two cylinder banks and the crankcase with connecting rods. When assembled it is fitted the fuselage and covered with the single piece cowling. The engine exhausts are then attached as are the horizontal tailplanes. There are optional tail cones, the normal solid type and an open tubular affair, which looks like it should be part of an anti-spin chute arrangement. The two upper wing sections are glued to the lower single piece item before the aileron trim tab panel lines are filled and sanded as per the instructions. A number of location holes in the lower wing also need filling and the trim tab actuating rods need to be removed. The completed wing is then fitted to the fuselage, followed by the lower engine fairing, with oil cooler, the cockpit role over bars and anti-spin strakes. The separate navigation light lenses are also fitted at this point, as are the aileron control horns. The main undercarriage consists of single piece wheels/tyres, oleo and outer bay doors, which can be left off as these were often removed to save weight. The undercarriage is then fitted into position and the outer doors attached, again these can be left off if required. The target streaming units, which look like rocket launchers in reverse, are made up of the two halves of the tube and capped off either end. They are fitted to the pylon, which is complete with separate sway braces and attached to the outer wings. With the model now standing on its undercarriage the pilots can be fitted and the four piece canopy arrangement attached. It is possible to pose the rear cockpits canopy open and the aerial mast is fitted to the fixed centre section. Lastly, the three individual propeller blades are assembled to the back plate, the spinner is then added and the completed propeller is fitted to the aircraft. Other than painting and decaling, the build is complete. Decals The decals from the latest batch of Japanese aircraft kits from Hasegawa have been pretty good, and it’s no different with this kit. Well printed, with thin carrier film, they are in good register and nicely opaque. Only the walkways on both wings and the identification numbers have any significant visible film, but on a nice glossy finish this shouldn’t silver too much. There are three aircraft for which markings are provided. All are from the Tsukuba Flying Group and both are in the distinctive and very colourful orange and black scheme, and are aircraft numbers 401. 407 and 415. Conclusion This is certainly an oddity I hadn’t heard of before receiving the kit and researching for the review. It will look great amongst a collection of Japanese aircraft, and in such a bright scheme it will certainly stand out. This will make a nice mojo lifter or weekend kit to while the hours away, and should turn out to be a fun build. Highly recommended Review sample courtesy of UK distributors for
-
Hello everyone, I open this thread to show the construction of the MIG-15UTI, model which has as advanced trainer with dual controls for the former CCCP introduced into service in 1950 until well into the 1970s. The model I have chosen is the Mig-15UTI of Hobyboss in 1/72 scale. It is a basic but correct lines and easily workable kit. It is the first model in the series easy assembly that I build. For GB's construction I will try that this aircraft was used as a trainer looks like the CCCP: You can find the full reference at the following links: http://crimso.msk.ru/Site/Crafts/Craft21067.htm and http://coollib.net/b/149953/read I also want to try a couple of different techniques, including paneling with watercolors instead of oil. The photos of the sprues: Photoetched parts made by me : Closed cockpit: The test assembly looks good, but I see that a weight will be needed in the front: The solution is fishing weights: The arrangement of the solution in the nose Problem solved! Final assembly waiting for paint The roadmap is as follows: 1. Masking and inclusion of the transparent in the fuselage 2. Basic Painting 3. Highlight of panels and paneling 4. Decals and end model Thank you very much for viewing this thread and comment. Regards.
-
Sorry folks, I hesitate to burden you with yet another T.11 thread but I really do like this kit so couldn't resist! As one with a special interest in T.11s I was over the moon to see this released by Airfix and it fitted with a modelling 'theme' I had on the go perfectly. That theme is to built the aircraft used by 233 OCU at RAF Pembrey during the 1950s. Types on my list are Tempest TT.5, Mosquito TT.35, Meteor F.8, Vampire FB.5, Vampire T.11 and Hunter F.1. I've done the Hunter and Tempest so with Airfix' timely release I'm starting the T.11. Progress will be slow (all my models are!) but I started with the seats. I have in mind that the model will be placed on the ground with hood open and with the instructor already strapped in. He's carefully watching the pupil pilot about to climb in. With the hood open I will really need to add some detail to the interior. The Airfix seats are a pretty good shape but are devoid of any details. I have always been unimpressed with aftermarket seats in my area of interest so decided to have a crack at adding detail to the Airfix kit seats myself. So, this is the starting point, reasonable overall shape but with no sticky out bits at all! I added the drogue gun, BTRU, scissor shackle, drogue sleeve, seat cushion, back pad, parachute and seat harnesses, firing handle, height adjustment handle etc. from plastic strip, rod, wire and copper sheet... So that's the unoccupied pupil's seat. The instructor's seat will be occupied but I found the kit pilots to be a little on the large side. Instead I used a figure from an Airfix Hunter which I modified to better represent a pilot wearing a Mk.1 bone-dome and G-Type flying helmet. I modified his legs to fit the Vampire and turned his head to a more natural looking angle - glaring at his pupil! His seat has the same detail added to the top parts but will only have straps added to the rest once the pilot has been installed... I found the copper made it difficult to easily see how the seat was looking so I gave the seat a light spray with Halfords primer. I know from experience that painting directly onto the copper means it rubs off easily so the primer will help that as well. So this is where things stand at the moment (with a bit of scrap plastic added to make holding while painting easier)... Needs a bit of fettling and smoothing in certain areas then it's on with some paint before moving on to the rest of the cockpit. The firing handles look a little thick now there's primer on them, but they'll just have to do - my eyesight can't stand much more of this! Cheers, Mark
-
Hi all, as some of you have seen in the WIP pages, I have been building an Avro Anson Mk.1 in memory of my grandfather, as well as in honour of all of the unsung heroes of training command during WW2. they worked just as hard to train the air crews of the UK and Commonwealth to fly, navigate, bomb and stay alive. My grandfather was stationed at RAF Wigtown initially, followed by a spell at RAF Bishops Court in NI, as a radio engineer on the Ansons. So here it is- the premise being that when the aircrews got home, their day was done, but the groundcrews would work long into the night to get the planes ready for the next sorties (and often going up with the aircraft as a gunner during the day, in case it was needed). Thank you for looking!
-
Been busy with work so not a chance to get any modelling done in a while, so it was time to move out of my 1/144 scale zone and onto something a little bigger. This is the vintage Heller Fouga kit, to say it was a challenge would be an understatement. I built this for a workmate who wanted it for his Father, it is all raised detail and due to age some of the kit parts had warped including the wings and fuselage, Main ref book was Fouga Magister, An Irish Perspective By Joe Maxwell and Radu Brinzan As it is such an odd scale Maxdecals 1/48 sheet was used instead, it was my first time using these and I found them to be superb in quality and they had no problems conforming to the kit details even without using decal softener. It was also my first time using Tamiya fine primer spray and the Humbrol rattle cans and with the heating tip in warm water worked brilliantly, the dayglo (looks orange in the pics but its more red in real life) and other colours are from Humbrol tins ( hairy stick application!!) Anyone who knows this kit is aware that the canopy is split down the middle and must be fixed in place before the fuselage is joined, this presented the biggest problem. Some details where not included and need a little scratch-building such as the periscope on the canopy, battery cover vents, new aerials and standard tamiya tape belts. Anyway I think it all worked out in the end and it built into a really nice kit, as always all comments appreciated.( ADF red and white aerials on the nose where added after these photos where taken)


