Search the Community
Showing results for tags 'Tamiya 1/48'.
-
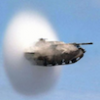
Late start, have been busy with some work stuff. This will be mostly OOB build, I will just use the Quickboost seat and aftermarket decals (Wolf Heritage Decals). If you are wondering why the sprues are so cut up, practical reasons, more kits can fit in one box. Have not yet firmly decided which plane I will build, but leaning towards a camouflaged one, ser,nr. 10550. (photo taken from Paluba.info) I have my own photo standing in front of this plane, which I cant find right now. This is the only I have seen so far wearing a squadron badge and number on the nose at the same time.
-
 Since I've already done the Short lived Republic F-105 Thunderbird, It's high time to go to the waaay back machine and do the Thunderbirds first iteration with Tamiya's 1/48 F-84G. In real life Chrome no less! Not sure how that will work out. I haven't built a chrome plated kit since sine I did a Hawk P-51 back when Johnson was President. Lyndon, not Andrew. SO lets see what the kits offers us shall we? Lots'O Chrome thats for sure This should prove interesting. to say the least. But forward as they say... Into the Fog!
- 19 replies
-
- 8
-

-
- Tamiya 1/48
- F-84G
- (and 1 more)
-
Less famous than the Kearby's 348FG, the 58th entered combat in Feb of 44 equipped with D-5 and D-11 Thunderbolts. They received the white leading edge and tails but, often the tail was overpainted in OD to make them less suspicious. Cowls were painted in the squadron color, White for the 69th FS, Yellow for the310th and Blue for the 311th. This is the great Tamiya model with Brassin wheels, a left over quick boost seat with harness, and, a first for me, the use of HGW wet decals. They work beautifully but I will never built the 19th decorations proposed!Anyway, here is "Sleepy time girl" from the 69th FG, before the 58th began to receive D-16 and D-21. Best regards. D8000AA6-465D-458F-999F-6B91FD47221F_1_201_a by jean Barby, sur Flickr 9E542ECE-D650-478D-9529-1ADA72F9C40E_1_201_a by jean Barby, sur Flickr 45A3AD0E-895F-4937-A570-AC40C469F86C_1_201_a by jean Barby, sur Flickr E2A5F38E-D18D-4E40-B6B8-503D84FDFB2D_1_201_a by jean Barby, sur Flickr E2A5F38E-D18D-4E40-B6B8-503D84FDFB2D_1_201_a by jean Barby, sur Flickr D191CFFE-5AC4-40E0-BB8C-CF831D7F635F_1_201_a by jean Barby, sur Flickr FCAE38A7-EAD4-4EDC-99AE-5CADD3CE903F_1_201_a by jean Barby, sur Flickr 236C5CAE-380C-4A84-94A3-724084902332_1_201_a by jean Barby, sur Flickr
-
Hi everyone This was my entry to the deHavilland GB earlier this year which I’ve only recently finished. It’s Tamiya’s NFxiii/xix kit with Pangolin Models two stage resin Merlin engines and the correct exhaust shrouds pinched from an old Airfix kit. I did a bit of scratch building in the cockpit to get the correct AI set. The sharp eyed among you will notice that there’s no bulge on radar operators side window. I tried to replicate this a few different ways using various vac form options as there’s no direct replacement available anymore but it just looked rubbish. So I decided to just live with the kit canopy as is. Anyway, we have Mosquito NF36 RL147 of 85 squadron based at West Malling circa 1951. Decals are from Freightdog, paints are Colourcoats, weathering with Flory wash and oils. The weathering looks heavier in the photos than to the naked eye. 0940DEDC-05B0-408D-AD5A-F880244B02C2 by James Halls, on Flickr 3B68DC54-5E82-4A53-A58D-03D52CD9C8F9 by James Halls, on Flickr CEF6F596-314E-4B4D-952A-E53E033B4AC6 by James Halls, on Flickr 8512E014-46FE-4BCE-ABCD-0155C2FFC358 by James Halls, on Flickr 3BA7EA9F-B17B-4EE3-B713-D558382BA884 by James Halls, on Flickr D499CE04-D74D-4CE1-8CF4-324E0E9A37A1 by James Halls, on Flickr Thanks for looking. Questions and comments welcome as always. James
-
Hello! I think it's time I try to get back into some scale modelling. I've not built anything in years (certainly not finished anything) but I'm beginning to get that itch again. I do like a Thunderbolt (who doesn't?) so why not try getting the modelling bug back with one of Tamiya's finest! I'm going to attempt a NMF (a first for me) with full invasion stripes and checker nose Jug, from the 83rd Fighter Squadron, 78th Fighter Group based in Duxford. The only photo I have: The kit I will ruin will be this one: I have an Eduard set to improve the cockpit and add seatbelts too. Looking forward to the start ☺️ Si
- 3 replies
-
- 10
-
-
- Tamiya 1/48
- Thunderbolt
- (and 1 more)
-
The next instalment of my Luftwaffe camouflage exploration is this He-219 exhibited at Farnborough in late 1945. The attraction is the challenge of the RLM76 squiggle camouflage. Painted over a base of RLM75 this scheme is sometimes represented as dark mottling on a lighter base. This is incorrect however (unfortunately, as it would be a lot easier that way!). I’ve found an excellent source of 219 camouflage info which I’ll link later when we get to painting. I have had the Tamiya 1/48 scale kit in the stash for a while so that will be the canvas for this one. The kit has a good reputation and I’m expecting a relatively trouble-free assembly. There’s a few builds of this kit on BM of which an excellent example is @reini‘s and who’s WIP from 2020 will suffice to show the contents of the box and general kit info for anyone interested in a preview. That’ll do for now, treat this as a placeholder until there’s something specific to show. I hope that will be a Sunday update showing some form of progress on the cockpit. Cheers.
- 134 replies
-
- 18
-
-
- He-219
- Tamiya 1/48
- (and 1 more)
-
My other overdue RFI is my more recently finished Tamiya 1/48 He-219 Uhu. This one I really enjoyed but ran into all kinds of trouble with the paint and subsequent clear coats. For whatever reason, the Future/Klear would not cure on the Hataka paints and remained tacky. After trying everything, I was able to remove the Future with Windex without damaging the paint. Even though subsequent clear coats were an improvement, the finish still didn't properly cure leading to a great deal of trouble handling the still-slightly-tacky model to completion. It's going to be a dust magnet... The whole story is in the WIP. I painted almost all of the markings, the only decals I used were the "IV" designation at the cockpit. I was quite happy with the paint job; the squiggle isn't as tight as on the real thing, but it's not bad and by the end I was quite comfortable with its application. I think I can do better next time though. The kit itself is Tamiya through and through, well engineered, well produced, a joy to work with. The photos. Cheers.
- 8 replies
-
- 36
-
-

-
- Tamiya 1/48
- He-219
- (and 1 more)
-
 Coincidence is a thing, is it not? After months of absent modelling mojo two things happened within the space of a few hours; I put away the Vought A-7 Corsair that had been sitting on my bench untouched for months, and I received a message from @Dunny wondering if all was well. Aside from the inherent kindness in the query, his message included an implied if not explicit gentle nudge towards the bench. Coincidently, we were both looking at the fugly Brewster Buffalo as a potential subject and an informal two-man group build was born. Dunny's thread has the kit pics and requisite preliminary info so I'll plow directly into my version lest my mojo wane. My topic for this two-man GB is a Buffalo belonging to 453 Squadron, RAAF based in Singapore during late December 1941 or early January 1942. I have not yet decided which one. I am using the Tamiya 1/48 scale kit, same as Dunny. As a mojo rebuilding project I did not intend to spend much time on anything really, just get on with it and make a decent, if not good model. The cockpit was first and after an hour or so I had this. The cockpit glass won't be open - the kit does not offer that option - so this will be more than adequate for my purposes. Next I glued the major parts together; some seam cleanup required... The key is momentum so I didn't care too much and just let the glue cure, clean up will come later. There was a faux pas that did require some extra work on the engine cowling. Overzealous sanding in an attempt to make the cowling join better made it much worse... A bit more work to do there but nothing serious. That's it for now. Next I will clean up the seams, complete the major assembly and prep for paint. Cheers.
- 82 replies
-
- 22
-
-
- Tamiya 1/48
- Brewster Buffalo
- (and 1 more)
-
 Here is the second of three P-47 Thunderbolts that I am building as a project -- Robert S. Johnson's "Lucky", in which he made most of his kills. Whereas I used the old Monogram "Jug" for Francis Gabreski's plane, here I've gone with the excellent Tamiya Razorback kit. To make it even more interesting, I "electrified" it using a motor and sound kit from Magic Scale Modeling, and added LED/fiber-optic lighting for the wingtip and tail position lights. Let's get straight to the photos! First, Robert Johnson's "Jug": plus, a short newsreel video: And, my representation: I used HGW resin rivet decals on my Monogram build, but they were lost under the camo paint. For this build, I applied the rivets after the main color coat was on, and followed a highly-thinned final color to "blend" them in to the surface. I'm very happy with the result! Rivets going on: and after blending-in: Position, Identification, and Landing lights: The three position lights are illuminated by LEDs, which attach to fiber-optic cables that run to the wingtips and tail: The Magic Scale Modeling kit includes a circuit board, motor for the prop, and speaker for engine sounds. The circuit board is programmed to go through an engine startup, runup, and shutdown sequence. Power is provided by external batteries and is run through spring-loaded contacts inserted into the main landing gear: Here's a short video of the engine startup sequence (click to play video, and turn up your sound): That about wraps it up for Jug #2. For more details, check out my WIP here: More photos of my build for Francis Gabreski's P-47 can be found here: https://www.britmodeller.com/forums/index.php?/topic/235119866-francis-gabreskis-p-47-thunderbolt/
 -
Eighty-two years ago the Royal Navy's Fleet Air Arm attacked the Italian Fleet at anchor in Taranto. They scored a remarkable success for very little loss. Some months ago I started a Tamiya Swordfish and as usual posted may progress in the WIP section of BM. It seemed to light a spark of enthusiasm for this remarkable aircraft and several others were started what became an unofficial GB. Down here in Australia it's already the anniversary of the raid, so this is one of the first of two or three Taranto Swordfish that may be posted today (I lost count, and not sure who finished, but some of the participants were @Dunny, @bigbadbadge, @AliGauld, @iang). My Stringbag was built as “L4A” belonging to 815NAS and flown by Lieutenant Commander K. Williamson with Observer Lieutenant N. J. ‘Blood’ Scarlett. 4A was one of two lost in the attack, both crew members surviving their crash into the harbour and taken as POW. The other loss was 813NAS "E4H" in the second wave flown by Lt. G. Gayley and Lt. H. Slaughter. Sadly, both were killed. After the raid 4A's airframe was recovered by the Italian Navy and the photos of it are in fact the only known photos taken of the Taranto Swordfish on or close to the date of the raid. The Tamiya kit is rightly lauded as superb, and it gave me no problems at all, save those I created for myself. I built it out of the box using the Tamiya PE set for the rigging. I made the auxiliary fuel tank from the kit's main fuel tank and installed it in the cockpit as it was for all of the Torpedo bombers on the raid. All of the markings were painted, it required no stencil decals because the black distemper covered them. I am especially indebted to @iang for help with the s/n, while it's not known for sure what 4A's s/n was but I'm confident Ian's suggestion cannot be bettered. Here's the WIP; ...and here are the glamour shots... This is, of course, also the 104th anniversary of the end of the First World War. They shall grow not old, as we that are left grow old: Age shall not weary them, nor the years condemn. At the going down of the sun and in the morning We will remember them.
-
Edit; Instead of Gray, I’m going to do Gerald Anderson’s Corsair. Anderson was the last Canadian killed in WW2, he lost his life crash landing his damaged Corsair on Formidable’s round down returning from the same action. I reckon I can squeeze this in before the end of the GB, and it appears no-one has chosen this topic yet. I shall be learning into this thread for the choice of marking; at this point I know I won't be marking it 115... Another useful thread (among lots of others, it should be noted) is this one... I dug around the stash and found this - obviously I won't be using the decal sheet but there's a mask set and 3D decals for the cockpit (purchased before I cared where it came from). As there's no time to waste, I made a start last night. I followed my usual process of black base allowed by main colour and then clear gloss in preparation for the following treatments. The engine is simply dry brushed with metallic paint. I'm unlikely to do much more with that, not much can be seen anyway. Next in the cockpit will be a highlight dry brush, a dark wash and the 3D decals. Then I have to begin to think about the level of weathering; KD658 was less than 3 weeks old on 9 August 1945 so I'm guessing not a lot of weathering. Cheers.
-
Hi all, back with another long term, finally completed project Completed the Corsair and fuel tanker, both Tamiya, at the start of the year. But working on the base got delayed due to lack of shelf space (never enough ><). Now that I have some freed, I could finally finish it off. Feel the scene is lacking a little something, and in hindsight would've liked some 1/48 Marsten mats. But, tis what it is. Bonus cockpit shot at the end. Thanks for looking Gaz
- 7 replies
-
- 22
-
-
- Tamiya 1/48
- Corsair
- (and 1 more)
-
 Made for a Mosquito GB at UAMF, this is the Tamiya 1/48 DeHavilland Mosquito NF.XIII kit, completed as an NF.XIX of 89 Sqn, Baigachi, India, 1945: In this case, I wanted something different to the run-of-the-mill grey/green UK-based night fighters. A little research showed that a small number of Mk.XIXs were shipped to the Far East to act at night intruders. These were mainly operated by 89 and 176 Sqns from Baigachi airbase just east of Calcutta in India during the last few months of WWII. There's a full-colour profile of one such machine in the Paul Lucas book, de Havilland Mosquito Day and Night Fighters in RAF Service 1941-1945 (SAM Combat Colours №6). This is TA230, letter N, of 176 Sqn - see also this photo of TA230 from the long out-of-print James Halley book, The Squadrons of the Royal Air Force: Due to The Pandemic, the British Public Records Office is allowing free downloads of materials, so I was able to get the Operations Record Book for 176 to try to find out more. What I found was that it has two lists of serials of the Mosquitos it used, but TA230 was not one of them, nor apparently did the squadron code any of their machines 'N.' So I downloaded the records for 89, as the squadrons were co-located for a short period. While that squadron doesn't have any serial lists, it does have some references to individual code letters, and N is one of them. So I feel that this is a case of misidentification of the squadron. Of course, it's Tamiya, so good fit, simple build and the only aftermarket were the crew harnesses and the resin wheels. I'm pretty pleased with the outcome.
- 16 replies
-
- 41
-
-
-
- 89 Sqn RAF
- Mosquito NF.XIX
- (and 1 more)
-
Continuing my TopGun / Aggressor theme YAY ......... Finally building a Tamiya F-14 in 1/48 scale Pictures of sprues to follow .. still sorting AM goodies
-
Read the book, built the plane
-
Hi there! Hope that this one will get more comments than the Wulf. But whatever, here we go. Same target, KISS, Keep It Simple Stupid! It's been started a week or so ago, and I plan to make it a 2020 complete build.
- 12 replies
-
- 2
-
-
- Tamiya 1/48
- Ki-46
- (and 1 more)
-
This is the Tamiya 1/48 Messerschmitt Bf 109E-4, finished in the markings of Oberleutnant Albrecht Drehs, of Stab III/Jagdgeschwader 54 in France, August 1940. Respecting my minimalist approach to modelling, I only performed the following minor enhancements to the kit. A note to fellow modellers in regard to the spinner colours. Hussar suggests a red and white spinner, and while quite attractive, is incorrect. The RAF Crash Report states the spinner is dark green and white. Fuselage - kit seat replaced with Ultracast seat - antenna wire made from stretched sprue - upper cowl intake opened - cowl gun barrels replaced with Master brass barrels - engine starter crank opening and lift points drilled out - kit propeller and spinner replaced with Ultracast resin parts - exhaust replaced with Ultracast resin exhaust Wings - wing gun barrels replaced with Master brass barrels - kit wheels replaced with Ultracast resin wheels - tail planes modified to eliminate the anhedral Paint and Decals - airframe painted with Xtracolor X202 Hellblau RLM 65, X201 RLM 02 Grau and X205 Dunklegrun RLM 71 - all markings are from Hussar 48D003 Messerschmitt Me 109E3A/E4 - model is weathered with chalk pastels References - Model Art No. 375 Messerschmitt Bf109B-E - Aero Detail No. 1 Messerschmitt Bf109E - Jagdwaffe Volume Two, Section 1, Battle of Britain Phase One July-August 1940 Special thank to Dave Wadman for providing info on this subject. Cheers
-
This is the Tamiya kit finished in the markings of Feldwebel Walter Scholz, 3/Jagdgeschwader 53 while in France, September 1940. I used Aero Master decals on this one and I feel that the yellow 13's area tad too small and the black outline is not bold enough. But, alas, I did not have any other numbers to chose from, so it is what it is. I have seen this scheme done by others and I am offering my interpretation based on how I see the photos of the real thing. I fell in love with scheme based on the presentation of the swastika and overall finishing of the vertical fin. Fuselage - kit seat replaced with Ultracast seat - antenna wire made from stretched sprue - upper cowl intake opened - cowl gun barrels replaced with Master brass barrels - engine starter crank opening and lift points drilled out - kit propeller and spinner replaced with Ultracast resin parts - exhaust replaced with Ultracast resin exhaust Wings - wing gun barrels replaced with Master brass barrels - kit wheels replaced with Ultracast resin wheels - tail planes modified to eliminate the anhedral Paint and Decals - airframe painted with Xtracolor X202 Hellblau RLM 65, X201 RLM 02 Grau, X204 Schwartzgrun RLM 70, X205 Dunklegrun RLM 71 and X213 Gelb RLM04 - all markings are from AeroMaster 48-014 Battle of Britain Bf 109Es Part 1 - model is weathered with chalk pastels References - Model Art No. 375 Messerschmitt Bf109B-E - Aero Detail No. 1 Messerschmitt Bf109E - Jagdwaffe Volume Two, Section 3, Battle of Britain Phase Three September-October 1940 Again, thanks to Dave Wadman for all his help. Cheers
-
 Hello Dears, Here we go in the Korean peninsula ... Yes... Once more !! Then, it's the 3rd Mustang out from my Pony's lunacy... If one had an intrerest in the deeds of the Tuskegee Airmen, or in the Career of Col Robin Olds... There's a common point in these two stories...The common point is named Daniel James Jr !! The man has been fully trained as a fighter pilot but war in Europe came to an halt just before he reached the front... Then, he participated in the Korean War, in 12th FBS, 18th FBG, flying the Mustang in a jet war !! I will not tell the whole story here since I still have some Chappie's build to do... One thing to keep in mind is that, Daniel James finished his carrer in the Air Force as a 4 star General, commanding the NORAD ! I spent a lot of time searching for the right serial but to no avail.. So, best educated guess has been the path I followed up. Since pics of Chappie's bird are rare... Here's one !! Of course, I altered the so nice Tamiya's sharmouth !! And in showing the pic of the real thing... the one who always complain about overdone weathering have a right answer... In fact, I stayed restrained Paints are Alclad and Xtracrylics, armament came from the box, Napalm bombs were made from War weary fuel tanks ! I can't resist a Pony family pic ! Well Gents, comments are welcome as usual !! Banter are mandatory !! Have a nice modelling sunday !! CC
 -
 This was my project for the T-34 STGB. The GB is still going on so, if you are a fan of WW2 Russian armour, it's well worth checking out. I had intended to do a much bigger scene but I haven't had as much time for modelling over the past few months as I would have liked. Kit: Tamiya 1/48 Paints: Humbrol, Revell, Citadel, Vallejo and Railmatch acrylic paints all applied by brush Extras: Vallejo Mud and Snow products, Tamiya figures, Tamiya Road Signs, Redog Resin Stowage, Aluminium foil, string, MDF, mounting board card, filler, Wilkos picture frame, Army painter tufts, twigs and fuse wire. The WIP can be found: HERE The RFI photos of the SU-122 itself can be found: HERE This first set of photos were taken with it in front of the sky background on my Spitfire display base: And some without the sky background: And finally a few on it's Wilkos picture frame: Big thanks must go to @SleeperService for a great GB and also to everyone who contributed to my build thread. Without everyone's input this project wouldn't be what it is. Thank you. Kind regards, Stix
 -
Hi all Here is my recently completed Tamiya 1/48 Jagdtiger. It was built OOB with the exception of a set of Aber grills and painted with Tamiya acrylics, oil paint wash and pigments. I also did a little hairspray chipping, but kept the weathering to a minimum on this one. Thanks for looking, Greg
-
VA-52 Knight Raiders NM300 April 1964.
-
 Hello to all, after nearly 8 months of research, sharing and partial scratchbuild from the Tamiya 1/48 kit, I have the pleasure to present you my last baby, the P-51 D-10-NA "Missouri Armada", Capt John B. England, of the 362th F.S, 357th F.G, 8th Air Force: I want to thank here all the contributors and followers without whom I would never have been able to get such a result. Main contributors: - Juan Manuel Villalba: I probably would not have built this replica if Juan had not asked me to do the translation (subtitles) for his great DVD dedicated to this aircraft. Even if I sometimes made different choices than him (rivets, seat cushion, White Alu primer applied, Satin finish rather than mat etc.), many of the techniques I used were learnt from this master (and friend). A big hug to you, dear Juan, who were also and in all circumstances one of my best supporters (in private mail conversations)! - Antonio Argudo: Antonio is an expert of the Mustang and a great modeler (his cockpit is just amazing) and he brought me so many useful docs and infos for months. I look forward him to find the time to go on with his build. You can ever see his thread: 1/32 Tamiya P-51D Mustang "Missouri Armada" on Britmodeller, of course! - John Terrell: another expert who learnt us so much for weeks. John is an artist too, who made the very realistic drawings for simulators. Pity, John has vanished these last weeks, I could not have news from him, hope he feels OK. - Laurent (silberpferd), another Mustang expert who brought great and very useful pics (bottom views, 108 gallon tanks and pressure line outlet, tail wheel canvas, gunsight etc.) - Fencer-1 (Alexey), who brought very accurate infos about panels and flaps Other contributors and followers (in the order of posting): - Biggles 87: another expert and fan of the Mustang, I have to go and see his threads on Brit! - Crimea River, important contributor and follower, as Biggles 87, from the beginning to the end - Hannes, my friend of the "Fiat 806 research and scratchbuild" thread (soon 200 pages on Brit!!). A great artist! - ronnierex - Squibby - Harvey, other friend and actually amazing full scratchbuilder of the Fiat 806... - Houston, a Mustang, 357th F.G and Missouri Armada fan, very encouraging and enthusiast - Bedders - Troy Smith (and not Troll !) - delis - Mattlow, important contributor too, especially for the Alclad stencils - DJJunis - gingerbob - matto21 - DMC - Garry c - NickD (another friend and contributor from the Fiat 806 saga...) - Ol' Scrapiron - Torbjorn - Plasto - Jamie @Sovereign Hobbies - thammond65 - Rumblestripe - sharknose156, another member of the "806 dream team"... I didn't expect finding another "dream team" like I did when I began the "Missouri" thread... - galfa - Tourist, definitely another Mustang expert, who suggested necessary corrections for the early version the Missouri was. - quangster - ArmouredSprue - T-21 - elger, always very encouraging and who brought very useful pics, especially for the wheel bays and landing light... - Johnny1000 - Scooby - Azgaron (Håkan), whose positive and encouraging comments have been very appreciated in the last weeks of my build/ thread. - CrazyCrank: another great modeler that I luckily knew on the Fiat 806 thread. I must go and see his progress on his great 1/8 Pocher Bugatti T50 thread... The short break I will do before beginning a new build will leave me the time for that. - crobinsohn - pipthepilot - Kahunaminor - seven - Blackcollar Internet has moved our hobby in another dimension: all the Brit members I just mentioned come from all over the world, and their contribution and support was essential for such a project . We are far from the modeler working alone in his corner. Thanks to that sharing space that is Britmodeller, I could try to recreate a really faithful replica of that aircraft. But internet has also his drawbacks, and my local dealer, Kits Discounts, is about to close, as many other ones before, what we may just deeply regret. The pleasure to come in the shop, to dream in front of so many kits, to touch, to smell, all what we have all known, is small and small disappearing, the old world, with real contacts. My next build should be the Revell 1/18 Ford T 1912, for which I will probably open a new thread. All the best to all and thanks again for following and helping. Olivier, July 6th, 2018 (I had to check on Reverso for the date in english, it is yet a problem for me ...)
- 37 replies
-
- 41
-
-
-
- Tamiya 1/48
- Missouri Armada
- (and 1 more)
-
Did a bit of weathering on this one ,also used a Eduad Zoom set for the cockpit .The decals were the kit ones and are a bit shiney in places
-
This is my latest build: a Tamiya's 1/48th scale F-14D Tomcat. It's a great kit, with superb fit and smart assembly, i had lot of fun building it! Kit built OOB, with some details from Eduard PE and KA Models exhaust nozzels. Painted with Gunze's Acryl Paint (h-307, H-308, H-337). So, let's start the photogalley: Ciao Ale
- 24 replies
-
- 53
-
-
- Tamiya 1/48
- Tomcat
- (and 1 more)