
Search the Community
Showing results for tags 'Starfighter'.
-
I've got a few kits in the nearly finished category and this one is the one I started most recently. Finished first probably because it was such an enjoyable build. Built out the box with Hataka Orange line paints.
-
 Przedstawiam model Lockheed F-104G Starfightet ze starożytnego zestawu, który został ukończony dzisiaj Hasegawa (premiera rynkowa w 1963 roku) w edycji brytyjskiej firmy FROG. Prezentowany na zdjęciach model pochodzi z pierwszej edycji FROG, która odbyła się w 1969 roku. Różnił się od późniejszej edycji elementami podwozia głównego, które składało się z 6 elementów, aw nowszych edycjach - jednym z wyższym sztywność. Starałem się pokazać jak najbardziej pudełkowaty charakter modelu bez wyceny, która mi się podoba (tylko osłona kabiny jest dociskana ze względu na uszkodzenie oryginału i rurkę Pitota z igieł iniekcyjnych). Udało mi się użyć oryginalnych kalkomanii, które mimo 50 lat były bardzo dobre, co było dla mnie sporym zaskoczeniem. Zapraszamy do galerii gotowego modelu 🙂.
 -
 Hi guys, my last project is F-104G Starfighter from Eduard limited edition. A very enjoyable work with no problems. I painted with my own blends of green and brown, mostly Tamiya and Gunze. Small details in cockpit with Vallejo. Eduard included a resin ejection seat, masks, PE parts and very good Cartograf decals (stencils prinded by Eduard). I added a pitot tube from Master. I made wash and weathering with artist oil paints.
 -
Hi everyone, here is my recent completion for the Interceptors group build. It’s a Danish CF-104D made from kinetic’s 1/48 release and is OOB except for some (rubbish) decals that all silvered badly. Starboard side is going through a process of fixing that issue but Port side is shown here, with lesser but still present silvering and all. here’s the build thread: and it’s based on this airframe... And here with her older sister-
- 70 replies
-
- 135
-

-

-
- 1/48
- starfighter
- (and 1 more)
-
 Seen in the Eduard Facebook : https://www.facebook.com/EduardCompany 1/48 Lockheed F-104G Starfighter???? - New kit (MiG-21 style!)? - Reboxing: Revellogram, ESCI or Hasegawa + improvement sets? - New PE or/& resin sets? IMHO the DACO set (http://www.britmodeller.com/forums/index.php?/topic/234933435-148-lockheed-f-104-starfighter-updatedetailing-set-by-daco-released) and decals + the Hasegawa kit are good enough. V.P.
 -
 Hello friends Some of you may have been following my build report. Now it's time to hire it here at the RFI. It was different and was a lot of fun. So I am satisfied. I am open to constructive criticism.
- 37 replies
-
- 56
-
-
-
- Kinetic
- Starfighter
- (and 1 more)
-
F-104N Starfighter z zestawu Akademii ukończony. Ten model kosztował mnie dużo pracy, ale efekt końcowy wygląda moim zdaniem całkiem nieźle. Zapraszamy do galerii.
- 8 replies
-
- 22
-
-
-
- Starfighter
- F-104N
- (and 1 more)
-
Hello Friends ! As a fan of Lockheed F-104 Starfighter and a fan of vintage models, I took the aircraft model from the Academy kit in 1/72 scale. It is a clone of the Hasegawa kit from 1963 and, like the original, has the same simplifications and errors such as the lack of undercarriage hatches, a primitive cockpit and a fatal cabin cover. I decided to slightly modify the model and supplement it with missing elements
-
 F-104DJ Seat Belts & Masks(for Kinetic kit) 1:48 Eduard These sets are for the new Kinetic kit Seat belts (FE1148) This set comprises a small fret with the belts for the C-2 seats fitted to the Japanese aircraft. Masks (EX748A) These are the Tface masks for both sides of the canopy, and the wheels for the kit Review samples courtesy of
 -
TF-104G Update Set, Seat Belts & Masks(for Kinetic kit) 1:48 Eduard These sets are for the new Kinetic kit Update Sets (491139) This set comprises two colour Nickel frets and a smaller brass one. The main parts are the new instrument panels and side consoles for both consoles. New rudder pedals for the cockpits are provided as well as many upgrade parts for the two ejection seats. There are new parts for the coaming, and the avionics bay behind the cockpits. There are new canopy sills and mirrors. For the main gear bay there are electronics boxes parts for the doors and gear legs. There is a new panel for the underside of the main exhaust. The last item is a new AOA sensor. Zoom Set (FE1139) This set comprises both Nickel frets from the main set. Seat belts (FE1140) This set comprises a small fret with the belts for the Martin Baker seats fitted to the these aircraft. Masks (EX739) These are the Tface masks for both sides of the canopy, and the wheels for the kit Review samples courtesy of
-
F-104C wheels 1:48 CMK by Special Hobby - For Kinetic kits These wheels are for the new Kinetic Kits, and are a drop in replacement for the kit parts. Review sample courtesy of
-
F-104 Early & Late type wheels 1:48 CMK by Special Hobby - For Kinetic kits These wheels are for the new Kinetic Kits, and are a drop in replacement for the kit parts. F-104G/S Wheels late type (Q48381) F-104G/J Wheels Early type (Q48380) Review sample courtesy of
-
I would like to take part in this GB with the 1/48th Monogram Lockheed F-104G Starfighter. This is the 1986 #5447 version of this venerable kit that was first released in 1978 and last in 2013. This version was released as the specially painted "Buschel Canary" operated by Jbg 33 and was retired in 1985. I paid £4.39 for the kit on eBay 11 years ago and I almost sent it back, the box smelled of mildew and sadly the decals are unusable. Not sure how I am going to paint her yet, maybe a 'Tiger' scheme but I have plenty of choices. Whilst looking around in the stash I found some Eduard photo etch detail sets which must have been in a sale so I might use some of them on this build. Michael
-
 Here's my first offerings and my first Starfighter too! the box art shows the Richthofen Squadron logo on the intake but the decals do not. I have looked online and I cannot tell what it represents. Decals... Here's a closeup. Looks vaguely NATO-ish to me... --John
- 66 replies
-
- 5
-
-
- F104G
- Starfighter
- (and 1 more)
-
F-104J/F-104DJ [2in1] Starfighter JASDF (K48092) 1:48 Kinetic Model via Lucky Model The Starfighter was another of Kelly Johnson’s advanced designs, although some might argue that at least initially it wasn’t one of his best. The initial design had problems with the ejection seat, which fired downward in early models, but its original remit was a high-altitude interceptor so that wouldn’t really have been an issue in all but the most extreme situations. When its role was widened this became a greater problem, as did its relatively high landing speed and comparative lack of manoeuvrability in a dogfight, amongst other things. It served in Vietnam, but was withdrawn pretty quickly from US service due to its general unsuitability, and while looking for suitable victims/buyers, Lockheed were embarrassed by and found guilty of passing huge bribes and “incentives” to companies and politicians to sell their “man in a missile” design to other counties. Those politicians suffered embarrassment and resignations, as did the head of Lockheed at the time who resigned, although no-one went to jail IIRC. The F-104G was a serious redesign of the aircraft, incorporating the larger tail of the two-seater, a new more powerful version of the GE J79 jet engine, new avionics and stronger landing gear, coupled with a larger drag chute helped reduce landing problems. The F-104J was a version of the F-104G for the Japanese. A handful were built by Mitsubishi from parts kits while they geared up for licensed production. The J was for the air superiority role and had no strike capability unlike the G The Kit This is a reboxing of the newly tooled F-104 Starfighter from Kinetic to include an additional new fuselage, cockpit etc. so that a single- or two-seat airframe can be made from the same box. The kit arrives in the standard top-opening box, with the Kinetic Gold badge over a painting of a two-seat Starfighter, and inside are five sprues in grey styrene, one in clear, a small sheet of Photo-Etch (PE), decals and instruction booklet in black and white, which could do with being a little better printed in truth. Happily, the parts on the sprues aren’t at all vague, and it is a well-tooled, nicely detailed kit of this type, with a good choice of decal options and the possibility of more on the sheet thanks to a large block of generic numbers. It should be note that while this is a two in one kit, both can not be built from the box. Construction begins with deciding whether you want to build a single seat or two seat aircraft, with the TF built on pages 4-13 and the F on 14-23 of the booklet. This is a nice easy way for the modeller to build the aircraft, as it takes all of the either/or decisions out of the mix apart from that first one. The sprues contain two complete fuselages, and around the rest of the sprues you will find the two cockpits, a new insert for under the nose and a slightly revised gear bay for the TF. The TF-104 wasn’t fitted with the Vulcan cannon, and a little less internal tankage, no centreline pylon, and of course had a redesigned forward fuselage to accommodate the additional crew member, although with no increase in overall length. The seats for the single and dual seater are identical C-2 ones (though the Mk.Q7(A) units are there as well), and are each built up from six styrene parts and a set of PE belts for each one, plus two more plastic parts that forms the launch rail. The cockpit tubs are prepped with instrument panels, throttle controls and sticks, with the single seat ‘pit being… well, shorter. Shocking, I know. A scrap diagram gives you painting call-outs for the panel, but there are no instrument decals so you might want to pick up some of Airscale’s excellent Early Jet dials if you’re interested in raising the level of detail. With the cockpit out of the way, the common radar and exhaust assemblies are made up, the former having 7 parts, while the latter has a rear engine face, afterburner ring and a two-part exhaust tube. The tube has a couple of ejector pin marks on the inside, which will require some clean up if you think they’ll be seen, which will be complicated by the ribbing that is moulded into these parts. It is best done before joining the halves, so break out the putty now, rather than later. There are two exhaust nozzles on the sprues (four if you count both sprues), and only one is appropriate for this variant, although both have very nice detail moulded-in and a thin lip that will look good under paint. The nose gear bays are subtly different, both with good detail after which (painting too) they’re inserted into the lower fuselage insert appropriate to their number of seats. A common main gear bay straddles the narrow fuselage, again with good detail within and a scrap diagram showing which way round it should be inserted into the fuselage, then the nose cone is assembled from two conical halves split top and bottom plus pitot probe and is then set aside for a while. The fuselages both require a little preparation, drilling holes for later use and detail painting the cockpit sidewalls that are moulded into the insides. With these completed, the internal subassemblies are installed into their positions, taking care to align the exhaust by using the scrap diagram provided. The cockpit is completed with one or two coamings with HUD on the front/only cockpit, then fitting the radar and radome in place, hiding that nicely detailed little assembly forever, which always saddens and confuses me a little bit. The appropriate underside insert is fitted in place, with two parts for the single-seater, and just one for the two-seater, both now wearing the correct gear bay on the interior, and the same air-brake a little further aft. The instructions have you putting the elevator on top of the enlarged fin, which is the same type with the G, then you make up the intakes on either side of the fuselage, which are again common and each made up from three parts each – shock-cone, internal trunk, and external fairings that blend with the fuselage. The nose cone is also common, but the gun trough is only fitted to the single-seater, with a choice of two styles of muzzle. The two-seater has an additional trailing jack on the oleo, but uses one of the two wheel options you have for the single seat option, with different bay doors for each option due to the change in fuselage shape. The main gear legs are identical between variants, using five parts each and with a choice of two-part wheels for both fuselage types, and identical bay doors with clear landing lights within, and closed front main bay doors that have a bulged profile. A scrap diagram shows the two positions that the open gear bay doors can be set to, with the forward bay doors drooping down slightly, presumably after loss of hydraulic pressure following shutdown. To the rear are fitted a strake, clear light and the arrestor hook for emergency landings, not for carrier work! The airbrakes and clear lights on the top/aft are able to be fitted open with the use of a retraction jack, or closed by cutting off the hinge-points from the door, with a little paint needed for the former, and careful fitting for the latter. The little stubby wings are common too, with two parts for the main wings with separate leading-edge slats, flaps and ailerons at the rear, using one of the two sets of tabs and cutting off the others to fit the flaps retracted or deployed. A few holes need opening up in the underside for weapons and tankage if you are using them, then they can be fitted into the slots in the fuselage, with PE insert for an airframe without wingtip missile rails or tip-tanks. Unsurprisingly, the canopy installation is different between the two options, even down to the windscreen parts. The twin seater has a small area behind the canopies that can be opened or closed to show off the electronics inside, with a combination fairing and glazed area fitted. A fixed hoop goes between the seats, and a couple of pieces of PE are used to decorate the sills if you’re leaving the canopies open. The movable canopy parts are prepared by adding demisting and other parts within the frames, some of which hook into the cockpit, so some careful masking will be needed, so you might want to get some of Eduard’s Tface masks if you airbrush or don’t have the steadiest of hands. An overhead scrap diagram shows the correct placement of the sill parts, which is useful. The single-seat cockpit has a large equipment bay at the rear of the cockpit that can also be shown closed or opened, again with a piece of glazing fitted to the top, and some detail painting needed if you are posing it open. There are similar tubing and parts fitted to the single canopy, then PE to the sills, with another scrap diagram showing the correct location from overhead. Angle-of-Attack (AoA) probes are attached to the sides of the fuselage, plus another group of sensors and lights beneath the nose, with a few additional parts added to the single-seater, checking out the scrap diagrams for correct orientation of the extra PE part behind the nose gear bay. The Starfighter was a thirsty bird in either seating configuration, so two tip-tanks with separate fins and filler caps are made up, and two more pylon mounted tanks are built for use on the wing pylons if you wish. If you don’t plan on using the wing tanks, there are alternative strakes provided, and under the centreline of the single-seater you can put a twin pylon arrangement that is made from a pair of curved parts and two pylon parts. What you fit to those is up to you. Markings This is a JASDF boxing, which includes one options each for the one- and two-seaters (a bit miserly given the 4 options in the Luftwaffe boxing), and those are shown in the back of the instructions in grey-scale, which is a bit poor given the printing is not great either. This could easily be fixed by including a colour sheet. You can also find the full 4-view profiles on Lucky Model’s website. F-104J 204th Tactical Fighter Sqn, Nyutabaru Air Base, 1982 Experimental Grey Camo. TH-104J 204th Tactical Fighter Sqn at Combat Competition 1983 with experimental 3 tone camp Decals are designed by Crossdelta and printed by by Cartograf, which is a guarantee of good registration, sharpness and colour density, with a thin gloss carrier film cut close to the printed areas. Conclusion We’ve not had a modern tooling of the Starfighter for a while, and this is a very nicely detail range of kits from Kinetic with lots of modelling fun to be had. The poor quality profiles can be fixed by visiting Lucky Model. Very highly recommended. Review sample courtesy of
-
It is February 1971 and after the close shave of the Apollo 13 mission the previous April, security around the Apollo 14 mission is fierce. The problems encountered by the previous mission had been put to the public as a failure of an oxygen tank on the Apollo 13 Command Module. However, the real story was kept secret from the public for fear of the panic it might cause. Pictures of the Alien space ship that attacked Apollo 13 were captured on the TV camera James A Lovell had been preparing to stow away after that day's scheduled telecast was finished. This footage and the damage caused by the laser blast fired by the Alien UFO were considered conclusive proof that we were not alone in the Universe and that our 'nearest' neighbours were potentially unfriendly. In the intervening 9 months between the two missions, the US military and the United Nations initiated two new military and scientific programmes. One was tasked with secretly preparing for Alien attack. This was called SHADO and was charged with developing advanced technologies that would enable UFO tracking and space-based defensive systems. As a cover for the vast expenditure this would require, a more modest but public programme was initiated called Spectrum that would adapt existing vehicles and equipment for a 'Peace Keeping' role. Both of these programmes were run separately from the existing UN funded United Nations Intelligence Taskforce, a predominantly British and European operation that had been responsible for dealing with a series of peculiar events in Great Britain in the previous few years. Spectrum was as much a PR exercise as an effective military organisation. It was quickly decided that it needed to have its own air force for reconnaissance, logistics and power projection. It was decided to take the innovative step of recruiting the best female pilots of the time and creating a special squadron of 'Angels'. These Angels were given code names taken from popular culture of the time, so the first four pilots were code named Galadriel, Eowyn, Arwen and Luthien. The aircraft they were trained to fly was a specially adapted Lockheed F-104Q Starfighter, and so the Spectrum Angels Starfighter squadron was born. Here we see Galadrial Angel with her Angel Starfighter getting ready to mount air combat patrol around the perimeter of the controlled airspace for the Apollo 14 launch. So this flight of fancy came about because I picked up the recent Kinetic F-104G kit: and when it arrived, I opened the box up sitting on the couch with the 1:24 scale Angel Interceptor on the coffee table directly in front of me and my mind started to wonder what the Starfighter would look like in white with Spectrum roundels... I managed to get a set of 1:48 scale Angel Interceptor decals from JBOT decals and used these along with some of the stencil decals from the kit to built it. I did originally intent to pose the cockpit canopy open but I ran out of time to get this ready for the March club meeting of IPMS Farnborough so left it closed. The cockpit looked like this before the canopy was shut: "Galadriel" Angel is a resin figure form this set As you can see I removed the beret and added more hair using milliput - non military haircut but it is a PR exercise after all. They get upgraded to white flight suits sometime in the future! I came up with the backstory while driving home from work this evening and mention of UNIT got me thinking about my NEXT build
- 33 replies
-
- 38
-
-
- Spectrum
- Starfighter
- (and 1 more)
-
 Hi all, Here's my just finished Kinetic 1/48 Starfighter, which I have done as a Dutch RF-104G, using the boxing released for the Dutch market, and a Daco Orpheus pod. The markings come from a Dutch Decal sheet, and some from the kit. It's a very nice kit, and I thoroughly enjoyed building it. One small thing that needs to be fixed in the kit, is the missing centreline pylon, though. The kit comes only with the twin AIM-9 launchers for the belly, but all the options in the first release, and this boxing are for strike squadrons, which do need the centreline pylon for weapons. I got mine from a Hasegawa TF-104 kit, which doesn't need it anyway. The real D-8143 was built by Fokker, and served with 306 Squadron at Volkel, until it was sold to Turkey in the early 1980's, where it was eventually scrapped. Painted with MRP on top, and Humbrol on the underside. I may need to fix that pitot tube. I don't like the way it looks now. Thanks for looking, I hope you like it.
- 18 replies
-
- 58
-
-
-
- Kinetic
- Starfighter
- (and 1 more)
-
Lockheed F-104G Starfighter Visual Modellers Guide - Wing Series No.1 Ammo by Mig Jiménez The F-104 Starfighter (or missile with a man in it) was Lockheed's & Kelly Johnson's attempt to reverse the trend for large more complex fighters then being developed. It was basically an engine with very little airframe surrounding it. The aircraft had a short life in the US with them going towards heavier and more complex aircraft. The Starfighter did have much more success with NATO nations, though it would later transpire that this success was gained someway by Lockheed bribing officials in some of those countries. The G model was the most numerous model made with over 1100 being built, many under licence. This new venture of walkaround books from AMMO features the F-104G, and in particular an example which has been restored by the Spanish Air force Museum in Madrid. The book is A4 landscape softback format with 70 pages. It is packed with high quality photos showing every aspect of the aircraft and its systems. Conclusion While walkaround books are not new this one is a top quality. We look froward to seeing the following books from Ammo Highly recommended. Review sample courtesy of
-
 Hi, My next project will be Kinetic's F-104G Starfighter. I have not decided what scheme to choose. The box is the Dutch "Volkel" edition, but I would really like to have a metal finish, so I think that leaves a Dutch version out of the equation..........? There is an all grey Dutch version, but this may be a little bland for a f-104: I am leaning towards a Norwegian f-104 in all NMF, although Eduard does a standard boxing of this scheme. It does look rather cool: Then there is also a Belgian scheme in NMF, but I would have to purchase yet another set of decals for this version. It is an option nonetheless....... So far I have the kit's decals which builds the Dutch Starfighter as displayed on the box art and then I have the Xtradecal sheet as per below: Anyway, some time still to decide on the final finish. Did do some work on the cockpit while waiting for "paint to dry" on my recent T-33. The seat belts on the ejection seat came as photo etch with the kit, but I added some netting to the side and guitar string for the hoses (courtesy of my teenage son). It did make for a tighter squeeze in the cockpit tub. To be continued, Thanks for watching, Regards, Rob
 -
"SUMMER 1982 - INTERCEPTION" CF-104 Starfighter, Royal Norwegian Air Force, 334sq Kit: Hasegawa F-104J/CF-104 Starfighter (#D16) Scale: 1/72 Aftermarket: Master pitot, Eduard photoetch, Reskit wheels, Vingtor decals Paints: Vallejo Model Color, Model Air & Metal Color Weathering: Flory Models Wash, Mig weathering Products Good kit, a solid choice for 1:72 Starfighter. Early 80's was the last years of the Norwergian Starfighters - conversion to F-16 was already happening. Scratchbuilt display base. Built for Nordic GB. Build thread: Thanks for looking! Comments & constructive criticism welcomed
- 17 replies
-
- 51
-
-
- 1:72
- Starfighter
- (and 1 more)
-
After the F-104G, Italeri is to release a 1/32nd Lockheed F-104A/C Starfighter - ref.2504 Source Primeportal: http://www.primeportal.net/models/thomas_voigt8/italeri/ V.P.
-
Hi, Here is the little egg plane that I finished a few months ago. This is a F-104G Starfighter from AFV. I have build this very cool kit in belgian colors like the one preserved in Beauvechain air base in Belgium. For the metal finish, I tried the Rub n'Buff before doing the same on the Kinetic F-104 I have on my workbench. For the flags and the roundels, my friend Patrick helped me with decals from Retrokit for the Mirage. The codes are Decadry. Well, an easy assembly kit I recommend! See you Lolo
-
NORWEGIAN STAR - CF-104G Starfighter (1:72) - 331 Squadron, Royal Norwegian Air Force, Late 70's. One got finished, so I got only two Nordic builds going on at the moment - better start a new one so I don't run out of momentum! This is 'Part Two' if you will - my double seater Super Sabre being part one. It will all become bit more clear once all the builds are all done. But for now, this will be about norwegian CF-104G getting airborne on a intercept mission - so a simple base will be included (eventually). This is my kit of choice - a Hasegawa CF-104. Hasegawa really is the way to go with Starfighters on a 1/72 scale - even if Italeri and Revell can produce a good results too. I prefer Hasegawa just because of the canopy that looks to be most precise - and can be displayed open. Details wise, it's quite good too - but Italeri is somewhat better on wing details. This is what I have to work with. Basic kit with some aftermarket stuff. Kit is showing it's age. It looks mostly decent but flash is quite evident in most of the sprues. After checking this kit out I realised that CF-104 apparently had non-bulged wheel doors - unlike the normal F-104G's. Early on Norwegian CF-104's didn't have the gun installed. Starting from mid 70's they received an update in the form of gun, RWR and better radar. I will be doing a late 70's plane . Clear parts. Aftermarket stuff. Not sure what makes the wheels 'Turkish' - as they were basically using second hand machines from other NATO countries. Looks normal G-wheels with optional 'F-16' nose wheel that some of the S-models had. CF-104 didn't have the wheel door bulges like the G - so I'm guessing these are too wide - but I'm suspecting the difference won't be noticeable. Have to do some comparison with the kit wheels. Decals from Xtradecal sheet (X72315). This will be green upperside and grey underside color scheme. I have the FS numbers written down somewhere - but good suggestions from Vallejo or Tamiya color range are welcomed. Thanks for checking - more will follow Oh, final thing - I tend to get bit carried away with my builds - so @RidgeRunner or @Giorgio N (or anyone with knowledge about Norwegian Starfighters for that matter!) feel free to stop me if I seem to be doing something that I shouldn't be doing
- 97 replies
-
- 18
-
-
- Starfighter
- Royal Norwegian Air Force
- (and 1 more)
-
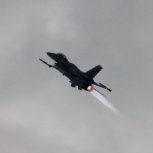
 Probably the quickest build yet for here, but fun none-the-less....Not the best of kits, with a number of fitment issues and inaccuracies when it comes to the cockpit. It's a basic kit, it's not all that bad. I don't think it is worth the £32 price tag for the kit though. hey ho. Full build log here if you care for a look-see? Anyways, here's my version of the F-104C Starfighter of Capt. Jonathon Christopher from the Start Trek episode - "Tomorrow is Yesterday" Enjoy! Tried a little weathering around the engine. I didn't want to overly do it. I thought I'd try a little "action" shot of the Starfighter "taking off" looks OK> 🤣 And my lazy bottom co-pilot through-out the build - Willow... Hope you all enjoyed the pics and the build? Next up with be over in the vehicle forum for the Polar Lights DeLorean DMC-12 from Back to the Future 2..........
- 6 replies
-
- 10
-
-
- star trek
- Starfighter
- (and 1 more)
-
Hi! I had the old but nice Esci/Italeri 1/72 scale F-104G laying in the box for some years painted and for most much of the parts assembled. When I got the Hasegawa kit at "Svedino's Car and Aircraft Museum" here in Sweden I thought it was time to dust of the box and start an "comparizon build". As the local shop also had the Revell F-104G I put my hands on that one to as what I knew these three kits are the best when it comes to 1/72 scale Starfighter kits. I built some Airfix kits since 1974 and the Airfix kit i still an favourit kit by "nostalia". I have also built the Matchbox kit some 30 years ago. I never seen the Academy kit nor the Frog. And the old Revell F-104 was in 1/64 scale wasn't it? But for now, here is what I found in the dusted box with the Esci/Italeri kit... Cheers / André
- 33 replies
-
- 5
-
-
- Starfighter
- 1/72
- (and 1 more)


