
Search the Community
Showing results for tags 'Star Wars'.
-
TIE Fighter & Vader's TIE Fighter 1:110 & 1:121 Revell The TIE Fighter is the standard Imperial single-seater attack ship, and attrition rates during the three films it starred in must have been horrific! Named after the bow-tie it resembled, a cranked "special" was also designed as the personal mount of arch baddie, Lord Vader. They have menacing designs in darker colours than Rebel ships, which emphasises their alignment with the Dark Side of the Force, as does the eerie scream of their engines, which as per most Sci-Fi films, can still be heard in the vacuum of space. The Kits These are both in the Level 3 range, and as such are more of a traditional kit than any of the Level 1 and 2 snap-together offerings as they require glue and paint, and are quite small thanks to the scale, which doesn't seem at all consistent throughout the five kits released so far for no apparent reason. That gripe aside, They arrive in a small red themed box with Kylo Ren (the new baddie) menacing us with a light sabre at the top, with a new style of colour printed instructions on slightly better paper stock. Darth vader's TIE Fighter Arriving on three sprues of Imperial blue/grey styrene with a clear sprue for the windscreen, you get a diminutive but fairly well sculpted Dark Lord sat in the same seat as the standard TIE Fighter, with the same angled tray and side walls, but a different control panel, which we see Vader fiddling with during the flight down the trench in Ep.IV. The top hatch is glued in place on the upper hull with a clear insert, and in the lower half the leading-edge inserts, windscreen and cockpit tub are installed before closing up the hull. A windscreen frame decal is included, and then it's time to make up the wings, which are moulded as one piece with a separate detail insert that hides some ejector-pin marks on the vertical inner side. A scrap diagram shows the correct orientation of the detail, as you wouldn't want them installed upside down! As with the other kits, the decal and painting call-outs are made during construction in Revell colour codes, and don't forget to have some masking tape on hand for those "solar panels" on the wings. TIE Fighter The standard TIE is presented in 1:110, which makes for a bigger kit than Vader's TIE, which is a shame for those wishing to create a small scale Death Star trench diorama. It is supplied on four sprues of Imperial grey/blue styrene with a clear sprue for the canopy and a decal for the framing in dark grey. The detail is better on this larger kit, and the pilot benefits as a result. His cockpit builds up the same way as Vader's, and the upper hull houses the hinging hatch with clear insert, while the lower hull accepts the cockpit tub and windscreen part. Closing the hull up should be fairly easy, as only the seams around the spherical crew compartment are properly visible, and they're quite short. The wings are each one large part with a central boss added to the outside to complete the detail. They side over the fuselage pegs and then it's just a case of assembling the two-part stand to keep her off the desk, with a small hole in the bottom of the crew compartment keeping it in place. Conclusion Again we have the scale discrepancy reducing the overall appeal to the avid modeller, but individually they are quite nice kits if you do your research and make sure you know what you are getting. All these Level 3 kits are ideally suited to the casual or younger modeller, and with a little care can build into nice models. Revell model kits are available from all good toy and model retailers. For further information visit
-
Bandai's latest addition to their Star Wars range. For my money this is the best one they've done so far, with the fit being perfect, and the breakdown of parts being completely logical. This one isn't lit but it would be a pretty simple job to do, as Bandai have conveniently moulded the engine inserts in clear plastic. The included Turbolaser turret is the icing on the cake. OK, it's not to scale with the A-Wing, but that would have been unfeasible anyway, but it makes a great display piece in it's own right. Everything's painted predominantly with a mix of Gunze and Tamiya and weathered with AMMO and AK enamels and oil paints. Oh, and of course there's International Man of Mystery, Mr Flatty, seen here with his somewhat low rent sidekick Nigel the Mouse Droid Thanks for looking Andy
- 37 replies
-
- 37
-

-
Just finished this other day. Lovely ole canvas for weathering. An enjoyable learning process. Bit grey but hey, she is what she is … the fastest hunk of junk in the galaxy Thanks for looking. Cheers
-
Hi all! So this is a project I started at Christmas on a group build on another forums. I didn't get very far because I was finishing off my degree in my spare time around work, and didn't even get time to chuck together a Bandai kit! But, that's all done now and after a month of settling down I've got back to the bench! So this is what I've been up to over the last day or two: The cockpit was undercoated in Tamiya rubber black, then painted with German grey, details picked out with True Metal Aluminium oil, then washed with black water based oil paint before decaling and flat coating with Tamiya's excellent flat coat. There was some dry brushing with light greys and silver paint. He was just painted with Vallejo black paint and lightly dry brushed. I know Phil Flory on his videos didn't paint these panels, but i thought I would with Tamiya rubber black, and then dry brushed with a few shades of lighter grey before Tamiya flat coat. I was pleased with how they've come out, i was hoping for that dusty kind of look. The build: It all comes together so quickly that I've not got many in progress shots!! It just falls together. I did glue the two halves of the main body together as it was quite tight and a couple of the locating plugs got lost in the process. She's undercoated in Tamiya's XF-82 Ocean Grey. I am intending to go over this in a blue grey from Vallejo, but actually this colour isn't that far off so maybe I won't... time will tell! I elected to paint all the framing for the black panels separately rather than fit them and mask the panels, but it probably took just as long or longer to do it this way! I've fitted the clear top part to the model and painted the non-glass bit separately. When the build is finished I'll fit the above bit instead and put windows in with Micro Krystal Klear. So that's it for the minute. Coming together nicely. I might finish it next weekend as I've got gigs all week, and then onto the Lancaster which is not too far off the painted stage. Thanks all Val
-
Sad news today that Kenny Baker, the actor behind R2 D2 has died. he was 83. Here's a link to the article in today's Guardian on line; https://www.theguardian.com/film/2016/aug/13/kenny-baker-r2-d2-dies-star-wars
-
Speeder Bike & Scout Trooper Bandai 1/12 I won't be starting this one just yet but I'll post some sprue shots for anyone interested in seeing what's in the box We'll proceed in alphabetical order starting, amazingly enough, with sprue 'A' which contains all the biker scout's white bits There's some nice mouldings on here including the front section of the helmet Chest armour Top of the feet And bottom of the feet The tread detail on the sole is excellent. The moulded text in the middle reads 'INTER'. No idea whether this is accurate to the costume or something Bandai added The white sprue's also got the tinted visor. There's a bit of VERY faint rippling in it but, under normal viewing, you can't see it All the parts have got the usual (for Bandai) plug & socket connections On to sprue 'B1'. The black bits Some nice creasing on the fabric sections but they could probably do with a bit of texture The Biker Scout's pistol (by far my favorite Star Wars blaster) And some disembodied fingers to fire it Which leads us onto sprue 'B2' which has the alternative hands Two pairs - one for the standing pose and one for the riding pose. They look OK if a bit mannequin like. They really could have used a few wrinkles here and there Next up's 'B3' which is an alternative base if you want to display the trooper separately (all the bases from these Bandai kits can be interlocked should you want to display them together) And now, rather oddly, we jump to 'B5'. I've no idea what happened to 'B4' but nothing seems to be missing from the kits so maybe Bandai think the number 4 is unlucky. This is the main display base for the speeder The rather naff looking 'tree stump' acts as a side support for the speeder (with the addition of a clear connector) to give the impression that it's hovering Sprue 'C' - bike bits Two pairs of thruster flaps, one for up, one for down. I haven't fully checked the instructions but it looks like you can't pose them in any position between fully open and fully closed which is a shame although I'm sure they could be modified to do so Control rods The seat's a bit too smooth so, again, a bit of texturing will help The bed roll's nice, with separate ends to give better detail in the folds and, yet again, a bit of texture wouldn't go amiss Sprue 'D' - The brown bits (a bit too brown to my eye, if you were thinking of leaving it unpainted) Good sharp control detail Rear fairing Forward stabilizer fins These are chamfered to give a very thin leading edge Every single Bandai Star Wars kit I've so far built has had split sprue gates. I don't know why this happens and I've not had any damaged parts as a result but it does leave some parts less protected in the box Sprue 'E' - The grey bits (which are more of a gunmetal on the real one) Repulsorlift engine detail Front forks The foot pedals have some very fine ribbing detail More engine detail Final Sprue - The vinyl joints for the trooper As per usual, two sets of markings - stickers and decals And finally, the regular Bandai instructions complete with the bizarre jumps from the main sequence to the black strip at the top and back again Overall, a great kit easily up to the level of Bandai's previous releases I'll start the build as soon as I get a chance (too many other things on right now) Andy
- 67 replies
-
- 7
-
-
- Bandai
- Speeder Bike
- (and 1 more)
-
 New Revell Master Series Star Wars Kits Are In Stock Now RV15091 This is the Revell 1:48th scale X-Wing Fighter from Star Wars. It is part of the Master Series range which is based on the famous Fine Molds kit, the most accurate kit ever built of this subject. Kit Features include: Molded in white and clear plastic Scale Figures and Droids Landing Gear in up or down positions Display Stand Length - 271mm, Width - 222mm, Height - 141mm Description: This is the most important rebel alliance fighter and one of the most powerful single-seat space ships ever produced. The T-65 X-wing Fighter owes its name to the double wings one above the other that form an X in combat in order to increase the firing range of the pilot. In addition to four high-energy laser cannon the X-wing Fighter has proton torpedoes, deflector shields, hyper drive and a navigation droid. Luke Skywalker prefers this type of fighter. It was used by the young Jedi to destroy the first Death Star in the Battle of Yavin. The X-wing Fighter quickly proved to be one of the most effective military aircraft in the galaxy. The unusual wing design of the T-65 is frequently regarded as the success formula of the space ship. The pair of twin wings remains closed during normal flights under the speed of light. In combat and on entry into the atmosphere of a planet, they can be extended. On the wing tips are high-energy laser cannon that can be fired singly, simultaneously, in pairs or in other combinations. Construction kit for the advanced modeller. RV15092 This is the Revell 1:48th scale TIE Fighter from Star Wars. It is part of the Master Series range which is based on the famous Fine Molds kit, the most accurate kit ever built of this subject. Kit Features include: Molded in white and clear plastic Pilot and Imperial Figures Full Cockpit Interior Display Stand Length - 133mm, Width - 130mm, Height - 157mm Description: Darth Vader used this prototype as the basis for the terrifyingly effective TIE interceptor in the Battle of Yavin. Unlike all other TIE fighters this prototype has a deflector shield generator and a simple hyperdrive. Vader's TIE Advanced is armed with heavy twin blaster cannon on fixed mounts but has no life support systems. The TIE Advanced is characterised by a hull made of duralloy steel, an extended after deck and unique solar cell wings. The Tie Advanced quickly became one of Darth Vader's favourite ships. Like all the TIE ships the prototype has a drive system consisting of twin ion engines. Its solar ionization reactor is reputed to be much more powerful than that of the standard TIE fighters. The TIE Advanced has proved itself in battle, as it is capable of withstanding many direct hits. In addition the pilots' chances of survival were considerably enhanced by the incorporation of a hyperdrive system, which enables the ship to escape from hopeless battle situations. Construction kit for the advanced modeller. RV15093 This is the Revell 1:72nd scale Millennium Falcon from Star Wars. It contains 904 parts. It is part of the Master Series range which is based on the famous Fine Molds kit, the most accurate kit ever built of this subject. Kit Features include: Molded in white and clear parts Scale Figures, seated and standing Landing Gear in up or down positions Display Stand Length - 456mm, Width - 311mm, Height - 76mm Description: This Corellian tranporter is reputed to be one of the fastest and best-equipped ships in the galaxy. The Millennium Falcon may look old and broken down, but continual modifications have made it into something special. The crew has for years consisted of the reckless pilot and smuggler become hero of the rebel alliance, Han Solo, and his co-pilot and technician, the trusty Wookiee Chewbacca. A long time ago Solo won the ship from Lando Calrissian in a game of sabacc. The Corellian transport type YT-1300 played an important role in the destruction of both battle stars and is probably the most famous ship in the galaxy. Inside the ship there is a hyperdrive that gives it almost double the speed of any imperial star cruiser. The heavily armoured Falcon has an illegal bank of sensors that can track distant imperial ships before they are aware of its presence. The ship goes into battle with the most up-to-date imperial deflector system, two quad laser cannon and two disruptors. Construction kit for the advanced modeller. Follow us on Facebook for all the latest news https://www.facebook...eativeModelsLtd Click on the link to see the weekly specials http://www.creativem...ials-c-205.html Thank you Creative Models Ltd
 -
 Looks like Revell are finally putting out a European issue of these (Fine Molds) kits - which have been out in the US for a while. X-Wing RRP €99.99 TIE Fighter RRP €79.99 Millenium Falcon RRP €349.99 Source: http://www.revell-shop.de/eng/Products/Modelmaking/Star-Wars/?utm_source=revellwebsite&utm_medium=preorderteaser&utm_campaign=starwars-masterseries cheers, J.
 -
 This is a highly detailed resin kit that I picked up off eBay last summer, I didn't start building it until the end of last year. I hope to have it finished for the end of this year as I intend to put it into a small diorama. This little kit was challenging to add lighting due to the small confined spaces however I managed to cram all of the lights into the model. I could have done with a spare pair of hands to help glue the top and bottom hull together as it was a fiddle, however I managed to do it and a last little bit of putty and primer getting ready for the final base coat colour, then some oil pigments and Flory wash to add weathering. I may tint the canopy window slightly darker, at the moment it is looking a little bit too light in colour but I was eager to show the lights inside. I hope you enjoy the build so far.
 -
I knocked up this quick diorama last Christmas to celebrate the launch of the new Star Wars film last year. I grabbed some supermarket packaging, a few old model parts, taped it to some foam boards with a lick of paint and a fish tank LED strip light, I made a half arsed trench run. ENJOY LOL!
- 2 replies
-
- 5
-
-
- Trench Run
- Star Wars
- (and 1 more)
-
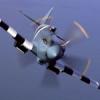
I built this kit last August and I purchased this kit from a guy who had 2 of these models 3D printed. I have bought the first printed prototype off him and he still has the second. The model I have has a slightly frosted texture to the plastic and was quite tricky to add lighting because of the lack of accessible panels. However I had a go at lighting the model and I had to scratch build the cockpit detail. The pilot figure came from a Revell Easy Snap kit that was the correct scale for this 3D model.
- 6 replies
-
- 12
-
-
- 1/38
- TIE Fighter
- (and 1 more)
-
 Hi, here’s my take on the Bandai T-70 Force Awakens X-Wing, the Incom-FreiTek T-70X X-Wing prototype. The 2nd prototype to be built which then went on into service for a very long time with Rebellion/Resistance so she’s a little banged up. Probably over the top for some but, I’m really quite happy with how it turned out. Obviously went together no problem at all (apart from the bandai v enamel exploding engine issue). Primed with UMP, painted with Vallejo Metal Colours and Vallejo acrylics. Washed with UMP washes. Anyway, thanks for looking. Cheers. A long time ago in a galaxy far away …
 -
Kit: Bandai Tie Fighter Scale: 1/72 Paints: Tamyia xf-82 Ocean Grey, xf-54 Dark Sea Grey, xf-63 German Grey, xf-85 Rubber Black, Vallejo 71120 USAF Medium Grey, other Vallejo colours for hand painting, water based grey oil paints for weathering, Tamiya XF-86 Flat Clear finishing coat. Extras: None, not even glue! Build link: http://www.britmodeller.com/forums/index.php?/topic/235005473-172-bandai-tie-fighter/ So, another Bandai Tie fighter. The kit? Well, as good as any Bandai Star Wars Kit. Glue not required!! Simply undercoated with xf-82, top coat 71120, base is xf-54, the wing panel things(!!) are rubber black and dry brushed with various Tamiya greys. Quite a lot of time went into the cockpit which is now invisible!! But it's in there!! Here are the pics: And here he is chasing that pesky x-wing around! That's about it, hope you like them! There will be more... Many thanks, Val
-
Hi. First attempt at a work in progress so don’t expect to much! Not sure exactly what I’m doing with it but its a build inspired by Poo Dameron’s Helmet, Crashy, Skid lid, whatever you want to call it and by all you people on here who don’t stick to the norm and make things look a bit different. So its getting a custom paint job with a Vellejo Metal colours and weathered to an inch of its life. So far its looking a little bit like Poo’s black Xwing, but i hope to make it look it a bit better by the end. Not sure my expert photography helps but here are some pics of my progress so far. Cheers X-Wings Flat Wings Body Poo Stick. Sorry … Poe on a stick. The main bits I’ve already showed, bundled together. Still finishing off the cockpit. Not gone bonkers with it as you will see. And have really struggled with getting the decals to sit their butts down around the intakes.
-
Following on from the 3D printed TIE fighter I discovered this large X-Wing which I thought would make a great companion. It is a very basic snap kit and the so called weathering that was applied from the factory I think was done by a 4 year old child overdosed on calpol! Not that I was bothered as I was going to give it a full repaint and try some new techniques that I never used before on a model that being hairspray, salt and using oils. I used a lot of fibre optics and LED's, I wasn't intending to go for a screen accurate model, in fact I call it X-BLING LOL!
-
 Poe Dameron's Black One T-70 X-wing | Bandai 1/72 scale Poe Dameron's Black One T-70 X-wing, completed in Tamiya, Vallejo, and Secret Weapon Miniatures acrylics; Alclad lacquers; 502 Abteilung oils; and Tamiya weathering pastels with a custom wooden base. This model was done as a commission along with Luke's X-wing for a fellow in Canada. This kit was a pain because I dislike painting black and the construction is not as intuitive as Bandai's classic X-wing. All in all, I think it turned out well enough on my end (I tend to be pretty critical of my own work) but more importantly, the client was extremely happy with the finished product. A WIP of this model can be found here.
 -
 Hi everyone, I have been lurking on here for a while now looking for tips and pointers; so I finally decided to register and ask questions. I am about to return to modelling after a major 35 year hiatus, but having said that, I am really more of a newbie. I used to build airfix kits and add the water slide transfers and that was pretty much it, any painting was done with a cheap brush and humbrol enamels (and not often at that) I more enjoyed the building. Anyway, looking on here has inspired me (especially the work of Andy Moore; I mean WOW). What I do need is advice. I have been bought the bandai 1/12 scale R2 and BB8 kit and I'm wondering where to start with weathering. The kit is still on its sprues so I have yet to make any kind of start, as for materials I have some Sprue cutters, craft knife and diamond files from some of my day job tools (I'm an engineer - mainly in the aircraft and submarines industries; 3 colour smoke pod in the red arrows hawk is some of my work). So, where do I start - I want to build the kits and start to introduce some grime to each droid, bit of dust for bb8 and some oily type grime for R2. Help?
 -
U9-C4 Astromech R5 Unit Droid - D-Squad Star Wars The Clone Wars So, the first droid's done. U9, despite the name, is an R5 unit, although I've had to make a few tiny alterations to the base kit to bring it closer to the screen version. For those who haven't seen The Clone Wars animation, U9 was part of D-Squad, a group of four astromechs, including R2-D2, who were sent on an undercover mission to steal an encryption unit in a season 5 story arc. The laser cutter arm was a scratch built addition as it's the most prominent aspect of U9 in the show. The top of the dome was also altered as U9s is slightly different to the movie R5 units. The full wip's here Next, it's on to R2 himself Enjoy the shots One for scale And one with his mates Thanks for looking Andy
- 21 replies
-
- 24
-
-
Bandai 1/72 scale X-wing starfighter (Luke Skywalker's Red 5) commission. Finished in Tamiya and Vallejo acrylics; 502 Abteilung oils; and Tamiya weathering pastels. I didn't do a WIP log for this build because it's more or less the same as the one I did in October of last year. I tweaked a few of the colors and weathered the panels a little more but other than it's pretty much a repeat of that build, though I think it came out a little better than my last one. The best thing I changed was using a 3mm clear acrylic rod instead of the supplied flight stand to hold the model. I just wish it was a little easier to source those rods here in the States; to get one at a reasonable price I had to order it from Hong Kong.
-
R2-KT Bandai 1/12 Scale Bandai R2-KT, completed in Tamiya acrylics; Alclad lacquers; Mig & AK Interactive enamels; and Secret Weapon Miniatures pigments. For the first time ever, I decided not to paint the white and instead applied the enamel washes directly to the plastic. Coming from the BB-8/R2-D2 kit, I also noticed that this plastic is glossier than the plastic in the original release of this kit, which I found interesting. Since R2-KT is an Imperial droid, I gave her a base that resembled the Death Star hangar from the original Star Wars. If you haven't heard the story behind R2-KT, check out their website (but be prepared to have your heartstrings tugged!).
-
Hi. Build number 4 on the journey. Had a lovely old time putting this together. Really enjoyable. Have to thank AndyRM101’s Snowspeeder build for inspiration & help along the way. His build was invaluable. Many thanks Andy. Had a few fit issues with the engine pods around the rear cockpit, but that was my fault by glueing in the front gun pods before i had everything painted & sorted. My dad bought me a 1/32 Hawker Hunter, which is huge, so i built the speeder while contemplating what i was going to do with that, apart from build it. Here’s some pics of the speeder in its natural environment … of cardboard. Cheers.
- 22 replies
-
- 13
-
-
 First Order TIE Fighter Special Forces Photo Etch (for Bandai) 1:72 Greenstrawberry Bandai's range of Star Wars kits are by far the best produced and this set of Photo Etch from Greenstrawberry takes the 1:72 First Order TIE Fighter Special Forces to another level. The PE includes parts for the seat, seatbelts, interior panels, control sticks, access hatch and solar panels. The seat alone has 26 PE parts and there are 44 for the solar panels!! The instructions are clear and well laid out giving details of which kit parts to use and how to modify them. The etched detail is very crisp with the etch gates being very small, and complements the kit details nicely, whilst raising the detail significantly. Conclusion A nice addition to the already great Bandai kit and the final model will look superb if you take your time and add all the parts available. Review sample from my personal stash. Further details available at
- 2 replies
-
- 2
-
-
- Greenstrawberry
- Bandai
- (and 1 more)
-
I've not finished the base, but here's my take on the Force Awakens Falcon. The model was primed in Citadel black from a rattle can, with a couple of light base coats of that rare beast Tamiya AS-20. For the panelling I used the supplied water slides, with lots of coats of Microsol. Everything else was completed with multiple pin washes in brown & black, with a couple of spots of soot airbrushed on (it was my first time using an airbrush, so be gentle!), and finally the streaking was a built-up mix of brown & black Gundam real touch markers (these blend up so well, and are very forgiving if you have an incident!). Looking at some of the other builds of this kit online, it seems to be all too easy to end up with a model that's a little too dark, so I tried to keep the weathering subtle to keep the overall base colour bright. Adding a touch of brown to any black washes also helped to keep the tones warm after the harsh black primer coat. Anyway, I hope you like the results!
-
Hi, knew here. Yes, i to was sprinkled with star wars magic when i saw the film aged 6. This was the 3rd model on my journey back in the hobby after a 30 year hiatus. (the other 2 are in Aircraft) What can i say about bandai kits that hasn’t already been said. They are amazing kits. When i first saw an x wing i saw a white spaceship with red stripes so thats how i approached my painting, not really into all the bright colours that adorn this model. Really really enjoyed making it, its not perfect (in normal light its to grey, doesn’t really show in the photo’s) and the weatherings not really in scale but i love it and guess thats what its all about. Really looking forward to building another one. (Which i did, a Snowspeeder) Don’t know if anyones noticed or done this, but the sticker masks, the bits that you don’t use, make perfect masks for the canopies! Anyway, all comments welcome. Cheers.
-
 Something WEIRD happened to me today. Like, REALLY flippin weird. So weird that "weird" should be in italics. I'm posting pictures of a COMPLETED model. Mark this day on your calendar folks, I know I will. Click the link to check out the full build. http://www.britmodeller.com/forums/index.php?/topic/235001750-bandai-t-70-black-leader/ 20160607-MJS_4704 by _m_sinclair, on Flickr 20160607-MJS_4705 by _m_sinclair, on Flickr 20160607-MJS_4701 by _m_sinclair, on Flickr 20160607-MJS_4697 by _m_sinclair, on Flickr 20160607-MJS_4695 by _m_sinclair, on Flickr 20160607-MJS_4714 by _m_sinclair, on Flickr 20160607-MJS_4716 by _m_sinclair, on Flickr 20160607-MJS_4706 by _m_sinclair, on Flickr Kill markings painted on using an old Verlinden scribing template as a stencil. 20160607-MJS_4724 by _m_sinclair, on Flickr Clear resin navigation lights courtesy CMK to replace the solid plastic ones that come with the kit. 20160607-MJS_4732 by _m_sinclair, on Flickr 20160607-MJS_4742 by _m_sinclair, on Flickr 20160607-MJS_4750 by _m_sinclair, on Flickr 20160607-MJS_4766 by _m_sinclair, on Flickr A cool accident in this pic. The light hits in just the right way to make the NAV lights look like they're actually lit up. 20160607-MJS_4777 by _m_sinclair, on Flickr 20160607-MJS_4799 by _m_sinclair, on Flickr 20160607-MJS_4814 by _m_sinclair, on Flickr Not enough photos? OK! Too many? Too bad cause here comes even MORE! 20160607-MJS_4821 by _m_sinclair, on Flickr 20160607-MJS_4829 by _m_sinclair, on Flickr 20160607-MJS_4830 by _m_sinclair, on Flickr 20160607-MJS_4834 by _m_sinclair, on Flickr The design for the base was inspired by Poe Dameron's helmet. 20160607-MJS_4836 by _m_sinclair, on Flickr 20160607-MJS_4841 by _m_sinclair, on Flickr 20160607-MJS_4845 by _m_sinclair, on Flickr Solid plastic barrels replaced with fine brass tube. 20160607-MJS_4843 by _m_sinclair, on Flickr 20160607-MJS_4846 by _m_sinclair, on Flickr Interesting little fact about this piece. Only about five decals were used in total and they all were on BB-8. The X-wing itself has zero decals and as a result, zero clear coats. That's a first for me. Thanks for looking! -matt
- 27 replies
-
- 23
-


