Search the Community
Showing results for tags 'Star Wars'.
-
 With the 40th anniversary of Star Wars this year, i'm going to try and build some kits from that series as a kind of a tribute GB. And to mark feeling very old! To ease myself into it, I've pulled this from the stash which I picked up last year at Telford for the princely sum of a penny shy of £2.. Just a small bit of wear and tear on the box! (hence the price) But everything there.... Behold the mighty sprue map...almost 40 parts! None of your fancy-shmancy 900+ parts Master Series nonsense here.... The upper hull/turret bustle had received a fair whack in the box and was cracked from left side to right so that needed fixing...plastic tabs (hidden) to support and lashings of glue.. It's an Easy kit (Snap-Fit to us older folks) but I'm going to glue it together. So out came a persuading tool to snip the lugs for a better fit. And we have a hull! While not as accurate as the AMT kit and smaller in scale (about 1/50 I think), I'm going to try and improve this by repainting in the Phantom Menace scheme and adding some basic detail to it. Yes, I know there are some minor shape/detail differences between these versions but hoping it will still look the part (and not upset the fans ) I'll miss those 'eyeliner' gun stains from the front glacis! Thanks for looking. Cheers, Dermot
 -
 Stormtrooper Built to keep Boba Fett Company. Once again a fantastic kit to build. Next up R2-D2, BB-8 And First Order Trooper. Comments always welcome.
 -
Been to Southern Expo at Hornchurch and picked these up from RetroKit https://retrokitonline.net/product/rebel-pilots-relaxed-poses/ Robert
-
 Good afternoon, My rendition of Bandai's First Order TIE Fighter in 1/72. On of the easiest kits I've ever built and painted. Weathering is almost non-existent as I assume that the First Order keep their TIEs in near pristine condition.
 -
My new project, a Bandai 1/72 scale A-Wing, I'm wanting to do this in a 'retro' style borrowing as George Lucas did ideas and colours from WWII fighter planes and early jet fighters. Just getting going and putting together the cockpit in a Spitfire-esque 'cockpit green' mainly because I love the colour. I'm also using Flickr for the first time so please shout out if the pictures look shonky. I took @AndyRM101 advice and bought a cheapy Optivisor from eBay and very expensive W&N No 7 brush - game changer, so much easier to paint detail. I'm really pleased with how this has come out - its tiny but under the Optivisor I've realised a bit sparse and could have done with a few extra details - I'll maybe get a PE set next time out. A few pictures with my $3 (delivered!) macro lens for the iPhone. Its not great but its not awful - should remember to blow off everything before a picture as the dust shows like nobodies business under this large magnification. Really enjoyed putting the cockpit together and painting it up. Don't worry about the 'nobbly' bits on the chair - I put a blob of liquid mask on so once I add the pilot I'll be able to glue him down easily. Couple of questions to those that know more than me. 1. Can I improve the look of the cockpit with a brown wash? 2. If I do add a wash - given its such a small area can I get away with not clear coating, applying a wash, then flat coating but just doing the wash on top of the (matt) paint work? Cheers.
-
Rogue One AT-ACT Walker (06754) 1:100 Revell Make & Play Rogue One is the latest film from the Star Wars universe, and sets the scene for Star Wars – A New Hope, which I'm hoping hasn't spoiled the plot for you. It introduces a raft of new types to the Rebel and Imperial forces, some of which are totally new, others are variations on an existing theme. One such is the new (old?) All-Terrain Armoured Cargo Transport AT-ACTs that the Rebels encounter on the Imperial outpost when they're trying to half-inch something special. I won't spoil it too much if you've not seen the film, but the Walkers' appearance on the screen is like seeing an old friend, even if that old friend is going to be shooting at you any minute now. These variants carry cargo in what appear to be modular containers that fit into their body, probably sliding in and out as needed. Their armament is limited to two cheek-mounted cannon that can still pack a sizeable punch, and they are still clearly related to the mighty AT-AT. The Kit Make & Play is a really cool range of easy-kits that require no glue, have few parts, and are fitted with light & sound modules, which makes them great fun for kids of all ages to play with. Inside the box are 45 parts in tough ABS plastic, some held fast in vacform plastic packing, other in heat sealed plastic bags. Like the other kit reviewed today, the numbers engraved on the insides of some of the parts are at variance with the first page of the instructions, so take care when putting together these parts. Construction begins with the large slab-sided hull parts, into which the orange-coloured cargo panels are clipped, after which the lower hull and the leg axles and bulkheads are attached together, the right hull half clipped into place, and the roof part slotted in before closing up the hull with the left side. The head is next, with its cheek guns clipping in place so that they can be posed, and the lower part of the head contains the light & sound module, which is shipped with the batteries isolated by a slip of clear sheet. Remove this, and pressing the button the top of the head will make the cockpit aperture glow red, and make one of two sound effects from the film. The legs are all built the same way, so a little production line will speed the process up. The foot can slide within the lower leg, which is in turn able to pivot around the knee by inserting a snap-in axle, the same process being used again at the hip joint. These snap-in parts required a fair amount of force on my sample, so it might be necessary for adult fingers to help out here to avoid frustration. On the upside, they should consequently be difficult to remove. Conclusion The kit captures the look of the on-screen walkers well, and apart from the cannons, should stand up to play very well. The sounds are fun, and the evil glow from the cockpit is surprisingly effective when viewed from the front. Kids will love them, and I'm sure some adults will too. It is also nice to see that the scale chosen for this kit is the same as the U-Wing that has been released at the same time. It isn't stated on the box, but they are both shown as 1:100 scale on Revell's website. Perhaps previous criticism of the eclectic scales of the earlier kits have been listened to? Very highly recommended. Revell model kits are available from all good toy and model retailers. For further information visit or
-
Rogue One Rebel U-Wing Fighter (06755) 1:100 Revell Make & Play Star Wars. You're reading this, so you've probably been a fan most of your adult life, whether it's only a minor obsession, or you live your life by the Jedi code. I know a few grown men (one in particular) who dress as Stormtroopers at the weekend, and since Disney took over the franchise from a rather dormant Lucasfilm a couple of years back, we've been treated to two new films. One following on from the original storyline, and now Rogue One, which is set in the Star Wars universe, and (look away if you've genuinely got no clue of the story) sets the scene for the conflict of Star Wars – A New Hope. I took my 6 year old son to see it soon after it came out, and there are some great new designs fighting alongside the more well-known ones, many of which will no doubt become icons alongside their older siblings (I know, sacrelige!). The U-Wing is a Multi-Role combat ship of the Rebel forces, and is seen many times during the film, transporting the main protagonists to and from many a "fun" encounter with the Imperials. It is swing-wing, and can carry a number of troops in its belly, whilst exhibiting a number of familial traits in common with the X-Wings of legend, which also make more than a brief appearance in the film. The Kit Make & Play are a superb line of easy-build kits that are great for both little ones to be introduced to the joys of model making, and for the older modeller that quite fancies one of these soon-to-be-iconic designs for their shelves. Not to play with at all. Oh no! They can also be used as a basis for a detailing project if you so wish, which I once did with the old Sith Infiltrator. These ones come with nifty sound and light modules built into them, which is always a bonus. The box contains 35 parts, some of which are contained by vacformed clear packaging, others within a pair of heat-sealed plastic bags. The instruction booklet is simple, and begins with a visual list of parts, which also gives them numbers, which is at variance with the numbers and letters etched inside some of the parts, so pay attention to which parts go where. There are two clear canopies, a pair of pilots and their seats, and a very simply hull construction that shouldn't take long to complete. In the rear of the hull sits the light & sound module, with a slip of clear plastic breaking the contact between the batteries to ensure that they reach you in good working condition. Pull this clear part out, and pressing the button will then activate a green light in the cockpit, and one of two sound effects culled from the film. Before the hull is closed, the wings are fixed to posts in the lower hull, and once closed up, the wings pivot around the posts, clicking into position around the octagonal shape of the posts. The four engines are made up in pairs and fit onto their own posts on the rear of the fuselage. They will only fit the correct way, with one from each pair installing on the top, the other on the bottom on the opposite side. Add four landing gear legs, and that's it. Go and play! Speaking of play, the parts are all made from ABS plastic, which is substantially stronger than the styrene that most "serious" models are made of, so the structure should be quite resilient to heavy handling, although the gear legs look like they may collapse in a heavy landing, and the flexibility of the wings could be severely tested in the wrong hands. Conclusion I've said it before, and I'll say it again. These kits are excellent introductions to modelling, and great toys for kids, but they are not super-detailed hyper-realistic replicas of the "real" thing. I know my Boy will love this one in particular, and their ready-painted nature means that there's no waiting around. I added a few dabs of glue inside some of the more structural friction-fit towers to keep the engines on the model during the inevitable rough play. Very highly recommended. Revell model kits are available from all good toy and model retailers. For further information visit or
-
The Sienar Fleet Systems TIE Fighter. Like all the Bandai kits, easy and fun to put together (wip is here: http://www.britmodeller.com/forums/index.php?/topic/235017858-bandai-tie-fighter/) The iconic 'bow-tie' shape. Colour is a matter of much debate (just have look on RPF!) but I'm very happy with what I mixed up. The solar panels look great in Vallejo Steel thanks @AndyRM101 I made a (stupid mistake) adding heat to speed up the decal drying and its disported the front canopy - I'll try painting up the clear version and swapping them out. Any comments and feedback gratefully received. Thanks for looking.
-
 Hello, Once upon a time in a galaxy far far away . . . everybody knows this opera of the biggest space opera all the time: STAR WARS. I always thought about the wonderful spaceship of Han Solo which is the most beautiful space ship ever in my eyes... now I want to build the Falcon finally... in 1/72 scale from Revell's Master Series. The kit is equal to the Fine Molds kit with more then 900 parts. Additionally I will use the etched parts from Paragrafix, some 3D-printed parts for the guns, the cockpit and the antenna. The engine will receive some clear resin parts, the exhausts some resin updates as well. And ... the most important thing for the Falcon.... I will illuminate it. It is the first time I will do this ... So let's start... I began with the planning of the lights. Finally I have decided to go like this: Red = red LEDs (8), yellow = warm white LEDs (14), blue = cold white LEDs (5), light blue = LED strap for the engine (1), plus one blue LED and some fibre optics for the cockpit. Here we go with the LEDs marked on the hull (downside): Next I will add some details on the outside and inside of the bottom side of the ship, then I will drill the holes and make the wiring ... I hope you like the new project ... Cheers Micha
 -
I've been doing a bit of work on the iconic TIE fighter. Lots of neat detail getting ready to be covered up. Sorry camera phone pic and it just can't do the detail. Paint tests - for this and my next planned build. I was hoping I could just buy in 'TIE Fighter blue/grey' - no such luck, I've spent all morning planning around with paint mixes and I'm still not sure it's 'right' but given the differences across films, studio models and other media I'm not going to worry too much and pick a colour I think looks like a TIE fighter. NB 'not worry too much' in this context means spend all morning mixing paint and trying to somehow reconcile what you see on screen, in photos, on the computer in different light, on a 40 yo model... Blah.. It's bluey grey let's go with that. What are you into? Modelling Masking! What a hobby so much fun... This took forever to mask. If it pulls off my Vallejo 'steel' paint (thanks Andy - I'm stealing your ideas) when I take it off I'll not be best pleased.
-
Bandai 1/72 scale RZ-1 A-wing with a Ralph McQuarrie-inspired paint job; finished in Tamiya & Vallejo acrylics, MIG enamels, and Tamiya pigments.
- 11 replies
-
- 22
-

-
Hello there and welcome to my little build log. Last week I received this small but beauty Bandai model kit of Darth Vader’s personal TIE Advanced x1. At first, let’s have a look into the box. The boxart is as usual a stunner. I like this very classic yet elegant style of the box. The typographic mix of japanese and the serif font make it pretty interesting. Yay! This looks great, several sprues well packed. I’m pretty sure this will be fun. Sprue A1 Mainly parts for the outer hull like the cockpit and the rear wings. Sprue A2 Parts for the cockpit, canopy, and machine. Sprue B The wings in so called “multicolor molded” technique. Bandai invented it to create parts with up to four different colors in one single sprue. Also there are some transparent parts of the canopy and window. Sprue C Vader himself in .72 scale. Good details and it’s cool that Bandai provides us with a seated and a standing dark lord of the sith. Sprue SWB2 The base with a deathstar looking surface. Compared to the newer kits, this surface looks a little bit simple. Sprue SWE1 To laser beams in a neon transparent look. Coold idea if you want to simulate a TIE fighter in full action. Decals Bandai provides us with two different kinds of decals. Classis water applied ones with pretty good details and for beginner there a stickers. I like the idea to satisfy both type of modellers. Skilled ones and those who are start building their first kits. Instructions Last but not least – the instruction. They’re completely in japanes but don’t worry the illustrations are pretty exactly so no words needed at all. It seems that Bandai remarked that the kits are more and more sold in Europe and the States so newer kits are in english and japanese. All in all everything looks great to me. Very fine molded parts, a well structured instructions booklet and a pair of very nice Darth Vader figures. Just to let you know: I ordered this kit through Tokyo Model Detective. It was the first time I ordered a kit over there. Darren is a very nice guy and provides a good service but as Andy already told in his TIE Striker build log (beautifully build by the way) you get two invoices. The first is about the model kit itself and a second one for the shipping costs. I have do pay approx. 13 Euro for the kit and 16 for shipping. I didn’t expect that shipping will cost that much. But to be honest, the delivery time was super fast. It took 8 days from order to delivery. Usual I buy the kits via amazon and it takes up to three weeks but in overall it is much cheaper. So I you want to receive you kit very fast and money is not that important for you I recommend you TMD otherwise if you are more patient you better go with amazon. I’m already building this little beauty and provide you with new pictures this weekend. May the force be with you!
-
Good evening folks I got the Revell AT-ACT for my birthday (along with the Star Destroyer). Now while these are very toy like I actually really like what Revell have managed to do for this price. But the AT-ACT is rather devoid of detail. So I thought that detailing this chap could be quite fun while I await the redesign of my studio/workshop, as I don’t want to start anything too complicated before the move. I had a quick look through the Rogue One visual guide book which has a couple of decent shots. I still thought that it looked a little, under-done so I went looking online and found some pictures of a couple of Hasbro toy versions which were very much more detailed, lots more greeblies. So one question is: are there any detailed pictures from any of the other visual guides or other Rogue One books that show different versions of the AT-ACT? Another question is: do I take the detailing from the Hasbro toys and use that as a pattern for my Revell AT-ACT? I rather like the extra detailing in the toys but would it look too busy as this scale? Any and all help is, as always, greatly appreciated. Cheers MD
-
Bandai's new TIE/SK x1 Air Superiority Fighter, or Striker for short, from the Star Wars Story 'Rogue One'. I wasn't sure about the design when it was first revealed, but it's grown on me since seeing the film, and more so while building it. A great kit, easily up to the usual Bandai standards, and quite large for a TIE, coming in at over 9" long (about twice the length of a TIE Interceptor). The one criticism I can lay at it, and it's not the fault of Bandai, is that it's a swine to photograph as the wings always seem to be in the way, hence the majority of the shots being from below. The wip can be found here Thanks for looking Andy
- 28 replies
-
- 25
-
-
Star Wars Imperial Star Destroyer - Rogue One 1:4000 Revell Star Wars is a little-known cult series of films about two 'droids called R2-D2 and C-3PO, that some of you may have seen. In line with the latest film of the franchise, which goes by the name Rogue One, Revell have released a number of new Star Wars kits with newly Rogue One themed boxart. The Star Destroyer has gone through a number of variants/versions for the various films, and quite frankly I get a bit lost as they're all huge and cheese-wedge shaped, so I hope the purists will forgive me. If you've not seen Rogue One, you should perhaps check it out, as if enough people watch it, they might make another one. The Kit Right from the start I feel the need to state that this is a Level 1 Make & Play "kit", and not the newly minted (and huge) Zvezda kit that is soon to be reboxed under the Revell brand. The kit is snap-together, using pillars and tubes that friction-fit together, locking the parts in place to all but the most determined fingers. It measures 400mm long, and comes in 46 parts, some of which are quite small, and could get lost if you (or a child) open them a bit too enthusiastically. The parts are all pre-cut from the moulding sprues, so there's less to throw away, and they are held loosely in place within the box by clear vacformed mouldings, which do go in the bin. It has light and sound, which is always a fun aspect of these kits for the kids, and my 6 year-old was cock-a-hoop when I demonstrated it to him, scurrying off to show mummy in a very excited manner. Everything clips together easily, with only the small clear blue liners to the engines a little tricksy in places, and the purists will have literal kittens when they see the three "landing gear" panels that hinge down from the lower hull to allow it to be stood square on the shelf when not in use. Small fingers find those a bit fiddly, but after a few operations, they slacken up a bit, and familiarity helps too. In step 4 and 5 the instructions show the rear detail area being constructed from two main parts that encompass and trap the exhaust bells in place behind the heavy light & sound module. The lower section is fitted to the lower hull, the exhausts mounted, and then the upper section is placed on the lower part, after which the upper hull is added. This turns out to be a bit fiddly, so install the upper rear part in the upper hull to make your life easier. The rest of the kit builds up very quickly, and if you're familiar with construction kits, you could have it ready for action in 10 minutes or less if you're that excited. The other moving parts are the small gun emplacements on the flanks of the superstructure, which clip in place and rotate quite freely once inserted. They have been moulded in a slightly darker grey styrene to help them stand out, as have the golf-ball shield generators and the lattice structure between them. On completion of the build, pulling out the little plastic tab on the underside allows the three 1.5v LR44 batteries to make contact with the circuit, and pressing the small square button on the underside will then play one of two sound clips from one of the movies (It sounds like A New Hope to me), which you will be able to hear if you play the video clip that I've embedded from Revell. The rear exhausts also emit a baleful blue light, but it doesn't extend to the smaller pairs of exhausts, even though they have clear blue inserts of their own. It's a minor omission, but it makes you wonder why they bothered with the inserts. Nevermind. Also on the underside is a small compartment for the batteries that you access with a small Phillips screwdriver, and if you can't be bothered Googling the alternative codes for the LR44, they are AG13, AG14, LR1154, AG76 and many others. It's about time battery manufacturers did something about that! Finally, there is a small grille near the button that allows the sound from the speaker to escape from the hull. Whoever put the kit together in the video needs more finger strength. My example had none of those massive gaps between the parts once the parts had been properly squeezed together. Conclusion Little Johnny or Jemima will love this, although the detail compromises that have been made to facilitate play will have the perfectionists rocking back and forth in a corner, but they should rest easy, as they're not the intended market. As I have said in the past, this series of kits is aimed squarely at kids, who don't care that Star Destroyers don't have landing gear, and that the panel lines are over-scale, and they certainly can't wait for the kit to be painted before they start whizzing it round the living room. My son still regularly plays with the other kits from this series, and this one has become a firm favourite with him too in the short time he's had playing with it. If they were to do a Make & Play Kylo Ren's or Krennic's shuttle, he'd be one happy boy, but if they did a new shuttle Tyderium with light & sound, he'd go ballistic, as he's inherited his love for that design from his old man. One of the many reasons I remain a proud dad. Very highly recommended. Revell model kits are available from all good toy and model retailers. For further information visit or
-
 Part 1 So, a new WIP for me to start and then leave partially completed because I've still not got around to buying the materials I need for the display and for my R2 kit. Anyway I was eager to start this one because I've finally got my hands on a compressor and airbrush so I can paint the parts I want to a little easier, I guessed this would be a good kit to start with. I should add at this point that I have been chronicling this one for a while now, waiting until I actually had some real progress to how before posting, but as with all my projects I have precious little spare time so diving out to my 'Nest' in the garage does not happen as much as I would like. First things first let's flip over the build mat - can't build a Storm Trooper on the 'metric' side can we! Here are the obligatory spruce shots. And this is just the water slide transfer sheet, but the plan is to use as few of these as possible I decided to prime and top coat the black parts whilst they are still on the spruces. For this I'm using Vallejo Black Primer. I snipped off the obvious white parts and gave everything a coating of primer. Then I panicked as I realised I had just painted the translucent eye shields So I snipped these off the spire and quickly rubbed a cotton bud soaked in airbrush cleaner over it to remove the paint. Phew! Now there is lesson number 1 for me: Double check the sprue! I was struggling with a bit of paint spatter and clogging at first whilst I worked out the best air pressure. I can spray with a full size gun so I rather arrogantly decided I would be able to airbrush with no problems. So the spattering was lesson number 2: Learn some humility you big head! Got a better layer of primer down in the end that I was happy with.
 -
My pal printed this out for me on his whizz-bang super-duper 3D printer, but I'll leave his name a mystery so he doesn't get bombarded with similar requests. This wasn't a cheap item to print, but it was worth it just to test the capabilities of the printer! Although it was printed before Christmas, I didn't receive it until a week or two ago, and have only now gotten round to doing a little work on it today. It's a phone pic, and the main upper receiver part was missing at this stage, due to it having to be printed separately. you can see the resin is still damp from clean-up, but what you can't see too well is the level of detail that's been achieved with a relatively "cheap" printer. A couple of years back this would probably have cost a quarter of a mill, but now it's a few tens of thousands. We're a long way from being able to print a squadron of Spitfires overnight, but we're getting there. They do need to reduce the cost of consumables though, as it's shocking how much a kilo of the stuff costs - it's almost as expensive as a gallon of inkjet printer ink! The grips on the handle of what was once a Broom-Handled Mauser were first to see the sanding sticks & primer, as tonight I just don't seem to be able to focus on anything meaningful, as I'm dog-tired and more than a little bit sore. I've been sat there staring into space with a sanding stick in hand, and a grip in the other, idly buffing at it to see how quickly the parts can be made ready for paint. These parts are curved, so as you can imagine, with them being made of thousands of tiny flat layers, there is some texture to them and a bit of sanding and filling was/is necessary. Comparing this print to the previous printer I've had dealings with though, the difference is chalk and cheese. The layers are far less obtrusive, and that means a lot less clean-up to get a smooth finish. hell, if I wasn't picky, I could just prime it with a high-build primer, slap a coat of paint on it and go "Pew, pew, pew" to my heart's content I'd like to do a bang-up job of it though, to do justice to the super job that Mister X did of the print. I thought I'd start with the grips because there are two of them, so it'll be easy to gauge the difference that a few coats of primer have made. As you can see, two coats of primer and some fairly idle sanding have improved it a lot, and with an extra session, plus paying a little more detail to the grooves, it should be ready for paint in no time. These are wooden on the real thing, so a little roughness is to be expected, but I'm going to go for a sleek, worn look when I finally get around to painting them. How I'll achieve wood grain effect though, I have no idea. We shall see. There are some replacement wooden grips available on eBay at the moment, which come with all the necessary bolts to hold the grips firmly to the frame, but comparing my Airsoft Mauser to this one, there are some subtle shape differences that might end up with a poorly fitting part. They're also £20, which is a fair wedge for something that might be useless really. I'll be updating this as-and-when I have time to make any progress, and I might also add the progress pics of my Son's Nerf version of this gun when it arrives, as I intend to paint it in proper colours, leaving the tip that blaze red colour, just in case. It's not as accurate as this one in terms of look (they've had to shoe-horn the Nerf mechanism into an elongated receiver), but it might reduce his clamour for this one. The flash-suppressor is a tad delicate IMO, and might not react well to being accidentally smacked against a door frame, swing, dog or my head
-
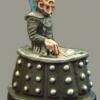
 She's done, the Koensayr Manufacturing BTL-A4 Y-wing starfighter, painted up in a dulled down 'squid pink' for something a little different. Lovely kit to build, everything goes together so well. It's my third build and my favourite so far; got to try out some new techniques - hairspray chipping and adding washes which I hadn't done before but which have worked well. There is a WIP here: http://www.britmodeller.com/forums/index.php?/topic/235015735-bandai-172-y-wing/ if anyone is interested. Purposeful bomber pose, not a bad shot from an iPhone. Overall I like the look - the front cannons are a bit 'heavy' and its not helped by the Tamiya Gunmetal I painted them with, it is (in my hands at least) very 'lumpy' and I'm not much keen on it. The droid - my terracotta tea-pot that I'm not so pleased with, I thought he'd set-off the Y-Wing by being a different tone but it doesn't really work as I wanted. I could have repainted him but I thought I put him up and see what others think of him. The pink stripes on the nacelle came out better than I expected - I really struggled with the masking and then on my next trip to the hobby shop found out you can buy special tape for masking curves... The underside, really pleased with how the weathering - a combination of Vajello washes and MIG enamels has come out The two little rust streaks are my favourite bit of weathering. I wasn't sure if I should add more - but working on the 'less is more' principle I thought I'd quit while ahead and leave it as is. Little streaks of grime added with MIG enamels. The pink paint was chipped with MIG chipping fluid and the 'undercoat' chips were sponged on after. The chipping fluid was the 'heavy' version which resulted in chips a bit too big for my tastes - I'll try to pick up a 'lighter' chip effect fluid before reusing the technique on something this small. Well used craft - some Tamiya weathering pastels were used to add the soot/blast marks. Thanks for looking - any feedback gratefully received.
 -
Paint & weathering advice - Bandai Sandtrooper
Dermo245 posted a topic in Science Fiction Discussion
So this fella' arrived last night and I can't wait to get started on it soon! I haven't build a Bandai kit before but have followed and been inspired by the many great builds I've seen here. I had a couple of newbie questions that I was hoping fellow BM'ers could help me with... Should I glue the parts or is the push-fit process strong enough to keep it all together? Do I need to seal the factory paint-finish with Klear before I start weathering? Or is it ok to weather right on top of it? I've read about the plastic being fragile with/attacked by certain products - I mostly use acrylics and water-based so would I be ok with those? Any advice on a final finish for this guy - Matt, Satin or Gloss? Sorry for all the queries, thanks in advance! Cheers, Dermot -
First finished build for 2017, this is Bandai's 1/12 K-2SO from Rogue One. Even if you haven't seen it yet, it's not really giving much away to say he pretty much steals the film. In many ways he's even better than 3P0 and R2. Bandai's kit is for the most part as good as all their previous releases, although the plastic is quite soft which makes cleaning up the sprue gates (which aren't as well hidden as some of the earlier kits) a little harder. I tried to mach the weathering to the real K2 as much as possible, using hairspray chipping and various washes to build up the grime on his plating. The base is a rough representation of the Jedha landscape. Full build here Thanks for looking Andy
-
Hi All Here is my recently completed Revell U-wing transport from 'Rogue One'. This ship is in my top 5 favorite Star Wars ships (the Republic Gunship, aka LAAT/i, is my favorite all-time) as I have thing for helicopter gunships like the Vietnam War era Huey in the real world. The same individual who 3D-milled the center drive section for my AT-ACT also milled the replacement engine nozzles and rear radiator panel for this kit as it was missing altogether (Revell received the U-wing profiles/plans for production from Lucasfilm before the ship's design was finalized for the movie). Instead of doing a total repaint, I concentrated on the areas around the seams and just touched those spots up after filling them in. The markings on the fuselage were distressed with a sanding stick or hobby knife (except the gray panel on the right side- it was airbrushed over some sprinkled salt for the chipping effect). The entire ship then received a pastel chalk wash. A little heavier than I intended, especially around the engines, so we'll just chalk it up to heavy interstellar abuse. Thanks for looking. Cheers, Albert
-
Workhorse of the Rebellion the venerable BTL-A4 Y-Wing Starfighter. It'll be an out of the box build but I do want to do a custom paint job rather than Gold Leader; partially for fun and partially as I'd like to do Gold Leader when I have the skills to do it justice. It goes together very easily but there are lots (and lots) of fragile little piping pieces - I'm amazed I only broke one. Here it is with most of the piping in place. It is so well engineered that what could have been extremely frustrating was actually rather enjoyable - although I was glad to finish with the piping. Looking at the phot now it seems there are a few spots that'll need filling before the primer goes down. and a couple of days later ready to prime. I elected to paint it in as big as possible parts as following my Gundam build i'm over having lots of little bits to paint individually - I hope I don't come to regret this idea.
-
Kuat Systems Engineering Firespray-31-class patrol and attack craft Slave I Bandai Slave I (1/144 scale); completed in Tamiya and Vallejo acrylics, MIG enamels, and Secret Weapon Miniatures pigments. The stand and the Star Wars decal are from the Fine Molds version of this model and the mythosaur skull was made with my Cameo cutting machine. All and all, I think this kit turned out great. I was pretty nervous about starting it because the paint job is pretty complex, but once I got in the thick of it I was okay. It could probably stand to use some more weathering and I'll probably do some before I take it to the model club meeting next month, but for now I'm calling it done. The work in progress log can be found here. Comments and criticism is welcomed as always!
- 12 replies
-
- 21
-
-
 Just had the heads up from Jimi at JPG Productions that he and Nicholas Sagan are close to finalising a 1:350 scale version of the EF76 B Escort Frigate which we know better as the Medical ship at the end of Empire Strikes Back and more recently in Rogue One. It will be about 36" long (about 90cm) and consist of about 100 parts. More info here. http://www.modelermagic.com/?p=89268 Cheers, Warren