Search the Community
Showing results for tags 'Star Trek'.
-
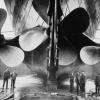
 USS Enterprise NCC-1701 Stardate 1601.28: After a year of extensive research, conservation work on the original studio model of the USS Enterprise is now underway in the Museum’s spacedock. Our goal is to stabilize the model and return it to its appearance from August of 1967, during the filming of the episode The Trouble with Tribbles, which marked the last known modification of the ship during the production of Star Trek. The model appeared in all 79 episodes of the original series, and was donated to the Smithsonian in 1974. It will go back on public display in the Boeing Milestones of Flight Hall this year, in time for the Museum’s 40th birthday in July and the 50th anniversary of Star Trek in September. Visitors to our third annual Open House at the Steven F. Udvar-Hazy Center on Saturday, January 30 can catch a glimpse of the work in progress. .
 -
This going to be the first Star Trek model I have built in a few years, and the first build of 2016. It is a commission of the AMT 1/2500 USS Enterprise C. These photos are upon completion of the first day. Enjoy! What you get in the box Another image of the kit unboxed After grey primer (Halfords grey primer) Some detailing work And another. So after opening the box and looking at the decals, I decided I would rather paint than use the decals supplied. The reasons for this are I think they are too bold and not very screen accurate. I also think "wallpapering" decals like this cover up a lot of the detail on the kit, so instead I will be painting the various shades and tones on the hull as well as some of the detailing.
- 2 replies
-
- 1
-

-
- amt
- enterprise c
- (and 2 more)
-
Hi all, just got my hands on AMT Klingon bird of prey model Generations release, This question may have been asked already, did a search but could not find anything relevant. So here Goes, The Scale is stated as 1/650 on the box, yet subsequent releases of bird of preys state the scale as 1/350, the in flight version, the later round2 mod with landing gear. Is this the same kit but with just a different scale plonked on it and updates, as digging the kit has the same overall dims as the supposed 1/350? If any one can shed some light it would be most welcome as i want to build and display it with the right scale (ok near enough 1/537 etc) enterprise. All the best Chris
-
 Hi Everyone, In memory of Leonard Nimoy, 1931 to 2015. Here is one of my four submissions for this group build : AMT 1/537 scale USS Reliant NCC-1864 from Star Trek The Wrath Of Khan. Here is the box art : The starship is 20 inches long once built and includes a display stand which fits into the warp nacelles. Sprue shots to follow. ATB, Rick
 -
This is a very small (Federationmodels.com website says 1:3500 but I think it's 1:1000) Romulan scout ship from the TNG episode "The Defector" P1010307 by stephen.north66, on Flickr P1010308 by stephen.north66, on Flickr P1010301 by stephen.north66, on Flickr P1010302 by stephen.north66, on Flickr P1010303 by stephen.north66, on Flickr
-
 Hi Gang- This is the 1/2500 K't'inga Class Battle Cruiser from Round 2/AMT's 'Star Trek: The Motion Picture' Cadet Series kit. It is a part of a three-ship set that includes the USS Reliant and refit USS Enterprise. The paint scheme is inspired by the type on the Bird-Of-Prey class ships so it isn't accurate to any of K't'inga class ships in the movies. Main hull color is Testors OD Green, and the 'feathers' were painted with Testors Rust. The details were brought out with Testors Create-FX Dark Gray wash. I've really taken a liking to these Cadet Series starship models as they are a nice, quick detour from the more involved projects on my desk. Thanks for looking! And how it scales out with the more "modern" Sovereign Class USS Enterprise-E;
- 8 replies
-
- 7
-
-
- Cadet Series
- 1/2500
- (and 1 more)
-
USS Enterprise "Star Trek Into Darkness" 1:500 Revell As a Star Trek Fan I think I am right in saying that in recent years the franchise as suffered a little bit. JJ Adams came in like a breath of fresh air to update things with the 2009 Star Trek, and this has now been followed up with Star Trek Into Darkness. Without wanting to give to much away the crew of the Enterprise must return home following an act of terrorism within its own ranks which destroys much of Starfleet leaving Earth in crisis. With a personal score to settle Capt James T Kirk will lead his crew on a mission to capture the one-man weapon of mass destruction responsible. The Kit With this kit of the latest film USS Enterprise Revell continue their tie in with the film & TV series, which seems to have generated them a lot of kit sales over the years. The scale on this kit is listed as 1:500 which seems to be big enough, the saucer section has a diameter of 280mm. The kit arrives in white plastic as two halves of the saucer, an additional six sprues of plastic; with two clear sprues (the large engine domes had broken off in our review sample, but with no bad effects). Construction starts with the bridge area. Two separate construction steps make up the bridge with a combination of clear and normal plastic. A further construction is the area on the lower saucer section directly below the bridge. The steps are well defined on the instructions. Once complete the bridge section can be added to the upper saucer section. A selection of clear parts are then added into the rim of the lower section, along with the section previously made. Once the parts have been added to both sections they can be joined together. I would advise caution if test fitting the sections before hand. The fit extremely well and I had difficulty getting them apart! Once these have been joined there are a few additional parts to fit to finish off the saucer. The next step is to move onto the main body of the Enterprise. Various clear parts must be added into both halves to start. Two internal bulkheads are added along with the hanger doors for the shuttle bay. If using the supplied stand then holes must also be added at this stage. The two halves can then be joined. A bottom insert is added, then a large U shaped insert, which completes the supports for the engine pods. The next is to complete the collector assembly for the front of the Enterprise. This is then attached (although you could do this later) .The main body can then be attached to the saucer. Following this its onto the engine nacelles. The fronts of the engines are complete using a white plastic bulkhead with an attached decal, and a large clear dome over the top. More clear inserts must be added to each engine pod half before they are joined together. Due to the shapes of these they are actually quite a few parts, which go onto & into the halves to complete the engine nacelles. Construction steps are the same but handed for both sides. A little time and care will be needed to ensure the correct parts are selected. Once the nacelles are completed they can be attached to the main body. The model is basically then finished. If you wish to use the supplied stand in the shape of the Starfleet badge then this will need to be assembled and attached to the model. Clear Parts As mentioned in the review the clear parts for this kit are extensive. Apart from the small issue of the larger parts coming adrift in the bag the parts are well moulded with no flaws, and are clear. Decals A large decal sheet is supplied with the kit which is up to Revells usually excellent standards, There are quite few large thin stripes which need to be applied around the saucer section and this might be better done when it is complete, but before it is attached to the main body. Overall the colour scheme of the kit is in blocks much akin to todays digital camo and I would imagine each part is best painted on its own before brining them all together. Conclusion Overall this looks to be an excellent kit from Revell to tie in with the latest Star Trek film. The kit features extensive clear areas and would benefit from the addition of a lighting kit (which I am told is being produced by Beacon Models). The kit should build up to make an impressive looking USS Enterprise. Highly recommended. Revell model kits are available from all good toy and model retailers. For further information visit
-
Hi all, this is my next build. Mark, a good friend of mine, is really into his science fiction and has been good enough to lend me a lot of DVD box sets recently. When I asked him which was his favourite Enterprise from Star Trek, he replied that it was the D from the Next Generation series, so I'm building this for him as a thankyou. I'm going to chronicle the build so he can follow along, and so this thread will be written with a non-modeller in mind. Here's the kit - I got it from Modelzone in Portsmouth before they closed down, and it's been waiting for a reason to be built ever since: There aren't many parts, but then again it was intended as a snap together kit: The decal sheet however, is another matter. Each of these three sheets is about A4 size, and I reckon they'll cover about 95% of the finished article: Hardly needs the instructions: Except for the decals - without the map, I'd be lost! Being a fairly old kit, the sprue attachment points are huge, and there are a couple of ejector pin marks to sort out - the big circular depression on the base of the nacelle pylon: A smear of putty: ...and some careful sanding later, and it disappears under a coat of primer: The warp nacelles were a pain to clean up the seams, as the joint goes right across the corrugations. It took a lot of careful scraping and trimming to get them acceptable. The one in the foreground is done, the rear one shows the blobs of liquified plastic squeezed out from the joint still awaiting treatment: The engineering hull presented a challenge, as there should be a prominent recess all the way around the chines. One side of the hull was badly moulded, so I had to build up the mating face with plastic card to ensure the gap for the star drive was even on both sides: Next I turned my attention to how to display it. These kits don't come with a stand, as I assume that the makers thought they'd be bought by kids who'd spend all their time flying them around the living room to the accompaniment of whooshing noises. (Actually, I'm not sure what sound the Enterprise does make, but I bet Mark could imitate it - you should hear his TARDIS impression!) I bought a Tamiya stand off ebay, which I cleaned up and sprayed with grey primer: and modified it by carving out the mounting point to fit snugly against the underside of the engineering hull, and adding a piece of square section brass as the support: I broke out the square drill, and made a hole in the underside of the hull: ...and used epoxy resin to attach a larger diameter square section inside, at a suitably dynamic angle: This allows the Enterprise to be firmly attached to its stand, but still be detachable for safe transport or warp drive fantasies... A coat of matt black later, and here's the stand awaiting final assembly: I attached the main saucer to the top of the engineering hull at this stage, as test fitting showed that there were gaps to be filled here and sanding would be a lot easier without the warp nacelle pylons in my way. Here's the sanded and primed result: The edges of the saucer section gave problems too - there's a recess all the way around as on the engineering hull, and getting the gap consistent took a LOT of carving, sanding, scraping and filling. In this photo, the impulse engines still need tidying up a bit yet. One piece which needed to be painted before I closed up the engineering hull was the main deflector. As I'm not lighting this model from inside, I thought the best way to get the glowing effect in this area was to prime it, give it a coat of gloss black which acted as an undercoat for the Alclad Chrome paint on top of that as a reflector, and then a coat of Tamiya clear blue on top. I hand painted the brown areas according to my references. The idea is that once it's installed and blended in, I can use my airbrush to feather the hull grey colour over the electric blue, giving the impression of luminance. That's the idea, anyway, yet to see if it works or I'm just talking rubbish: Anyway, the engineering hull has now been closed up, and the final (hopefully) coat of white primer has been added. Here she sits, awaiting paint: And a mock up on the stand to make sure everything works. Looks ok to me: Next step, painting... Keep watching, Dean
-
This is just a basic, out-of-box build with no lighting as I've yet to venture into the world of electronic wiring! My original plan was to aim for the pearlescent effect seen on the TMP studio model, however I couldn't get my pearlescent medium to airbrush very well, so I hedged my bets and settled for the coat of Tamiya pearl white spray that I'd applied over a white undercoat. The end result is a little on the light side compared to what we see on our screens (and not as beautiful!), but I'm reasonably pleased with the pay-off, and the old gal still looks fine in white! At first I'd considered a panel wash, but thought twice and decided to let the model do the talking due to the scale. Next step was the kit's extensive Aztec decal coverage, which visually I am extremely impressed with; however these were the hardest decals I've ever had to work with. They were very brittle, and I couldn't get them to slide very much, so there's a few mistakes in there. A coat of Revell acrylic matt varnish smartened things up nicely. Next, the clear parts for the nacelles, deflector dish, torpedo launcher and impulse engine were airbrushed with Tamiya clear paints. I installed a paper screen inside the deflector housing to hide the models innards; I painted it in an attempt to mimic a glowing effect, but it can't be seen very well through the shadow and the dish part. Overall the kit was a joy to build and a challenge to finish - the decals are well worth the frustration as they lend a feel of authenticity to the model. Thanks for looking, and as usual any comments etc are most welcome. Regards, Ross.
-
Hi Everyone, This kit was started over 2 years ago and was one of the first kits that I built after starting to build models again. At the time I never painted a kit or applied decals so didn't complete the kit. I started working on this kit for painting last September and have finally completed it. I am really happy with the way this kit has come out and think that Voyager is one of my all time favourite builds. I have several more starships in my stash (1 of which needs completing, 1 needs the decals removing and repainting, and 2 that need to be started on). History of the Ship : The USS Voyager is an Intrepid class starship, launched in the year 2371 under the command of Captain Kathryn Janeway. During her first mission, the USS Voyager was abducted by an alien called the Caretaker and taken to the Delta Quadrant 70,000 light years from Earth. During 7 years in the Delta Quadrant, the Voyager encountered the Borg, the Hirogen, Kazon and lots of other species. After 7 years the ship returned to Earth via Borg transwarp conduit and is placed into drydock for refit before being involved in keys events including the Borg invasion and finally returning to the Delta Quadrant (using a Starfleet slipstream drive) to explore. Anyway here are the photos of the finished kit with the Warp Nacelles in Impulse position : Anyway here are the photos of the finished kit with the Warp Nacelles in Warp Drive position : Thanks for looking everyone and as Mr Scott (Simon Pegg) says at the end of Star Trek Into Darkness : She's ready for a long journey. Now onto the USS Enterprise NCC-1701-E to get that one finished before starting anymore builds. Cheers, Rick
-
 Well after over a year in the making, im calling this one finially done (well until I decide to tinker with her again!) Ive build about half a dozen other kits since starting this one, but at long last I got around to finishing her! (and just im time for a model show tomorrow, which may or may not have been the kick up the backside I needed to finish her!!) Anyway enough of this chit chat! Here she blows..
- 6 replies
-
- 2
-
-
- polar lights
- uss enterprise
- (and 3 more)
-
Another one from the stack completed today, the Revell Klingon 1/600 D7 Battlecruiser. Built as is from the box with a little bit of artistic flair for the decals and some lighting added in the shape of a set of LED Christmas tree lights!
-
My first ever starship. I am more into painting figures than building the kit but I absolutely love Star Trek and couldn't resist this kit. I lookf forward to your constructive criticism and comments. I painstakingly masked the kit for the aztec design. I think the shade of white used was too white, and the grey was too dark. It has made a strong contrast for the pattern which makes it quite interesting. I considered lighting the Enterprise but decided this was a little too ambitious for such an amature.
- 7 replies
-
- 4
-
-
- star trek
- enterprise
- (and 3 more)
-
 USS Enterprise, Star Trek Into Darkness 1:500 scale Revell In 2009, producer/director JJ Abrams released “Star Trek”, which was planned to be the first in a new series of films, designed to reboot the ailing franchise. The movie became a huge hit, pulling in over $385 million worldwide. Many fans of the franchise were less than pleased with the film, however, feeling that Abrams and the writers, Roberto Orci and Alex Kurtzman, had played fast and loose with established events from Trek’s history and had been disrespectful of Gene Rodenberry‘s original vision of the series. Fans of the new film would then counter with the fact that the Trek history and timeline had become so convoluted and full of inconsistencies, that the only way forward was to give the franchise a fresh start and free it from the shackles that had been set over the past 40 odd years. Many people were also less than impressed with the appearance of the new ‘old’ Enterprise, nick-naming it the JJ-Prise. It certainly has somewhat of an ungainly appearance, with overly large engines contrasting against a rather slim engineering hull, giving the ship a rather top heavy look. However, the ship does have plenty of fans who consider it a beautiful looking design. Abrams, although confessing that he wasn’t particularly a fan of Trek, did admit that his version of the ship has a little of the Refit Enterprise in it. Most notably the so-called Aztec paint pattern. He recalled watching “Star Trek: The Motion Picture” and being struck by the look of the Enterprise, when she was first revealed in the famous space dock scene. In May this year, the sequel to the 2009 movie hit the screens. Named “Star Trek: Into Darkness”, the box office was once again set alight, with worldwide earnings (at the time of writing) totalling $328.5 million. Whether you love it or hate it, it seems that this new version of Star Trek is (for the foreseeable future, at least) here to stay. The Kit Revell’s new kit arrives in a large box, which for once is a conventional top-opener with a separate lid, as opposed to one of their more familiar end opening cartons. Inside we find 42 parts moulded in white plastic, 2 sprues of clear parts, holding 49 pieces and a large decal sheet. Overall quality of the plastic looks very high indeed. If you were expecting something along the lines of the original series Enterprise (which they released last year), then you’d be mistaken. There are no heavy trench-like panel lines here. The surface detail is excellent and much more refined. I do wonder if this is Revell responding to the criticism of that earlier kit and upping their game. The instructions are in Revell’s typical style, but this one is quite a book, being 24 pages long. The construction is covered in 51 steps, with paint and decaling taking up the remaining 6 steps, although Revell do include additional paint diagrams showing the Aztec pattern, during the build sequence. We begin at the same starting point at which most miniature Starfleet vessels begin with, the saucer. The bridge is a mutilayered assembly, with each deck level being a separate piece. I assume this has been done in this manner, rather than with just a single piece moulding, to avoid it suffering from soft edges and details. If that is the case, then it’s worked very well. There is some very fine surface detail on the exterior of the bridge, yet this multi-part approach hasn’t affected the fit. Sliding each piece within the next and then into the upper saucer, the join seams are nigh on impossible to make out. It’s very impressive, the fit really is that good . I would recommend holding the parts together and then applying liquid cement, from the inside, to avoid marring the exterior. There are some clear inserts to add from the inside, for the bridge dome and the 3 large windows which run around the forward edge. The planetary dome on the underside of the saucer is a similar multi-piece assembly, with more clear inserts to add. The saucer halves themselves are large, impressive looking parts, at just under 11” diameter. The grid patterns are represented by very fine recessed lines, while there are also numerous small raised panels and tiny little details dotted around the surfaces of both parts. Comparing it to screen shots found on the net, it appears to mimic the appearance of the digital model very faithfully. Before the 2 halves are joined, there are several clear inserts to be added, for the banks of windows that run around the rim of the saucer. At the rear, the impulse engine slots into place and I find it strange that Revell didn’t mould this in clear, also. They state on the side of the box that the “Kit (is) suitable for the addition of lighting” and the clear parts supplied actually outnumber the opaque pieces, so it is curious why it was done this way. It is another nicely moulded part, though and it features a fine rendition of the hexagonal grill pattern on the impulse exhausts. With all the internal pieces added, the 2 saucer halves can be brought together. There are 5 chunky locating posts which securely lock the 2 halves in place. So well in fact, that it’s actually quite tricky to get the 2 pieces apart again if you are just test fitting them, so care will be needed to avoid damaging the parts (more on this later). Unfortunately, an unwanted side effect of those thick internal posts, is that there are some slight sink marks on the exterior surface. Thankfully, they are quite shallow, so it shouldn’t be a major issue to rectify them, but some care will be required around some of the grid lines. At this point in the instructions, Revell have actually supplied the modeller with scaled down illustrations of the upper and lower saucer halves, showing the position and pattern of the Aztec paint job, which is a thoughtful touch. They also call out the paints at this point, too. They recommend a mixture of white, light grey and silver, mixed to 2 different ratios. There is a darker band on the underside of the saucer and they once again recommend 2 differing paint mixtures. The saucer is completed with the addition of the upper impulse deck and the raised structure which runs from the back of the bridge, down to the impulse deck. This part also has clear inserts for the row of windows at the rear and, what I presume to be, the impulse crystal. The engineering hull is moulded in left and right halves, and each half incorporates the neck pylon and outer halves of the warp pylons, which should ensure that there‘ll be no droopy warp engines here. Once again, the exterior surface is reproduced with a mixture of engraved panel lines and raised details, to the same level of finesse as witnessed on the saucer. I did notice, however, that the recessed panel lines do get a little shallow as they approach the underside join line. It’s not a major issue though and once you’ve cemented the 2 pieces together, a couple of light passes with a scriber will sharpen them up. As with the saucer, Revell once again include a paint diagram at this stage, featuring the distinctive panelling effect on the ship’s surface. They also recommend adding decals at this point, but it’s not something I’d be inclined to do, preferring to leave the decaling until the end. If you intend to use the kit supplied stand, then the instructions point out that the mounting holes will need to be opened up on the underside of the secondary hull and their positions are clearly marked on the inside surface. We have more clear window inserts to be added on the inside, plus 2 internal bulkheads, which are hollowed out to enable lighting and wiring to be routed through them. The shuttle bay doors are a single piece moulding and it simply slides into place at the rear of the hull. On the underside, there is a separate insert to be added, which forms the recessed area in the lower hull. It locates into to a series of moulded guides on the inside. Some test fitting showed that this works very well, although the tiniest amount of adjustment might be needed at the rear end, just to ensure a flush fit with the hull. A few swipes with a sanding stick should be more than sufficient. With that accomplished, the 2 hull halves can be brought together. Generally everything appears to line up pretty well, but there is a small amount of misalignment at the forward torpedo launcher. It might just be an issue with my copy of the kit, though. There is a locating pin right in this section and I think removing it and then tightly clamping the part together, should provide a more accurate fit. With the 2 hull halves together, the one piece inner pylon moulding can be inserted into place. It’s actually quite a tight fit and some pressure will be needed to get it fully in position, so make sure your hull halves have had plenty of time to set, otherwise you risk popping the hull seam back open again. Speaking of seams, once the inner piece is in place, it looks as if there will be some work needed where the inner pylon part meets the hull, at both the forward and rear edges. A little test fitting, along with some careful adjustment and shimming here and there, prior to assembly, should reduce the amount of filler work required, but I don‘t think it is entirely avoidable, unfortunately. It’s not a massive job, but it may prove a little tricky to clean up, just because you’ll be working in-between those 2 curvy pylons. Some thin sanding sticks may prove useful, at this point. The forward end of the engineering hull receives the deflector housing, at this stage of construction. It is a single piece and has plenty of detail moulded into it, providing a nice area of visual interest. The deflector itself, has 2 opaque plastic backing plates and the clear dish simply slots in place. If so desired, an LED could be placed behind the dish’s mounting peg, in order to replicate the on-screen appearance. I tried holding an LED in place and the dish does light up quite nicely. With a little experimentation (maybe sanding the rear surface of the dish, to help evenly transmit the light) and some selective painting, I think you will end up with a very acceptable result. Moving on to the warp engines and we begin with the Bussard collectors, at the front of each nacelle. These assemblies are dominated by the large clear domes. They feature some great detail, with fine incised grid patterns, combined with some chunky looking raised frames. They will be a real focal point on the finished model, so some careful masking is in order, here. A separate clear crystal is attached to the upper edge of each piece and an opaque plastic cradle locates on the bottom side. The whole thing is then fixed to a backing plate. Revell supply a circular decal to apply to each back plate, which represent the internal fan detail, although I’m not sure how convincing this will look. If you wish to light this area up, then the back plates have openings in the centre to place an LED or run wiring through. I know that at least one aftermarket lighting manufacturer has already released a light kit for this model, which reproduces the blue spinning light effect. As with the saucer and the secondary hull, Revell provide illustrations detailing the paint pattern to apply on the nacelles. It is largely made up of small blocks of square and rectangular panels. The nacelles are quite impressive looking chunks of plastic, with numerous cut-outs requiring the addition of clear inserts. If you do choose to light your kit, then the engines will look quite spectacular. Some of these clear pieces are quite delicate, however and in my review sample, one of them was, in fact, broken in half. I’m fairly confident that it will glue back together with no problems, though and that it wont even be noticeable, once completed. Once cemented together, with the external rear panels added, the nacelles can be attached to the pylons and here we have some rather novel, tongue and groove style joints. They hold the engines securely in place, very well indeed, with a lovely tight fit (mine was only taped together to check how well it would work). Very impressive. The instructions show adding the saucer now and it also locates very securely, using a series of long pins on the neck attachment point. Once again, it is a very tight fit, that requires a fair amount of pressure to get a flush finish. I think I would recommend giving the location holes in the lower saucer, a quick twist with a round file, just to open them up very slightly and to make it easier to connect the lower hull. If you’d tried pressing the completed saucer on, without doing this, I can just see the seam on the saucer edge cracking open under the pressure. In fact, it may be better to add the lower saucer to the completed secondary hull, and the cement the top half of the saucer in place. Another word of warning here. The kit isn’t really designed to keep adding and removing the saucer. There are 2 locking tabs on the forward edge of the neck, which click into place in the lower saucer half. When I tried to remove the saucer, after my dry fitting session, one of these tabs broke off, with part of the neck. If you want to test fit the parts, then I would suggest filing down these raised tabs. This will avoid damaging the plastic, but shouldn’t have an adverse affect on the fit of the parts. Once altogether, it really is a big impressive beastie. My pictures here, show the main parts taped together and onto the kit stand. The engines are mounted on to the pylons without the assistance of tape, though, as is the saucer, which is very impressive considering the size and weight of these pieces. The completed model measures out at just over 23 inches long. Revell have supplied a large decal sheet, containing the registry, names, pennants, hull striping and markings. It is printed in Italy, therefore I suspect it’s the work of Cartograf, which means the quality should be assured. The images are sharp and crisp, with bold colours and featuring some nice metallic effects, too. Excess carrier film is virtually non-existent on most of the decals, with only things like the NCC-1701 and USS Enterprise logos appearing to have a minimum amount. I will say that, running a finger over the sheet, they may be the tiniest amount thicker than usual, but I don’t foresee a problem with their use. Conclusion Well, disregarding whatever I may think about the design of the ship, I have to say that I am really rather impressed with this kit. It is a marked improvement over their previous TOS Enterprise model, in terms of detail and engineered fit. Even built straight from the box, you will end up with a large, impressive looking display piece. Add lighting and that complex Aztec paint job and the result should be stunning. We can only hope that this is a sign of things to come, regarding sci-fi subjects from this manufacturer. Highly recommended. Revell model kits are available from all good toy and model retailers. For further information visit
- 17 replies
-
- 3
-
-
- Enterprise
- Star Trek
- (and 1 more)
-
 amt 763 star trek cadet the original series 3 ships scale 1:2500 The 3 ships comprise: USS Enterprise, Romulan bird of prey, Klingon D7 battle cruiser Scale The photos include that unit of measurement of miniatures: a one pound coin. Is there a "bottom" in space? anyway here is the underside view: Comments on the Kit: Cute little models. Comprehensive decals are included. Display stand(s) are NOT included. Problems Poor fit: the tightness of the "snap-fit" parts is very variable. The Enterprise pods were sloppy and very difficult to align, the "V" shaped support was a very poor fit and needed lots of filler. The Klingon upper wing surface needed so much force to "snap" it into position that I popped the seams on the "neck" of the ship. The decals "grabbed" and needed lots of micro-set to allow them to be manouvred into position. Some of them were slightly too large for the surfaces and needed to be trimmed to fit. My Build notes This is my first sci-fi kit and I (foolishly) rushed into the build. With the benefit of hindsight I should have test fit and measured everything and carefully worked out how to locate the parts and how to align them. In most cases I think it would be best to drill out the locating holes and glue the parts rather than "snap-fitting". The Enterprise pods are not properly aligned, do do so would have required me to trim the mating surfaces of the left pod and the "V" strut more than I did. I didn't follow the painting instructions exactly, in the case of the Klingon ship I used part join lines as my painting demarcation lines, rather than masking off as directed (so sue me!). Stands I bought a set of clear Airfix stands and bodged up little "Y" shaped holders on top to support the craft. Conclusion With care this can build to a nice model. If I could figure out how to do it a "tree" stand supporting all three models in formation would be nice. (However I seem to be in a junior league compared to most of the posts on this site, some sort of levitation device would be better?)
 -
Four kits but only one to show as a result. One 1/48 SAAB J29 Tunnan fuselage, two wings and two fuselages from Matchbox 1/72 J29 Tunnan and a saucer from an 1/2500 AMT Starship Enterprise D Ok. I can scratch four kits from the stash but all the filling and sanding probably took longer time that building the four kits out of the box. H.M.S. Fylgia a light cruiser in the United Federation of Planets fleet. HMS Fylgia was an armored cruiser of the Swedish Navy. She was launched on 20 December 1905 at Finnboda slip at Nacka and was used until 1953 so I thought that it would be a good name on my space cruiser. A really bad picture during construction.
-
 Alright, I know that was a quote about the Enterprise B, but I thought it suited the series of pictures that follow. It's the AMT Enterprise E in 1/2500 scale, messed about with in a photo editing programme. It's about ten inches long, and about 90% of the surface area of the kit is covered in decals believe it or not. the decals alone took over four hours of the twelve hours I spent on this kit. I think the Enterprise looks good in any of its guises, but the E looks particularly streamlined to my eye... Hope you like it. Now, what's next? Dean Preparing to leave orbit... Full impulse and maneouvring thrusters... Earth starting to get smaller in the windows... That's the moon going by now... Heading for Saturn for a quick look... ...and back to Earth again... Established in orbit... Who knows where we'll go next... Look, I've got the day off and it's raining, ok? What else was I supposed to do?
- 5 replies
-
- 1
-
-
- Star Trek
- Enterprise E
- (and 2 more)
-
HI, ITS BEGUN?... the world is about to get an upgrade? http://uk.news.yahoo.com/-cryo-sleep--and-other-sci-fi-tech-nasa-is-quietly-working-on-124507953.html#yQgaHuD cheers Don
-
I did the review for this one a while ago, here. I've had some ideas for doing some in-expensive lighting and thought this was an ideal kit to try them out on. The windows are already opened up and there's plenty of room inside to run your wiring. Also, being a modern tooling, then there shouldn't be too many problems with the construction, so I reasoned that it should be a relatively quick build. The paint job is pretty straight forward too, so that shouldn't present any issues either. Of course, I can always be trusted to complicate things somewhere along the line and this build is no different. As it turns out, the prep work for this one has taken a lot longer than I originally estimated. I started her around New Years, giving all the inside surfaces a coat of black aerosol paint, to provide my light blocking coat. When that was dry, several coats of white primer were then applied over the top of the black. This white layer disperses the light very effectively and gives you a nice even glow. I did some preliminary light testing, using some ultra bright white LED's. This gave me a good idea of where the bulbs needed positioning inside. It also highlighted the fact that the white LED's have a distinct blue tinge to them, which didn't look authentic to the original model, so I swopped them out for some warm whites, instead. They give a much more pleasing, retro look to the model. So with that all clear in my mind, I could of just pressed ahead with construction at this point. However, that's not what I did, because something was bothering me. In my review, I mentioned that the surface detail was a bit on the heavy side. Well, the more I looked at it, the less I liked it. For the most part, the original studio model had a completely smooth surface. There are 3 concentric rings scribed into the underside of the saucer, but that is pretty much it, as far as surface detail went. Photos of the original model, (before restoration) show the upper saucer has a very feint penciled-in grid pattern drawn on to the surface, but the Revell model is far too exaggerated in this area. So, there was only one thing for it. I gave all the exterior surfaces a coat of automotive spray filler, which is a sand-able high build primer. I used this as a barrier coat for what was to follow. So, starting with the upper saucer, I made a plastic card spatula and took a deep breath. Stand back peeps... I've got a big tube of filler and I'm not afraid to use it. Now, just a word of warning here. If you planning to do something like this, then make sure you work in a well ventilated area, because this amount of car filler chucks off a fair amount of stink and it gets right up yer nostrils. Needlees to say, when you sand it, then make sure you use lots of water to cut down on all that dust, as well. Speaking of sanding, this 3M stuff is great and it sands beautifully, but don't kid yourself into thinking it's easy. It still takes elbow grease and your going to be doing a lot of repetitive fill, sand, prime, inspect and repeat. You can see in the pic above that I ended up sanding off the raised bases for the left and right nav lights. As far as I can tell from reference shots, they aren't there on the big studio model, which is handy because they just get in the way when you're trying to sand all that filler down. Once I was generally happy with the surface finish, I stuck the bridge on and blended that in. A coat of primer revealed that a little more work was needed, though. I'm very happy with the upper saucer now, though. It's a pretty prominent area of the finished ship, so I wanted a very smooth, blemish free finish here. As it turned out, this was one of the easier parts to do. The underside of the saucer was trickier, because of the need to retain those 3 concentric rings. I ended up masking the outermost ring and filling everything outboard of this. Then the masking was removed and the inner portions were done, one at a time, masking each ring as I went. Then the whole lot was sanded down. Again, I had to go through more than a few cycles of filling, sanding, priming and inspecting, until I got an acceptable finish. I took a scriber and deepened the 3 rings, as the were getting filled with the continuing applications of spray filler. I used some Mr Surfacer around the rings, as well, to help tidy things up. I got to a point where I got it looking about as good as I thought I could get it. So I laid on 2 or 3 more coats of the filler primer. This was then wet sanded with some 800 and 1200 wet and dry. This smooths the surface out and and gets rid of any last hint of those panel lines. Then it was given a good coat of grey primer. The Warp engines were a relatively easy job, but they still took about 4 rounds of filling and sanding. I was concerned about obliterating the grille detail that features on the inside of each engine, with the repeated primer coats, so I wound up masking these grilles up, to protect them. I thought that the secondary hull halves would be fairly easy, but they turned out to be quite tricky, as well. Initially, I masked either side of each panel line, and then applied my filler, to cut down on the amount of sanding that would be required. I soon discovered a bit of an issue with the moulding here, though. After sanding down and then priming, I noticed that the surface of the ship, on either side of certain panel lines, was actually moulded to different heights. This gave the surface a stepped look, when you looked along it's length. I wound up going very aggressive with my sanding grits, in order to smooth the surface out. After a few cycles though, she now looks a lot better and has a much smoother surface finish. You may also notice that I filled the rearmost stand hole, as well. I'm not going to be using the kit supplied stand, so the rear hole is now redundant. So that brings me up to date. As I said, it's taken a bit longer than I originally estimated, but I think the work was worth it. It wasn't particularly difficult, just time consuming. I ended up doing most of the sanding work in the living room (remember, wet sanding over lots of old newspaper). I could plonk myself down with the telly on, or with some music playing and just get busy sanding. I just took my time, however long was needed and worked slowly and methodically. I know we all have a bit of a moan when we have to do a significant amount of filling and sanding, but in truth, I found this quite therapeutic and I hope I'll end up with a much better looking model now. One other thing I'd like to mention. After doing a bit of research, I don't believe Revell have based their Enterprise kit on the original 11 ft studio model, built in the 60's. As with their Klingon Cruiser, I think this kit is based on the smaller (and more recent) Enterprise model that was built by Greg Jein for the DS9 "Trials and Tribble-ations" episode. His model features the grid line detail and also has the flat outer edge to the underside of the saucer, as the kit has. The markings on the underside of the secondary hull, also match the markings in the kit, with the white square on the decal sheet (whereas it is grey on the 11 ft model). I feel this goes a way to explain a number of issues that have been brought up with this kit. Maybe the issue is just simply what reference material Paramount made available to Revell, when they were designing the kit. Anyhoo, next up is a bit of paint, installing the windows and then we can start getting the lighting fitted.
-
HI,CHAPS, oh no it hasna got the poower, captain? http://news.sky.com/story/1106409/star-trek-stars-ashes-to-head-into-space cheers Don
-
 Well after a manic week last week we only have just over 30 kits left into stock..... http://www.models4hobby.co.uk/Revell-Model-Kit-STAR-TREK-into-Darkness-USS-Enterprise-NCC-1701-04882.html Any questions just shout we've had a few customers walk in last week and were expecting more soon after these have gone out.
 -
 The much anticipated Revell USS Enterprise from the forthcoming "Into Darkness" film is now in stock. http://www.wonderlandmodels.com/products/revell-1500-star-trek-uss-enterprise-ncc-1701-dark/ At 1/500th scale this is 58.8 cm long and , according to the instructions, is capable of being adapted for internal lights. Best of all we are currently offering the kit at 20% off the 29.99 RRP at £23.99
 -
We have seen a lot of interest in the new Revell 1/500 kit of the USS Enterprise from the new "Star Trek Into Darkness" film. The kit is due for release in May and to celebrate the launch we are giving away one of these kits. Just follow this link http://woobox.com/t9cjnj to find out more and enter the competition.