Search the Community
Showing results for tags 'Seaplane'.
-
 A build from 9 years ago: After the Japanese Hansa with Rising Decals J-BIRDs decoration posted here: The limousine conversion (also inspired by the Arawasi magazine) was typical of the time when passenger carrying was starting to be taken more seriously. The pilot was exposed to the elements and the passengers usually sat face to face inside the enclosure, being an inheritance from the horse-driven road coach configuration. This arrangement pioneered the passenger transport before the now standard cabin started to dominate the field. The conversion was applied to pre-existing types that for one reason or another seemed suitable for the adaptation, being mostly military surplus or old types that were given a stretch on their life-span. There were many of such conversions, but I found only one photo on the Net depicting the plane with the registration J-BCAL. This time though the decals had to be home-made. The profile published in the same Arawasi magazine that featured the subject of the previous article is a good general guide, but compared to the photo shows a couple minor inaccuracies, like the exhaust arrangement and a slight difference in the windows of the passenger cabin. Again the Eastern Express re-issue of the Toko kit was used with the transformations already depicted in the previous article, plus the “limo” canopy. The kit prop was used this time, since J-BCAL had a two-blade prop. Different exhausts were fabricated too and of course besides removing the front fuselage, the aft position area had to be removed too. A wood plug was carved and used to vacuform the passengers’ canopy. Similar and yet different to the other Hansa, with the extra appeal of the lumpy proto-cabin
- 5 replies
-
- 28
-

-

-
- Hansa Brandenburg W.29
- seaplane
- (and 1 more)
-
A build from 9 years ago: It is not a common occurrence that decal makers will release options for civil machines of kits that are sold as warplanes. When I saw the (made in Czech Republic) Rising Decals “J-Birds” sheet and a related article in the ARAWASI magazine #7 on Japanese Hansa Brandenburg W.29, I was all for it. I wish Arawasi would include more civil golden era plane content. The acquisition of a W.29 kit proved difficult, though. The MPM, TOKO, and Eastern Express kits were not as easy to obtain as I thought. The available resin kits were not an option for my modeling budget. Finally Steve K. kindly sent me the Eastern Express release from his stash and Christos Psarras from the soon-to-be Atlantis (Florida) helped me to get another for a future “limousine” version (this one not included in the decal sheet). The Eastern Express (ex TOKO) kit has a reasonable level of detail. It offers two different stabilizers and two rudders. As a bonus you get a dolly and a couple of supports to prop the model “on land”. The wing-fuselage joint needs a certain amount of shaving and sanding to get it to fit, but I won’t go on describing the kit since it was already reviewed on the Net. Its nose is not applicable to the Japanese versions (which were powered by a geared Hispano Suiza) thence some nose cosmetic surgery was in order. A new radiator, firewal, support pieces and a metal cover were made .An engine was scratchbuilt too as per images. The interior was enhanced a tad adding bulkheads and some other detail parts. The kit two-blade prop was replaced by a touched-up four-blade prop from Aeroclub. All building and accessories made, the model was painted with a whitish aluminum acrylic and Future applied in preparation for the decals. The decals are wonderful, but bear in mind that they are thin, as good decals should be. Handle them with care and patience. I used Micro Sol and Set, but my impression is that they may not need setting solution if you apply them to a gloss surface and take care of eliminating water and bubbles. Their color is dense and not translucent at all, they are sharply defined. Two decals folded on themselves as I was trying to apply them (again, they are thin) but adding water and carefully prodding them with a toothpick straighten them out. Be aware of the direction of the Japanese lettering, you may not notice if you put them upside-down if you don’t speak Japanese. In this case (one of the four machines you can dress with the decals) you have a couple of options regarding some small lettering. Study the provided leaflet beforehand. After decaling assembly of the main parts ensued and details were added. There were a number of Japanese Hansas on the civil register (J-BASL, J-BAAI, J-BAFI, etc.) and if you are interested on the type a little research will be in order. The Hansa has indeed “character”, further enhanced by a civil registration and livery it really stands out. Stay tuned for the “limousine” version. (the other HB W29 is here): Scratched engine: Modified interior: Scratched radiator:
-
A build from 9 years ago: The year is 1935. Wiley Post, renowned pilot, is putting together a hybrid plane made of a Lockheed Orion fuselage and the wing of a lesser known Lockheed type, the Explorer. The wing of the Explorer is about six feet longer in span than the original wing, and to add to that Wiley wants his plane to be able to land on water, so he attaches two EDO floats. To compensate for the increase in weight, a beefed-up power plant replaces the original one. People at Lockheed apparently weren’t exactly thrilled about those modifications at the time. Companion in his adventure is the no less renowned Will Rogers, comedian, humorist, writer and actor. The flight, thought as a way to explore possible routes to Russia and to provide writing material for Rogers, unfortunately ends in disaster in Alaska with the loss of the two lives. The graceful lines of the Orion are indeed pleasant enough, but with the longer wing and the floats, the total becomes more than the sum of its parts, if you allow me this Gestaltean digression. I got the Special Hobby Orion release as a starting point. I am glad manufacturers are venturing with iconic civilian releases, and I hope it is a trend that will continue. This kit has been in the market for a while and has been reviewed plentifully, so I won’t abound in details. Suffice to say that it is a short-run release with a large number of resin bits and vac canopy included, good cockpit detail, no cabin detail, butt joints and exuberant panel lines. A nice set of decals (that went unused for this model) completes the package. For a moment I considered using the kit’s wing, splicing it and adding a center section, but the work surely would have been long and tiring, and the wheel area had to be deleted anyway, so I opted instead for scratching a new wing. The floats were no problem, since Khee-Kha Art Products from Alaska -besides its range of bushplane vacuformed kits- has a wonderful, well made and well detailed range of resin EDO floats. I ordered the J-5300 (based on masters produced originally by Jim Schubert) from them. They came with the water rudders, control arms and cleats, all well detailed and flawlessly cast. I have used Khee-Kha’s products before and was extremely pleased with them and their customer service. So I had the Orion’s kit fuselage, Khee-Kha’s floats and the scratch-built wing. Some reports state the interior of the plane lodged quite a bit of cargo; in order to do that it is probable that some seats were removed, but lacking references on the matter I opted to paint the cabin matt black. The resin engine that comes with the kit is very nice, and given the fact that in this particular machine the engine is covered by a frontal plate used to reduce airflow in winter or cold climates, I decided to save the resin engine and swap it for a good white metal one that had a little less detail. You get a spare cylinder for the resin engine, but you get exactly the number of injected clear windows you need for the cabin, in spite of the fact that they were molded longer than necessary and that you have to tailor them to fit –as indicated in the instructions-. Guess who lost a window to the “twing” dimension and ended up making one from a cd cover? It would be nice if the manufacturers would add a spare part when you have multiples, like in struts, seats, etc. I am sure the cost should not be impacted too much, and will give the modeler a second chance when minute parts jump into the “twing” and “twang” dimensions. As it is almost invariably the case with resin interiors you have to spend a couple hours trying to make two objects occupy the same space at the same time, which, as anybody knows, is a physics’ impossibility (although apparently not for some manufacturers). Once the fuselage was closed a missing luggage hatch was added, and an air intake was glued to the right-hand side of the cowl. The fit of the scratch wing was adjusted and before gluing it the wing was given sparse surface detail. The locations for the float struts, Pitot, landing lights and nav lights were prepared. Some hoisting lugs and bumps underneath were added at this point too. Floats were given the right track (as per Khee-Kha instructions), bridged with two brass airfoiled struts (from “Strutz”), and the inverted “V” upright struts were also fixed to facilitate ulterior joining with the wing (after painting, since they were different colors). Once the main parts were put together the puttying and sanding cycle ensued, the task I unfortunately enjoy the least. Well, it is not that “I enjoy it the least”, actually I really don’t like it. More so, I blatantly hate it. Once the primer stage arrived I coated lightly some areas of the model and heavily some others (on the fuselage) in an attempt to subdue the too prominent panel lines. Now, I must warn you here about a little known law of physics, the infamous Pugetian Principle. It states that when you don’t want to cover your beautiful panel lines, they will be utterly obliterated at the slightest pass of the primer, but when you want them to be less obvious or at least fade a bit they will resist any kind of overcoat you can throw at them, no matter how thick. The Orion/Explorer hybrid was overall red with silver/aluminum floats, registrations, trim and tail marks. I painted the silver/aluminum color with a lacquer and coated it with Future in preparation for the subsequent actions. My plan was to cut masks for the registrations, and they came up so so. Then again to the rescue came Christos Psarras and his doggy-dogs of Florida with the silver decals. He saved my two last projects with his kind generosity. Again, as with the Clark GA-43, I used some CMK navigation lights. They are good, although a tad expensive for my pocket. Some of them, usually the bigger ones, for some obscure reason, are mounted in flat, rectangular-section stalks, instead of the round thin stalks used for the smaller lights. This makes mounting them a pain in the neck. Why they are not all of them mounted in round-section stalks has no logic to me, since it would make installing them in a previously-drilled hole a breeze. Cutting them out of the useless stalks and then trying to glue them I lost four to the Twang dimension. Once the main sub-assemblies were ready they were put together with a sigh of relief. I added the home-made Venturis and then started to peel-off the window masks. Or try too. You see, I decided to use again the Mr. Masking Sol Neo, in spite of a not pleasant experience with the Vultee V-1. What I can say now is that my very short acquaintance –to call it friendship would be indeed excessive- with this product is hereby terminated. The mask became –because may be for the use of primers- a sort of gooey ectoplasmatic blob that resisted removal and could make the delights of a science fiction B movie producer. I was not completely successful in the removal what didn’t want to ruin the surroundings using a harsh product. The canopy was added and its frames were represented by painted decals. Then the Pitot and the walkway were positioned and it was time to seat back after the intensive ride. All in all not a pharaonic enterprise thanks to the readily available Khee-Kha floats and Orion kit. You only need to add that wing. And a few hours work. I hope Wiley is smiling somewhere. I would like to thank (the late) Jim Schubert, Lars Opland and Christos Psarras for their generous help.
- 13 replies
-
- 29
-
-
- Lockheed Orion/Explorer Hybrid
- Wiley Post
- (and 1 more)
-
A build from 11 years ago: What would have been of us without the 60’s… The Beatles, the Mattel Vac-U-Form, so much good stuff. But before the 60’s there were the 50’s. And before the 50’s, in case you didn’t notice, were the 40’s. And the Eldred Flyer’s Dream was born exactly then. In 1946. Many would argue that Eldred’s creation is not a Flyer’s Dream, but a Flyer’s Nightmare. There will always be those who are impervious to beauty. The Eldred was apparently impervious too, to criticism and also to water. If, as many of you apparently do, you think I am a shameless generator of apocryphal stories and planes, just have a look at this one, thanks to Youtube (and to the gentleman that posted it): http://www.youtube.com/watch?v=pvVS97dmVYQ As you probably guessed, there are no three-views for this clunky baby; so I had to make mines. They self-destructed after the well-known five seconds period. The model was made utilizing the best cutting edge technology available, namely the Mattel Vacuform Psychedelic contraption. I used it already in previous projects, as many of you know, but this is the first time I made a whole fuselage shell out of it, not left side and right side, but bottom and top. As you will discern from the accompanying images, the lower part was made of white styrene, while the top was made of clear styrene for reasons that will also become clear -no pun intended- later. The technique was inspired by the contemplation (and avid ingestion) of Argentinean empanadas. And as convenient filling some interior was fabricated. The floats came –as well again as for previous projects- from the Aeroclub Models generic vac float sheet. Some little tweaking was necessary to get it right for the project. Given the unusual “W” dihedral arrangement –no, it is not for “Weird”- and the car-like fuselage pod, this creature was referred to as a “StukaBaker” by enthusiast Richard Weber. Now, tell me, isn’t it the Mattel Vac-U-Forming a psychedelic experience? Escape to paradise in your Eldred Flyer’s Dream. I did!
- 6 replies
-
- 17
-
-
-
- Eldred Flyers Dream
- seaplane
- (and 1 more)
-
A build from 8 years ago, related to the thread of my model of the Tupolev ANT-25. Classic planes from the Golden Age of aviation have a charm that increases with time, as it should be with classics. After finishing the Clark GA-43, it seemed natural that the Vultee V-1 would follow, as they share some characteristics, not being the least important their remarkable aesthetics. They had the same weight, were single-engine cantilever low wing monoplanes and featured modern metal monocoque fuselages. The Clark could carry ten passengers and the Vultee 8. Although aware of the Special Hobby release, I choose to exhume from my stash the Execuform vac. As described in the Clark GA-43 article, these are simple molds that should be regarded as a white canvas to express yourself. Once the research stage started, one machine immediately caught my attention: the V-1AS variant that Russian pilot Levanevsky and navigator Levchenko flew to Moscow from California -where I live- via Alaska and Siberia in 1939 (CCCP-H208 in Cyrillic). For this version a new vertical stabilizer, front cowl and floats were needed. Fortunately adequate vac floats were found in the spare parts’ bank from the same manufacturer’s Clark GA-43. The kit I had was purchased some time ago from an online vendor specialized in rare kits, since at the time I wasn’t aware that Execuform kits are now available from the manufacturer. Nevertheless, mine included an epoxy engine and prop that used to come with the kit before. Since the plane I was modeling had a “winter” front cowl, which almost completely blocked the view of the engine, I included the one that came with the kit. The prop after some refinement was deemed usable, but I replaced it anyway for a metal one. In some photos the plane sports a chubby spinner. Plenty of images of the V-1AS can be found on the Net, and some color clues that in some cases are not entirely accurate. After some study the choice was a blue general color with red flying surfaces and trim, plus black rubber boots on all leading edges. Many attractive liveries can be chosen for the Vultee V-1, I counted at least twelve when browsing the Net. The American Airlines and the iconic Lady Peace come to mind. All these versions require some tweaking because they diverged in minor details. Strangely enough, the markings used for the plane modeled here are the western version of the original Russian Cyrillic CCCP (actually SSSR in western language); but the code H208 wasn’t translated as N208 as it should have been, being “H” Cyrillic for “N”. Construction started by marking, scoring and separating the parts from the backing sheet, then sanding and adjusting carefully. Locating and opening windows followed, and then the interior structure was scratched from leftovers of the same kit, all of that depicted on the customary in-process photos. It is worth of note that in the Russian Vultee, although it flew 10,000 miles, the supplementary fuel tanks were in the wings, not in the fuselage as in Lady Peace. N-208 had the full eight cabin seats compliment. The bathroom was also scratched and even provided with a toilet roll for the long trip. All the cockpit and cabin detail, as it happens frequently, would be almost hidden once the fuselage halves are glued together. A vertical stabilizer was as said fabricated, considering that modifying the kit’s one would have taken more time than making a new one. Departing from the Execuform arrangement I separated the stab parts in order to be able to deal first with the aft cone of the fuselage and then add the stab halves via a spar inserted through the fuselage. The wing halves were glued, and here Execuform devised a way to “embrace” the fuselage by gluing the wing halves and later cut the upper central section in order to lodge the fuselage. The joint will need attention. Styrene “Contrail” and brass “Struz” airfoiled struts were used to prepare the attaching structure for the floats; the later were trued and detailed as per photos. Bear in mind that although wearing floats this machine had the landing gear retracted, not deleted, since after reaching Russia it left the floats and reverted to wheels. After arriving to Moscow (where Nikita Khrushchev was present!) the plane was carefully examined by the Russian aviation industry, finding it remarkably modern and intelligently built and suggested that many of its features should be incorporated in Russian design and production. Once the interior was finished windows were inserted before closing the fuselage as described in the accompanying images. One by one they were cut and adjusted, because unlike men they were not created equal. You could super-glue very thin rubber pads to your broad tweezers in order to hold the window panes as you sand their edges to make them fit. I didn’t, and scratches were the result. Sometimes in these articles what it looks like a straight line from zero to model is actually a winding, meandering, puzzling scribble that involves a good number of boo-boos and their correction (or not). I had to do a few parts more than twice, blotched, marred, patched and so forth a number of times, so if it happens to you too, don’t feel alone. While the fuselage was drying, it was time for engraving the flying surfaces’ panel lines. I had a lot of fun filling and sanding the results of the over-exuberance of my scriber. A few exterior details were fabricated like the DF loop, carb air intake, “winter” front panel for the cowl, hatches, Pitot, Venturis, exhausts, nav lights and so forth. Especially tricky were the cockpit transparencies, due to the strange angles of the panes at the front and the lack of positive locking points. Four individual panes and some tweaking did the trick. The floats were primed with their struts and inspection covers already in place; the rudders, rudder posts, horns and “pulleys” were glued and then the floats were set aside. Same for the engine, cowl, prop and associated bits. The wing was fitted to the fuselage, then the stab halves, and then the vertical surfaces were removed and replaced by the scratched, bigger ones. Then it was the somewhat dull job of puttying, sanding, re-scribing, but all in good mood listening to the music of Fito Paez, Charlie Garcia and Spinetta. After a rather complicated masking/painting session to do the stripes and separate the colors the horizon looked better. A few minor decals were applied at this time on the prop and the vertical stabilizer. All the bits started to come together and flat black-sprayed decals were used for the de-icing boots. The floats’ rigging was done and tiny cleats that came with one of Khee-Kha’s sets of EDO floats were added (I ordered those detailed and impeccably cast floats for the next model, the Wiley Post’s Orion/Explorer hybrid –more on that matter later, stay tuned). A well-hearted fellow modeler and friend, Christos Psarras, sent me the white registrations decals. Thanks to him the model could be finally finished. Now the Vultee with its conspicuous shape is part of the ever-growing collection of hidden beauties of the Golden Age. (The model as said is 8 years old, the photos are not the best, I see that I dodged building a beaching trolley as I do now for such models, and I photographed the model on grass. Hope all these sins are forgiven)
- 16 replies
-
- 29
-
-
- Vultee V-1AS
- Vacuform
- (and 1 more)
-
A model from 5 years ago that I had the chance to recently photograph again. When Supermodel released the 1/72 CRDA Cant. Z506B Airone in 1986 little perhaps they knew that in 2012 (36 years after) it will still be around thanks to the re-release by Italeri. I bought the model during a modeling outing with one of my sons with the intention, as usual, of giving it a life in a more pleasant role, as a civil record aircraft. I was hesitant to convert the kit to the “C” (civil) series, which involved a number of challenges, a new fuselage to start with. So I was very happy to say the least when I found among my references that a “B” series machine (same as the kit) was taken off the production line at an early stage and converted to a long distance record machine with the I-LAMA registration. It flew from Cadiz, Spain to Caravelas, Brazil, establishing a record, but unfortunately when attempting to reach Africa in the return flight it crashed and only one crew member, Stoppani, survived and was eventually rescued. Some modifications are necessary in order to represent such machine. The most obvious being the elimination of all military parts, the removal of windows on the fuselage sides and the deletion of the glazing on the front and back of the gondola under the fuselage, plus new decals of course. Given the time the molds were created the Supermodel kit is not bad, but it surely benefits from some attention. Some surface details can be erased and redone, the interior improved and there is even an aftermarket photoetched set by RCR Models available if you wish to use it. The photoetched parts are good and extensive, although not all of them can be used for this specific modification. Its instructions are comprehensive and have a detailed parts’ map, but leave a lot of areas totally unclear. Folding diagrams are present, and detailed list of names and –in the real plane- uses for the parts, but not group assemblies; the photos are of bad quality. Although one complete seat supporting structure assembly is present, the other one is missing the pedals and its associated supports. No instrument panel photofilm is included, so I scanned the etched parts, pasted some instrument images on the corresponding places, made decals of them and placed the etched parts on top of the decals. Strange mix of good parts and disappointing instructions. Nevertheless, the set is useful and will do well in an otherwise crude kit interior. Just be prepared for a lot of head-scratching. I think that with the re-release of this kit by Italeri, RCR could at least include in future sets the missing parts and better images. I found only one color profile on the Net, with a few discrepancies with the few photos I got. Bear in mind that at least three liveries can be seen in photos, one has the tricolore on the rudder and not fuselage lines, other has no tricolore and has the fuselage lines, and the third has no tricolore and no lines, but only the registrations and the “I” on the rudder. None have the aft fuselage little round windows present in the kit. At the time the Z506 was built (as a civil plane prototype originally) it was a remarkable aircraft that conquered a notorious number of records. Its lines are not what you will call racy, but its clunkiness is of course what made me chose it. For those with a steady hand and strong heart, there is always the possibility of making a new fuselage and model the plethora of machines of the “C” series or the only land version which used the landing gear of the SIAI S81. They wore splendorous liveries. Fellow modeler Alex Bigey created a beauty (using partially a Broplan kit of the Z506C). You can not simply practice “surgery” on the kit’s fuselage to obtain the “C” version, since in the “C” the fuselage was wider –not to mention different viewed from the side too-. As soon as work started on the kit its understandable lack of detail became apparent, and a few refinements were practiced. There are ejector pin marks, some blobs here and there, ragged edges, not happily located sprue attachments and so forth. In my cleaning zealous I mistakenly erased some excrescences from the engine gondolas thinking that they were excess plastic when in fact they resulted to be locators for the engines and cowls; nothing terrible, though. The fuselage shells, following references, were given internal structure in the form of stringers, formers, seats, shelves and the like. The above-mentioned photoetched set completed the interior, although part of it is hardly visible once the model is finished. The kit compasses were replaced by scratch-made ones from clear rod. The glazing on the lower front fuselage has two options in the kit, for this plane you must use the “curved” one, which has to be smoothed out and painted with rest of the fuselage. The aft lower transparency comes faceted, so you have to scratch there a curved part as replacement or glue to the existing transparency some styrene or apply putty and round it out since in the 1/1 plane again this was curved metal fairing. I grouped the sub-assemblies as follows: the fuselage with wings and tail, the floats and associated struts and the cowls and associated parts. This facilitates the messy procedures of filing, puttying, sanding, scribing, priming, etc. and leads to a better handling during painting and decaling. The struts that connect the floats to the wing were adjusted and given metal pins. Gloss black enamel was airbrushed on everything and then different types of metal paint. A die was created to punch out inspection hatches from metal-sprayed decal stock. Application of Future followed to protect the metal finish and to provide a gloss surface for the home-made decals. The diagonal struts braces that connect the floats to the fuselage did not quite match the actual length of the gap, so new ones were measured and cut from Contrail styrene airfoiled stock. The clear display stand that comes with the kit was used to help position the parts and check their alignment, a clever addition to the kit. Miscellaneous detail was added (control cables, antenna loop, etc) and the model was finished. Many kits that sit around or are easily found can be converted to represent these remarkable civil planes without too much effort, giving the shelves and club/contest tables a necessary breath of fresh air. Thanks go to Fabrizio D’Isanto for his always enlightening help. Bibliography: AeroFan 1978-02 Ali d'Italia 5 - C.R.D.A. Cant Z506 Dimensione Cielo 5 - Bombardieri 2 The Pasta Should be Al Dente, by Giovanni Schubertini, Pugettoni Editore, 2011
- 11 replies
-
- 43
-
-
- Cant Z-506
- Seaplane
- (and 1 more)
-
The cumbersome and ungainly Hansa seaplanes family has nonetheless some charm and appeal, and I had build so far two on Japanese civil registrations some time ago, if of another Hansa denomination (W.29): Browsing the Net I found some images of a civil machine that flew for the Tiedemann tobacco company. Tiedemann had a very smart marketing department then, and the company owned a number of vehicles that wore the company's colors and symbols in very striking, well-produced and elegant schemes. Here the plane on Flickr: At some point they used for publicity purposes this Hansa W.33 seaplane that they named "Tiger" -that was by the way the company's mascot- that had on the tail the Norwegian colors, and on the fuselage the stripes of the tiger, that cunningly matched the colors of the company land vehicles, painted as "wrapped" on a number of carefully reproduced tobacco leaves of different hues. Looking for a suitable kit candidate I found the Broplan vacuum-formed offer. Broplan kits are not what you call affordable, and their accessories in injected plastic can only be described as crude. No decals either. The struts come molded, but four of the smaller struts are undefined. Broplan doesn't include a diagram with the correct lengths of those parts, vital for alignment. The plan included in the instructions is, for some unfathomable reason, not in 1/72 scale, so no measures or references can be taken from it. Many of those injected parts will be replaced with better parts anyway. On the other hand, the vacuum-formed parts are correctly molded, the plastic has a reasonable and even thickness, and reasonable surface detail is there. But hey, this is no mainstream kit of powerful manufacturer, so you have to make certain allowances, although let it be said: there are very good vacuformed kits, so the media is not an excuse. But enough: res, non verba; let's get at it. Two modifications are needed to convert this kit to the Tiedemann machine: 1) The nose has to be modified as the intended plane had an underslung radiator, a blanked front, another engine, and an open nose top. 2) The aft position was of course "civilianized" and had no scarf ring, therefore it's cleaner on the top following the natural shape of the fuselage, and having a half-round access door on the left side that was hinged at the bottom for the access of the passenger. Other minor changes in detail will apply, like prop and such. The package: Contents of the bag: Instructions: Surface detail on parts: The injected bits: Permanent marked used to trace parts contour. If you think that you may get confused, especially with the smaller parts, you can use the permanent marker to put their numbers (from the instructions sheet) or name on their internal surfaces: Some will need additional cuts from inside: Parts separated from backing sheet: The injected bits plus clear material for windshields: Parts separated: Cleaned up: Although I will not use this engine I will assemble it for the sake of review: Kind of rough: Here is why you need that permanent marker line, to know where to stop sanding: Vacs require careful, measured and extensive sanding to look right: Thin trailing edges are the goal: Sanding of parts up to the marker line completed: The parts: Changes needed here for this version: Some gluing begins:
- 85 replies
-
- 15
-
-
Here is the completed model of the Barkley-Grow in its seaplane configuration. For the step-by-step building article please go to the WiP post: The kit presents only the basic shapes, you have to fabricate or provide everything else: cockpit, cabin, exterior details, decals, engines, etc. This one will surely help you develop those modeling skills! I used a set from Arctic Decals, which worked perfectly as usual. This is a nicely-shaped plane that has many possible finishing schemes, and can also be built on skis or wheels. It takes some time, but you can make a pleasant model from it. And you won't see this one around much, that's for sure!
- 21 replies
-
- 35
-
-
-
- Barkley-Grow
- seaplane
- (and 1 more)
-
hi All, finally got round to starting my Iris, as you already know Jockney is doing a very similar Contrail Perth. All parts now snapped from the plastic and the two halves of the fuselage sanded! Doesn't sound much but it's a start! Someone asked about Contrail v Sanger versions of these kits, the answer is Contrail as the Sanger ones don't come with any strut material, you have to make your own. If only Aeroclub still had some....
- 88 replies
-
- 14
-
-
- Floatplane
- seaplane
- (and 1 more)
-
 Fresh off the bench...Eastern Express/TOKO Hansa Brandenburg W.29...I built this kit years ago and it was good to revisit this interesting seaplane. The decals are Americal/Gryphon Kriegsmarine and are a much better color match than those in the box. Paints are Mister Kit German Naval Light Blue Grey for the fuselage and assorted Vallejo colors for the rest (greys, wood, etc...) varnished bits are Tamiya Clear Yellow over Vallejo Wood. I found the Mister Kit worked well over a light grey primer. The kit, for some reason, was kind of a dog although it finally came together easily with a few additions of putty, the usual filling along seams and some sanding. It was those large crosses I didn't like. Yes...I know, there are many inaccuracies with this kit as mentioned all over the web, but what the heck...I have to draw the line somewhere! I want to build eventually. I cannot continuously fall down the rabbit hole of historical OCD! Exhaust pipes and support struts (the kit pieces didn't fit and only 5 of the 6 pipes were supplied!) are scratched from Evergreen stock. The windscreen is from the spares box. I like it and it makes a nice addition to the shelves! --John
- 5 replies
-
- 17
-
-
- Hansa Brandenburg
- Eastern Express
- (and 1 more)
-
Hi Guies, wish all of you a happy new Year. I would like to show you the last Bird, i got completed in 2016. It`s another replacing build for my Seeplane Section, it`s the, quite old, Kit of Supermodell`s BV-138, in Revell-Version. If anyone likes to build this Bird, he should use this Version, because of the superb Decals. But be aware: It´s quite a big "Sanding Monster", nearly big as the Matchbox DO 18, i did several Month before. Paints are above RLM 72+73 from Agama, below RLM 65 from Humbrol, done, as allways by brush. I replaced the MG 131 in top defence position, with a better one from the stash, and replaced the tubes of the other two guns with brass ones. I hope you like the result. Any comments are warmly welcome. Best regards Stefan
-
 Revell 1/32 Arado AR196A-3 Seaplane "FINAL REVEAL!!": Hello Guys, Following on from my "Build Update #6" posting, I assembled the canopy onto the fuselage, attached an EZ-Line antenna, glued all the light lenses into their locations, glued the pitot tube and counter-balance weights onto the underside of the wings, along with door handles on the canopy frame sections, and, fitted the engine cowlings and engine bay doors in their open positions to complete her!! So, here are the "Final Reveal" images of my completed Arado AR196A-3...I hope you enjoy the views as much as I enjoyed building her! And, forgive me for the number of photos that I have posted, I couldn't make my mind up which ones to select and it was taking me too long to choose, so in the end, I just uploaded all of the photos. Well, there she is. I hope you enjoyed the views as much as I enjoyed building this fabulous kit, which I must say, is fabulous value for money! Now, I have to start designing and planning part two of this build, which will be the diorama to set this plane into. I have 4 ideas presently "floating" around my head (no pun intended), but first, I need to sketch them all out and calculate my material requirements and costs before deciding which design idea I go with. I'm a little anxious as I've never built a diorama before and have no clue where to start, so, I guess watching some fellow modelers "How To" vids are my next step! If you didn't see my "Build Thread" for this model, here is the link to it: http://www.britmodeller.com/forums/index.php?/topic/234980467-revell-132-arado-ar196a-3-seaplane-my-first-post/ In the mean-time, if you'd like to watch my "Final Reveal" YouTube video for this plane build, here is the link to it: https://youtu.be/ZRKU-k-M-BE And, on my YouTube channel you can find my "In-Box-Review" and "Build Update" Videos, for this build, too: "In-Box-Review" video link: https://youtu.be/MxfUpfYJDyU "Build Update #1" video link: https://youtu.be/nJ4rEbxFcv8 "Build Update #2" video link: https://youtu.be/Z_NoWew9Qus "Build Update #3" video link: https://youtu.be/AUQsz__kKyE "Build Update #4" video link: https://youtu.be/FpnxQFUASbU "Build Update #5" video link: https://youtu.be/iyCPzT-H_wU Thanks again to everyone that has followed this build thread, and, for the kind and encouraging comments that you have left me, they are all greatly appreciated and keep me motivated to continue! Happy modeling guys! Have Fun! Cheers!! Martin
- 52 replies
-
- 39
-
-
Hello Everyone, I have just joined the forum and this is my first contribution to Britmodeller. I hope you enjoy this build thread? History: The Arado Ar 196 was a shipboard reconnaissance low-wing monoplane aircraft built by the German firm of Arado starting in 1936. The next year it was selected as the winner of a design contest and became the standard aircraft of the Kriegsmarine (German navy) throughout World War II. Design and development In 1933, the Kriegsmarine looked for a standardized shipboard reconnaissance aircraft. After a brief selection period, the Reichsluftfahrtministerium (German Air Ministry, RLM) decided on the Heinkel He 60 biplane. This was one of a line of developments of a basic biplane airframe that appeared as a number of floatplanes, trainers, and fighters. Deliveries started in a matter of months. By 1935, it was found that the He 60's performance was lacking and the RLM asked Heinkel to design its replacement. The result was the He 114. The first prototype was powered by the Daimler-Benz DB 600 inline engine, but it was clear that supplies of this engine would be limited and the production versions turned to the BMW 132 radial engine instead. The plane proved to have only slightly better performance than the He 60, and its sea-handling was poor. Rushed modifications resulted in a series of nine prototypes in an attempt to solve some of the problems, but they didn't help much. The Navy gave up, and the planes were eventually sold off to Romania, Spain and Sweden. In October 1936, the RLM asked for a He 114 replacement. The only stipulations were that it would use the BMW 132, and they wanted prototypes in both twin-float and single-float configurations. Designs were received from Dornier, Gotha, Arado and Focke-Wulf. Heinkel declined to tender, contending that the He 114 could still be made to work. With the exception of the Arado low-wing monoplane design, all were conventional biplanes. That gave the Arado better performance than any of the others and the RLM ordered four prototypes. The RLM was also rather conservative by nature, so they also ordered two of the Focke-Wulf Fw 62 design as a backup. It quickly became clear that the Arado would work effectively, and only four prototypes of the Fw 62 were built. The Ar 196 prototypes were all delivered in summer 1937, V1 (which flew in May) and V2 with twin floats as A models, and V3 and V4 on a single float as B models. Both versions demonstrated excellent water handling and there seemed to be little to decide one over the other. Since there was a possibility of the smaller outrigger floats on the B models "digging in", the twin-float A model was ordered into production. A single additional prototype, V5, was produced in November 1938 to test final changes. 10 A-0s were delivered in November and December 1938, with a single 7.92 mm (.312 in) MG 15 machine gun in the rear seat for defense. Five similarly equipped B-0s were also delivered to land-based squadrons. This was followed by 20 A-1 production models starting in June 1939, enough to equip the surface fleet. Starting in November, production switched to the heavier land-based A-2 model. It added shackles for two 50 kg (110 lb) bombs, two 20 mm MG FF cannons in the wings, and a 7.92 mm (.312 in) MG 17 machine gun in the cowling. The A-4 replaced it in December 1940, strengthening the airframe, adding another radio, and switching props to a VDM model. The apparently mis-numbered A-3, which had additional strengthening of the airframe, replaced the A-4. The final production version was the A-5 from 1943, which changed radios and cockpit instruments, and switched the rear gun to the much-improved MG 81Z. Overall, 541 Ar 196s (15 prototypes and 526 production models) were built before production ended in August 1944, about 100 of these from SNCA and Fokker plants. The Ar 196C was a proposed aerodynamically-refined version. The Ar 196C project was cancelled in 1941. Operational history An Ar 196 on board the German cruiser Admiral Hipper The plane was loved by its pilots, who found it handled well both in the air and on the water. With the loss of the German surface fleet, the A-1s were added to coastal squadrons and continued to fly reconnaissance missions and submarine hunts into late 1944. Two notable operations were the capture of HMS Seal, and the repeated interception of RAF Armstrong-Whitworth Whitley bombers. Although it was no match for a fighter, it was considerably better than its Allied counterparts, and generally considered the best of its class. Owing to its good handling on water, the Finnish Air Force utilized Ar 196s just for transporting and supplying special forces patrols behind enemy lines, landing on small lakes in remote areas. Several fully equipped soldiers were carried in the fuselage. Arado in Allied hands Arado AR196 naval reconnaissance floatplane in the collection of the Bulgarian Air Force Museum at the airport in Plovdiv. The aircraft is the pride of the director, who is seen in the foreground. Previously, this seaplane was at the Marinemuseum in Varna, but was returned to the Air Force Museum for lack of space The first Arado Ar 196 to fall into allied hands was an example belonging to the German cruiser Admiral Hipper, which was captured in Lyngstad, Eide, by a Norwegian Marinens Flyvebaatfabrikk M.F.11 seaplane of the Trøndelag naval district on 8 April 1940, at the dawn of the Norwegian Campaign. After being towed to Kristiansund by the torpedo boat HNoMS Sild, it was used against its former owners, flying with Norwegian markings. At 03:30 on 18 April, the Arado was evacuated to the UK by a Royal Norwegian Navy Air Service pilot. The plane was shortly thereafter crashed by a British pilot while on transit to the Helensburgh naval air base for testing. At the end of the war, at least one Arado Ar 196 was left at a Norwegian airfield and kept in use as a liaison aircraft by the Royal Norwegian Air Force for a year on the West coast. Former military operators Bulgaria- Bulgarian Air Force Finland- Finnish Air Force Germany- Kriegsmarine Luftwaffe Norway - (captured)Royal Norwegian Navy Air Service, Royal Norwegian Air Force Soviet Union- Soviet Air Force, Soviet Naval Aviation Aircraft on display Ar 196 A-3An aircraft operated by the Bulgarian Air Force is displayed at the Museum of Aviation and the Air Force, Plovdiv, Bulgaria.Ar 196 A-5, Werknummer of 623 167An aircraft that formerly equipped the German cruiser Prinz Eugen is in storage at the Paul Garber Facility of the Smithsonian's National Air and Space Museum, and awaiting restoration. Ar 196 A-5, Werknummer of 623 183Another aircraft from the Prinz Eugen was displayed from 1949 to 1995 at the Naval Air Station Willow Grove, Pennsylvania and subsequently transferred to the National Naval Aviation Museum in Pensacola, Florida. The upper fuselage and canopy were damaged during transit, and it remained in storage awaiting restoration. In December 2012, it was packed into containers and shipped to Nordholz, Germany. Restoration began in August 2013, in time for that city's celebration for 100 years of German naval aviation. The plane, on long term loan from the National Naval Aviation Museum, will eventually be displayed at the Naval Air Wing 3 (Marinefliegergeschwader 3) headquarters at Nordholz Naval Airbase. The Aircraft Historical Museum, Sola, Norway, has on display an Ar 196 A-2 fuselage frame raised from the wreck of the German cruiser Blücher in Oslofjord. Another aircraft is known to lie in the Jonsvatnet, a lake near Trondheim in Norway. A number of wartime German aircraft have been recovered from the lake, but the Ar 196 remains undisturbed as its crew were killed when it crashed there in 1940 and it has the status of a War Grave. A wrecked Arado Ar 196 A-3, believed to be D1 + EH, was snagged by a fishing trawler off the island of Irakleia in 1982 at a depth of 91 meters. It was towed out of the fishing lanes to shallower waters (about 11 meters). The upside down plane, with fuselage and wings mostly intact, has become a popular spot for Scuba diving. Specifications (Ar 196 A-2) General characteristics Crew: Two (pilot and observer) Length: 11.0 m (36 ft 1 in) Wingspan: 12.4 m (40 ft 0 in) Height: 4.45 m (14 ft 7 in) Wing area: 28.4 m² (306 ft²) Empty weight: 2,990 kg (6,592 lb) Max. takeoff weight: 3,720 kg (8,200 lb) Powerplant: 1 × BMW 132K 9-cylinder radial engine, 960 PS (706 kW, 947 hp) Performance: Maximum speed: 311 km/h (193 mph) Range: 1,080 km (670 mi) Service ceiling: 7,010 m (23,000 ft) Rate of climb: 300 m/min (980 ft/min) Wing loading: 98.2 kg/m² (20.1 lb/ft²) Power/mass: 167 W/kg (0.101 hp/lb) Armament: Guns: 1 × 7.92 mm (0.312 in) MG 15 machine gun 1 × 7.92 mm (0.312 in) MG 17 machine gun 2 × 20 mm MG FF cannons Bombs: 2 × 50 kg (110 lb) bombs The Box and Artwork: A side panel of the box showing some of the many details included in this kit: Contained within the box are 13 grey sprues, one clear sprue, a 16 page black and white assembly, paint and decal instruction booklet and a sheet of cartograf decals. The grey sprues are divided into 5 clear polythene bags that are sealed with a strip of cellotape, and, the clear sprue is in a bag of its own. The decals are covered with a soft opaque paper sheet and inserted into the center pages of the instruction booklet. The box is one fabrication with access to the contents enabled by pulling open one of the end flaps. I much prefer the two piece box constructions with a base and a lid: Pages 2 + 3: Pages 4 + 5: Pages 6 + 7: Pages 8 + 9: Pages 10 + 11: Pages 12 + 13: Pages 14 + 15: Pages 1 + 16- the front and back pages: The 13 grey Sprues: A close up of some detail on one of the sprues: The clear sprue: And, finally, the Decal sheet: Overall, at first sight, these parts look very well engineered with zero flash, and if any, it's hardly noticeable. The details are nice and crisp, the molded parts are clean, free of warp and ejector pin marks in visible surfaces. The clear parts are thin, free of blemishes, gate blushing and/or splaying, air traps, knit and weld lines and no optical aberrations to disturb visual transparency and clarity. There's a ton of styrene for the price, the decals are very nice (cartograf), but the instructions look a little confusing in places...we'll see when we get to the build. That's my introduction done with, now onto the build! Thanks in advance for taking a look guys and commenting. Cheers, Martin
-
 My Kursk model is nearly finished, but my F-16 model seem more like a slow project, so I would like to delay that kit for now. I found this Roden kit for a seaplane version of the Pilatus Porter on Ebay for cheap, and thought I'd get lucky. Previously I had built a regular Turbo Porter with some photo etch, but I was a little unlucky I think with the clear part for the canopy, and to my surprise as I opened this other kit from Roden, the big clear part for the canopy looks much nicer. I started with the floaters and given the experience I gained from the other kit, I should be well prepared to end up with a great looking seaplane model. Below is a photo showing some thin bits of styrene, cut from a big sheet. That part went surprisingly well. I had previously added putty the the assembled floaters (or whatever it is called in English) and sanded away the excess putty (Vallejo putty) to get a flat top surface. I also sanded down the detail, so that is why I am adding the styrene. It was tempting to try custom cut pieces of photo etch that I had lying around, but I don't think I have tools for anything more than very rough cuts and minor work on the PE, so I am trying out using stryrene. Known issues / interesting things: • Nose part, front side, have bad molding. Will have to use a power tool again to shape a nice circular cavity, because of how the two big plastic parts don't have a properly molded shapes on the very front where the propeller goes in. • The kit comes with a lot of tiny parts for the rear seats, but this time, I will leave all those parts unused. • I think it is best to glue on the two red signal lights with super glue at the very end, after having painted the model, to get the best result. • Kit is missing the anti static wicks. Photos show these to be rubber like strings that bends a little downward when the airplane isn't moving. • Box art suggest that there is some wiring beneath the airplane for stabilizing the floater parts of the airplane. • I must remember to not glue on the spinner before having airbrushed the propeller blades. • Decals look ok, not Cartograph quality, but ok. I foresee a slight fitting issue for that big long decal, as it nears the spinner, where the fuselage surface seem to split in two directions. • Build instructions show no indication of any nose weight to be added, however I will add some behind the propeller just to be sure the model doesn't flip backwards. In order to be more accurate when working with the styrene, I carefully used the ruler to make sure cutting lines were at an angle, and to the proper length. That way I didn't have to redo any of this work. When making the rounded corners, I made sure to drag my coarse sanding stick seven times across the tip of the corner on all parts (just a straight line), to better end up with a coherent result. I used a medium sanding stick to actually create the rounding. Update: The light on each wing tip wasn't that well defined. Luckily, I managed to cut off the lights from some wing tip parts that isn't for the seaplane version. The old lights were sanded down, so only a flat stub was left, and then I glued on the loose parts for the cut off lights:
- 40 replies
-
- 3
-
-
- Pilatus Porter
- Roden
- (and 4 more)
-
Hello folks, This is my very first post to Britmodeller. I've been a member for a while now and look at everyone's contributions everyday but have never posted anything myself. This is a trial run to make sure I get it right so bear with me please So here goes!! I've chosen the kit that I've just finished - the Revell He115 Seaplane - see below: I seem to have been drawn to seaplanes over recent months and have also completed an Arado 196 (maybe posts for another day). Back to the He115. The kit shows its age and I believe it's the matchbox kit that Revell re-boxed. The kit fought me in so many ways and tested both my modeling skills and my patience - particularly sorting out the huge expanse of less than perfect cockpit glazing!! However, I really enjoyed building this kit and I think there's something quite therapeutic about wrestling pieces into place every now and then to keep our modelling minds fresh. I'll apologise for the photos as they were taken on my phone in fairly poor light - I'm no professional photographer - something I'm going to need to work on. Hope you enjoy and any feedback and comments will be greatly received.
- 20 replies
-
- 13
-
-
Having a break from painting (a wall not the plastic) I glanced at the stash and thought " why have I 3 biplanes and 2 Parsols when I hate rigging?"...and thus the story begins... Would it be sacrilege to wiff with a Matchbox Walrus? Probably not thanks to the Revell re-issue, albeit without the multicolored plastic we all love so dearly. ok so ideas now began to form in my crazy mind... Turn this: into this: From Turning to Burning. Or maybe this: Monoplane it (although Supermarine already beat me to this with the Seagull) Or a simpler: Just drop the rigging, and repaint in a new scheme wether alternative warbird or civi. Of course there other whacky options: 'gunship' - rockets, torpedos, turrets etc 'electric' - long before the EKA-3, predating the F3D-2Q, and making even the TBM-3Q seem positively modern. '2000' - well if Dornier can modernise their WW2 vintage boats... 'racer' - didn't a Walrus do a lap at Reno? Not looking like this... ...and I'm sure there more! Some things would be hampered by the rather bare stores box, others by the skill box - but nothing by the 'outside the box'
- 47 replies
-
- 6
-
-
- Supermarine
- Walrus
- (and 8 more)
-
Thought it was time I presented the result of my efforts to take an Airfix F2b and turn it into a Bristol Tourer Seaplane. It took far too long but has proved that I can take a kit and change it into something else using reasonable scratch building techniques. All of this was originally inspired by The Old Mans excellent WW1 scratch builds, I just thought I'd go half way to start with. Anyway the history of the Tourer is basically that at the end of WW1 manufacturers like Bristol had to diversify to stay in business and like Avro they looked to the civilian market and their new found fascination with flying. The tourer came in a number of types, two seat, three seat, open passenger compartment, closed in and a seaplane. There's a part WIP for anyone interested, I'm afraid I lost patience with posting progress; must give up the day job! http://www.britmodeller.com/forums/index.php?/topic/234969660-airfix-f2b-conversion-to-bristol-tourer-seaplane/?hl=%2Bbristol+%2Btourer There is a bit of a mistake which I have to confess, the logo is wrong! I had them specially made based on artwork I found on the internet and overlooked the fact that this is the later Bristol logo used after the late '20's. One day I might correct it but getting white bespoke decals made is not cheap!
- 22 replies
-
- 16
-
-
Hi, folks! Let me present you my next model. This model is long discontinued. I barely found it somewhere in Luxembourg. Unfortunately, 72nd scale is not able to pass all the techniques that I used to simulate aging and weathering paint. I drew inspiration from the work of one of our Greek colleagues, who made this gorgeous model in 48th scale. Unfortunately, the cockpit canopy was yellow in my set. I also added to the model a few homemade items.
-
 Ok here's my little beasty for this GB, a Sword 1/72 Curtiss S03C Seagull/Seamew. I have never built many seaplanes so wanted to give this build a go. I decided to just do something nice a simple, mainly because I have too many GB’s in progress or planned!!! This will be pretty much out of the box as a US Navy bird (or Seagull ) , though the markings are a bit simple, so may have to do a extra bit of research for that. It looks to be quite nicely moulded for a limited run model, plus the resin cockpit is nice as well. Sorry about cr#p photo. Have only found one fault and that is the edge of the rear window frame, it hasn’t been moulded correctly, but should be easy to fix. Will start doing little bits and pieces of this build as the other builds progress/finish, so will look forward to a nice a simple build.
- 34 replies
-
- 1
-
-
- Sword
- Seagull/Seamew
- (and 2 more)
-
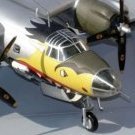
Nakajima A6M2-N Type 2 Fighter Seaplane Hasegawa 1:48 Japan was the only nation to produce and deliver into service float-equipped single-seat interceptor fighter seaplanes (the British Spitfire float adaptation did not progress beyond the experimental stage). When in 1940 the Japanese navy initiated the design of a new interceptor seaplane (the Kawanishi N1K1 Kyofu, or 'Rex'), the need was also expressed for a stopgap aircraft and the Nakajima Company was instructed in February 1941 to develop a float-equipped version of the excellent Mitsubishi A6M2 Zero naval interceptor. As evidence of Japan's long-standing plans for territorial expansion through the Pacific, it had been recognized that in the inevitable 'island-hopping' war there would be few ready-made air bases from which to provide air cover during the occupation of the smaller islands, and that the construction of runways would be impractical. Although equipped with almost a dozen aircraft-carriers, the Japanese would be unable to use them in support of every single island invasion. After removing the wheel landing gear and fairing over the wheel wells of a standard A6M2, Nakajima mounted a large float under the fuselage by means of a forward-raked central pylon and a pair of V-struts below the cockpit; two cantilever stabilizing floats were also mounted under the wings. The standard Zero gun armament was retained, and the first prototype was flown on 7 December 1941, the day on which the Japanese navy attacked Pearl Harbour. Entering production as the Nakajima A6M2-N and codenamed 'Rufe' by the Allies, the new fighter still displayed a creditable performance, being first issued to the Yokohama Kokutai and deployed to Tulagi in the Solomons where the Japanese had first landed during the Battle of the Coral Sea. However, almost all the 'Rufes' were destroyed in a strike on the seaplane base by 15 Grumman F4Fs from USS Wasp on 7 August 1942. Better success attended the 'Rufes' which fought in the later Aleutian campaign, but losses soared as soon as American fighter strength could be built up. During the final year of the war, when American heavy bombers and naval aircraft opened their great attacks on the Japanese homeland, 'Rufes' of the Otsu Kokutai, based on Lake Biwa, were thrown into the battle as interceptors in defence of Central Honshu but suffered very heavy losses. Total production of 'Rufe' amounted to 327 before being halted in September 1943. The Model The kit, the third re-issue, comes in a very attractive box, that Hasegawa seem to be very good at, with an artists representation of the aircraft in flight. Inside, the main sprues of grey styrene are all contained in a single poly bag, which, whilst not the best way of protecting the parts there doesn’t seem to be any noticeable damage. Fortunately the clear parts are contained in a separate bag. The parts are very well moulded, with no sign of flash and only a few moulding pips. It appears that since the real thing is based on a A6M Zero, Hasegawa have used their Zero to be the basis of this model. This means that there are quite a few spare parts, such as the lower wing, engine crankcase, undercarriage, drop tank and numerous smaller items. The build naturally starts with the cockpit, which is very nicely detailed, with the floor, fuselage sides, rear bulkhead, seat, rudder pedals, and joystick. The instrument panel has raised detail, but the dials are each provided as separate decals, which, with a blob of Kleer or gloss varnish will make them look quite realistic. Onto the panel the breaches of the fuselage guns are attached along with the gun sight. The completed assembly is then sandwiched between the fuselage halves as they’re joined together. The upper forward fuselage decking is then fitted, along with the machine gun muzzles. The construction of the engine is next. This is built up with the rear exhaust ring, the two banks of cylinders and the crankcase at the front, complete with pushrods. The engine is then attached to the front fuselage and covered by the one piece cowling onto which the two exhausts are attached. At this point the two single piece horizontal tailplanes are fitted. Before fitting the wing parts together, the holes for the bomb racks, if desired, need to be opened up. The instructions also say that the trim tab recessed panel lines, and a couple of other panel lines need to be filled on the upper wings. With the two upper parts attached to the single piece lower section the separate, clear navigation lights can be attached, along with what look like horn balances. The completed wing assembly is then attached to the fuselage. The two halves of the main floats are joined together with, according to the instructions, 16g of ballast in the nose section. The two, two piece wing floats are also assembled. The floats are then attached to their respective positions on the lower wing and fuselage, the main float, along with its support struts and boarding ladder. If the bombs are to be fitted and these are constructed of the bomb racks, crutch plates and the two piece bomb halves with separate horizontal fins. Once complete these can be attached to the lower wings. To complete the aircraft, the propeller, made up of separate hub, blades and spinner, is attached and the three piece canopy is fitted along with the aerial mast, which passes through the rear Perspex. TO complete the model there is a very nice dolly for the aircraft to sit on, this is made up of the main horizontal beams, support cradles, suspension mounting, axels and main wheels. The aircraft can then be posed on the dolly. Decals The decal sheet is nicely printed, in good register. Along with the standard Japanese markings there are the individual instruments and identification numbers for four aircraft from the Yokosuka Flying Group. Conclusion No matter that the kit has been released before it is still an interesting subject and will build into a very nice model. I imagine it will be subject to severe weathering for those that like that sort of thing, but that’s up to the individual modeller. Recommended. Amerang Hasegawa Review sample courtesy of UK distributors for