Search the Community
Showing results for tags 'SPITFIRE'.
-
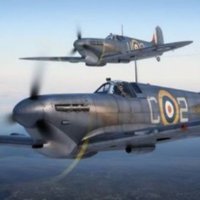
 Border Model is to release a 1/35th Supermarine Spitfire Mk.Vb kit - ref. BF004 Test shot pics. Source: https://www.facebook.com/rayxdow/posts/pfbid04xS58D4fcgaMmbAqPTjW5RTiGynVzEEu85eospWW7N6pq4tiEV8baKzugsuh3pgMl V.P.
 -
 Good day fellow modellers! I would like to present you my the latest model in a few words and a few more pictures. Criticisms, comments and suggestions are more than welcome. Spitfire Mk.Vb, 1/48 Eduard, 11149 (Eagle's Call Dual Combo) Pilot: Lt. Dominic S. Gentile, Debden-Essex/England, August 1942. Level of details: EXCELLENT! More suitable for a 1/32 scale! After famous Tamiya's Spitfire series in 1/32, the second place is certainly occupied by Eduard's Mk.V Spitfires! Accuracy: I did not make precise measurements, but I would say that Eduard has done a superb job here as well. On the Internet, didn't find any objections in this regard. And when we are talking about accuracy of the details, just worlds of praise. FIT: Almost flawless. First of all, I would like to point out that I am extremely satisfied with the fit! Parts with extremely complex geometry fall into place without need for a puty! I used puty in very small quantities at only 2 places: the upper cowling of the engine (given in two parts) and the connection of the lower wing with the fuselage. But Eduard's plastic made sure that everything was not ideal, which caused a slightly obtuse dihedral of the lower wings. The problem was easily solved by applying masking tape in order to stretch up wings to the right angle when assembling the body and the wings. Decals: A new type that gives the possibility of double treatment: as standard decals and as transfer decals. In both cases they worked great! If you prefer to peel off decal film, do it after 24 hours at least and after that (the peeling) immediately protect the decals with varnish. Decals have responded wonderfully to gunze's decal setting solutions. The box: Attractive with a brief history of RAF and USAAF units in which American pilots flew Mk.V Spitfires. There is also a review (of a few sentences) about each plane that is the subject of this Eduard’s boxing. The illustration is in the newer (already old) Eduard manner for limited editions - it's just a illustration of the plane (great one) with a symbolic, graphic background. Painting and weathering: I used Gunze C colors (standard RAF shades C361, C362, C363, C368) and the camouflage was done freehand (no masks at all). Weathering was done in the following order (conditionally): chrome silver (partly), chipping fluid, first layer of camouflage, marbling technique in several colors (used stencils for that), final camouflage, sponge technique, chipping the paint, wooden crayons, protective varnish, decals, protective varnish, powder pigments, protective varnish, panel wash (Tamiya), protective varnish, oil painting wash and final varnish. FINAL IMPRESSION: Absolutely for every recommendation! As far as I'm concerned, it's only the first in a row, and I'm not even an die hard fun of Spitfires! The model made for review purposes for online magazine Maketar plus (https://www.maketarplus.com/) and obtained by courtesy of Eduard. ...the few references photos (internet sources, for discussion purposes only): And "few" photos of details...
- 26 replies
-
- 63
-

-

-
Summer is not normally an active model building time for me but the recent damp weather has allowed me to actually finish something! In this case the Airfix 1/48 scale Spitfire Mk1. Having previously built the Hurricane and Me109 from the same stable I thought it would be nice to complete the BoB set of rivals. The kit itself was quite nicely detailed and went together easily with virtually no fit issues or filler. The only addition being a set of PE seatbelts. Paint was predominantly Vallejo Modelair with a little Tamiya acrylic here and there. For the first time I tried out the flexible masking putty when spraying the camo' and it went reasonably well with only a little touch up required - lessons learnt for next time. I decided to go with one of the kit options of a 222 Squadron machine from late August 1940 just because I liked it and I kept the weathering on the subtle side of things (I think/hope) but in keeping with how the machine would have been used. Anyway, here are the pictures and I hope you like it. Feel free to give tips and hints to improve the next one.
-
 I can't quite pin down when it started, but I think I may have developed a Spitfire acquisition problem. I think it happened when I bought a PR Mk.XI for the Recce and Scouting GB after joining the forum earlier this year, then followed it up with a build of an FR Mk.IXc in the same GB; I'd already restarted my modelling with a couple of Eduard Mk.XVIs before lockdown, followed by an Airfix Mk.I and an AZ Models Mk.IIa (LR) in 2020 when I paused the Eduard ones until after a house move (not wanting to knock off IFF aerials etc.). After finishing those, I acquired an Eduard Mk.IX and accidentally bought a Mk.22 in the local model shop, but didn't start either. It seemed like it was under control. Then I found and read @ModelingEdmontonian's Hawker Hurricanes Around The World thread, modelling more-or-less every non-RAF marking scheme of Hurricane. And I bought more Spitfires, and started thinking 'well, I've done one each in PRU blue, PRU pink, Temperate Land Scheme (with and without sky band), Day Fighter Scheme (with vestigial invasion stripes) and DFS (2TAF with C1 roundels on the upper wings) - what if I try and do something in each major RAF marking scheme?' So I bought an Eduard Mk.VIII, which still lies in the stash, thinking that I could add a SEAC colour scheme. Then I thought 'hmmm, I didn't make any Griffon-engined Spitfires when I was modelling in my youth, it'd be good to build a couple', and I started researching how to kit-bash a Mk.XII. Then I discovered Kingkit.co.uk. And then this happened. Ooops. The Admiral Spitfire Mk.24 probably has a prop that's too small (I've not measured it yet) so I'll make sure it's removable for if I ever find an aftermarket one. The Airfix Mk.22's prop will be replaced by a Freightdog one, and the original which will then find its way onto the Sword Mk.XIV (which will be converted to a Mk.XVIII - are you paying attention at the back?). One of the Seafire Mk.XVs (probably the Ventura, but maybe another Sword Mk.XV) will be turning into a Mk.XII, although I've just put a bid on fleabay for an Academy stumpy Mk.XIV and a Brigade Spitfire XII conversion kit which I might try on something. Griffon-wise, there are also Marks XIX, 45, 46 and 47 to consider at some point, although I'll probably draw the line at the Mk.IV/XX. Then there are the Merlin varieties to start thinking about... This will be a slow-burn, long-term project as I've been enjoying doing the GBs and have my eye on a couple which can't have a Spitfire or Seafire shoehorned into them, and will be used as a focus for my modelling rather than haring off to try different things. First thing is to finish the Mossie for the Airco & DeHavilland GB and the Mustang for the Southern Europe GB - then I'll probably start with the (hopefully) nice and simple Airfix Mk.22 to get the mojo going. Although, knowing me, it'll probably get started well before the other two are finished. Here's the current state of affairs, in poor lighting as the weather is currently dreadful. Here's looking forward to adding a few more before the year is out!
- 147 replies
-
- 28
-
-
-
 Hi Comrades! Here is my recently completed Spitfire IXe from Eduard "Operation Velveta" limited edition kit (with Techmod decals) Great kit! The model depicts the prototype at the end of 1949 with highly weathered look. No stencils, no antenna wire. Thanks for looking
 -
Hi Comrades! Here is my recently completed Spitfire IX. The kit is Hasegawa, decals from Eduard's special edition "Operation Velveta". The Spitfires in Tayeset 107 were from Italian surplus, so they had the non-cripped "c"-wing, unlikely to the Chech originated Spitfires from Tayeset 101. Thanks for looking
-
 Well here she is... one of the smallest kits I've built but definitely one of the nicest to assemble. The Eduard kit had a great reputation and it did not disappoint! Front end was obviously hacked away to reveal the Eduard 1/72 Merlin engine kit, which also went together nicely and looks great in this tiny scale. Everything was built OOB apart from the aftermarket decals for MH434, and the whip aerial and removal of a pair of cannons. The kit PE mirror atop the canopy was the wrong shape, so I scratchbuilt a rounded version. Bit fiddly, to be honest, but I got there in the end! All mods were to represent the modern MH434 aircraft. Paints were Vallejo acrylic (RAF Day fighters set) - which airbrushed beautifully, only let down by some dodgy masking by me! A bit of oil paint and Flory clay wash weathering finished it off. I can't resist a bit of diorama photography, which requires some extra bits & pieces. The hangar backdrop is Noy's Modern Fighter Hangar; the RAF Coningsby backdrop is from, I believe, Coastal Kits...self-adhesive vinyl print which I mounted onto some foam board. Assorted small tool bits are 00 scale from Goodwood Scenics and the stepladder is from Rusty Rails - both model railway suppliers. The personnel are ReedOak figures - amazingly detailed, especially for 1/72 scale. Land Rover is an Oxford Diecast 1/76. If I've left any background info out, please ask... someone asked for a thread on how I do the hangar and night diorama photography, so if that's of interest, I'll cover that in the diorama section? In the meantime thanks for reading and enjoy some more photos, please overlook the deficiencies in the model but I think I'm reaching the limit of what my eyes (and tweezers) can achieve in 1/72!!! And finally.... a couple of shots with a one penny coin, to show the scale of the kit/accessories!
- 26 replies
-
- 67
-
-
-
Supermarine Spitfire Mk.Vc BR294 GL-E, 185 Squadron, Hal Far, Malta, mid 1942 Subject; Supermarine Spitfire Mk.Vc (t), Merlin M46, twin Hispano Suiza 20mm cannons and four .303 Browning's. Built 17th April 1942, and transferred to 8 Maintenance Unit. Arrival in Malta 30th April 1942 (second Op Bowery delivery launched from USS Wasp and likely to have standard camo overpainted in transit), and crashed on landing at Hal Far on 3rd July 1942. De Havilland prop, fishtail exhaust stacks. The kit Manufacturer; Airfix Scale; 1/72 Aftermarket; Xtradecal Defenders of Malta set otherwise out of the box. Kit number; A02108. Extras; Prym Knitting Elastic for the antenna wires. Planned paints; Exterior; Standard supplied Dark Earth and Middle Stone 'A' type camo with Air Ministry Sky underside overpainted upper including spinner with Dark Blue Grey mix. Lower, (Air Ministry Sky) XF23 Light Blue, XF19 Sky Grey and XF2 Flat White mix. Upper, AK Real Colour RC292 RAF Middle Stone and RC287 RAF Dark Earth with RC295 RAF Extra Dark Sea Grey and XF8 Flat Blue mix oversprayed. AK Xtreme Metal Burnt Metal on exhaust stacks, Mr Metal Dark Iron and Aluminium for external detailing. Interior; AK Real Colour RC293 RAF Interior Grey Green, AK Xtreme Metal Aluminium and various Tamiya XF and Posca pens for detailing.
-
Hello gents, here's my fifth completion of the year, Kotare's 1/32 Spitfire Ia (Mid). I had a momentary sag when I realised I was on the final stages of this kit, the same way that you might when you realise you're on the last few pages of a book you were really enjoying and you don't want it to end. It's an expensive kit, for sure, but it's beautifully moulded and engineered, not so complex that it's difficult to build, doesn't require weeks, days or even hours of sanding, filling, scratchbuilding etc. so depending on what you enjoy about modelling this may not be the kit for you I had a couple of minor irritations - I didn't like the look of the landing gear leg attachments at all so I ended up fitting the landing gear legs before adding the upper wing... I wasn't too keen on adding the fuselage spine light before fixing the fuselage spine in place, but in fairness that was a good solution and I only had a bit of resentment due to the fact it meant I had to mask it before painting. Finally I wasn't terribly happy at having to shave off part of the cockpit door opening in order to have the door closed as if it were me who was the freak here and not those oddballs who want to leave the door hanging open The paints used were Colourcoats of course - for the strange interior green colour noted in the instructions I used ACRA08 Verde Mimetico 53192 which is a close eyeball match for the Humbrol 120 recommended in the instructions (I needn't have bothered, you literally can't see anything except the pilot's seat and armour if you have the cockpit closed, and I had painted those in ACRN28 RAF Interior Grey-Green as this was one of the optional colours noted in the instructions). Upper surface camouflage was ACRN09 Dark Green over ACRN10 Dark Earth and the undersurface camouflage was done in ACRN01 - Sky "S" Type. I wasn't really taken with any of the kit's markings options; Al Deere has always been a hero to me but I just don't like to see a Mk.I with a Rotol prop and spinner, plus the proportions of the fuselage roundel look strange (though they are accurate); Richard Hardy's aircraft is basically famous for being captured more or less intact which doesn't strike me as a great claim to fame, and the 610 Squadron Spitfire has the fuselage codes on wonky... I tell you building this kit I learned quite a lot about Spitfires (and I thought I already knew a fair bit but I was overestimating quite a lot as it turned out) and one of the things I learned is that I can get quite uptight about some strange things Anyway I ordered some aftermarket decals and used the ones for one of the 92 Squadron Spitfires from August 1940; it too has a misproportioned fuselage roundel but for some reason I like that one. I almost managed to snatch defeat from the jaws of victory by picking the model up to test fit the underwing pitot while the decals on the starboard side were still wet with decal setting solution: the serial and squadron code on that side both disattached themselves from the model and stuck as little crumpled decorations on my fingertips. By a stroke of extreme good luck, our late forum-buddy Silver Fox had sent me some years ago the 1/32 transfers from the Kagero Battle of Britain Part II set which included the same aircraft as an option - the stroke of the serial is slightly thinner and the grey of the squadron code a little darker than the individual aircraft letter, but I was happy to accept the trade-off for the save. Well, sorry for the ramble, if you made it this far, thanks for your attention Cheers, Stew
- 21 replies
-
- 52
-
-
-
Twenty one volumes of the Wingleader Photo Archive series. The new Typhoon book makes it 21 volumes! Still big original photos, still 'I never knew that!' text, and still £19.95. Check out the range at: www.wingleader.co.uk
-
 Hi folk's.the unplanned failure of the Heracles has me looking for another build to stretch the patience and skill's.Been on BM for ten years now and although I have posted a fair few silver finished builds never in that time have I attempted a kit bigger than 1/72 so here we go,my youngest and fellow BM member Luke has a growing stash of kits dedicated to aircraft of the Israeli Air Force mainly 1/48 Jets but just took delivery of Eduards Spitfire MKix with a half dozen options one really struck me and as it's not his chosen option I've nabbed the decals and picked up a kit in the form of Revells re-pop of Hasegawa's Mkix which despite it's well liked design seems to command little money on E-Bay and the like in fact £10 secured my kit. This is the chosen scheme. I bought some Vallejo metalics a while back which I have only used once so far on a 1/72 kit hope it works out in the bigger scale.
 -
When a couple of sets of etched and resin parts came back into stock from my Hannants watchlist, I accidentally bought a second reconnaissance Spitfire. In my defence, it could happen to anyone! It started out because I thought that it might be easier to sell the concept of a pink Spitfire to my other half, as my two small girls might be intrigued by it. Then I did some more research and found out that PRU pink was in fact very, very pale - almost white in fact - but I'd already latched onto the idea so bought it anyway! I'll be doing it as the well-known MK716 - I know loads of other models have been made of it, but I don't own one so I'm not that fussed that it's not uncommon A very minor bit of research shows it to have had some bleed-through of the stripes through the paint once it was overpainted again with pink later in 1944, so I might try to replicate that. The photos here also show it to be relatively mucky with some staining around the ejector ports as well as exhaust staining, so I'll try and replicate that too. It's planned to be another straight out of the box build, although I've got a couple of resin RAF pilots to hand (visible top left) and might use one of those...
- 29 replies
-
- 8
-
-
- Kovozávody Prostejov
- 1/72
- (and 1 more)
-
Hello all. I'm after a bit of info on the rearming procedure of an e wing spitfire. I know the outer two Brownings on c wing were rearmed from below the wing but what about the e wing where the new 0.5 Brownings sat in the spare Hispano slot? Were they rearmed from above? Thanks in advance Craig
-

Eduard 1:48 Spitfire Mk ix 'Cirecooks'
Sherlock888 posted a topic in Ready for Inspection - Aircraft
7 Hello everyone- this is my first post on this forum. I've been meaning to share here for a little while. I painted this using Vallejo model air and VMS gloss and matt varnish. I also used enamel panel line wash (grey) to accentuate detail. I had some serious issue with very feathered egdes during my freehand camo painting session. I now believe that this was PARTLY down to me not thinning correctly, but also, due to my 0.2 needle being bent or something, as I've since compared it with a brand new one and it sprays off centre! No idea why! Anyway, There are lots of mistakes but I won't mention them here... Anyway- I hope you like this and let me know what I should do differently on my next aircraft, which will be either: BF109 G2 or F6D/K (both from Eduard.) -
As a tribute to a recently deceased modeller on another forum, all modellers from that forum are being asked to build a Spitfire, as this was the last kit he built. My chosen model is the Mark VII High Altitude. ICM have done a good job with the kit, but the only colour references show the Spit in a medium grey livery with a flat light blue underside. My question is, was the Mk VII ever flown in a standard camouflage, or was it only used in the grey livery? Any information will be appreciated.
-
Hi all Being fortunate enough to live in the same city as the head office of Kotare Models, I received my pre-order delivery last Thursday evening. Decided, despite many other models on the bench, to move this one to the top - might even get it finished this year (since the birth of my daughter 8.5 years ago I've started many, finished 2....). Has been a pleasurable build so far, nothing out of the ordinary with putting it together. Only thing I have struck is very tight tolerances - so those familiar with Wingnut Wings will know to keep gluing surfaces free of paint. I used thin strips of Tamiya tape to mask areas that would be glued (bulkheads-to-floor for example). Spent a few hours painting, masking, then painting again. Not so sure on some of the colour call-outs - but knowing the people behind the model I'm sure the references and call-outs are accurate - just can't personally bring myself to paint the pilots armour plate black for example. Modelling is a lot about perception I guess (looks like a Spitfire, smells like, etc, etc - in my mind, early Spits have always been green-ish...). Anyway, here is where I'm at so far with the cockpit - a few things still to add, flat coat to apply overall and gloss details to be added to instrument panel. Also still to tension the cables (although I did debate the point of them given the limited visibility - used 0.2 braided fishing line coloured with a silver sharpie - slightly too large but it was either that or .1 which seemed a bit thin...). I've also assembled the wings, wheels, tailplane and fettled some other minor parts ready for final assembly. Cockpit painted with Tamiya paints, some mixed to the Kotare Models guidelines, some not. SMS Silver used for the fuselage. Mig/Ammo and Vallejo paints used for the details. Citadel washes used to cover up my mistakes... Changing cameras... Just goes to show how we can't trust colour images (let alone black and white war time images) for colour accuracy - same lighting, two cameras - one Canon, one FujiFilm - yet the tones, shadows, colour cast, etc, are completely different. Hence I model for enjoyment and don't fret too much about the colour shades and the correct number of rivets! Cheers Bob
-
Here is my entry for the group build, which is a Spitfire PR Mk XI, thought to be EN685. This aircraft was captured by the Germans and operated by 'Zirkus Rosarius' whose role was ro display captured allied aircraft to Luftwaffe units. The base kit is Hasegawa's Spitfire Mk IXc: I will dress up the cockpit with an Eduard cockpit Zoom set and will use the Aero Club Fuselage correction kit . To convert the Mk IX to the Mk XI I will be using the Airwaves conversion kit and and the Cutting Edge Zircus Rosarius Special Missions Part 3. (I have already built the Hawker Typhoon and the P-51B Mustang): Let the build commence!
- 31 replies
-
- 10
-