Search the Community
Showing results for tags 'Roden'.
-
Although the "Ole Bill" version of this kit has made an appearance in BM I don't thing anyone has done a WIP on the London General Omnibus version. To start the usual box and sprue shots Should be an interesting build. The decorations are a small waterslide decal sheet and two paper sheets of posters and destinations. The glazing is the small acetate sheet at bottom left.
-
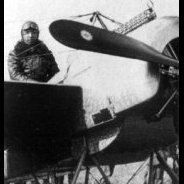
After the 1/32nd kits (link) Roden is to release in Autumn 2018 a 1/48th Cessna L-19/O-1 Bird Dog "Asian Service" kit - ref. 409 Source: http://www.roden.eu/HTML/framenews.htm Box art V.P.
-
Hi Guys This set is now available for the Roden kit, offering great more strength and a little more detail than the kit parts. These are in limited numbers for now as the brass casting company has now closed, due to the current situation. see the link below https://aerocraftmodels.bigcartel.com/product/cessna-l-19-o-1-bird-dog All stay safe and enjoy your modelling, Ali
-
Hello everyone! Set of Ukrainian company RODEN. I liked the set. No flash, weighted or other defects. The abutment of parts is good. The development of details is also on top. I have experience in assembling “sewing machines”. The painfully complex candibober was obtained during the construction process. The biplane box, even frayed, is a very delicate design. I had to drill the ends of the wings, use needles for a more durable dock. And the assembly order did not comply with the instructions. I wanted it to be possible, but I managed to do it. I would also like to dwell on the decals. We lay down easily, without problems on a glossy surface. However, it was surprising that silver appeared around the edges. When trying to bring her to mind, the cockade with the case generally just detached from it. Well, if so, I think I’ll remove the decals, make stencils, spray cockades and numbers. But it was not there. The rooms from the building did not want to be completely removed. I had to polish all my imitation. The wings were not touched, imitation of nervous tissue was applied in order to reduce the effect of applying matte varnish. As a rule, the instructions should include Liberty, but in fact the manufacturer is Rolls-Royce Eagle IV. I had to dodge. The interior of the model, despite the fact that it is quite difficult to see on the model, for stretching, pulling, and other “rigging”, raises concerns once again the brothers in the hands of the model. Plant materials were made of spandex, made of 0.3 mm copper rings, glued into plastic, painted with acrylic and oil paints. Stand - a free installation of a slice of a pear, slats, sifted pebbles, sand. Painted in oil. A model was assembled in the evenings from November last year, much of what was then remained non-embodied. I was satisfied. Photo at the end - construction, if anyone is interested. Paints were used by Mr.Hobby, Valejiio, art oil times of the USSR. Happy viewing. Regards, Mikhail
- 22 replies
-
- 42
-

-

-
 The future 1/144th Lockheed C-5B Galaxy kit - ref.330 - is now quoted as "in processing" in the Roden homepage. Also programmed C-5M Super Galaxy - ref.332 Source: http://www.roden.eu/HTML/models1.htm V.P.
 -
Since this is now taking most of my modelling time I thought I'd post a WIP thread. I'm building a Roden 1/48 DH4a in Aircraft Transport & Travel Livery Blue and Silver although opinion is divided as to wether it should be Black and Silver. I like hte blue so that's what I'm going to run with. First bit of assembley. It's a nice kit with sharp mouldings but everything is very thin and I had a lot of issues with alignments and fits. Not for beginners. Some prelimary paint work and breaking out the oil paints for some wood effects. Teeny tiny eylets (1mm OD) attached to the undercariage for rigging wires Rigging of same in progress Wheels on definitely needs a bit of cleaning up and retouching. Vertcal tail added. I'd have put the upper desk on the Cat (my avatar btw, hes 20 so I suppose I have to forgive him his foibles) knocked it off the desk and I can't find it. Not the rug in the room I model in is a very short pile so it's more space time anomaly than carpet monster. However as the Roden kit comes with all the parts for the DH4 bomber ( and about 10 other variants) , if I can't find the decking I can always use the one from that version with just a little cutting.
-
C-5M Super Galaxy (332) 1:144 Roden The competition to design the next generation of oversize load carrying aircraft began in the early 60s with concepts and proposals, with Lockheed eventually winning the competition due to the projected lower total cost of the project (ha!). The Lockheed design had the T-tail that we see today, and a quartet of high-bypass GE engines were selected to give the required range and thrust, but very soon after the type entered service, problems occurred that meant expensive changes were needed to make the fleet airworthy again. Cost overruns were also an issue, and this caused Lockheed some serious financial concerns that threatened their stability, as well as questions as to the honesty of some of the decisions and their makers. The –B model made some improvements to the original design, but the major improvement was the Reliability Enhancement and Re-engining Program (RERP) discussed late in the last millennium and implemented in the early 2000s, which put many existing airframes through the rebuilding process, giving them new energy-efficient engines, a modern glass cockpit and improved avionics. This also improved many other aspects of the airframe and gave over 20% additional power, increasing their cargo capacity accordingly. Designated the C-5M and given the name Super Galaxy to differentiate them, these are the airframes that you will see in service today, side-by-side with the C-17 and Hercules fleets. The Super Galaxy is expected to be in service with the US Air Force until 2040 at the earliest, and attempts are already underway to further enhance the aircraft's performance and efficiency. The Kit There have been a few kits in various scales over the years, but nothing recent that you could consider mainstream in a reasonable scale and in injection styrene. Until Roden announced their kit a few years back, and now we have the latest variant of this behemoth, the Super Galaxy. The kit arrives in a long box by necessity due to the length of the fuselage, with a nice painting of a C-5M heading toward us in landing configuration. Inside is a bunch of mid grey styrene, although not as much as you might expect and as many have already noted, there is no interior other than the front cockpit, which has been carried over into this edition. There are twelve sprues of varying sizes, plus the two fuselage halves, which have been removed from their sprues and have a little flash around the cockpit opening and the gear bay apertures. They're the work of moments to remove however, and of no concern. There is also a small clear sprue, a fairly large decal sheet, and of course the instruction booklet along with a separate painting and markings sheet. Construction begins with the engines, which have fan details moulded in, and are handed in pairs as you'd expect. They are then shown being fitted to the wings, which are each made up from top and bottom halves, and have the slat actuators slotted in along the leading edge, and an elevator trapped between the two halves. There are some shallow sink-marks along the trailing edges of the wings where the flap bay upstands are moulded, and these will need filling and sanding back to improve the look of the model. The flap housings are all built from two halves that are glued together with a butt-joint, and will need to be fitted and marshalled carefully to avoid getting them in the wrong order. Take careful note of which parts go where before you attempt the task, and cut off the mounting pips of the flap sections if you are depicting them stowed. You may also need to fill the holes for the deployed flaps too, depending on whether they stand proud of the flaps when installed. The Galaxy has lots of wheels to spread its substantial load over the runway, with 28 in total, all made up from two halves each, so plenty of seam-scraping unless you decide to get some resin replacements. There are four main gear legs and one nose gear leg, with each main gear leg having six wheels on the bogie, and a strut that fits into a hole in the centre, which could well be a weak-point, and you must ensure that you don't cut off the pin on the strut, which has a slightly fuzzy join with the sprue gate. The gear bays are made up comprising a large roof with moulded-in detail, to which is added a quantity of ribs and stringers, plus bulkheads closing off the bay from the rest of the fuselage. The main bay is a single area, and has bay door hinges added to the sides before it is installed in the fuselage later in the build. Before this happens, the large T-tail is made up from two halves for the fin, and two more parts for each elevator fin, plus the elevator itself, which both plug into slots in the side of the aerodynamic fairing at the top of the tail. Finally, the rudder is glued together and fitted into the rear of the fin. The fuselage is a bit on the large side, and due to this and the thickness of the walls, there is a quantity of distortion in the underside of my example, which should be easy enough to fix with some test-fitting, careful gluing and perhaps some tabs added to one side or the other to prevent them diving past each other. The cockpit, nose gear and main gear bay platforms are all glued into place beforehand, and six holes are drilled into the fuselage top for a pair of towel-rail antennas. The location of these are given using two scrap diagrams, which make a lot more sense once you realise you are looking at them from above. For the benefit of alignment, they're probably best done with the fuselage together. A number of clear portholes are supplied on the clear sprue, which are inserted from the inside, and will benefit from sanding flush if they remain proud (plus polishing back to clear) and a dot of masking fluid before you forget where they are. With the fuselage together, it can be top-and-tailed with the nose and the tail cone, which reminds us that there's little interior detail other than the cockpit and bays, which is a shame when you consider its sole raison d'être. The joint for the "visor" that allows cargo access to the front is engraved deeper than the other surrounding panel lines, so if anyone's feeling brave that makes the cut easier, but there's a lot more work still to do. The canopy is simply inserted into the slot in the nose, and take care to test-fit this before gluing it, as an element of flash on either part could cause it to stand forward, ruining the slope of the nose. The instructions show the landing gear and their bay doors added at this stage, but as the wings are yet to be joined, I'd be leaving those until much later for fear of shearing those joins on the main gear. The wings are as yet without their slats, which are a single part each that affixes to the arms that were installed during main construction. You might notice that these are attached by a very thin layer of styrene all along the sprue, which is presumably to obtain minimum short-shots from the mould, so take care slicing them free with your weapon of choice. Then the whole assemblies are inserted into the big slots on the fuselage, which have internal buttresses to help keep the wings from sagging, although I'd also consider a little tab on the inside of the seam between the wings too, just as a belt and braces exercise. Ba-dum tish! It's done. Now for some colour. Markings At the end of the instruction booklet there is an overhead diagram showing where all the miles of walkway lines go, which augments the A4 colour sheet that only has enough room for two side profiles and a partial underside diagram. There's only one decal option, which is a modern grey airframe, as follows: S/n 86-0022 Air Mobility Command, 60th AMW, 349th AWM, Travis Air Base, 2007 The decals are printed anonymously, and although they're fit for purpose, they're a little fuzzy under magnification, and the highly visible white decal for the refuelling receptacle has been printed slightly offset on my copy, but I can probably fix that with a scalpel and a dot of white paint. The American flags are also ever-so-slightly off too, but this can be fixed with a sharp blade. Check your copy when it arrives, and ensure you'll be able to use them. Conclusion This is a great subject and as long as you keep your wits about you, test-fitting everything and adjusting things as you go, paying careful attention to the instructions, you'll end up with a good model. If you approach it expecting it to fall together however, you'll have a lot less fun. Sure, there's a bit of flash hither and yon, but that's pretty simple to remove, and is a lot better than having short-shot parts. It would have been nice to have a little interior, the decals could have been a little better, but overall I'm still very glad to have it, and look forward to building it. Recommended. Review sample courtesy of
- 1 reply
-
- 6
-
-
-
Roden is to release a 1/144th Boeing 307 Stratoliner kit - ref. 339 Source: http://www.roden.eu/HTML/framemodels.htm V.P.
- 9 replies
-
- 2
-
-
- B307
- Stratoliner
- (and 1 more)
-
Hallo again This is my DH2 from Roden in 1/32. Here is the rigging a particular thing. I designed the strut support plates, on CAD. In cooperation with Cooperstate Models, they produced these parts. I did this design work voluntarily. It was the idea, to create for all WW1 model a/c these strut support plates. To achieve easier rigging. Moreover, to prevent drilling the wing. On the same way, I did the Be2c in 1/48 and the DH2 in 1/48. However, in the state of assembling the DH2 the troubles did not show up. The strut support plates I glued with CA on the wing. As I need them, for the static rigging. The gluing of struts I did with CA, because of the pin diameter & hole diameter from the Roden kit. In this case, the DH2 I got along because I did all gluing with CA. Well, I have to mention, that the assembly was very difficult. Today I improved the etched parts. I build the Be12 in 1/48, but here I failed. I glued the etched parts with CA and the struts with Tamiya glue. I did not get along. The gluing process is the problem. As a verdict: As long as you only use CA, it is ok. However, here I see the problem for bigger scales. With CA, there is no chance for drying alignment or a dry fit since you need bigger holes and the struts may not be in place for more than a second. I have no solution yet for gluing the struts with Tamiya glue; so I gave up. Maybe some days I have an idea, but not yet. Happy modelling
- 12 replies
-
- 26
-
-
This is my contribution, tricky paintwork and lots of rigging otherwise it will be straight OOB!
-
Fokker Dr.1 Triplane 1:32 Roden On hearing the news that Wingnut Wings are going to release 1:32 'Early' and 'Late' versions of the Fokker Triplane in 2020, I thought I'd better get on with my Roden kit or it might never get built. I bought it because Wingnut Wings have a general policy of not producing kits already available from other manufacturers, and I reckoned this was one they might never do. Wrong! It is pretty good but lacks the refinement of a Wingnut Wings kit, and also benefits from a few detail additions and corrections. Having already built one from the Encore boxing of Werner Voss's early F.1 version with Fokker's 'streaky green' camouflage: (it is the Roden kit in an Encore box) I want to do a more colorful one. I intend to do the red and white one operated by Jasta 18 and featured as a bonus on Pheon Decals 1:32 Jasta 18 Fokker Fighters decal sheet. I've already used Pheons sheet to do it in 1:48 on the Eduard kit, so this is what I'll be intending to do here; First up I added the edging for the plywood panels that are missing inside the fuselage halves, using some Evergreen strip. The white discs are where I filled in some ejector pin marks. The forward tank should have a filler either side, so a matching hole needs drilling in the coaming, and scratchbuilt spout adding. While I was working on the coaming section, I test fitted it on the taped together fuselage halves. There is quite a bit of fit interference, cured by trimming excess plastic from the inside at the rear of the opening for the middle wing. Moving on to the cowling, it can be improved by scribing in the semi circular panel line on the front face. I put a block off wood under the prop shaft hole, and centred the compass cutter on it, and scribed. Looking better. I also made a series of rivet marks around the outer edge. Also, there is a raised strap that goes around the rear of the cowling. Roden have moulded it, but it is very faint. I ran a strip of plasticard around, and once it has set I will sand it back a little as it is now too prominent. I find it is easier to do it this way than to try and glue a very thin plastic strip on. For some reason Roden moulded the tailplane as if the middle was part of the fuselage, with 2 separate 'planes' attached to it. It isn't. It's a one piece unit. I sanded the ridges down and also filled the deep channels in it. On the left corrected, on the right as it comes in the kit. The 'Axle wing' needs attention as well. The split panel line and clamps need to come off. They were on the Fokker D.VII, but not the Dr.1 Triplane. I will sand and fill to fix this. Finally, some of the interior elements ready for priming and painting. I show them here as some of them are assembled from more than one piece, such as the rear wall with seat brackets attached. Gluing them together now saves mucking up the paintwork if you try to do it later. If you have a Roden Dr.1 in the stash, why not build it now? Thanks for looking. John
-
I originally posted this in the Rumourmonger section where there was a thread about the kit but it probably makes more sense to re-post here where more airliner fans are likely to see it. I received my first Roden CV340 today. I don't claim any great expertise in Convair Twins but Roden seem to have given us the narrow rectangular engine exhaust outlets of the 440, not the twin round pipes of the 340. I know that many (most?) 340s were upgraded to 440 standards but unless I'm mistaken it's not possible to build an unmodified 340 from the kit as it comes. Scratch building replacement exhausts shouldn't be difficult but it's a bit of an annoyance. Would anyone who knows more about the prototype than me care to comment? Rumourmonger thread including sprue shots here. Apart from the exhaust issue the kit looks lovely.
-
 Hey everyone, One of the kits i currently have in my little stash is the Wingnut Wings Roland D.VIb. I plan to start on this model soon, when i've finished my current built of the WNW Fokker E.II. I'm slowly starting to gather aftermarket products for this model and one of the things i'm looking for for this kit are alternative decals / markings. I've been searching the web for a while now, but haven't been able to find any suitable 1/32 scale decals for the Roland D.VIb so far. Does anyone of you happen to know if these even exist? Also, i've been looking at several 1/32 scale WWI aircraft models of Roden. I've never actually owned one of their kits, but since they do have some very interesting models, i was wondering how the quality of these kits compare to Wingnut Wings. Are they even comparable? If any of you could share your experiences, that would be much appreciated. Thanks very much indeed! Dolf
 -
 Here's my recently completed Roden Holt tractor with the 8" howitzer. Model Cellar will have the driver available in September with three choices of headgear. The figure was sculpted by Mike Good. Weathering on the tractor with Ammo and MIG products. Ammo Moss Green and Vallejo Bronze Green were my base colors.
 -
According to Hannats, Roden will release a new Great War model, Type B WWI Omnibus Ole Bill kit, in 1/72 (no 732). It is nice they are slowly but steadily add new kits to WWI ground range in 1/72 scale.
-
The 1930s was a hugely interesting decade for a lot of different reasons, not least because of the incredible speed in which aeroplanes developed. Torn between the age of the biplane and the new times, the unfortunate He-51 was basically outdated as soon as the paint dried on its wings, like so many other designs from the early to mid 1930s. Shipped to Spain to prove itself it had a very short period with success against even more outdated planes, but had to be withdrawn as a fighter plane before it embarrassed the Third Reich further and redeployed as a ground attack aircraft. It did find some success there and was eventually produced in a pretty impressive 722 examples, which lingered on as advanced trainers and perhaps factory protection for the first years of the war. As a ground attack plane it got its only nickname, "Caza de Cadena" or "Chain Fighter", after the way they attacked ground targets, coming in one by one to draw fire away from the plane that had just finished its attack. A pretty boring nickname for a fighter I guess few remembered fondly, or even at all. But still, it is from the 1930s interwar period that I enjoy very much, and while in my eyes not as pretty as some people think due to its somewhat bulbous cro-magnon forehead created by the BMW engine, it did appear in some handsome colour schemes. The kit is Rodens He-51 B.1, which is a nicely detailed kit I hope will go together well. It will be built mostly OOTB with after marked decals, a bit of Quickboost resin and other stuff, plus some amateurish scratchbuilding where needed. So not really OOTB at all then.
- 52 replies
-
- 12
-
-
Dear Colleagues Here is my newly completed Roden 1/72 Gotha G.III. Probably the toughest modelling challenge I have completed in the last 20 years! The kit has many refinements but it is not engineered in a way to give it any strength. Each lower wing is made of three parts, with the engine nacelle being one of the parts. Roden offer you tiny nibs to make the join. But I felt safer drilling out and using brass rod. One of the rare examples in which the rigging is critical in holding it together in fact! It has the photo etch set from PART. Given the limited engine power of the time you can see why the designers went for a gigantic wing span. Apparently the most dangerous part of any mission was landing the beast! Note there is no windshield for the pilot and his throttle controls were outside the cockpit on a sill to his right! In January I visited the St Pancras Hotel restaurant in London set in the old station booking hall. I was surprised to hear from our guide that the roof was not original due to it having been destroyed in WWI from a bomb dropped by a Gotha! Regards Andrew
-
 Hello Folks Haven't had much bench time in the last few months but I just managed to get this one done. It is the truly horrible Roden issue of the Skymaster with extra parts to represent an aircraft operated by No. 4 Sqn Rhodesian Air Force during the Bush War. After embargoes were imposed on the regime at the time by the major powers, Rhodesia turned to French company REIMS who modified civilian Cessna 337 Skymasters. The added weapons capabilities in the form of 2 x 303 Browning machine guns mounted above the cabin and strengthened underwing hardpoints gave the Lynx a formidable close air support capacity in a stable and east to operate platform. The aircraft carried no national markings. The kit is pretty average all round but the worst parts are the clear parts and the decals. Despite a lot of polishing and buffing the windows are barely see through and the decals were rubbish. I used aftermarket brass landing gear legs I got from Ebay to help cope with the metric ton of lead in the nose and some Master metal 303 barrels improved the look of the gun pods. The landing lights under the nose are MV lenses. Here's some pics.
- 25 replies
-
- 69
-
-
-
 I've been getting strung out. The Pz IV STGB has finished, as has the Coastal Command and Maritime Patrol (wingie things) build. Not being excited by the Patton STGB (sorry ) and with the Tiger and D-Day builds ages away, I'm scratching around for something to make. 🤔 Shelf of shame? 🤔 , , 🤔 .... .... Stash? Stash? Ah, stash! OK, this was bought for an MTO build that happened at an inconvinient (for me) time. A Roden Rolls-Royce Armoured car. OK, it has it's faults, but, it may get me through the desert of (no) group builds. Faults? A lot of the locating holes are shallow and proud of their mating surfaces. The stand-up nature of the holes can be cured with a couple of swipes with a modelling knife. The lacatinh pins are then too long (but they are anyway). So far, I've taken to lopping them down with side-snips. Stages 1 and 2 in the instructions are ... add stuff to the sides of the engine ... before glueing the engine halves together. Uh-uh, no! This modeller would be breaking the stuff off before the two halves went together. Engine first, then worry about the other bits and pieces. Progress so far ... A few bit of the car's nether regions, all in need of clean-up.
 -
Reims FTB337G LYNX Roden 1:32 Under the terms of total sanctions, the purchase of new weapons was absolutely impossible. The management of adjacent South Africa, which also had increasing confrontation with the world community, over apartheid, nevertheless managed to transfer helicopters and trained pilots to Rhodesia; in addition, through unofficial mediators, it was possible to acquire dual-purpose aircraft in some Western European countries, which were de facto civilian, but could be easily reconfigured for military purposes. One such aircraft was the Reims 337G, the French license build of the American lightweight multipurpose Cessna Super Skymaster 337. In 1975, it was possible to purchase 18 such machines, one of which was lost while flying over Mozambique. All the other 17 succeeded in arriving at new bases and were soon involved in anti-terrorist operations. The civilian airframes were converted for their future missions - two 7,7 mm machine guns in containers were mounted above the cockpit over the wings, a number of pylons for hanging various types of weapons were mounted under the wing - from light bombs to cassette bombs, unguided rocket pods as well as special Mini Golf bombs, which turned out to be very effective weapons. The right row of seats in the cabin in almost all 17 planes were dismantled to allow for installing litters to evacuate wounded special forces directly from the battlefield. Also, the engine exhaust outlets were shielded to reduce infrared radiation, as irregular combatants at that time already widely used the Soviet "Strela" MANPADS against government aviation. The first application of the new machine, which received the semi-official name of Lynx, revealed it to be a very effective weapon for anti-partisan warfare. The ability to launch attacks from low altitudes, a respectable turn of speed, and low visibility in the face of ground to air defence, and fairly high survivability made this aircraft indispensable in all significant operations against Nkomo and Mugabe. Particularly successful were attacks with the use of napalm containers - when they were used whole units of insurgents seemed to be paralysed, because the chances of surviving Lynx attacks with napalm were virtually non-existent. Another successful innovation was the Mini Golf bomb with a long, 1200-millimeter detonator in front of the body of the bomb itself. When dropping it from the plane under a parachute, the pin struck the surface of the ground, and detonation of the explosive occurred at a height of a meter above the surface. Due to the special composition of the explosive there was an effect, which was compared with the "mini-explosion of a nuclear bomb" - in the strike zone, this weapon destroyed absolutely everything alive without exception in an area of 100 by 150 meters. The use of this type of weapon was only occasional, but it had a very great psychological impact on Mugabe's armed groups. Another important role of these planes, just as with their US sibling the O-2, was to direct more heavily armed planes on to a target. A Lynx flew directly to a target and marked it with light or phosphorus bombs, and after that, there appeared a Hunter or a Canberra, which completed the mission. Also, very often, Lynx pilots flew in "free hunting" fashion, patrolling areas where insurgents were crossing the borders of the country from neighbouring Mozambique or Zambia. The Model Third in the 1:32 series of Cessna Skymaster derivatives, the kit comes in a rather large box with an artist’s impression of a heavily armed Lynx in-flight. Opening the box reveals ten sprues of grey styrene, and one of clear, there is also quite a large decal sheet. As with the previous releases there is quite a lot of flash visible and wave fronts on some of the parts. That said the details are finely done and there is a fair amount of detail included in the kit. While it looks great on the sprues, I’ve read that while the accuracy is fairly close, although there have been no reports of build problems I’d imagine the ones seen in the 0-2A Skymaster kit will probably surface in this kit as well. While the majority of parts are the same, this release includes a new clear sprue which contains the bulged pilots door windows there are also two new sprues containing the Rhodesian specific weaponry. The different wing tips and tail booms are also included The build begins with the assembly of the two, four piece propellers, which include the spinners, horizontal tail unit with separate elevator, two, two piece wing mounted machine gun pods, two four piece pylons which includes the nicely produced crutch pads. The tail booms are assembled next, each from two halves and with separate rudders and anti collision light on the port fin. The engine exhausts are also assembled at this point and fitted. The engines themselves are complex little models in their own right, each engine consisting of no less than 50 parts. The rear engine frame and nose engine compartment/nose gear bay are also assembled, as is the seven piece nose landing gear. The seven piece front engine bay is fitted with the nose wheel assembly, followed by the engine assembly and the pair of exhaust pipe assemblies, which go into a new exhaust collector that sits under the rear fuselage. The rear engine frame is then fitted with its engine and the simpler exhaust parts. Unfortunately the anti Strela exhausts are not included. The completed front engine assembly is then the attached to the firewall and under pan. Work then begins with the aft avionics bay that sits between the engine bay and the cockpit, this consists of four shelves on which the various radios and other avionic boxes are fitted. The instrument panel is then assembled, consisting of the panel, coaming, four rudder pedals, centre pedestal and control yolks with separate shafts. The four seats are then built up, two from five parts and two from four parts, before being glued into position on the cabin floor, unfortunately this is incorrect as I believe the rear seats were removed and the two 600 round ammunition boxes for the wing mounted machine guns are fitted in their place, but there appears to be very few, if any photos of this on the net. The three piece doors are then assembled and the windows and viewing ports added to the fuselage sides. If you wish to have the starboard side cargo door open the instructions show you where to cut so that it can be split and posed open, the struts are also included for this option. Now while the interior is quite nicely done, there is plenty of scope for the modeller to add further detail, including the quilted sound proofing, circuit breaker panel on the captain’s side of the cockpit, and seat belts. Hopefully an aftermarket company will release the parts required for the exhausts and interior. If building out of the box the cabin floor is glued to one half of the fuselage, along with the engine assemblies and instrument panels and the three piece aft engine intake glued into position. The wing comes as three main parts with the upper section being a single piece moulding, not forgetting to open up the holes required for the pylons. The separate flaps can be posed in either extended or stowed positions and there is a skylight fitted above the cockpit area. The wingtips are also separate and are of the correct type for this version. The main landing gear comprises of a single piece strut and a pair of three piece wheels. With the fuselage all assembled, which will require a significant amount of weight in the forward area, wherever you can squeeze it in, the wing is glued into place along with the two booms and horizontal stabiliser. Then the main undercarriage assembly is add as are the pylons, weapons pods, nose bay doors, Rad Alt panel, and main gear doors. Finally the outer pylons are fitted with the four piece mini golf bombs, while the inner pylons are fitted with four piece napalm bombs, while the two wing mounted pods are also fitted, as are the various aerials. Decals The decals are really rather a disappointment, while they are correct colour and style, they are not in register, although they are better than those in the O-2A kit. FBT337G Lynx , #Sqn RhAF, late 1979 FBT337G Lynx , #Sqn of Zimbabwe Air Force, October 1981 FBT337G Lynx , Air Force of Zimbabwe , late 1982 Conclusion It’s great to see this variant finally kitted in 1:32, as although it was only used by one air force and in limited numbers, it is still an interesting sub-type. As with the other releases it is a disappointment with the amount of flash as there is no way a newly released kit should suffer from this, and the wave fronts can be overcome by heating the moulds better. Now we have to see what the aftermarket companies come up with to make this a more accurate and impressive model. Review sample courtesy of
-
Here is my Roden 1:72 Fokker F.I which I built in 2006. It represents 103/17 flown by Lt Werner Voss, of Jasta 10, from Marcke, in September 1917. Lt Voss was shot down in this plane on 23 September in a lone battle with six S.E. 5as of No 60 Sqn RFC. The Fokker F.I was a pre-production variant of the famous Fokker Dr.I triplane of which there were only two built. It was built OOB and my notes point out it was a bit of a tricky build. The paint scheme came out very well by accident. I followed the suggestion of various sources that the olive streaking was over a light blue base. Humbrol 47 Sea Blue was brushed all over and I then started dry-brushing Humbrol 155 Olive Drab when I put too much and had to rapidly spread the paint. Due to the "slippery" surface of the glossy blue paint, the paint spread out streaking exactly as I wanted so I painted the streaks in this way. A coat of dry-brushed Humbrol 66 followed with another of Humbrol 155 on top to add texture to the streaking. The rest of the kit was also painted by brush and the matt varnish airbrushed. The decals were delicate and needed some trimming, as they were a bit oversize, and then some touching up with paint. Thank you for looking and, as always, all comments are welcome Miguel
-
Cessna O-2A Skymaster Roden 1:32 Cessna O-2A Skymaster In the early 1960s, the Cessna aircraft company built a small commercial aircraft, the Model 337. Compared with similar aircraft of the same class, it had an unusual layout: a tractor engine in front, and a pusher in the rear. Instead of the classic fuselage layout, two booms extended backwards from the wing, which were connected by the horizontal tail assembly. The aircraft could carry two crew members, and four passengers or up to 450 kg of payload. It was quite successful commercially, but Cessna also hoped to find an outlet in a military role. In 1967 a military version of the machine appeared, the O-2A Skymaster. With the start of the Vietnam War, the US Air Force began to actively employ light aircraft as scouts, for fire direction or lightweight communications. One of the most widely used was the O-1 Bird Dog, but it was not always able to perform certain military tasks, such as controlling targeting for other planes. The O-2 was more suited to this type of task and, therefore, was soon involved in missions of this kind in the Vietnam conflict. Also, the O-2 could be used as a light strike plane, like its predecessor the O-1. For this, pods of unguided rockets and other light weapons could be hung under the wing of the aircraft. Some machines, designated O-2B, carried out 'psychological warfare missions - they were fitted with speakerphones broadcasting calls to the population to stop the war, but this exercise was not successful. Another important application for the O-2 was the rescue of pilots whose planes had been downed in an area of operations. The O-2 could take off from the shortest airstrips and land in the most unsuitable places for this purpose. Many US Air Force pilots had this machine to thank for their rescue. Series production continued until 1970, during which time at least 532 aircraft were produced. The end of their active military career in the US Air Force coincided with the end of hostilities in Vietnam, but in the US they were used long afterwards by the Air Force for patrol or liaison tasks, and were eventually decommissioned due to age and obsolescence. Despite this, this aircraft is still very popular among private owners. And many former military machines are still operated under civil registration or take part in numerous vintage airshows. The Model The kit comes in a rather large box with an artist’s impression of an armed O-2 in-flight. Opening the box reveals ten sprues of grey styrene, and one of clear, there is also quite a large decal sheet. Surprisingly for a new kit there is quite a lot of flash visible and wave fronts on some of the parts. That said the details are finely done and there is a fair amount of detail included in the kit. While it looks great on the sprues, I’ve read that while the accuracy is fairly close, there are problems encountered during the build, particularly with warped fuselage halves and an awkward roof fitting. So while I will go through the build process, be aware that there will be a fair bit of work required to get everything to fit correctly. You should also note that there are no spinners included, so some of the aftermarket deals may not be suitable for aircraft that were fitted with spinners. The build begins with the assembly of the two, six piece propellers, horizontal tail unit with separate elevator, four piece pylons which includes the nicely produced crutch pads, and two, four piece rocket launchers and two seven piece gun pods. The tail booms are assembled next, each from two halves and with separate rudders and anti collision light on the port fin. The engine exhausts are also assembled at this point and put to one side. The engines themselves are complex little models in their own right, each engine consisting of no less than 50 parts. The rear engine frame and nose engine compartment/nose gear bay are also assembled, as is the seven piece nose landing gear. The seven piece front engine bay is fitted with the nose wheel assembly, followed by the engine assembly and the pair of exhaust pipe assemblies. The rear engine frame is then fitted with its engine and the simpler exhaust parts. The completed front engine assembly is then the attached to the firewall and under pan. Work then begins with the the forward avionics bay that sits between the engine bay and the cockpit, this consists of four shelves on which the various radios and other avionic boxes are fitted. The instrument panel is then assembled, consisting of the panel, coaming, four rudder pedals, centre pedestal and control yolks with separate shafts. The four seats are then built up, two from five parts and two from four parts, before being glued into position on the cabin floor. The three piece doors are then assembled and the windows and viewing ports added to the fuselage sides. Now while the interior is quite nicely done, there is plenty of scope for the modeller to add further detail, including the quilted sound proofing, circuit breaker panel on the captain’s side of the cockpit, and seat belts. Check you r references when using aftermarket deals as some O-2’s had the rear seats removed and the co-pilots seat moved aft so that a litter could be fitted for medevac purposes. If building out of the box the cabin floor is glued to one half of the fuselage, along with the engine assemblies and instrument panels and the three piece aft engine intake glued into position. The wing comes as three main parts with the upper section being a single piece moulding, not forgetting to open up the holes required for the pylons should you be using them as not all O-2’s were armed. The separate flaps can be posed in either extended or stowed positions and there is a skylight fitted above the cockpit area. The wingtips are also separate allowing of later versions to be released. The main landing gear comprises of a single piece strut and a pair of three piece wheels. With the fuselage all assembled, which will require a significant amount of weight in the forward area, wherever you can squeeze it in, the wing is glued into place along with the two booms and horizontal stabiliser. Then the main undercarriage assembly is add as are the pylons, weapons pods, nose bay doors, Rad Alt panel, and main gear doors. Finally the upper wing is festooned with a multitude of aerials and the two propellers attached. Decals The decals are really rather a disappointment, while they are correct colour and style, they are not in register and there are numerous spelling mistakes. Also the aircraft using the serial number is number 67-00109 is an imposter as that number was assigned to an F-111A. There are markings for three aircraft on the sheet, these being:- Cessna O-2A Skymaster “Don’t’ Shoot”, Vietnam, 1967 (No unit or squadron information provided). Scheme composed of overall Aircraft Gray with Snoopy nose art on cowl and White upper wing panels carrying “Don’t Shoot” in large letters. Cessna O-2A Skymaster, Unknown Unit, Vietnam, 1971. Scheme composed of overall Black with Ghost nose art on cowl and “THE FAC” in large white letters on upper wing. Cessna O-2A Skymaster, Unknown Unit, Vietnam, 1970. Scheme composed of interlocking swirls of Tan, Dark Green, and Medium Green with Light Gray undersides. Conclusion Over all it’s great to see this aircraft being released in 1/32, yes it is more of a short run release that will require a little more work than say something from Tamiya, but it will look great once built. I have heard reports that some fuselages are warped so please check before starting the build. I am disappointed with the amount of flash as there is no way a newly released kit should suffer from this, and the wave fronts can be overcome by heating the moulds better. Review sample courtesy of
-
 Have not seen this kit completed here so I thought I would post this as it is my last bi-plane which I finished toward the end of 2018. This is Roden’s kit #430 in 1/48 scale. It represents a variation of the standard DH.4 in that the engine was replaced by a 230 hp Siddeley Puma. It was not particularly successful but ended up being used anyway because of the lack of other suitable engines. This particular aircraft was built by Westlund and was known as “Sultan Selim II” N.6416 of F. Squadron 62 Wing RNAS, in the Aegean during the Dardanelles campaign during the Summer of 2018. Clearly not too concerned about camouflage. I have pretty much settled on using Uschi van der Rosten rigging thread as it is extraordinarily stretchy and very thin. Up to now I have used the .02 thickness but have on order the larger thickness as I want to see how it works. I also use 2lb test fishing line where I need to add strength. I make my own rigging anchors using 32-gauge beading wire twisted around the point of a needle and then glued in with CA. Have not made the leap to turnbuckles. I know people knock Roden but other than their decals (which I think is only a problem with their older kits) I like their kits and this was typical of their efforts in that the parts fit well with lots of detail. The most time-consuming piece being the fun paint scheme and the rigging. I also painted the tail as I figured the decals would not work anyway. I also got myself a 300-Watt mini blow dryer/heater which helps the decals lay down (but be very careful as it will melt them quickly). This is not a perfect model but I love how the paint scheme came out. And yes, that is a lot of snow out my window.
 -
 #4/2019 Well, my dad did the best he could but sadly the model didn´t turn out as wished. He used the new Roden kit, which is a typical one, mediocre fit, engineering and molding quality, the clear parts could be clearer too. The selfmade style decals from Brent-Air-Decals weren´t convincing too, couldn´t prevent them from silvering. Used a selfmixed paint for RAL7013 brown-grey. The kit inclides metal wire/rods for the antennas but my dad used plastic rods. Masking tape used for the seatbelts. Shapeways 3D printed spine antenna. The Austrian airforce bought 7 L-19E in 1958 and a further batch with 22 L-19A in 1959. The last Bird Dogs were decommissioned in 1997. Build thread here https://www.britmodeller.com/forums/index.php?/topic/235047254-bundesheer148-cessna-l-19a-bird-dog-austrian-airforce/ DSC_0001 by Reinhard Spreitzhofer, auf Flickr DSC_0002 by Reinhard Spreitzhofer, auf Flickr DSC_0003 by Reinhard Spreitzhofer, auf Flickr DSC_0004 by Reinhard Spreitzhofer, auf Flickr DSC_0005 by Reinhard Spreitzhofer, auf Flickr DSC_0006 by Reinhard Spreitzhofer, auf Flickr DSC_0007 by Reinhard Spreitzhofer, auf Flickr DSC_0008 by Reinhard Spreitzhofer, auf Flickr DSC_0009 by Reinhard Spreitzhofer, auf Flickr DSC_0010 by Reinhard Spreitzhofer, auf Flickr DSC_0011 by Reinhard Spreitzhofer, auf Flickr DSC_0012 by Reinhard Spreitzhofer, auf Flickr DSC_0013 by Reinhard Spreitzhofer, auf Flickr DSC_0014 by Reinhard Spreitzhofer, auf Flickr DSC_0015 by Reinhard Spreitzhofer, auf Flickr DSC_0016 by Reinhard Spreitzhofer, auf Flickr DSC_0018 by Reinhard Spreitzhofer, auf Flickr DSC_0019 by Reinhard Spreitzhofer, auf Flickr DSC_0020 by Reinhard Spreitzhofer, auf Flickr DSC_0021 by Reinhard Spreitzhofer, auf Flickr DSC_0005 by Reinhard Spreitzhofer, auf Flickr DSC_0006 by Reinhard Spreitzhofer, auf Flickr DSC_0007 by Reinhard Spreitzhofer, auf Flickr
 -
Hello All, Finished this one off - sat on the shelf of doom for over 12 months. Decals are ordinary. Fit in some places poor, Landing gear problematic due to uneven location lugs. Ian Happy Modelling all. Ian
.thumb.png.6e11fc11af5645499ae76cb59fcfb788.png)