
Search the Community
Showing results for tags 'Revell'.
-
Most recently released by Revell Germany, this small scale Yamato was originally produced the Italian company Casadio as one of their pre-assembled "Miniships" way back in the early 1970s. Over the years It has been reissued many times as an unassembled kit by Revell UK and Almark in England, Revell/West Germany, ESCI in Italy, Sablon in France, and by both Model Power and MPC in the United States. The same plastic has also been marketed as the Musashi. Apparently the only differences among the various releases have been in the instructions and box art. This toy/model from the early 1970s is a very simplified, snap-together affair designed for quick building. When I built it as a kid back then I was among those for whom the kit was apparently designed: wargamers and young modelers (even though it was snap-together, the instructions recommended kid-friendly NOTOX plastic glue... I can still remember the weird lemon scent of that stuff!) At the time I liked the snap together design, but the poor fit of the parts was annoying. And the model is very basic: while the one piece hull is recognizably a Yamato, the shape is vague and toylike. The complex main guns and funnel are reduced to single parts, and the prominent mainmast is missing entirely. Aircraft are only generalized single float monoplane representations, in any case wrong; if they are meant to be Aichi E13A "Jakes", they should have twin floats, if Mitsubishi F1M "Petes" they should be biplanes. The 127mm type 89 guns are only vaguely correct, and the numerous 25mm triples are molded directly to the decks and turrets. Still, the kit has its good points. First of all, at a mere 27 parts the ship goes together quickly, and although basic, I remember that the completed model does resemble the Yamato. The bridge windows are neatly represented as recessed squares, and two alternate main turrets are provided so you can depict the ship at an earlier point in her career before she got the extra antiaircraft guns on the turret tops, or perhaps as the Musashi. Examining the parts this time around, I was struck by the crudeness of the molding with its chunky shapes, flash, goofy pits and bumps... but oh, well. At least the simplified kit wouldn’t tempt me to go nuts superdetailing it! Refering to the overall general arrangement drawing from Janusz Skulski’s Anatomy of the Ship - The Battleship Yamato, the model rides a little high, so I sanded about 2mm from the hull bottom. The hull shape is mostly ok otherwise ...except the bow. After gluing the deck down I added a plastic shim and sanded things into a little better shape. There is adequate representation of planking on the main deck, but the second deck was also shown planked – this particular deck was actually steel, so I sanded the area smooth. A bigger problem was the configuration of the antiaircraft guns. The model is pretty accurate for Yamato (or Musashi) in October, 1944 (Battle of Leyte Gulf) with all those 25mm singles on the main deck. Unfortunately, it also has the six additional 25mm triples along the deck edge amidships which were added to Yamato only later when the single mounts were removed, so the model as is wouldn’t be accurate for either time frame. The simplest fix would have been to remove the center six 25mm triple mounts and go for a Leyte Gulf Yamato, but I liked the powerful look of those triples all lined up on the deck edge. Keeping these meant going for a Yamato in her final 1945 configuration. The 1945 Yamato would require eight more 25mm triple mounts, so I bought a second kit to raid for parts. After trimming off all those 25mm singles (24 of them!), I added the eight 25mm triples from the spare kit in the appropriate places to make an April, 1945 Yamato. ] It was a lot more alteration than I had originally intended, but the mini battlewagon’s air defense is now more accurate for 1945! The main 18 inch guns, though reasonable, were too long compared with my references. Cutting the ends down was the obvious solution, but then the steps in the barrels would have ended up too far forward. Doh! To solve this I removed the barrels, drilled holes in the turret faces and reinstalled the rifles with much of their length pushed inside the turrets. This left guns of the correct exterior length with the steps where they should be. After that I drilled out the tips of the 18 inch barrels with my X-acto and added Milliput blast bags. Also, I improved the aft fire control station (part #12) by combining it with the forward fire control optic array (part #13 with the radars removed) from the spare kit. One of the strengths of this little snap-together kit is the combat bridge windows which are clearly defined, even see-through from the sides in places. I left the kit tower pretty much as is except for a simple wind baffle over the combat bridge using a part from a wrecked 1/350 Tamiya Musashi as a guide. I also replaced the solid kit radars with simple photoetch parts. These were re-purposed floater net baskets from a Gold Medal Models 1/700 scale WW2 USN Cruiser/Destroyer Fittings set. I wanted to avoid scratchbuilding for this quick battleship project, but a shortcoming of this kit is the absence of any representation of the Yamato’s distinctive mainmast. That mast was just too prominent a feature to ignore, so I went ahead and built one up using Detail Associates (part 2505) .015 inch diameter brass wire. This makes for a scale mast about 1½ scale feet thick in 1/1200. Since the complex-looking mast assembly measures a mere ¾ of an inch in height, I made only a simplified representation of it. This model is certainly no masterpiece of the kit maker's art, but it was superior to comparable Pyro and Lindberg offerings of the time, and it is still way less expensive than the various pre-assembled wargaming and collector models out there. I spent less than ten bucks for it, so taken for what it is, this little Yamato isn’t a bad kit at all.
-
USS New Jersey, Platinum Edition 1:350 Revell The USS New Jersey, a 45,000-ton Iowa class battleship, was built at the Philadelphia Navy Yard, Pennsylvania. Commissioned in May 1943, she spent the rest of that year in the western Atlantic and Caribbean area. New Jersey went to the Pacific in early 1944 and conducted her first combat operations in support of the Marshalls invasion. She was Fifth Fleet flagship during the mid-February raid on the Japanese base at Truk, where she used her guns to sink one enemy ship and join in sinking another. Through the rest of 1944, she took part in raids on Japanese-held islands, the Marianas invasion and Battle of Philippine Sea, the Battle of Leyte Gulf and operations against the Philippines. From August 1944, she was flagship of Admiral William F. Halsey's Third Fleet. The New Jersey continued her Pacific combat operations into 1945, supporting the invasions of Iwo Jima and the Ryukyus. Following overhaul, she again became Fifth Fleet flagship during the final days of World War II and remained in the Far East until early 1946. She then went to the Atlantic in 1947 and made one midshipmen's training cruise to Europe before decommissioning in June 1948. The Korean War brought the New Jersey back into commission in November 1950. Two Korean combat tours in 1951 and 1953 were punctuated by a European cruise in the Summer of 1952. After returning home from the western Pacific in late 1953, New Jersey operated in the Atlantic. She deployed to Mediterranean and European waters twice in 1955-56 and was placed out of commission in August 1957. During the Vietnam war USS New Jersey was the only battleship recalled to duty. She recommissioned in April 1968 and arrived off Southeast Asia in September. From then until April 1969, she conducted frequent bombardments along the South Vietnamese coast. But, whilst preparing for a second Vietnam tour, she was ordered inactivated and decommissioned in December 1969. The early 1980s defence build-up produced a fourth active period for the New Jersey, beginning with her recommissioning after an extensive refit, which saw the mounting of cruise missile boxes, harpoon launchers and Vulcan Phalanx CIWS in December 1982. She again fired her big guns in combat during the Lebanon crisis of 1983-84 and deployed to the western Pacific in 1986 and 1989-90, with the latter cruise extending to the Persian Gulf area. Decommissioned again in February 1991, USS New Jersey was towed from the Pacific to the Atlantic in 1999. She is since become a museum at Camden, New Jersey. The Model Originally released by Revell in 2000 and re-released in 2002 this kit appears older than it really is with quite a lot of flash and extraneous moulding stubs. The original kit looks like it was meant to have been motorised at some point as all the mountings are still extant. When released it wasnt exactly the best produced model of the New Jersey, that accolade went to the Tamiya kit, but it was pretty accurate. In this Platinum release Revell have included lots of goodies to try and bring the kit up to date including wooden decks, etched metal parts plus turned brass barrels and masts. Once cleaned up and the areas which fall short of todays standards removed, the additional parts really bring the model up to a good standard with lots of fine details and accurate shapes. The completed kit on shop at Scale Model World in Telford showed how good it could look. With the appropriate care, patience and time the model could meet almost museum standards. The major hurdle in building the kit is the way the instructions are presented. The original kit instructions have not been altered in any way. Instead the assembly and fitting of the etched and turned parts are provided on three A3 double sided sheets, so a lot of toing and froing will be required to ensure the correct assemblies and parts are fitted to their respective positions, which could get quite frustrating. It might be an idea to go through all the instructions first and mark on the main booklet where the additional parts need to go, so that none are missed or you find that something needs to be removed and youve got to the point where it will be awkward to do so. The standard build starts with the some areas on the single piece hull being removed. Dont forget to add the strengthening beams that were a feature of this commission, along the hull sides before painting. This is followed by the assembly of the three main gun turrets which consist of the mounting, upper turret, the three barrels, rangefinder housings and hatches. With the addition of the etched parts and brass barrels these turrets are transformed. The three barrels are now meant to be fitted to the main deck with locking piece fitted from the underside so that they turn. This is a toy like feature which I feel is unnecessary and will cause problems later in the build, so leave them off until the painting and wooden deck are fitted. What you can do is fit the main deck to the hull and once the propellers, their shafts and the rudders are fitted I would paint the hull and deck furniture, fit the wooden deck, and then put the assembly to one side whilst the rest of the parts are constructed. Attention is now focused on the main single piece superstructure section onto which the superstructure sides are attached. Now there is quite a bit of flash on these parts so a good clean up is called for before fitting. Dont forget to check with the etch instruction sheets as quite a few splinter shields and the like need to be removed, to be replaced by the etched brass parts. This goes for the whole superstructure, bridge and foremast, including the aerials, radars, funnels and main gun directors. In fact there is an awful lot of work to be done when building all these assemblies, but it will be worth it. The whole of the top of the foremast is in fact replaced with brass, the highlight being the super complex SPS-49 and AN/SPS 10 radar arrays. The kit funnels come with solid tops, so these need to be drilled out and carefully cut away and filed before the new caps can be fitted. The instructions have very clear diagrams showing how to do this. With the main fore and aft superstructure assembled and spruced up its on to the other weapon systems where again extensive use of the PE improves the look of the Harpoon and Cruise missile systems. The only downside is that the Vulcan Phalanx systems do not get any treatment and really could do with replacing with more accurate aftermarket parts. With this build you might as well go the whole hog and make the best model you can. The five inch gun turrets are improved with the addition of the turned barrels, etched ladders and doors. There is so much additional detail included in this kit that its difficult to explain it all, suffice to say that everything from the ships boats crutches, ensign and jack staffs are replaced. I particularly like the treatment the Refuelling At Sea boom gets, with replacement fixtures and the addition of the fuel hoses dangling down. The boats davits are also given an overhaul with the addition of the downhauls, access ladders and blocks. Even the Seahawk helicopters are given the etch treatment, with new undercarriage, rotors, both folded and spread, swash plates and pitch controls. Once the wooden decks are laid there are numerous deck hatches, windlasses and other fittings to add. Finally a full set of railings for the whole ship are included, including the flightdeck netting and blackned chain for the anchors. Decals The single decal sheet contains the ships name plaques, identification numbers, awards, and the whole of the faintail flightdeck with the correct markings. The helicopters also get national markings and Navy titling. There are several decals for certain sensors, but I think these would better painted. They seem pretty well printed, with good density and with minimal carrier film, but the larger items will probably need some softener or setting solution to settle them down nicely. There is also a paper sheet with code/signal flags should you wish to add them. Conclusion From a pretty ropey looking kit, certainly on initial inspection I think Revell have really turned this one around with the addition of the etched parts, turned brass and the wooden deck. It has the potential to build into an outstanding model given the appropriate care and attention. Yes it will take some work, and definitely one for a seasoned modeller not a beginner. Very highly recommended Revell model kits are available from all good toy and model retailers. For further information visit or
-

Carrera Revell BMW Z8 - 007 The World is not Enough (05662) 1:24
Mike posted a topic in Vehicle Reviews
BMW Z8 - 007 The World is not Enough (05662) 1:24 Carrera Revell The Z8 was a short-lived two-seat roadster that was produced from 1998 to 2003, designed as an homage to the 1950s era 507, to which it bears a striking resemblance. It started as a concept, and by 1996 there were sightings of prototypes, then in 1997 it made its debut at the Tokyo Motor Show as the Z07 in a more flamboyant form, toned down to a more practical style by launch, at which time it sported a removable metal roof that had been designed with the car, rather than as an afterthought. It was not a cheap vehicle, but BMW took the unusual step of guaranteeing spares supplies for 50 years, in the hope that it would go on to become a modern classic, thereby encouraging the super-rich collectors into the market. The interior was designed by Scott Lempert, with the intention of keeping it clean and uncluttered by making the controls multi-functional, reducing the driver’s workload. With a power output of 400bhp, it could rocket to 100km/h in 4 seconds, thanks in part to its all-aluminium construction, which included the spaceframe that was custom formed at a separate plant before being hand-finished at BMW’s Munich factory, with a total of over 5,700 built before production ended in 2002. It was replaced by the Alpina Roadster V8, which was toned down from the seat-of-your-pants style of the Z8, even down to the leather chosen for the seats, suspension, and the ease of a 5-speed automatic transmission, which gave it the feel of a Grand Tourer. The Z8’s image was etched into the minds of the cinema-going public when it was used in the James Bond film The World is not Enough, starring Pierce Brosnan as the eponymous 007, where it tore around the countryside before being cut in half lengthwise by a helicopter with an underslung set of multiple cutting wheels that cleaved his ride in two and stopped its roll completely. The Kit The copyright on the kit is 2000, which was the first time it was seen on the shelves of a model shop, when the car was still new, as was the film. This boxing arrives in a medium depth end-opening box, and inside are two sprues and a bodyshell in Revell’s usual light grey styrene, a sprue of chromed parts, a clear sprue, a bag of flexible black tyres, decal sheet and the instruction booklet that is printed in colour and has the decal profiles on the rear cover. Detail is good, and this is the only game in town at this scale. It is a kerbside model, with no engine, moulded-in doors, bonnet and boot panels that make for an easier build, while the alloy wheels and the underside are well detailed however, as is the dash and interior. As this is a special edition boxing related to the 007 film The World is not Enough, it also includes a set of six thumb-pots of acrylic paint, a #2 paint brush and a 12.5ml bottle of Revell’s Contacta Professional plastic cement, plus a folded A3 poster of the box art without the additional adornments necessary for the packaging, which is a little large and difficult to photograph, but a thumbnail of it can be seen on the box photo above. Construction begins with the two seats, which are moulded as individual units with separate back inserts that extends up to the headrest and side supports for the back cushions. The dash is a well-detailed moulding to which the steering column and chromed steering wheel are installed, with decals for the centrally mounted instrument binnacle and a choice of central bosses on the steering wheel. The door cards are fitted with grab-handles and are detail painted to match the rest of the interior, carrying that over to the cabin before applying six more decals to represent the smaller details. Foot pedals, gear shifter, handbrake and roll-over bars behind the head of each seat are installed, then the seats and dash are fitted into position, to be set aside while the rest of the underside is made. The wheels are first of the underpinnings to be built, each in pairs due to the size difference between the front and rear wheels. The tyres are moulded in a flexible black material, and have their centres filled with material out of the box, which must be cut away with a new #11 blade before you can install the two sides of the hubs, with the combined disc rotor and calliper acting as the pivot around which the wheel will rotate. The rear of the hub is blank, and should be painted the blackest black you possess, slipping it into the rear opening of the tyre, and slotting the rotor in through the hole. The front hub is well-moulded with five pairs of spokes, five studs in the centre, and a BMW logo decal applied to the centre. This might sound like a compromise, so I put a wheel together to test whether it would work, painting the interior ‘Black 4.0’ from Stuart Semple, and using his ‘Mirror’ for the brake disk. It looked good once it was put together, even though I didn’t bother with any preparation, primer or painting of the calliper. The rear axle is detail-painted and glued to a sub-frame along with two suspension mounts, dropping it into the rear of the floorpan, which is also detail-painted before the extensive twin-pipe exhaust system is laid over the underside, ending in custom-shaped back boxes. At the front, the steering arm is slipped through the suspension mechanism, trapping the suspension struts and stub-axles between the floorpan and the inner arches moulded into the interior. Staying at the front, but on the bodyshell, the front light reflectors are fitted from inside, moulded together by a carrier that keeps them in the correct orientation, installing the angled number plate holder under the grille, then following up with the clear lenses, and two chromed grille inserts that have circular fog lights embedded in the outer ends. The detail inserts in the front wings are also chromed, and are slipped into position from inside the bodyshell, then the clear windscreen is fixed on a pair of tabs in the front of the cab cut-out, adding a pair of windscreen wipers to the lower outer edge, and a combined rear view mirror and sun visor part is inserted into the top frame on a peg. The bodyshell is then lowered into position on four turrets, fitting the rear valance and two chromed exhaust pipes, one on either side after installation. The wing mirror housings are chromed, as are the mirror parts, one for each door, and a chromed door handle is inserted into the depression in each panel. The wheels are brought in and glued into position by applying glue sparingly to the centre disc part and avoiding the outer portion of the hub if you wish to rotate the wheels at any point. The final option is posing the roof up or down, with this boxing supplied with a cloth roof that can be shown stowed away by using a C-shaped styrene part at the rear of the cabin cut-out. The deployed hood is a single clear part with the integrated rear screen the only part that remains clear. The part that is intended to be the canvas hood is quite smooth, and would benefit from some stippling with glue or primer to give it a more fabric-like texture, and there are also a few ejector-pin marks on the inner face that you may want to deal with if you think they’ll be seen. Markings This is a special edition representing the movie car, so only one option is included in silver. From the box you can build the following: Decals are by Cartograf, which is a guarantee of good registration, sharpness and colour density, with a thin gloss carrier film cut close to the printed areas. Conclusion The Z8 was an attractive car with a significant claim to fame. This kit is a good kerbside model of the type, and if you can find a 1:24 3D printed Pierce Brosnan figure to put in the driver’s seat or stand next to it, you’ll have an interesting addition to your display cabinet. Highly recommended. Carrera Revell model kits are available from all good toy and model retailers. For further information visit or -
This is my version of the great Revell Lockheed PV-1 Ventura, the plane that replaced the Hudson. Apparently much reviled by the RAF (unmaneuverable and under-armed) , it was put to wide use by the USAAF (amongst others). This is BuNo 48891, flown by Lt. ‘Butch’ Mason, based in Attu, Alaska, 1944; part of numerous bombing sorties in the Pacific, the plane was finally lost at sea in 1945. Revell’s kit is a fantastic build - large parts that fit together cleanly, unfussy engineering and a decent degree of detail. It was nearly all OOB, with just the addition of an Airfix pilot and a Tamiya navigator as no figures were included. Even though it was not designed for an in-flight option, the gear bay doors fit perfectly anyway - although the tail wheel doors needed a little surgery. Once built, it’s a large canvas. With broad, nearly monochrome areas, it invites some invention in the paint work to provide some variety. These planes were flown to the point of exhaustion, and that was my aim - to convey a well-worn machine near the end of it’s functional life. I used a lot of Mission Model paints, which build in transparent layers pretty well. Masking in different ways (liquid masks, salt, tape, etc.) broke up the surfaces and the weathering across them - a really addictive process. Thanks for looking!
- 32 replies
-
- 85
-

-

-
- Lockheed Ventura
- 1/48
- (and 1 more)
-
 My first kit finished this year, almost in time for the 50th anniversary of the first F-16 flight - 1:72 F-16AM Fighting Falcon, no 1615, serial 61-630, 53rd Fighter Squadron "Warhawks", Romanian Air Force, Borcea AB 2023. This is an ex-USAF 83-1077 and ex-Portuguese 15134 aircraft, delivered to Romania in 2021 after refurbishing and repainting. I chose this camo just because I simply like it very much. It's also nice to see an old plane with all this modern equipment. Revell kit, CMK resin cockpit, Master metal Pitot tube, AOA probes and static dischargers, Hasegawa missiles, Eduard Sniper ATP and some scratch. Painted with Mr. Hobby C series paints. Decals are from ModelMaker set. Thanks for watching!
- 17 replies
-
- 72
-
-
-
Hi All, My first completion of 2024 is Revell's mighty Halifax, which I chose to complete as NA242 of 192 Sqn RAF, based at RAF Foulsham in 1945. 192 Sqn were part of 100 Group, and these aircraft were fitted with various Electronic Warfare installations, including Mandrel. As well as the normal crew complement these aircraft also carried a pair of Special Operatives who were responsible for operating the equipment. The aircraft had completed 55 missions when this photo was taken, and survived the war. Here's a photo of NA242 (copyright Australian War Memorial - image for discussion only and will be removed on request: You may note that the aircraft carries some rather extensive nose-art, which I created using a combination of stencils and self-printed decals. Here's the WIP if anyone is interested: The kit was an absolute joy to build - the engineering and detail were superb, and I added an Eduard etch set along with a mask set and some lovely Freightdog wheels. You may or may not know that this kit is OOP, so I am very grateful to @tomprobert for agreeing to part with his kit and all the goodies. Thanks also to Nigel @T-21 who provided a wealth of detail on 100 Group Halifaxes which was most educational in details of the EW installation. Anyway, on with the pictures! Here's a pic during construction to show the interior detail: Here's a final shot with a double dose of mighty Bristol power: I have thoroughly enjoyed this build, and it's nice to finally have a Halibag in the collection. Thanks to all those who have offered kind words and encouragement along the way - it has been much appreciated! Thanks for looking, Roger
- 43 replies
-
- 100
-
-
-
 This is a placeholder for my next build in this GB. EDIT,now withdrawn, as this version was never actually built, which is news to me. See below ... I can confidently predict this will be a very straightforward build, just by looking at the plastic. This kit was originally released in 1994 as the reconnaissance version, followed by the night fighter in 1995. As far as I am aware, the reconnaissance version has never been released again, but the night fighter has been re-released several times, and will be again later in 2024. I bought this kit in 1996 for 9 Irish pounds. Original version. Note the the 3-bladed propellers and truncated spinners. Unlike the night fighter, this version did see limited service, over the Eastern Front and the UK. Contents: A closer look at the parts. The night fighter has longer span wings. I'm not sure why the fuselage is split fore and aft, but I'm sure there's a good reason. There's a cut-out in the lower rear of one of the nacelles, which in the reconnaissance version is fitted with a clear part, very likely a camera port. In this version, it's blanked off. The instructions don't say what side it's on, but studying the instructions for the reconnaissance version, it seems this is on the starboard side. The canopy framing is going to be very, very easy to paint, compared to the kits I'm currently working on: Finally, the radar aerials:
 -
Hi All, With the Christmas festivities out the way it's time for a new project. Although I do have some odds & ends to sort out on a couple of other builds, I do enjoy starting a large build at this time of year, much like the breadbin-swapping modelling machine that is @AliGauld. At this time last year my employment status (or lack thereof) precluded such an extravagance, so it's nice to be able to kick off another 'heavy'. This time around I've been lucky enough to get my hands on Revell's Halifax B Mk.III, which was kindly transported to these parts by my parents. Now many of you may know that this kit is currently OOP, but the large-scale legend @tomprobert kindly agreed to part with his kit (he likes them bigger these days, he said 🤣). Anyhoo this rather large end-opening box is now in my possession: It's a BIG box! Tom very generously threw in a few extras - a set of Freightdog wheels: And an Eduard interior set, along with a rather obligatory mask set: Now there is a LOT of plastic in that box. Here's the sprues: The transparencies: A rather nice set of decals: The kit allows for 2 marking schemes, an RCAF aircraft 'Oscar' (which seems to be an oft-modelled option), and an RAF aircraft. I've decided to model a 100 Group RAAF aircraft, probably one of these two: (Both images copyright Australian War Memorial - for discussion only and will be removed on request). I am led to understand that the kit is a little deficient in the bomb department, so it might finally be time to add this to the pot: Now that's a festive mix! I might be a little slow getting this going, but it should be a hoot! Thanks for looking, Roger
- 180 replies
-
- 31
-
-
Hello Britmodellers, Here's another Revell P-47M, reverse-engineered into a D-28-RA. Because all my Thunderbolts had red cowling fronts, I required one with a blue engine cowling. The "Thunderbolts over Germany in Color" documentary on YT was another inspiration. Thanks for looking! Luka
- 1 reply
-
- 28
-
-
- Thunderbolt
- 1/72
- (and 1 more)
-
I'm pretty sure this is the right place for this RFI, so here goes. The Revell 1/72 V2 rocket box art.. Some of the photos were taken by my grand little helper, my 4 1/2 year old grandson, who was only too happy to inspect the rocket before the photo session to get a feel for the model; This last build of 2023 was finished a couple of days ago, when I realised as I was about to take some photos for the RFI I hadn't painted the wheel hubs of the launch platform "wheelbarrow" type thing and so did it on monday, circumstances conspiring a little to delay the RFI. I've painted the kit in a 1942 prototype scheme, the revell instructions rather cunningly only showing one quarter of the scheme, so despite looking in some books and on t'internet for more details, I kind of used some common sense and painted it in what seemed to me to be a symmetrical scheme. I confess that some of the touching up made me consider using the all over green scheme instead, but I perservered and the end result may look a little wavy, but maybe Hans or Joachim weren't overly concerned about dead straight lines back in the day, either. Anyone who's made this kit will know the rocket itself is a doddle to put together, the launch platform a little less so; I did have some moments with a few fiddly bits, but it went together in the end with a touch of superglue here and there. Paints used were Halfords appliance gloss white, tamiya and Mr Color (RLM 04). All in all, I think it's a reasonable way to finsh the year off, thanks for looking.
-

Revell 1:25 Foose Custom Cadillac Eldorado.
BrianI posted a topic in Ready For Inspection - Vehicles
The last bits glued on and the last decals applied an hour before the end of 2023, so I'm calling the Revell 1:25 Foose Custom Cadillac Eldorado done. An interesting build (with several roof repairs!). My first real use of 2K clear gloss coat (which I'm still not convinced about, due to it looking like clear syrup covering the model due to it's thickness). But overall a good build, apart from Revel quality such as a slightly twisted chassis. But at least it's now done and dusted 🙂 IMG_6863-web by Brian Innes, on Flickr IMG_6872-web by Brian Innes, on Flickr IMG_6873-web by Brian Innes, on Flickr IMG_6875-web by Brian Innes, on Flickr IMG_6880-web by Brian Innes, on Flickr IMG_6883-web by Brian Innes, on Flickr IMG_6888-web by Brian Innes, on Flickr IMG_6889-web by Brian Innes, on Flickr IMG_6890-web by Brian Innes, on Flickr -
This is my last for 2023, finished last week. Originally started in 2013 (😮) and picked up (and put down) over the years, I finally got it done thanks to a Shelf-of-Doom group build run during the Christmas holidays. The kit is the pre-painted Revell 1/29 Easy Kit with a few mods - I drilled out and enlarged the cockpit clear parts as they're too narrow out-of-box. The right side airbrake was opened up and detailed while the Gunner got his head turned for some movement and both crew repainted. Added some bolt details here & there. The pre-painted kit was repainted and weathered with pastels, Maskol chipping and finished with a Satin cote. Revell_Snowspeeder_9 by Dermot Moriarty, on Flickr Revell_EasyKit_Snowspeeder_6 by Dermot Moriarty, on Flickr Revell_EasyKit_Snowspeeder_11 by Dermot Moriarty, on Flickr Revell_EasyKit_Snowspeeder_13 by Dermot Moriarty, on Flickr Thanks for looking and happy new year! Cheers, Dermot
- 3 replies
-
- 14
-
-
- Empire Strikes Back
- Revell
- (and 1 more)
-
Airbus A400M Atlas RAF (03822) 1:72 Carrera Revell The A400M is a large, turboprop powered aircraft designed by Airbus Military to fulfil the future military transport requirements of the air forces of Belgium, France, Germany, Luxemburg, Malaysia, Spain, Turkey and the UK. Following the first flight of the A400M in December 2009, Airbus planning delivery of the first production aircraft in 2013, which they managed to achieve, to the French Air Force in August of that year. Further deliveries have been made to other customers since, and the RAF initially ordering 25, then reducing that to ‘at least’ 22, whatever that means. A further order later in the 2020s is expected, but with the fickleness of governments worldwide, who knows? In terms of capability, the A400M is designed to fill a gap between the tactical capabilities of the venerable C-130 and the strategic lift abilities of the C-17. When parked up next to a Herc, it dwarfs it, and you realise what a large aircraft it is, but equally it is dwarfed to a lesser degree by the Globemaster III. It will eventually replace the Herc when their airframes time-expire with many operators, and it offers a substantial upgrade to capacity over its predecessors. Powered by four huge and highly efficient Europrop International TP400 turbo-prop engines, each developing 11,000 shaft horsepower and delivering it to an 8-bladed prop, the A400M is capable of cruising at 37,000 feet at a speed of up to Mach 0.72, cruising at a shade under 500mph with a range of around 2,100 miles when fully loaded, or 5,400 miles unladen as a ferry flight. The A400M is capable of carrying up to 37 tonnes of cargo or 116 passengers, or up to 66 medical cases on stretchers plus their attendant medical staff. The Atlas has been in service now since the end of 2014, and although there have been some issues with the type, we often see them flying over Britmodeller Head Quarters at fairly low-level, which is quite an impressive sight to see and hear. The RAF airframes have been involved in a number of disaster relief efforts, and have also been deployed on combat missions, most recently evacuating refugees from Kabul during the hand-over of Afghanistan back to the Taliban in 2021. The Kit This monster of a kit was first released toward the end of 2011, and this reboxing represents an in-service machine in RAF and Spanish service, dedicated to taking up much of your display space in your cabinet at its earliest convenience. Once complete, it measures almost 65cm nose to tail, and 69cm from wingtip to wingtip, which gives an indication of its true size. The kit arrives in a large top opening box, and inside are fourteen sprues in grey styrene, and some of these are almost too large for my 60cm3 photo booth. There is also a (comparatively) small clear sprue, a large decal sheet, and the instruction booklet that has colour throughout and profiles at the rear to help with painting and decaling. Detail is good, but due to the size of the thing, it can seem a little spread out to some, but as you will see, there’s a lot to it. Construction begins with a choice whether to have the rear ramp deployed so viewers can see the inside that is provided by the designers. If you wish to open it up, you need to carefully cut the outer door and the cargo floor into two sections before you start on the cockpit, which is the first aspect to need glue. This process starts with adding the two bulkheads to the front of the floor, which include a set of steps that lead to and from the cockpit. The cockpit floor has the side and centre consoles moulded-in, plus the three bases for the crew seats, which are each a single part, joined by another one that is fitted on its own base in a nook at the level of the cargo floor. The instrument panel and its coaming are fixed into a groove across the centre console, and there are a total of six decals for the consoles and panel, all of which are on a clear background so there’s no paint matching needed. The rear of the cockpit floor has two more bulkheads laid on grooves in the floor, which creates the bedroom where two of the crew can sleep during longer journeys. Sadly, very little of this room will be seen unless you have sharp eyes and a torch. The completed interior is then encased in the inner skin, which has the expansive ribbing in the rear, and a set of folded-up seats moulded into each side. The outer fuselage halves have small side windows inserted into the apertures from within, and the nose area is painted, then the nose gear bay is made up from a C-shaped roof, and two side panels to get detail on all surfaces. It is placed into the starboard nose, and at the rear either the aft part of the cargo door, or the full uncut part is inserted for open or closed doors, respectively. With that done, you can close up the fuselage, placing 80g of nose weight in front of the nose gear bay before you commence the gluing. To avoid narrowing the cargo area within the fuselage, the landing gear is housed in large external sponsons that are made from separate parts once the upper sections of the landing gear legs have been emplaced, totalling three per side. Bulkheads are inserted after putting the top section of the sponson into position, with another smaller one near the rear. The lower surface has a large rectangular hole for the gear, and another pair of tiny windows in each one at the rear, then they close in the bay and complete the sponsons, leaving the visible part of the gear until later in the build. For a change, the upper wing is full-span, and has the lower halves glued in place, adding two lights at each tip, then four flap fairings under each wing before it is joined to the fuselage and glued in place at the same time as the canopy, which also includes the are above it to make hiding the seam easier, and is overall a much better method than trying to fix individual panes in place. The tail of the beast is a peculiar shape, the fin appearing to be wider at the top, where you will find the elevators. Each of these three sub-assemblies are two parts each, and are joined to the fuselage on a long peg, taking care to get everything aligned tidily in order to keep your pedantic friends from having a dig. There are four engines to build up next, and each one has an identical internal representation of the turbo-prop motor, which includes front and rear surfaces of the engine with a long trunk, and a tapering intake added to the top. These are then installed in four unique pairs of external cowlings, that are given different numbers to assist you in putting them in the right slots on the wing. The front of each engine has an identical insert that contains the intake under the prop, and a bobbin onto which the prop will be added later, taking care not to inadvertently glue it in place. Three forward-raked gear legs are made from two halves for each side, with a two-part axle inserted perpendicularly at the lower end to receive a two-part tyre on each side, with a scrap diagram showing how they attach to the U-shaped uppers that were glued into the sponsons earlier. The nose gear strut is squat and also has two wheels, plus a separate scissor-link and retraction strut, a transparent diagram showing where they mount within the bay. Many wheels require many doors, beginning with the long set that close over the main gear bays. For in-flight, they are moulded into a single part per side with an engraved line down the centre, which you should use to cut them in half for the gear-down option. The same method is used for the nose gear bay, cutting them in half for the wheels-down option. There are a lot of blade and rail antennae dotted around the underside, and more around the hump over the wings, with a clear flasher and an exhaust for the APU included. The crew door on the side can be posed open by adding stairs and a handrail to the door and gluing it by the long hinges, or you can cut those off and close the door. For the cargo bay door, the closed version is already finished, but if you cut the floor and outer skin into two parts, you now join those together to complete the ramp, which is fixed into slots in the sides of the aperture, and is held in place by a pair of struts, plus another that drops down onto the ground to help keep her straight and level during loading. A few more small parts are added just in front of the gear sponsons, and two strakes are placed under the tip of the tail, plus a two-part refuelling probe over the cockpit. The last task is to make up the 8-bladed props, and again you need four, which is no surprise, but you also have a choice of feathered blades with their leading edge following the line of flight to minimise aerodynamic resistance. Both types of blade units are moulded as one part, and have small overflow nubbins and a tiny bit of flash to tidy up, then they are each trapped between the front and rear of the rounded spinner. The blades are handed, so take care to use the instructions to help you put them where they should be, and if you have been careful with the glue, they should be able to spin once glued to the bobbins in the front of the nacelles. Markings There are two decal options included on the sheet, plus a template for the walkway that runs along the majority of the top of the fuselage, making sure that the crew exiting one of the two top doors don’t wander over delicate parts of the airframe. You can either cut it from the sheet and use it carefully as is, or you can make another replica from tape. Whichever you feel will work best. From the box you can build one of the following: ZM406 ‘100 Year No.70 Squadron’, RAF Brize Norton, 2016 TK.23-02, Ala 31, Spanish Air Force, base Aérea de Zaragoza, 2022 Additional diagrams are provided for each of the engine nacelles from the sides and underneath, plus the props, each blade of which has the yellow tips and stencils front and back on each blade, although you will have to paint the grey de-icing boots in the leading edges yourself. I’d suggest grey decal strip from Fantasy Printshop if you don’t already have a candidate of your own. There are a lot of decals, as is common with many modern aircraft, so it won’t be a 5-minute job, so take your time and work methodically to get them all in the correct place. Decals are by Zanchetti, which is a guarantee of good registration, sharpness and colour density, with a thin matt carrier film cut close to the printed areas. Conclusion A welcome re-release of this huge aircraft now that suitable time has elapsed and the type has been out in the wild and had time to get used. It’s a nice kit, and if you’re interested, the only real question will be ‘do I have the space?’, but when has that ever stopped us? Highly recommended. Carrera Revell model kits are available from all good toy and model retailers. For further information visit or
-
Seasoned green things Britmodellers 🌟 I recently finished this Revell bubbletop Thunderbolt, Hamilton prop and rocket tubes came from an Academy Razorback. Thanks for watching! Luka
-
 I just have to have a go at this blue camouflage! Sure, it has been done loads of times but it will certainly brighten up my display cabinet. Quite a bit of flash from what I am used to these days. The original mould is from 1999 and I managed to pick it up for £10 so I guess I can’t really complain. I also found this in the depths of the loft. I must have brought this in the early 80’s. Not sure I am brave enough to attempt it though. I am a bit behind on my GB’s so I might not be able to start this for a couple of weeks, time will tell. George
- 53 replies
-
- 10
-
-
Hi all. I've finished this last week and it's taken me a couple of months slow time. It's out of the box bar the data pod on the wing tip. There is no more to do to the kit, but I am going to put a pilot in it when I get one. I've chosen to model it engines running, hence the aux doors open and as intended from 1979. It's a simple kit enough and a design of its day. There's not much out there if you chose to detail it up. Kit decals were fine but I had a torrid time with the gloss varnish (W&N) I use. Perhaps it's going off. I glossed the model and putting the decals on, once dry it was obvious there was silvering. I've done the usual remedies which worked to a point. However we lost our 2nd dog within 12 weeks of the 1st, to cancer again so my heart wasn't really in it. This kit must be my nemesis as I've tried to build one twice before and it beaten me. Anyway it's done and never again. Thanks for looking Steve.
-
Back in 2014, I did the Boultbee Spitfire Introduction course at Goodwood. The course involved 70 minutes in a Chipmunk, followed by 40 minutes in a Harvard and a Spitfire Tr.9. The Harvard was this one: I've managed to do two models of the aircraft I flew in so far and this is the second of them. WIP is here: 1/48 SNJ Texan - Work in Progress - Aircraft - Britmodeller.com One last one with the last aircraft in the training continuum: I probably should've picked out the unpainted screws in the panels but time's against me. I needed to finish this by the end of the week as everything's going into store for an extended period after Christmas while we move to the Netherlands for a year or so. This classic Revell/Monogram kit was added to with Eduard P-51D wheels (most warbird T-6s use the Mustang wheels as they have disc brakes and anti-shimmy tailwheel tyres), Metallic Details CW-22B propeller (they're both Hamilton-Standard 2D30 props), Barracuda Studios spade grip in the front cockpit, Eduard details set (for the Occidental kit) that I used bits and pieces from and Microscale decals. Each letter and number is separate, so took a bit of mucking about! The decals on the engine cowl are from a 1/72 USAF C-130 that I had in the decals stash. None of the decals are the correct size but all are close. I made the antenna on the spine from a piece of metal rod and drilled out the pitot tube, added the ADF antenna on the belly from a modified Mirage III part and cut the elevators to show them drooped as they lock in that position on the ground. Unfortunately, the lovely artists' chalk white exhaust weathering I did on the port side disappeared with the Future clear coats; a phenomenon I experienced with the Lancaster, too despite the matt coat over them. I might need to use a different technique in future where white is used (no pun intended!) I didn't pick up until I was decalling that this particular T-6 doesn't use the standard tail nav lights on the vertical stabiliser and instead has a single one on the rudder. I wasn't about to go back and do it again! Enjoy! The Chipmunk still to come is the Heritage Models version I hunted down about a year before Airfix release their excellent version. Oh, well.
-
Sometimes I cheat on my Luftwaffe planes with USN a/c, although, an F4F was actually my first ever 1/48 scale kit. Last effort: the Revell Dauntless. Besides my fascination with carrier aviation, I also wanted to use this kit to try out weathering with oil paints. It came out, well, let's say allright - with much room for improvement. and it goes nicely with my collection so far, especially on the flight deck (and YES I am aware that the flight deck is Japanese, but I couldn't get my hands on the US version ) As always, thanks for looking Cheers here's my collection from the "dark" side https://photos.app.goo.gl/od4agvy1tebuSm7L8
-
Consolidated B-24D Liberator (03831) 1:48 Carrera Revell Consolidated's Liberator always seems to have flown in the shadow of the more popular B-17 Fortress in the media's eye even thought there were more of them, and in some aspects it was inferior, with its Davis Wing design offering poor low-speed handling and a lower maximum ceiling, but it saw more than its fair share of action in almost every theatre of WWII, both in US use and in the hands of the RAF. It has a specification written around its main design traits, and had a long wingspan, twin bomb bays and four super-charged engines to provide motive power. It was unusual in having a high wing placement, tricycle undercarriage, and tamboured bomb-bay doors that retracted up the side of the fuselage, and was fitted with a fully glazed nose cone with .30cal machine guns for protection from head-on attacks, which proved unsuitable for the task of defence. This was later updated to a turret fitted with .50cal guns with a glazed lower for the bomb aimer's position that was the H variant, but many of the earlier D models were still in use concurrently, even with the later J models. Taking a leaf from the B-17's defensive armament book it could be fitted with up to 10 .50cal M2 Browning machine guns, with the layout changing during production changes, when various options were found to be unsatisfactory, such as the poorly defended nose, offsetting the waist guns to give the crew more room, and the underside guns, which were eventually replaced with a Sperry ball turret that could be retracted into the fuselage to reduce drag, and must have been a relief for the crew if they had to make a belly landing. The name "Liberator" was coined by the British, as they were early adopters of the type after the fall of France, serving with Coastal Command, and later with the RAF after the fuselage had been lengthened, the nickname soon spreading to other operators. In US Service the Liberator flew alongside the B-17, and later superseded it when the shorter range of the B-17 began to be an issue, with the Ploiesti raid being one of the most notable operations that featured the B-24, which suffered heavy losses due to the low-level nature of the attack on such a heavily defended installaion. After the J standardised the nose turret, the N was intended to be a major upgrade that incorporated a standard single tail fin to improve handling. Due to the end of the war this was cancelled, although the tail was still seen in the PB4Y-2 Privateer operated by the US Navy until long after WWII. After the huge success of the B-29 and the dawning of the jet age, the Liberator was drawn down with unseemly haste at the end of the war, with only the Privateer soldiering on. A civilian airliner was prototyped as a potential offshoot, but that didn't proceed due to the same issues. The Kit This is a reboxing of the original Monogram kit of the type that has been around since the 70s, at which time it was the pinnacle of injection moulding technology, and must have been quite an impressive kit at the time. To be fair, time has been incredibly kind to the moulds, particularly as some would have you believe they’ve been at the bottom of the sea at some point! The rumours we hear on the internet, eh? It has raised panel lines, includes a set of figures and a ground-handling tractor that would probably be considered gimmicks by today’s cynical modeller. Those aspects aside, the detail is still pretty good for the age, and is a firm basis on which to improve if you’re interested in going the extra mile. It’s a big model too, with the Davis wing making for a substantial wingspan of almost 70cm. Construction begins with the broad cockpit, which seats two pilots abreast on substantially framed seats, with steering yokes inserted into the wide instrument panel after applying the included decal for the instrument dials. The seats have belts moulded-in, and the bomb aimer’s stool and sight is added to the lower forward section, before the fuselage halves are prepared with paint and side windows that are applied from inside. There is plenty of ribbing moulded into the interior, plus some other details and oxygen hoses for good measure, but the prominent yellow oxygen tanks are absent from the kit. The fuselage halves are further detailed with bomb bay ladders that are hung from the two bays and have a stick of two-part bombs attached to the rungs. The waist gun windows can be posed open or closed by making them up with their central windows, and positioning them swung up into the roof for the open option. The two gunner positions are situated in a section of floor with lower sidewalls moulded-in, and have the mounts for the .50cals glued into position on each side, trapping the pintle-mounts in place so that the gun can be moved after completion. There is a moulded-in texture to the floor in this section too, and it is inserted into the starboard fuselage half, then the nose is detailed with equipment add-ons and the nose bay doors, which I’m sure were changed to open outward at some point, I just can’t remember when. The cockpit and a rear bulkhead are fitted into the front of the starboard fuselage, as is the nose wheel on its short strut, attached to a short bulkhead by a V-shaped brace. A small mudguard is applied over the top before it is glued under the cockpit floor, and another bulkhead is fixed at the back of the bomb bay to permit closure of the fuselage, which will need lots of tape, no doubt. The four Pratt & Whitney R-1830-35 Twin Wasp engines are each depicted by a single insert that fits inside the nacelles with a drive-shaft slipped through the centre, trapping them in position by closing up each wing and adding the cowling to the front. The gear bays are moulded into the lower wing halves, and do a decent job of depicting the interior, and shouldn’t need any additional work other than painting, unless you’re a detail hound. The completed wings are slotted through the fuselage to interlink in a strong bond, thanks to the long tabs at the roots that project through the fuselage and into corresponding holes in the opposite wing root. The three-bladed props are each a single part and glue straight onto the shafts at the centre of the engine inserts, but are probably best left off until later. The prominent H-tail with big rounded rudders is made up from upper and lower halves that accept a two-part rudder at each end, the flying surfaces having a fabric texture engraved into the surface, which although a little over-scale should reduce under a few coats of paint. It is glued to the rear of the fuselage over the rear turret, which is made from two clear halves that trap a twin Browning mount between them that rotates on a circular platform once installed. Moving forward, you have a choice of modelling the bomb bay doors in the closed position by using one set of parts, or rolled up the side of the fuselage using another set. Behind the bay is an insert that covers the location of the belly turret, which was often either absent or retracted on many Liberators. Behind that is a bumper to protect the tail against over-exuberant take-offs, and behind that is a crew access hatch that can be posed closed by inserting the door, or open with the access ladder and cutting off the tabs that hold the door flush with the rest of the fuselage. Going back to the wings, you have a choice of building your model gear up or down, each option starting by making up two sets of gear from four parts each, comprising the strut, captive bay door and two-part wheel with flat-spot moulded in. The instructions show the flat-spot uppermost for the retracted option, so that it will be hidden by the bay door, but fails to note that for the gear down option, the flat-spots should be inverted. Each leg is supported by a retraction jack, giving the leg three points of contact within the bay. The canopy is built from three parts, adding bulged side windows and gluing the finished assembly over the cockpit with a clear astrodome in front over the bomb-aimer’s position. Behind the cockpit is an upper turret that traps the twin guns between the top and bottom of the turret ring before putting the clear dome over it and snapping it into position. Either side of the nose is a whisker-like probe and four Browning machine guns are pushed, one through the side of the nose and three through the clear bomb-aimer’s window before it is glued in place, with each of the waist gunners also getting a Browning for their pintle-mounts. The last parts of the model are a pair of probes that sit on the wing behind the inner engine nacelles, a faired D/F loop and an aerial just behind it, which has two wires (from your own stock) fixed to it and the top of each of the rudders, as per the picture of the finished model on the cover of the instructions. As mentioned earlier, there is a tracked ground-handling tractor that is made from thirteen parts, including a pair of crew seats for two seated crew members, who are accompanied by a guy with a spanner, another wearing headphones and pointing up at something, and finally a gentleman in a parachute harness with headphones that could be a representative of the crew. If you are using the tractor, there is a towing bar included that fits into a recess in the yoke of the nose wheel and hooks over the towing hitch on the tractor. The colour call-outs for the tractor are shown during the build process, with more diagrams showing the correct colours for the included figures. Markings There are two decal options on the large sheet that are substantially different from each other, and have a good range of decals to add some detail and realism to the paintjob. From the box you can build one of the following: B-24D-25-CO ‘Flak Alley’, 44th Bomber Group, 68th Bomber Sqn., Shipdham, England, October 1943 B-24D-20-CO 98th Bomber Group, 343rd Bomber Sqn., Brindisi, Italy and ‘Bond Tour’ in USA, Winter 1943 Decals are by Cartograf, which is a guarantee of good registration, sharpness and colour density, with a thin matt carrier film cut close to the printed areas. The instrument panel decal is a realistic-looking depiction of the real thing, with two cut-outs for the yokes. Conclusion The Liberator was an important, if slightly overlooked part of the US bombing offensive during WWII, and until someone releases a new tooling with engraved panel lines, this is the only game in town in 1:48 scale, and because of the size of it, shouldn’t be too hard to re-scribe if you prefer recessed panel lines. Highly recommended. Carrera Revell model kits are available from all good toy and model retailers. For further information visit or
-
 Well it's all a bit late but I'd like to enter these two: and: they are both relatively modern, state of the art kits. The Revell mould seems tired and has a lot of flash, particularly round the open cowling flaps: Revell correctly gets the gun alignment parallel to the ground, Academy doesn't. But the elephant in the room is the huge difference in fuselage depth: The Revell one (lighter plastic) has a huge belly. Now I don't know for sure (Academy is a -D, Revell is an -M) but I (and the Internet) think that may be a mistake on Revell's part. More digging required... Regards, Adrian
- 120 replies
-
- 10
-
-
Next off the bench is the Revell-Monogram 1/48 T-6G, being built as the SNJ I flew at Goodwood a few years ago. I actually made astart on this in 2020 but lack of bench space and COVID-19 put it on hold. Just starting on the Eduard detail stuff (meant for the Occidental kit but most of it is useable on this kit).
-
Hi all and latest finish for me, built for the 'Above the Karman Line" GB here on the forum. The short build thread is here but to recap: Kit: Revell Millennium Falcon 'Solo' version Scale: 1/164 Build: Out of box Paints: Tamiya, Mr Hobby, Flory Models Wash, W&N Satin Varnish Decals: Draw Decals for Fed Ex 757 Cargo Extras: A good friend 3D printed some cargo containers but haven't finished them yet. Revell_YT_1300_Freighter_Falcon)FedEx_Done_1 (6) by dermot.moriarty, on Flickr Revell_YT_1300_Freighter_Falcon)FedEx_Done_1 (5) by dermot.moriarty, on Flickr Revell_YT_1300_Freighter_Falcon)FedEx_Done_1 (9) by dermot.moriarty, on Flickr Revell_YT_1300_Freighter_Falcon)FedEx_Done_1 (8) by dermot.moriarty, on Flickr Revell_YT_1300_Freighter_Falcon)FedEx_Done_1 (7) by dermot.moriarty, on Flickr Revell_YT_1300_Freighter_Falcon)FedEx_Done_1 (10) by dermot.moriarty, on Flickr Thanks for looking, take care and happy Christmas! Cheers, Dermot
-
Carrera Revell Volkswagen Corrado 35 Years Giftset (05666) 1:24
Mike posted a topic in Vehicle Reviews
Volkswagen Corrado 35 Years Giftset (05666) 1:24 Carrera Revell The VW Corrado was a child of the late 80s, arriving in 1988 and based on the then-current Volkswagen A2 platform that could also be found under the Mk.2 Golf amongst others. It was a replacement for the Scirocco, but ran alongside it for around three years, with almost 100,000 made, half of which were sold in the US. It was designed as a 2 plus 2 sports hatchback, and for its time had classic lines that don’t look too out of date, even now. The bodyshell was partially zinc-plated, which kept the panels from rotting out as the years went by, although because of the nature of the car, many saw the wrong side of the hedge at some point in their lives, meaning that there is a dwindling stock available on the second-hand market today, with the price increasing as a result of that fact, and the nostalgia of those that would have liked one when they were in-production from 1988-95, of which I was one. The top-of-the-line VR6 had some components from the A3 platform, adding a new wider front-end to cater for the suspension and the additional bulk of the V6 that was either 2.8 or 2.9 litres if your budget would stretch to it, or you could have the G60, which was equipped with a supercharger mounted on a 1.8 engine, which wasn’t quite as fast as the VR6, which could get to 60mph either side of 7 seconds depending on the engine type. The base model 1.8L 16V wasn’t slow however, getting to 60mph in a respectable 9 seconds, but those two seconds make a lot of difference on the ground. Initial sales were slower than VW would have liked, partly due to the higher price when compared to the ageing Scirocco, which sold alongside the Corrado for three years, but anyone that had a hankering for some hi-tech gadgetry would have been enamoured with the spoiler on the rear of the sloped hatchback boot, which automatically deployed at 100kmh and drew admiring glances from those that were left in its wake, although whether it helped with handling is debatable, as all Corrados were front-wheel drive, so technically the airflow was putting more weight on the rear, thereby lifting the front wheels and reducing their traction. Still cool though. There was talk of the police being able to tell how fast you were going by whether the spoiler was deployed, and I have a feeling that its function was made selectable at some point, but as they have radar guns anyway, it didn’t deter many people. The last model in the US was in 1994, with Europe following on the next year, with no upgrade or replacement available in its place, which is a shame, as the Corrado had a good reputation and a stylish name that was gleaned from Spanish and roughly translated means sprinter. I’d still like one. The Kit This is a reboxing of the kit that was originally tooled in 1990 as a G60, complete with supercharger assembly under the bonnet, although it has been reboxed in the past as other variants, one the extremely rare Zender cabriolet that was released in 1991, just a year later. The kit is a celebration of 35 years since its launch, and arrives in an end-opening box with three sprues and the bodyshell in grey styrene, a clear sprue, a bag of four flexible black tyres, decal sheet and the instruction booklet, which is printed in colour and has the painting and decaling guide on the rear page. The package is completed by another bag containing six thumb pots of acrylic paint, a 12.5g bottle of Contacta Professional cement with a precision applicator, and a #2 brush without protector that had got a little bent out of shape. Detail is as you would expect for a kit that is almost as old as the 35-year anniversary that the giftset is intended to celebrate, and although some aspects of the model are slightly simplified, there is a full engine on the sprues, and with a little surgery you can ‘pop the hood’ to show off your work under the bonnet. Construction begins with the engine, starting with the cylinder head with integrated supercharger unit, applying a choice of two decals on the head after painting. This is then added to the top of the two-part block and transmission, and has the sump fitted underneath, installing the exhaust manifold under the supercharger at the rear of the transversely mounted engine, and fixing the distributor on the front, which you’ll need to wire up if you are planning on opening the bonnet. At the front of the engine, the air-intake path is connected to the supercharger on the left side, and at the other end of the block depicting the alternator, which is later supported by the front axle. The front of the floor pan is painted in preparation for engine installation, painting the inner arches in body colour, and the ancillaries in various other shades, plus black for the cover panels, and applying a decal to the top of the battery that is moulded into the left inner wing. The completed engine and front axle are then inserted from below into the space at the front, supporting the axle with a pair of coil-over shocks that are painted yellow in the centre. A scrap diagram shows that from the side the engine should be tilted back 5° from vertical, using the floor pan as datum. Underneath the pan, the exhaust with catalytic converter is inserted into a recess down the centreline, starting at the downpipe and ending at the forward muffler box, which is made from two halves, the visible portion having stiffening ribs moulded into its surface. The rear box has the entry pipe moulded into it, as well as the exhaust pipe, adding the stainless-steel tip, which is over-thick and will need thinning or replacing with a length of tube to improve realism, remembering that the tip is angled. The rear axle is mounted behind the front box, and fits snugly around the rear box, mounting on another pair of yellow coil-over shocks. The wheels are each made from three parts, consisting of a bland inner rim that you paint black inside to hide its presence, then gluing the visible alloy wheel design to the front and slipping the flexible black tyre over the assembly, the latter having a nice tread pattern moulded-in. There are some slight sink-marks in the surface of the alloy portion of the hub, which can be filled and sanded flush with a little care to protect the moulded-in details around the stud locations and logo. The finished wheels snap into position, then the radiator assembly is made up from the core moulded on a cross-member, with the fan trapped between it and the tin-work behind, lowering it into position at the front of the engine bay, and connecting a hose to the supercharger, then linking the air box to the intake trunking via a ribbed cylindrical structure. The front seats are both made from front and rear parts, and have two decals applied to the centre cushions to depict the pattern of the material on those portions. They are set aside while the interior tub is prepared, first painting the moulded-in scuttle at the front, the carpet, centre console, pedals and the integrated carpet mat under the driver’s feet, which are on the left side, sadly for the right-hand-drive fraternity. There is a choice of white or red Corrado logos to apply to the front carpets if you wish, depending on which colour you paint the carpets. The rear seats are painted and decaled, the gear shifter with gaiter and decal plus manual handbrake (remember those?) in the centre, and speaking of the centre console, there is a large sink mark at the front of this, but as it is covered by the dash panel later, who cares? The seats are installed on a pair of raised guides, fitting the door cards after painting them and detail painting the accents and latches for added realism. The dash is made from two parts, most of the detail is moulded into the vertical section, which has two decals applied for dials and heater details, then is topped off by the coaming, which has a pair of vents in the forward corners. The short steering column with stalks is inserted under the instrument binnacle, fitting the steering wheel to the top with a grey accent panel in the square centre boss, which is perhaps the most dated part of the car. The completed dash is inserted into the front of the cab, and here the diagrams initially seem to imply that there is a separate lower structure that is undocumented, but it is simply the shelf under the dash, which has had its connecting ends mostly obscured by the red location arrows. The completed interior can then be joined to the floor pan, mounting on rails and locating via the exhaust tunnel. The bodyshell has its upper interior painted black, except for the roof, which is painted a dark grey to match the accent material, and the bonnet is also painted black if you plan to open it up for viewing, which is shown in the next step, although only after the deed has been done, and you have taped it back into place, presumably to keep the bodyshell from deforming during handling. The rear of the shell has a pair of inserts fitted into the light cluster cut-outs, and these may need trimming of flash, then painting with your shiniest silver or chrome colour to reflect some light back through the clear lenses installed later, which are painted red, amber and left transparent where the reversing lights are. The trim around the doors, windows and screens are all painted black, assuming you have painted the shell red (other colours are available), adding more black paint to the clear part to depict the trim at the bottom of the windscreen and on the B-pillars. The clear part is inserted from within the shell, and the body is then fixed to the floor pan, leaving the front side windows without glass, as is common with many car models. The rear bumper is added under the boot at the same time as the rear light cluster mentioned earlier, then the front bumper with black valance is fitted with clear lenses under the main lights, fixing it in place, then adding the grill and integrated light backing strip under the bonnet. These lens backings are flat, and should be painted chrome to reflect the light before you fit the headlamp lenses. If you have cut the bonnet loose from the bodyshell, the tape can be undone and the bonnet removed so that you can install the slam panel, and a dash pot on the rear bulkhead, then the bonnet is glued in place at an angle, but a stay isn’t provided, so check your references and make one up from wire or rod that fits the bill. The two windscreen wipers are fitted to the clear windscreen, so take care with your choice of glue so that it doesn’t fog the screen around it. Another wiper is fitted to the rear screen too, and the wing mirrors are built from the shell plus clear mirror, which you should paint chrome on the back side to maximise reflectivity of the part in the same manner as a real mirror. The final task is to stretch a length of sprue to create the radio antenna that fixes to a base glued to the rear of the roof at an angle, which helps the car look fast even when standing still. Markings There is only one set of marking for this model, but the main differences between individual cars is the body colour and the number plate, of which there is a wide choice from various countries. From the box you can build the following: Decals are by Cartograf, which is a guarantee of good registration, sharpness and colour density, with a thin matt and gloss carrier film, which varies between individual decals, and is cut close to the printed areas. Conclusion I was a big fan of the Corrado when it launched, and still have a soft-spot for it, even today. The model is a little on the old side, but it’s also the only game in town, so I’m planning on building it. If you’re looking for an upgrade to the detail, you could consider the transkit from Whitechocolate124. Highly recommended, despite its age. Carrera Revell model kits are available from all good toy and model retailers. For further information visit or -
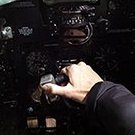
Hi all, Here's my Phantom FGR.2 that I finished this weekend. It's the Revell rebox of the Hasegawa kit (the original one, not the recent one), which we are all pretty familiar with. Not a bad kit, but I did replace some bits of it with aftermarket. The wheels are Aires, the seats are Quickboost, the pylons are from Aerobonus. I was planning to just use the old Airdoc RAF Germany Phantom decals, but they turned out to be not so good. Not in register, undersized, and some colours were a bit off to me. So I also got some from a Model Alliance set, stencils from Xtradecal, and a few from the kit sheet. Painted with Mr. Color. I went for 31 Squadron markings, mainly because you don't see those often. Thanks for looking, Pete
- 29 replies
-
- 107
-
-
-
- Revell
- Bunch of aftermarket
- (and 1 more)
-
 Having already edited Rafale B and M kits in 1/48th Revell has surprisingly not yet in its range the most produced variant I mean the single-seat Rafale C. This will be done in 2018. Don't forget the Korean mix (B+M=C !) edited once upon a time by the Revell plastic injection contractor: ACE (Link) - ref. 3901 - Dassault Rafale C Source: https://www.hannants.co.uk/product/RV3901 V.P.


.thumb.jpg.ad2b820bfdebfdb8541e9255a05f38c7.jpg)
