Search the Community
Showing results for tags 'Mustang'.
-
Evening guys, this is my last finished kit, P-51D from Airfix 1/72 kit Kits - World decals, built mostly OOB with few details added to the wheel wells and riveted fuselage + improved the fasteners around cowling. The paints used are agama alcohol based silver and aluminium, mixed in various ratios for diferent shades and vallejo paints for rest of the painted areas. I did not want to go too hard with the weathering this time. The WIP is here http://www.britmodeller.com/forums/index.php?/topic/234965758-p-51d-f-51d-2x-airfix-sweet-arlene-finished/ Exhausts are just placeholders (cut from Hasegawa exhausts), ll be replaced by quickboosts during next week . Hope you like her and thanks for watching guys
- 28 replies
-
- 23
-

-
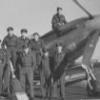
P-51D-30NT 45-11518 G-MSTG "Janie", Pics from Colin Ruffles Additional "Janie" Pics from Mark Mills
-
Hello guys, This is my first and only car build so far, really enjoyer building it. Here it is: Thank you for looking...
-
Okay ladies and gents, the Easter break is over so it's time to get this show on the road. This is my entry for the Korean War Group Build and as the title says it will be the Tamiya 1/48 P-51D Mustang as flown by 77 Squadron RAAF during the initial stages of the war until the squadron re-equipped with Meteors. I am going to model the personal mount of the squadron CO, Wing Commander Lou Spence who was KIA during a raid on storage facilities at Angang-ni, north of Pusan in South Korea, which had been recently captured by Communist forces. Spence was leading four Mustangs in the attack armed with rockets and NAPALM when his aircraft failed to pull out of a steep dive at low altitude and was seen to crash into the centre of the town, exploding on impact. The best boxing of the Tamiya Mustang is definitely the Korean War F-51 one as this contains all the additional mustang parts that don't come with the other boxings, These include both standard and Dallas canopy, cHamilton Standard and Aeroproducts props, as well as all of the ordinance and drop tanks carried by the P-51. Now I admit I might have gone a little overboard on the Utracast resin accessories but in my defence I have been hoarding these for ages and this seems like a goon place to use them. Lastly we have the decals from Aussie Decals and unfortunately the aircraft I'm doing is the bottom one (A68-809) which is the most boring of the lot, oh well.
-

North American P-51D Mustang 1:72 **COMPLETE**
Rickpadwick1801 posted a topic in P-51Mustang STGB II
Hi Everyone, Here is my build for this group build, an Airfix 1:72 scale P-51D Mustang (A01004). Here is the text from the Airfix website : The North American P51 Mustang is viewed as one of the iconic American fighters of the Second World War. Designed to an RAF specification, the Mustang was transformed once the Rolls Royce Merlin engine was installed. Its long range and excellent firepower made it a superb escort fighter, able to protect the bombers all the way to Berlin and back. After the war the P51 saw service in Korea and was used by some air arms up until the early 1980s. Anyway here are the photos. Box Art Front Box Art Rear Sprues I will be making a start on this kit in the next couple of days. Thanks for looking. Rick -
 Well, I've finally managed to finish one! This is the excellent new-tool P-51D mustang from Airfix. I built the kit with a few scratchbuilt parts such as harnesses, wiring and gun barrels. The decals are by Kits-world with Stencil markings and insignias from the kit sheet. For less than the price of two pints this kit has provided me with hours of entertainment, and with so many decal options available I can't wait to build more! I hope you like it. Sean
- 53 replies
-
- 23
-
-
The next kit I'm going to try not to ruin is this one. I'm also going to try Alcad, although from what I have seen here it can be touchy stuff to use. As you can see I have chopped off some bits and had a bit of a fiddle. Stephen
-
Hi folks,if I can come aboard with this one,Tamiya,s beautiful P51 in the colours of the USAAC 375th,sqn which flew missions in support of the landings including I believe six on the day,The kit needs no introduction as it,s been around a good number of years,got this last week for a tenner at the Northern show.
-
Guys a little guidance if you will.I am building Tamiyas P51D Lou IV over on the D-Day GB,and I am at the masking stage of the black/white I.D. stripes clearly the stripes were carried under the wings but not I assume on the upper wing surfaces as the only actual photographs I can find show none,however most restored aircraft,die casts and even a few models on the net show full stripes.Can anyone clarify the situation? thanks in advance.
-
Hi folks looking through my decals box I had not realised that the Airfix mustang I have was the starter set boxing with the markings of 112 squadron based in Italy so I thought It would make a good partner for the other Mustang I have just entered. The box has long gone but We all know what the kit is all about as there have been some superb examples posted here since it,s release this is my fourth go at this kit. Here,s progress so far.
-
Hi folks last entry for the under a tenner GB,great kit to build.This was the starter set boxing so I don,t know why no serials were supplied on the sheet maybe they were not present on the photographs used by Airfix during the preparation of the kit,Wolwe sent me the photo this model is based using the "firewall" scheme(I did not add codes) also the upper wing decals are different to those supplied and there is some basis for the aircraft not having the yellow leading edge bands.Many thanks for looking.
-
Hi folks another under a tenner GB entry,nice kit apart from the canopy,just could not do any better job of it,base colours are newish humbrol acrylics which I am very impressed with,green as usual brushed,many thanks for looking.
- 13 replies
-
- 13
-
-
 Hey I get to go first on a thread that's not mine! - see Mike's reply below for details. Nice idea for a project. Will watch with interest.
 -
Hello guys, last 14 days i was working on this baby. Felt i need to do something for rest, so decided to give a go on the Airfix 1/72 P-51D mustang, along with Eduards PE set. But because there are tons of Lollipoops all around, i wanted to make it a bit diferent. And because i had spare decals for shark mouth (from revells B mustang) and GA code letters (from swords P-40K) it was quite easy.. Sadly, i did not find many info about the 112sqn mustangs, speaking about colours scheme, untill it was too late (ofc, mr. Murphy....), so the camouflage scheme is based on other RAF mustangs (and does not fit the 112sqn, sadly). But well, doesnt matter so much for me, i had fun with it anyway I think this is the first build since i joined BM, where i did not made WIP thread - i realy felt i need some rest without any kind of pressure, should i fail or so.. So if you dont mind, just two or three images from build. Cockpit was just quickly painted. Used some PE parts from Eduard set, but i left the cockpit side walls as it was(only made new oxygen hose from wire wired around other wire - huh... ) - the PE side walls were too falt and i dont like the pre-painted side walls bcs you can see the texture from printer on it.. I m not sure if the RAF mustangs had the wooden floor or not, but i wanted to try it. At first, i wanted to make it from real wood (safety matches), but the structure ofc did not look too good, so i just painted it. Its too rough, i know I did some stressed surface around - thanks spiton, used your way (i did not want to overdo it as in this scale it would be probably not noticeable, but i wanted to try how it looks - you can see it if you know where to look or when the kit is angled right way, but the photos cannt catch it so good, sadly ). Also i did some rivet work on the airframe - i know the general idea is, the mustangs had the wing panels and rivets puttied. But you can find out there photos of mustangs wings with quite visible rivets, so in the name of practicing.. Here after some base paint work. So far it looks so clean.. but that should change soon. After decals were set i gave it few coats of future (klear) stuff and followed Jamie Haggo´s step by step oil paints weathering what i found on his blog - i have to practice it a lot and a LOT more, but his blog realy helped me a lot. I have only like 5 oil colours so far, so using this limted palette, after fading the camouflage colours and darkening the surface here and there (wanted to achieve some dirty look), this is where i was : Its not so good visible, the phone camera cannt catch the colours so good.. Anyway, this is RFI, so i m sorry for showing a bit of the progressing and lets go to the finished kit. It was nice sunny day so i thought i would try to make some photos outside. The sunshine shows the colours realy nice and on the photos its very close to what it looks in reality. Sadly, the bright side doesnt allow the phone camera to catch the weathering good. So i made few more shots inside, where the weathering is a bit better to see.
- 28 replies
-
- 14
-
-

New Digital Decal Releases from Oldmodels Decals
Oldmodels Decals posted a topic in The Rumourmonger
Totally New: Air New Zealand B777-219ER 2013 Trademark scheme 1/144 and 1/200 RNZAF Sunderland MR Mk V 1950s / last scheme in 1/48 RNZAF Venom FB1 in 1/32 Now available in Digital format: Air NZ B737-200 NAS delivery and NAR interim schemes in 1/72, 144 and 200 Air NZ F27-500F NFD and NFE delivery schemes in 1/72 and 1/144 DC3s - Ministry of Transport, James Aviation (now in 2 schemes), and Pionair in 1/48, 72 and 144 Air National Dash8-100 in 1/72 and 144 Air Chathams and Air Freight NZ CV580s in /172 and 144 DC-3 Warbird ZK-DAK in 1/144 (previously only in 48 and 72) RNZAF UH-1D/H Iroquois – all schemes are now available in 1/35, 48, 72 and 144 RNZAF Bell 47-G Sioux – all 12 schemes now available in 1/32, 35, 48 and 72 RNZAF AESL Airtourer T6, CT-4B Airtrainer, CT-4E Airtrainer – all schemes now available in 1/16, 48 and 72 RNZAF 75th Anniversary supplementary decal sets – C130H in 1/48, 72, 144 and 200th and CT-4E in 1/48 and 72 RNZAF TAF P-51D Mustangs in 1/24, 32, 48, 72 and 144. All available through my website www.oldmodelsdecals.com John Oldmodels Decals -
Airframe Constructor No1. The P-51 Mustang Valiant Wings This is the first in what I imagine will be a great series of books from Valiant Wings, that take one particular model and describe the processes and challenges throughout a build. In this case it’s of the Zoukei-Mura 1:32 P-51D Mustang. Inside the glossy cover there are sixty four pages of information, starting with the preface, which covers the history of the P-51. The rest of the book is on the build itself. The pages are very well printed and the photography of each stage of build is superb. Rather than an out of the box build the author, Daniel Zambaride Suarez has taken the standard kit and modified it with some fairly simple scratchbuilt items to build a post war aircraft of the Guatemalan Air Force. The author has written and interesting build narrative which precedes the build pictures and explains his reasoning behind the build, how certain effects were achieved and how he painted and weathered the completed model. After this there are thirty six pages of photographs showing each stage of the build. Each picture is annotated stating the process of building, painting and weathering each assembly, plus any additions which were scratchbuilt. Even if you weren’t building the ZM kit the book is still a very useful reference of the various techniques that can be used on any model. After the build section there is a small section on how to paint a bare metal scheme including weathering, which some may not agree with, but it may be somewhat exaggerated, but could still be useful. After this there are five pages of colour profiles, each page with five different schemes, all nicely drawn by Richard Caruana. The profiles are followed by a six page walkround of P-51D in the markings of Ser No. 413704 along with diagrams taken from the pilots manual. The last couple of pages consist of lists for all the aftermarket items available for 1:32 scale P-51’s plus the ones available from Zoukei-Mura themselves specifically for their first P-51D release. Conclusion[/size] Considering this is the first book in the series I think Valiant Wings have done very well indeed. It feels like a quality book which also really shows in the photography. The brief history at the front along with the period photos is a nice touch, as are the side views and walkround, all of which will come in very handy to anyone wishing to build a P-51. The build section itself is an absolute mine of information and I hope to use some of the techniques in my future builds. Highly recommended Review sample courtesy of
-
Dear Fellow Modellers The old Academy kit is actually very nice other than the problem of attaching the separate tail unit. With this one the windshield is vacform after a disaster with the original. The 4th FG markings are from Xtradecal and the figures from CMK. Paint is from Gunze. I noticed on period photos that the cowling fastners typically had all their paint chipped off! The refueller is Academy altered with a resin tank from CMK Hope you like it? Andrew
- 19 replies
-
- 20
-
-
Hi all Could any Mustang experts help me out and let me know whether the wings panels of natural metal finished RAF Mustang IVs (P-51D/K) were puttied like their USAAF counterparts to improve aerodynamic performance and then painted with aluminium lacquer? Thanks Rob
-
 Evening Britmodellers Today I have made a start on my RAF Mustang Mk III, as with my Spitfire it will be 95% OOB. I have used bits of Eduard photo etch for the cockpit and HGW seat belts. Thanks for looking and as ever critique is always welcome. Yours aye Iain
 -
Hi everybody as I'm new here I thought I'd show some of the models I am particularlly pleased with from my 100+ collection. The Jaguar I just finished tho still cant get a straight yellow band around the bombs! And the A319 before the Jag (lesson learned with the A319 dont use aircraft paint on plastic it peels off) Anyway please look and comment, my next Build is the Airfix 1/48 Lynx HMA8 Roundals and fin flash on the Mustang had to be painted by hand due to decal disintigrating. And now my personal favourite
-
 Okay now the big spit is out of the way and the decals for this one have arrived, I can start building. As well as being a build for this GB it will add to my mixed 1:32 and 1:48 357th collection. Obligatory box, sprue and decal shots
 -
Hi folks third one today and last one of the year,the later version of "passion wagon".I usually shy away from unpainted aircraft but the decals were there and any excuse to build this lovely little kit(my LMS does them for under a fiver.
-
Hi folks, second build of Airfix,s lovely Mustang,The famous "passion wagon"straight OOB the soft plastic meant the ventral strake was easily removed,A wash of light tan was applied as an experiment,thanks for looking.
-
After a few things which have stopped me posting the completed thread last night, here's the finished F-51D Mustang from Airfix: Thanks for looking! WIP Thread here:
-
 P-51D Mustang 1:32 CMK Since some modellers don’t particularly like the rubber/vinyl tyres used in the various 1:32 Mustang kits, there is the option of replacing them with resin parts. There are a number of sets from different manufacturers and now CMK have joined the fray with this set Q32 184, in their Quick and Easy line. The resin comes in a small poly bag stapled to card header with a small instruction sheet also inside the bag. On removal the quality of the mouldings can clearly be seen. The diamond and hole tread pattern is beautifully rendered and with the moulding block thinly attached to the inside of the tyres inner edge no damage will be caused to the tread on removal. Clean up is nice and simple, as it is for the inner and outer hubs. There is a choice of outer hubs, one for the Dragon and Tamiya kits and one for the Trumpeter kit. There is also a set of diagrams on how to modify the different kits oleos to give the correct height for the Dragon kit and to reduce the size of the axles on the Trumpeter and Tamiya kits. CMK have also been good enough to provide a replacement tail wheel complete with finely moulded radial tread. Conclusion I’ve not seen this line of add-ons before, but am pretty impressed by the detail in this set. The only downside in this set is that the brake detail on the inner hubs is a little soft and could be better defined. Other than that I can happily recommend this to all owners of any of the three kits this set is aimed at. Review sample courtesy of