Search the Community
Showing results for tags 'MIG-21'.
-
Hi folks, My contribution for the GB gallery - my Mig-21bis from Zvezda. Please find a WIP in the overall group build and the finished article photos in the RFI section. Thanks - Kris
-
Hy guys, Recently i took the decison to quit the 48th scale and buy and build only in 72nd scale. But... i have this in my stash (and others things in 48th scale), so i decided to build my last 48th plane (or one of the lasts). And this GB is the right occasion to do it! So, this is my subject: a classic MiG-21MF in bulgarian old style markings. To build it, i will use the Eduard kit: I will build it straight out of box, except for the Linden Hill decals sheet "Brothers in arms". And this my airplane: Before i begin, i have to finish another model in "final circuit". ciao Ale
- 11 replies
-
- 7
-

-
- 1/48th scale
- Eduard
-
(and 1 more)
Tagged with:
-
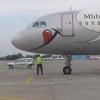
A couple (or so) from Mitiga in 2007 .....
-
Finnish MiG-21Bis Fishbed-N Pics thanks to Bootneck Mike.
- 4 replies
-
- Mikoyan-Gurevich
- MiG-21
-
(and 1 more)
Tagged with:
-
Hi fellow modellers, Just in the nick of 2016, I’m able to post these images of my latest completion. It’s the 1:72 Zvezda MiG-21bis built up as an izdelie 75AP in Hungarian Air Force colours in the early half of the 1980s, just before the camouflage pattern was standardised throughout the MiG-21 fleet. I took this kit out of my stash completely contrary to my initial plan, which was to build something Phantom-ish. But I went with it and here it is. After market stuff: Kuivalainen (Eduard) MiG-21bis PE cockpit set, True Detail’s KM-1 seat, and two HAD models decal sheets with MiG-21 stencilling and generic Hungarian markings. I also used a length of copper tubing both as an exhaust can and as a way to forcibly deepen the aft fuselage, to make it more in line with what I saw in pictures. Gaps were filled with plastic and filler. Paints used: Gunze Sangyo Mr Hobby, different colours, all mixed to approximate photographic info. I wanted to reproduce a weathered finish. Especially the green used for the camouflage faded quickly; this is -approximately!- what I was going for: The kit as a kit is fairly nice. Parts fit together quite well, and if I had avoided modifications this would have been a comparably quick build. The plastic too is quite good overall - not too thick which pleased me. Especially the wings and horizontal tail look suitably thin. The wings are molded as one piece and the main gear leg housing is molded in the plastic; which is where the ejector pin marks are located. Filling these is difficult without damaging the surrounding surfaces but the marks can be hidden by overlapping added detail. However I discovered most of the panel lines on the kit were either misplaced or completely fictional; the tail fin in particular being a tableau of criss-crossing lines to nowhere. I always thought later MiG-21’s fins looked fairly distinctive, in part because of the big vertical panels in the centre. Remedy: filling, rescribing. The wheel chock was made with plasticard using the HADmodel PE part as a template. Thanks for looking! Have a nice 2017! Jay
- 32 replies
-
- 48
-

-
Source: http://www.hannants.co.uk/product/EDK8238 After the MiG-21MF/SMT/BIS/PFM etc. Eduard is to release a ProfiPACK edition from the recce MiG-21R "Fishbed-H" - ref. EDK8238. Release is expected in December 2013. V.P.
-
Hi All, I hope you don't mind seeing another Mig-21 completed from Eduard. For me it was a first time trying the NMF on a plastic model. I used Vallejo's metal range paints. (Note: I'm absolutely aware that all Hungarian Mig-21Bis was painted grey, so you can take this model as a "what if" before you start hammering me in the comment section ) Thanks for all improvement comments / recommendations in advance
-
I give you one of my favorite aircraft, the colors of the Syrian Air Force. The model is perfect for work and a real pleasure. Enjoy.
-
Hi Fellow modellers! This time I´ll show you one of my recent builds. It´s the little Zvezda Mig-21 Bis in 1/72. It has Kuivalainen PE, Pavla seat, Master pitot and Lift Here decals (wich are very good). I´ve also added some details in the landing gear. It´s a very nice kit, a little thick on the details but improved a lot with the aftermarkets. It only lacks a nice canopy, It´s too thick and distorted. It represents an airplane flown by cuban pilots for the Angolan Air Force in the 80´s in the conflict with South Africa. I hope you like it and all comments are welcomed! best regards from Uruguay Ignacio
- 20 replies
-
- 37
-

-
First the MiG-15: I used Kuivalainen (Eduard) photo-etch for the cockpit. I know there are things that are not 100 % correct, but this was enough for me. Since it was pre-painted, the whole cockpit became a bit too blue. I painted it with Vallejo's new, brilliant metallic colours. Decals are - also brilliant - from SBS Models. The whole build was pretty uncomplicated. Although nothing fits perfectly, it is easy to get a good fit with some trimming of the parts. And over to its successor in Finnish Air Force, the MiG-21UM: Painted with Gunze colours. Decals are a mix from different sheets - the roundels are actually from Eduard's MiG-21bis in 1/144, the old-style large roundels were perfect for modern small ones in 1/48! The lynx is from the MiG-15 sheet. The model has two main problems: The nose and the cockpit. The nose has an avionics bay that can be displayed. However, this is wrong, since it is from MiG-21MF. But when closed, the door does not fit at all, so lots of sanding is required - which also affect the canopy that has to be trimmed to fit. The other issue is the cockpit. Trumpeter have left out the window between the two cockpits. The problem is that even if you can scratch-build it, it will not fit since the whole aft cockpit is too long. My solution was to build the "roll bar" between the cockpits, which also gave me something to glue the (scratched) pin to. Apart from that, this was an enjoyable build. Thanks for watching!
- 30 replies
-
- 44
-

-
After posting my first build on this forum, I've now got quite a taste for it. So after rummaging through the stash list I ended up with about four choices; 1. Tamiya F-84G 2. AMK L-29 3. Kittyhawk F-35A 4. Airfix Gnat After a while I found that I kept coming back to Eduard's Silver Arrow edition of the MiG-21. I've been slowly adding the missing sprues and etch so that I can build all three versions eventually, and it was whilst doing the original sort out that I realised that there were a couple of important parts missing. These were very kindly replaced by Eduard themselves. So, on with the show. The box top art is carried over onto both instruction booklets. This is the scheme chosen. Just as a side note, could someone please translate the boxes at the top for me. A wild guess, but is the first one the mix for the interior colour? The build has started and the first thing on the agenda was to wash all the sprues in warm, soapy water. This was left to dry over night and then everything was sprayed with Halfords grey primer. Some areas were then assembled such as the cockpit and main wheel well. The cockpit area was then sprayed with MIG.223 Turquoise Green. Then the green areas such as the tail, wheel hubs, recon pod, nose cone and parts of the exhaust area were sprayed Tamiya XF-5. Another first for during a build was adding some rivet detail. I'm hoping this will come into its own at the weathering stage for paint chipping. First impressions of the kit are that its light years ahead of my previous build. This kit just seems to fall together with a lot of the seams just disappearing. And thats before any glue! One thing I'm stuck on though is the colour for the wheel bays. There's nothing mentioned at all in the instructions. I normally use Tamiya XF-23 but I understand things are little different for Czech MiGs. Any pointers would be greatly appreciated. Cheers, and thanks for reading.
-
At Nürnberg Toy fair 2013. 1/48th MiG-21MF "Fishbed-J" by Trumpeter - ref.02863 Source: http://www.primeportal.net/models/thomas_voigt7/trumpeter/ The test shot For my part I don't see the interest of this future kit as the Eduard MiG-21MF is not only top but readily available and at good price. V.P.
-
MiG-21MF Fishbed 1:48 Trumpeter The MiG-21 has probably been produced in greater numbers than any other jet fighter. Over the years they have been many variants. The M in MF stands Modernizirovannyy or Modernised. The F standing for Forsirovannyy or Uprated Engine. In effect the MF was the export version of the MiG-21SM where the S referred to the Sapfir-21/RP-22 radar. As well as an uprated engine an internal 23mm Cannon was provided alongside a considerably updated avionics package. The SM & MF were called the Fishbed-J by NATO. The MF had a greater arsenal of weapons available including the R-60, and later R-60M IR seeking AAM (NATO Name AA-8 Aphid) The Kit It is quite surprising how much plastic Trumpeter manage to get in the smallish box this kit arrives in. There are 10 sprues of grey plastic, a clear sprue, a small sheet of PE and a set of rubber tyres. Construction starts without any surprise in the cockpit area. The ejection seat is built up. This comes as nine parts and builds into a very fair representation of the real thing. The front instrument coaming is built up and the instrument panel added. The ejection seat is added to the cockpit tub, then the sidewalls and rear bulkhead are fitted. The control column is added and the front coaming completes things. Next up the wheel wells are built up. The front well is three parts and you have you add the front wheel/leg at this stage. The main wells are four part affairs and are built now as well. Following this the rear jet pipe is assembled. This has seven parts and again will build up to a good looking representation of the real thing. Once all of these subassemblies are complete they can be added into the main fuselage along with the nose radar bullet and the area in front of the cockpit. Once the main fuselage is closed up various intakes are added to both sides of the rear fuselage. The engine exhaust nozzle can then be made up and added to the main fuselage. The separate one piece vertical fin is then added, along with it's separate rudder. The brake parachute housing can then be added. This is able to be modelled in the pen or closed position. Moving on to the underside of the main fuselage the underside fin is added, along with the internal cannon. The main centre line air brake and two side front airbrakes are added. All the airbrakes can be modelled open. The main gear door on the fuselage are then added along with their retraction struts. The front gear bay doors are also added. A centre line pylon is provided if the modeller intends to use it. This can take either a large or small fuel tanks as supplied in the kit. Construction then moves onto the wings. These are conventional upper/lower parts for each side. The wings are supplied with separate flaps. Two pylons and a landing light are added to each wing. Once the wings are built up they can be attached to the main fuselage. Two PE wing fences are supplied in the kit. The tailplanes are also added at this time. The main landing gear is the next area for the modeller to concentrate on. Two hub parts sandwich the rubber tyres as supplied in the kit (no plastic alternatives are supplied). The prominent brake lines for main gear legs are also supplied. The main gear door which attached to the leg then needs to be fitted, this has to be bent to shape by the modeller. The main gear legs and their retraction struts can then be fitted. The last items to be made up and fitted are the underwing armament. Twin fuel tanks are supplied for each type though I think the large one was only ever fitted on the centre line so the modeller has a spare. References would seem to indicate that if fuel tanks were carried on the wings they were carried on the outer pylons only. UB032 rocket pods are supplied if the modellers wants some air-to-ground weapons. If air-to air is needed then a pair of R-3R and R-3S missiles are included. Markings Here Trumpter have provided markings for six aircraft but provided absolutely NO information about the markings what so ever. The six are; German Democratic Republic Bort #Red 511 USSR Bort #Blue 30 Poland Bort #Grey 6804 Czechoslovakia Bort #Black 8207 Iraqi Air Force - Unknown Aircraft Green/Sand Camo Iraqi Air Force - Unknown Aircraft Brown/Sand Camo Conclusion Whether it's another one to add to your brace of Cold War Soviet metal, or just an impulse buy, there's a lot of plastic in the box, and some nice detail. Highly recommended. Review sample courtesy of UK Distributors for
-
So, my cuban fishbed is finished! - Academy kit built oob except for the neomega's pit and the HAD nose and engine cover - painted with Gunze's acryl range (H338 undersurfaces; H320 and H323 for the camo) - decals form Aztec and Afterburner sheets - a lot of fun in building it, my ourth Academy's Fishbed. For the next ones i will use the Eduard new tool... Hope you like it ciao Ale
- 11 replies
-
- 20
-

-
I always liked the blue/green camo of the Cuban MiG's, so i think it's the time to build one of them! I choose the famous "black 665", a Bis Fishbed. just for discussion, source http//makettinfo.hu I have a Eduard box in my stash, by the way i choose to build this Academy, also present in mi "to build pile". It's a godd kit, easy and fun to assemble, this it's my fourth Academy Fishbed! A bit of aftermarket Neomega's pit (i'had originally bought the FM Detail set but it was useless due to a big damage to the tube; i will use the interior canopy detail), Brassin wheels and decals from Aztec Models I'm a lazy modeler, so i will use this for the nose cone and the engine cover! I will post soon some progress! ciao Ale
-
The first of several Eduard 1/48 MiG-21s I have been working on has now reached the painting stage. It will become a Czech MiG-21MF. I didn't have the right colours in the Xtracolor range, so I had to use Model Master. Paints used were RLM78 for the lower surfaces and FS30117 Military Brown and RLM80 for the upper surfaces. All three colours were painted on top of a black undercoat. Jens
-
MIG-21 BIS HUNAF 1/72 R.V.Aircraft
- 14 replies
-
- 25
-

-
A question for anyone that have ventured into the build of Trumpy's Mongol. Is it just me or does the cockpit tub sit too low and too forward in the fuselage when attached to the stubs in the fuselage. I am thinking of going "Aires" on the tub to fuselage fit, namely sand everything until satisfactory fit is achieved. (parts U5 and U10). Test fitted to the complete tub and the fuselage. Same for the avionics bay details. (Part E2) If fitted where it's supposed to go, the fuselage does not close up, and the panel cover fits (Part E13), while the intake cowl (E19) is too small. if left out, the fuselage closes but the cowl is too large and the avionics panel cover looks like taken from a different kit altogether. Did anyone encounter these things?
-
In January, February & March 2014 R.V. Aircraft (http://www.rvresin.com/plastic_kits.html) is to expand its 1/72nd "Fishbed" plastic kits family with four new boxings. Sources: https://www.facebook.com/pages/RVAircraft/412179818902422 http://modelweb.modelforum.cz/2014/01/23/novinky-firmy-r-v-aircraft-na-leden-2014/?lang=CS 1/72 Chengdu J-7 III News coming in late January 2014 ! Limited edition - 500psc. only ! Source: https://www.facebook.com/media/set/?set=a.489056307881439.1073741854.412179818902422&type=1 1/72 MiG-21 LanceR A + MiG-21 LanceR C New plastic kits in February 2014. Source: https://www.facebook.com/media/set/?set=a.500380473415689.1073741855.412179818902422&type=1 MiG-21RF Egyptian Air Force new plastic kit ! + dedicated RF resin parts Source: https://www.facebook.com/media/set/?set=a.502800393173697.1073741856.412179818902422&type=1 MiG-21M is in preparation ...decals and camouflage....on sale during March. Source: https://www.facebook.com/media/set/?set=a.503822436404826.1073741857.412179818902422&type=1 V.P.
-
MIG-21 MF Hungarian, 1/72 R.V. Aircraft Building: Here Photos:
-
Hi, I am starting building this perfect MIG-21 R, in scale 1/72 from R.V. Aircraft. I will build the camo which is on the box- camo with the dragon on left side. some pics here:
-
MiG-21F-13 Fishbed C Revell 1:72 The MiG-21 was a second generation fighter for the USSR following the earlier MiGs. It is the most produced jet fighter in history and has seen service in more then 60 countries Air Forces. It also boasts the longest production run of a fighter since the Korean war with production starting in 1959 and only stopping in 1985. The MiG-21 is still in use with many Air Forces. The MiG-21F-13 (NATO Reporting name Fishbed C) was designed as a short range day fighter. This would be the first MiG021 to be produced in large numbers. The designation F-13 following the MiG-21 shows the F to be Forsirpvannyy (uprated) and the 13 refers to the ability to carry the K-13 missile. Unlike the earlier MiG-21 this variant carried only one NR-30 cannon on the right side with only 30 rounds. The capability though with the "13" was for carriage of the K-13 or AA-2 Atoll missile system. This was a short range infrared homing missile. This was similar in appearance to the US Sidewinder missile, which was no surprise as it was in effect a reverse engineered copy. The Kit This kit is a welcome re-release from Revell of their 2004 new tool kit of the Fishbed C. The kit was praised in 2004 for its great detail, engraved panel lines, and indented rivet detail. There is no evidence of any mould wear, and only a small amount of flash. This release looks as good as the first. Construction starts shockingly enough with the cockpit. The ejection seat features 3 parts with moulded on seat belts. This is constructed and added to the cockpit tub along with the control column and instrument panel. A decal is provided for the instruments. Once the cockpit is built up the two part exhaust nozzle is completed. The exhaust, cockpit, front wheel bay and right side main gear bay can then all be added into the right fuselage half. The left main gear bay is added to the left fuselage half; and then the two halves can be joined together. Construction then moves to the main wings. These are of conventional upper/lower parts which must be joined together, and added tot he completed fuselage. The tailplanes are then added.The next steps are to add the front airbrakes, the main under fuselage air brake, afterburner actuator fairing, and various cooling intakes. This then completes the underside. The next major construction stage is to add the landing gear. The front is one leg with an additional part to help mount the single nose wheel. The main gears are again a single wheel with a main gear strut, and an actuator arm. The smaller gear door attaches to the main gear strut. The larger gear door attach direct to the fuselage. Once the gear, and doors are on the nose ring is added (this is one area of the kit know to be slightly inaccurate and Quickboost provide a replacement part if the modeller wants to change it). The front gear doors are added along with the required armament/tanks. The kit provides a centre line fuel tank, a pair of rocket pods, a pair of bombs, and what look to be ECM pods. The last items to be added are then the canopy and the large front pitot probe. Canopy The canopy is clear and free from distortion, if not a little thick for this scale. Decals Decals are provided for two Aircraft. Both overall Silver lacquer. Blue 66, 32nd Air Defence Regiment USSR 1961. 737 German Democratic Republic, as flown by 1st German Cosmonaut Sigmund Jähn, 1963-65 Conclusion This was a great kit from Revell when they released it, and its still great now they have brought it back to us. Arguably still the best F-13 in 1/72 get it while you can. Highly recommended. Revell model kits are available from all good toy and model retailers. For further information visit
-
Mikoyan-Gurevich MiG-21PF / Fishbed-D, pics by Darwin from the Combat Air Museum Kansas
-
- 1
-

-
- Mikoyan-Gurevich
- MiG-21
-
(and 1 more)
Tagged with:
-
Hi there, Some of you might remember LCAerodesign from their 1/48 IAR-81 and 1/32 Extra 300 kits. They have now released a conversion set in 1/48th scale allowing you to turn the Eduard MiG-21MF into a LanceR upgrade. The set contains the necessary bits and pieces, starting with the cockpit (there's a complete cockpit supplied, minus the ejection seat, which apparently has nothing special in comparison to a standard KM-1 as found on the classic MiG-21 and found in the Eduard kit as such), continuing with the various antennae (comm, RWR), other lumps and bumps and finishing with a nice decal sheet and a painting mask (for the roundels and aircraft reg.) should you consider paint would look better than decals in this scale (?): So, if you fancy, like every other item coming from LCAerodesign, this set can be purchased directly from the source. I bought a couple of these thinking to build a LanceR C (as directly possible from this set) and a LanceR A (delete the right hand MFD from the instrument panel and get some decals from Linden Hill or Parcmodels). Cheers, Niki
- 29 replies
-
Having already signed up to build something South African, I couldn't stop myself from volunteering to do a second build. (A little voice in the back of my head keeps telling me that this is going to end in tears....) So here's the starting point for my Indonesian Mig-21F-13 in the rather flashy scheme of the AURI display team : Should be a simple OOB with decals by Aztec...... ....should be....... See you all in January mike

