
Search the Community
Showing results for tags 'Kitty Hawk'.
-
I started this one just as the kit hit our shores, but as is sometimes the case with me, I got distracted by something more shiny during the last stages, so after a long sabatical I've finally summoned the courage to finish it off, which involved a little touching up of some of the paint, a complete change of load-out and fabrication of a few parts that had gone missing in the interim. She's almost OOB apart from those parts, plus the replacement box inside one of the flap bays where a 2nd APU exhaust was placed in the kit There is also a set of Paragon wheels hanging off the landing gear, as the kit parts are quite a bit over-scale in this edition. The main wheels have been shrunk down on subsequent releases, but you'll still need to reduce your nose wheel to make it look right. I decided to model it as a desert camo aircraft after a long stint of use, photos of which are available online if you look, and that's what I patterned the weathering after. If it looks over-done to you, just check out the photos, as these things were filthy! If you think it's badly done though, I'm afraid that's down to me I did intend to detail the engine to give it more realistic spaghetti around it once installed, but I'm afraid I just wanted it finished in the end, so I painted the little bits I'd already added. It was difficult to tie all the aspects of the weathering together when the kit was still in several sub-assemblies, so some things needed sorting once they were spotted, such as the re-painting of the air-brakes to the Dark Earth colour when I noticed the surrounding area during installation. Some bits I just plumb forgot about, such as the undersides of the elevators, which I just didn't weather at all... By then it was just too late, as I was taking pictures, and bound to break something off. As usual, if you had a good look over it, you'd see plenty of human error and inaccuracies, but it looks ok when you're staring at it from 3' The pics: You can skim through the WIP here if you're interested
- 68 replies
-
- 50
-

-

-
 No it's not a joke. Kitty Hawk is to release a 1/32nd Focke Wulf Fw.190A family: - ref. KH32025 - Focke Wulf Fw.190A-8A-5 - ref. KH32026 - Focke Wulf Fw.190A-8A-8 Source: https://www.facebook.com/photo.php?fbid=2129165307342083&set=a.1874930699432213.1073741830.100007459027346&type=3&theater 3D render 😜 V.P.
 -
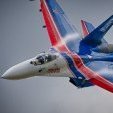
Kitty Hawk is to release a 1/48th Sukhoi Su-57 (T-50/PAK-FA) "Felon" kit - ref. KH801?? Source: https://www.facebook.com/song.wang.5076/posts/2325685271023418 V.P.
-
Source: http://www.themodellingnews.com/2014/04/guess-who-is-about-to-launch-new-f-84f.html#more Strong rumours say KittyHawk is working on a 1/32nd Republic RF-84F Thunderflash kit. Time will tell. V.P.
- 10 replies
-
- 1
-
-
- Kitty Hawk
- Thunderflash
- (and 1 more)
-
Source: http://www.themodellingnews.com/2014/04/guess-who-is-about-to-launch-new-f-84f.html#more Strong rumours say KittyHawk is working on a 1/32nd Republic F-84F Thunderstreak kit. Time will tell. V.P.
-
Atalef Hallo again. This is my 4th helicopter to build. The kit is from Kitty Hawk Dauphine II and the conversion is from Wingman. The colors from Gunze are quite simple: All over is C308 and the blue C392. This blue is new for sowjet a/c like Sukhoi. The equipment for this helicopter is something else. It is equipped for search and rescue ops. Here it is very important to have the Wingman conversion. In this conversion set you find a huge amount of resin parts. They are very tiny and so I recommend to use a US cutter and a Japanese saw. I got them all out without any loss or damage. You will find links to these tools on my posts already. If you need any more information, so let me know. The build is straight forward. My way on helicopter building is, to add all glazing to the very end of the build. It is impossible to avoid the dust. And also impossible is to clean them all afterwards. Well, until next time. Happy modelling Pictures of the original: ATALEF walkaround
- 2 replies
-
- 3
-
-
- AS565MA
- Kitty Hawk
- (and 1 more)
-
Hallo again This is my 3rd helicopter. After hundreds of aircrafts. I changed basically my modelling for this issue: 1. I use the new Tamiya glue EXTRA THIN. Why? · It works much faster. It glues rapidly! · It does not harm my color. I use Gunze C colors. · I can glue more tiny parts, as with the common Tamiya glue. · I save a lot of CA glue. · In this built only the etched parts are glued with CA. Nothing else! 2. I do not cement all glazing before the helicopter is fully assembled and sprayed. Also the final clear varnish is sprayed. Some antennas I assemble after the glazing is assembled. 3. The grinding process is kept to an absolute minimum, to keep surface details unharmed. Well, in this case I opted for the IAF UH-1D, but I left it out, because of the camouflage. At the top I used the etched part from Eduard, and I can not mask it at all. The US Army version from Vietnam is absolute not my favor, but I had no other by hand. Happy modelling
-
Hallo This is my first helicopter. I built it straight from the box. The fit is sometimes not so good. Actually, the installation of the wings before spraying was not a good idea. At my second helicopter, the AH-64D, I installed the engines later on. Therefore, you may prevent an uneven surface. It was a nice build. Happy modelling
-
This GB is nearly at the half way mark and I haven't joined in yet - time to do something about that. I had various options but felt drawn to the Kitty Hawk F-101B kit and the RF-101B option. I feel the need to build something big and this fits the bill. There's also a bit of nostalgia involved - I remember building the Matchbox Voodoo as an RF-101B when I must have been about 8 or 9. Here's the KH kit. I've also got an Eduard zoom set for the cockpit and Eduard steel seatbelts. Apart from these and a couple of simple corrections it'll be more or less OOB. A lot has been said about the fit of this kit so there will be a lot of test fitting but hopefully not too much cursing along the way! cheers Julian
- 53 replies
-
- 10
-
-
- Kitty Hawk
- 1/48
- (and 1 more)
-
 Finally finished, the 1/48th Kitty Hawk RF-101C Voodoo as 56-0166 which on 27th November 1957 was flown by Capt. Ray Schrecengost from Los Angeles to New York on Operation Sun-Run, an attempt to set three new transcontinental speed records. I had to build this kit! I have waited over 30 years for a 1/48th mainstream kit of the incredible RF-101C Voodoo, an awesome supersonic photo reconnaissance aircraft which overflew Cuba, North Vietnam, and the Taiwan Straits. The mid to late 50's were exciting times with the 'Century Series' fighters setting new records seemingly all the time and American airpower appeared unbeatable. The Kitty Hawk kit gives four decal options but as soon as I saw it, I knew it had to be Operation Sun-Run! I am really pleased with the final result. No, the Kitty Hawk Voodoo isn't a 'shake and bake' kit, it does present some challenges, there are quite a few inaccuracies, but it is up to the modeller to decide what he/she wants. Me, I build OOB, I am open to trying new techniques, I detest filling/sanding, I love painting, I am ham-fisted (God made me that way), so I don't stray too far from the instruction booklet. 👍 Built OOB including the decals. The silver finish is Humbrol 11 silver from a rattle can and I am very pleased with how well this went on. The yellow bands are all masked and air brush painted, Revell Aqua Color 15 Matt Yellow gave the best match (and for some odd reason the air brush loved it) and these were a fun challenge and very satisfying to apply. After painting I brushed the yellow bands with magic Klear 😊 The rear fuselage / exhaust area was Humbrol Metal Cote 27003 Polished Steel applied by air brush, that is my go-to for anything like this and again very happy with the result. All other paints are from the Vallejo Model Color series applied by brush. The decals are the kit decals and they went on fine helped by a little Humbrol Decalfix. All the Voodoos were big planes, sheer brute power barrelling along on afterburner on those tiny wings. I understand that the nickname for the RF-101C was the 'Long Bird' and you can see why, with that T tail she looks... well, long! Be careful of the kit instructions. Kitty Hawk would have you round off the yellow bands on the top and under the fuselage however I watched the Sun-Run video on YouTube and I think they were straight and pointed. Now I have built a Kitty Hawk Voodoo before, it was the F-101A/C about four years ago, so I should be familiar with this kit. I really had a problem with the photo nose section. I decided to build and paint it separately and attach it very late in the build, unfortunately it all went wrong and I could not get it to match properly. This is the better side! If you look carefully you can see what appears to be a silver band running from the front of the windshield down to the front of the gear well doors. I had to fill this with Perfect Plastic Putty and repaint it. I think this was my fault (remember 'ham fisted'?) as it seemed ok when I dry fitted the photo nose section. Also, now, I wish I had sanded off that slime light holder! Also in critical mode, the cockpit canopy and the windshield don't quite match. And I think I left something off the nose gear oops! 😂 On a plus the fuel tanks went together well as did the jet air intakes. Also the nose cone. A view of the rear end. Personally I think the Kitty Hawk burner cans build well and look good though maybe next time I will fill that gap! This also shows one of my mess-ups, I have no idea how I failed to get those wing trailing edges to join. I took a look at my F-101C which I built 4 years ago and I got that part right then. The Kitty Hawk kit isn't very forgiving but, then again, neither was the Voodoo in some flight regimes! For all the kit's faults and my personal shortcomings the final result is just so good! Would I build another Kitty Hawk Voodoo? Oh yes! Either 56-0166 a few years later in S.E. Asia camo or maybe the later shorter nosed RF-101G, no hesitation. Back to 6:59 a.m. 27th November 1957, Ontario International Airport near Los Angeles, Capt. Ray Schrecengost takes off on the first RF-101C round-trip flight of Operation Sun Run and three speed records were set. It is believed that the "Cin-Min" markings were added to 56-0166 after the record breaking run. What did they signify? The "CIN MIN" was named for the pilot's two daughters: Cindy and Mindy. 61 years later where are they now? Col. Ray Schrecengost passed away 15th August 2006 after a varied career in the USAF including a role in the development of the Lockheed A-12 Blackbird and combat in Vietnam. RF-101C 56-0166 also served in combat in Vietnam with the 45th TRS "The Polka Dots" marked as 'Luv Bug' and on 27th October 1978 was retired to the Air Force Museum with 6604.9 airframe hours where she can be viewed today. Can I make a wish? Please Kitty Hawk, a 1/48th RF-8A/G Crusader? Please... Michael
 -
For the sake of clarity and after the release of the Kitty Hawk Bell AH-1Z Viper (http://www.britmodeller.com/forums/index.php?/topic/234943269-148-bell-ah-1z-viper-super-cobra-by-kitty-hawk-released/) I've decided to open a new dedicated thread for the future KH 1/48th Bell UH-1Y Venom - ref.KH80123 Source: http://scalemodels.ru/news/6428-vertoletnye-anonsy-Kitty-Hawk-Models-1-48.html Source: http://www.arcforums.com/forums/air/index.php?showtopic=276651&view=findpost&p=2627492 V.P.
- 16 replies
-
- 2
-
-
- Kitty Hawk
- UH-1
- (and 1 more)
-
I would like to share a dual build OOB of two kitty hawk 1/48 Su-34. Making 2 at a time is such as laborious task, which most certainly can be categorized as a form of self-torture and I shall gladly never attempt again. The kit is incredibly detailed buth riddled with many issues and unclear instructions.
- 12 replies
-
- 28
-
-
-
- Su-34
- Kitty Hawk
- (and 1 more)
-
After the Su-34 "Fullback" (http://www.britmodeller.com/forums/index.php?/topic/234996669-kitty-hawk-su-34-148-render-march/), Kitty Hawk is to release a 1/48th Sukhoi Su-35 "Flanker-E" kit - ref. KH80142 Source: http://www.kittyhawkmodel.com/copy-of-kh80141 Looks like a weapons box with a Sukhoi a/c as bonus V.P.
-
F-35C Lightning II 1:48 Kitty Hawk We reviewed the F-35A (reviewed here, and F-35B (reviewed here) when they were released, and you can pick up some information on the real thing from there if you have a read. The F-35C is the traditional carrier-borne variant, which has a number of differences to make it resilient enough to work from a carrier at sea, including strengthened landing gear for those hard landings, larger folding wings and tail planes for greater control at landing speeds, and of course a big hook at the rear for trapping-on, which was subject to a little controversy when it had to be hastily re-designed. The Kit This is the third variant of the Lightning II from Kitty Hawk, and you can read our reviews of the previous two by following the links above. The C is likely to be the last for a short while until the various other operators settle on their configurations. In line with commonality of the real variants, the A and the C models share a great many parts on the sprues, with a subtly different fuselage that omits the refuelling port and adds a bulge under the tail for the arrestor hook. The guts of the beast are familiar, with new sprues containing the larger wings, a new cockpit tub and some weapons, plus the gear legs and wheels for this ruggedized variant. The box is standard Kitty Hawk fare, with a painting of an F-35C on the blocks ready to be catapulted into the air – a scene that lends itself to Kinetic's diorama base that I have half-completed behind me. Inside the box are eight sprues in light grey styrene, one of clear, a reduced Photo-Etch (PE) sheet, and two sheets of decals. A detail & Scale flyer hides the instruction booklet at the bottom of the box, which has a fold-out full colour painting and decaling guide that is much improved over their early efforts. Thanks for listening guys! The kit is typical Kitty Hawk, and if you have any of their kits, especially the other F-35s, you'll know exactly what to expect. The sprue ejector guy still has his machine turned up to eleven though, and there are some visible stress marks on the surfaces of the wings, and the instrument panel looks like it was almost punched in half by the severity of the ejection. The clear sprue is marked up differently than the A, but a brief visual inspection doesn't show any obvious differences, but it does show how lovely and clear the part is, although my canopy had broken off the sprue (cleanly) by the time I had opened the bag. The PE sheet is much smaller than the earlier A, eschewing the option of having the crisp metal exhaust petals that could easily drive the novice PE user to despair. Construction begins with the cockpit, and don't be tempted to choose the wrong tub as your basis for this. Appropriately it is number B13, and the instructions call for E25 instead, which has a sort-of missing edge to the tub to accommodate the refuelling probe bay on the starboard side. The pilot's seat is a little lacklustre, but does have a set of PE belts to hide the bland cushions, and of course a pilot figure that isn't mentioned in the instructions if you want to hide it properly. The instrument panel had received a punch in the back from the ejector pin, but remains intact on my review sample, so take care when you remove it from the sprue. The central portion is blank and has a decal to depict the large expanse of glass that is the modern instrument panel. It's like sitting in front of an ultra-wide LED screen, mainly because that's what it is. The rudder pedals are nicely moulded integrally to the tub, with a short control column and HOTAS stick on the port side console. A few black boxes affix behind the seat, and a large coaming shrouds the instrument panel, with the assembly to be added to the lower fuselage in due course. The nose gear bay is shallow and made up from separate sides with a separate angled forward section, so detail here is good. The chunky gear leg with a massive retraction strut can be placed in at this stage, or left 'til later, and the additional parts add extra life to it, with separate bracing struts, and of course the twin nose wheels, which are made up from halves, which suits the circumferential tread engraved into the contact surface. The big weapons bays in the belly are next, with a long snaking conduit running their full length, and a couple of equipment boxes added to busy the area up. You'll need to do a little more work with wiring (did I say a little?) to add extra visual interest and make the whole area as faithful as possible, or you can chicken out and close them up! The two weapons bays and nose gear bay are then installed in the lower fuselage, which should give it the structural rigidity that it lacks out of the box. A little tail-hook bay is placed in the rear, and then it is time to build up the engines, which comprise full-depth intake trunking, plus a basic representation of the engines themselves, which will ultimately disappear within the fuselage forever. The F135 engines that are currently too large to carry by the US Fleet replenishment systems have their rear face surprisingly close to the rear of the aircraft, so exhaust trunking isn't required, but you'll have enough sanding and filling already with the intake trunks, so breathe a sigh of relief here. These slot in on top and between the weapons bays, and are joined by the main gear bays, which will also need some additional wiring to super-detail them. The big gear legs have separate retraction jacks and oleo-scissors, with the wheels themselves made up from two halves and a separate inner brake calliper part, which look like they can also be installed later if you wish. Once in place outboard of the weapons bays, the cockpit is then attached to the roof of the nose gear bay, and attention turns to the upper fuselage. The gun blanking plate is attached above the starboard intake lip, and the refuelling probe is added, which doesn't seem to have a closed option, although the cover is added later in the build. Some test-fitting and fettling would be needed if you wanted to pose this closed. Ten PE shackles are added to around the cockpit lip, as well as a rear bulkhead behind the pilot's head, and the sharp tip is added to the nose, before the wings are started. The wing sprues of the C are totally different from the other variants, both in terms of sprue layout, configuration as well as size. The inner wing panels are built from a two-part core with separate leading edges and posable flaperons, both of which are also made up from top and bottom skins. The outer wing panels are similarly constructed, and can be posed down for flight, or by the use of a small hinge part, they can be posed up for storage below decks. A hinge strip is placed horizontally or vertically, respectively. The horizontal tails are two parts each and plug into the rear booms either side of the engine, so you won't be able to pose them without some adjustments. The enlarged vertical tails are also two parts, and these fit into some large sockets on the top of the fuselage. Again, they're fixed, so posing them offset to one side or other will involve work on your part. The exhaust petals are a single very finely moulded part, and quite nicely done. Mine had received a light blow during transit, so a couple of the petals were very slightly less sharp than the others, but this shouldn't notice under a few coats of paint. Once installed, a pair of serrated fairings are fitted to blend the exhaust in with the fuselage. A crew step is included in the kit, and that normally resides behind a fuselage panel á la the A-10. Another small door is present at the front of the tail-hook bay, and that opens up to permit the hook to deploy fully. If you are depicting your F-35C in flight, you'll need to address all these bays to fettle and fit them closed, and this will be best done before you close up the fuselage. The underside of the Lightning II is as forest of doors in order to maintain its low-observability as much and as long as possible. The weapons bays have two doors running their whole length, and the main gear bays have two that open toward the wing tips. The nose gear bay has a pair of clamshell doors at the front of the bay, and a single door captive to the retraction jack at the rear. All of these doors are well detailed inside, and have separate hinges that should result in a good strong joint with the fuselage. At the nose a clear part represents the faceted Electro-Optical Targeting System (EOTS) that is integrated with all of the F-35's systems. The real thing has an oily holographic sheen, but good luck with representing that one! Kitty hawk aren't usually stingy with their weapons, and with the C, we have a number that can be added to the pylons that are included with the kit, but none are able to be installed in the weapons bays out of the box, which seems a shame, and misses the whole point of providing the opening bays. There is however the new semi-stealthy pod that contains a GAU-22 25mm four barrelled gatling gun to give the new uber-aircraft old school dog-fighting capabilities at the expense of some of the stealth. This sits between the weapons bays on the belly, and is made up from three parts. The external pylons are fabricated from two halves plus an insert for the location points, with the slim outer pylon having faceted stabilising base attached to the upper edge of the pylon. To these you can add a combination of the following, but check your references if you want to make the load-out more accurate. 2 x AIM120 AMRAAMs 2 x AIM-9X Sidewinders 2 x GBU-38 Iron bombs 2 x GBU-31 Iron Bombs 2 x GUB-31B Iron Bombs 2 x GBU-12 Smart Bombs Markings We are treated to four markings options, which is good considering the short lifespan of the "final form" F-35C so far. From the box you can build one of the following: US Navy No.01 VFA-101 – all over RAM grey with hi-viz markings and Grim Reapers badge on the tails. US Navy CF-01 – all over RAM grey with lo-viz markings and blue/yellow lightning strikes on the tails with F-35 in yellow. US Navy CF-03 - all over RAM grey with lo-viz markings. US Navy CF-01 prototype – patchwork blue/grey primer, RAM grey and blue tail fins. Depicted before the final finish was applied. Colour call-outs are Gunze throughout, as you'd expect from a Far Eastern company, and the decals have been printed anonymously, as per their previous kits. The quality does seem to have improved somewhat, and registration is good on this issue, but there are still the occasional bleed of some of the more intense dark colours, especially on the stars and bars, although it's barely noticeable without magnification. One of the greys has been composited by mixing grey and black printing, so on close inspection some of the logos on nose appear a little grainy, but again, you really have to be paying close attention. The yellow flashes on the tail of option 2 are printed, and may not show up too well over a blue tail, so perhaps give some consideration to masking them, using the decals as a template. Conclusion The final part of the F-35 trilogy will fit nicely on the shelf with the A and B, and as usual with Kitty Hawk, should build up into an impressive looking replica with the application of some modelling skill. Test-fitting and care in preparing the parts will pay dividends, and that patchwork primer option is really rather tempting. Recommended. Review sample courtesy of and available soon from major hobby shops
-
Among numerous projects, anounced or not announced, Kitty Hawk is reported to have a 1/32nd Northrop F-5E Tiger II. Mike Benolkin from Cybermodeller has even reported words from Glen "Kitty Hawk" Coleman saying that the 1/32 F-5E is coming in March barring any logistics problems... Wait and see. Sources: http://forum.largescaleplanes.com/index.php?s=5c2ff6e68ae17012c76054379ea11236&showtopic=66843&p=886701 http://forum.largescaleplanes.com/index.php?s=5c2ff6e68ae17012c76054379ea11236&showtopic=66843&p=887578 - ref. KH32018 - Northrop F-5E Tiger II - ref. KH32019 - Northrop F-5F Tiger II - ref. KH32023 - Northrop RF-5E "Tigereye" V.P.
-
 Su-34 Metal Landing Gear and Exhausts (MT-02) 1:48 Kitty Hawk We reviewed the new Kitty Hawk 1:48 Su-34 recently here, and I'm allegedly building one here to stretch my cabinet space to breaking point when I manage to finish it. I made a plea to Song on Facebook a couple of weeks ago for a set of these new gear legs that he was showing off, and thought no more of it until we received our latest box of kits from them. I opened up the Little Bird with figures, and spotted a couple of clear plastic boxes wrapped in bubble-wrap and some really tough clear tape, which immediately piqued my interest, as they didn't look like they belonged there. A few minutes (seemed like hours) of wrestling with the packaging later, I discovered this handsome set of upgraded parts (times two) and was overwhelmed with both their shininess and the fact that Song had remembered me! Inside the little clear boxes with the Kitty Hawk and Panda logos embossed on the top are three gear legs, two exhaust cans, and the little mudguard for the nose gear, all in what looks like brass to non-metallurgist me. I've been working on the kit gear legs on and off recently, and have become quite familiar with them as a result, and was impressed with the number of parts that these replacements render surplus to requirements. The nose gear leg is very well appointed with most of the parts in-situ, other than the landing lights and their brackets, plus the ancillary parts on the back of the main leg. It also benefits from the fine struts that form part of the mudguard support being made from metal, which makes them much stronger. I had already knocked off the end of my styrene leg, so this is great news. The mudguard is also very well appointed, and will look great in place. Moving on to the main gear legs, you have the structural parts all provided as a single part, with the scissor-links and dampers all there and adding to the strength of the gear leg immensely. The casting technique has been chosen very wisely, and has almost no clean-up to do, and zero visible seams. I'm no expert on casting metal, so suspect it's possibly lost wax casting, but whatever the technique it is very effective. Top marks! The exhaust nozzles provided in the kit are resin castings, and as such look pretty good. Putting them side by side with the metal cans shows two things that stand out in the replacement parts' favour. The first is that the lip is finer on the metal one, and the second the detail in the forward end is different, with a corrugated section and a ring of aerodynamic fairings at the inner base of each petal. The two location pegs are also much more sturdy than the resin ones, and again clumsy old me had managed to break one off the resin ones somehow (although it could have been damaged in transit - I can't remember). Conclusion Having been bitten by collapsing styrene landing gear with my AMK Mig-31BM in the past, I will be a lot happier with the long-term stability of my Su-34 now it is fitted with big strong metal gear legs. A great idea, and excellent execution. They should be available soon, and I would heartily recommend picking up a set, especially if you are adding any aftermarket to your model, which of course increases the all-up weight of your creation, all of which balances of three legs. Extremely highly recommended. Review sample courtesy of Available soon from major hobby shops
 -
After the the interceptor (MiG-25PD/PDS) and training (two seats MiG-25U/UB) "Foxbat" types, KittyHawk is to release in 2014 (?) a 1/48th kit from the reconnaissance & bomber variant of this Soviet era iconic aircraft: the MiG-25RB "Foxbat-B". My favourite variant. Among the various test shot pictures posted recently on Internet, THE evidence a MiG-25RB test shot with a bomb and a recce nose. But the engine exhausts are wrong for the type... Source: https://www.facebook.com/Kagero.SM/photos_stream The KH MiG-25RB exhausts Source: https://www.facebook.com/media/set/?set=a.588810247842510.1073741931.224979750892230&type=1 Real MiG-25RB Source: http://scalemodels.ru/modules/photo/viewcat.php?id=913&cid=62&min=60&orderby=dateA&show=12 MiG-25RB walkarounds: http://scalemodels.ru/modules/photo/viewcat_cid_62.html http://scalemodels.ru/modules/photo/viewcat_cid_369.html V.P.
- 27 replies
-
- 1
-
-
- Kitty Hawk
- Foxbat
- (and 1 more)
-
F-101B/CF-101B/RF-101B Voodoo (KH80114) 1:48 Kitty Hawk Delays to the USAF WS-201 interceptor programme lead to calls for an interim aircraft to be brought into service, a design programme which was eventually won by McDonnell using the original F-101 Voodoo as the basis for the new aircraft. Some major modifications were need to the front of the aircraft to accept a twin cockpit, the large radar and a means to carry air-to-air weapons. The new aircraft was designated the F-101B by the Air Force though the manufacturer suggest the F-109. The new aircraft would also get more powerful engines with longer afterburners. To do away with airframe design changes the longer afterburners simply extended from the airframe. Weapons carriage for the new aircraft was also something new, in the form of a rotating weapons pallet under the main fuselage. The original missile of choice was the AiM-4 Falcon. Two semi active radar homing missiles, and two infra red guiding missiles were carried, one each on either side of the pallet as it was practice to fire one of each at the target. Later on the aircraft would gain the Nuclear tipped Rocket the AIR-2 Genie. In this case two Genies were carried on one side of the pallet and two infra red Falcons on the other side. 479 F-101Bs were built in the end, many more then the original A and C model. The only export customer would be the Canadian Air Force who designated the aircraft the CF-101B. As a final end to the Voodoo story in the early 1970s the USAF identified a gap in their reconnaissance capabilities ad a plan was put in place to mount three KS-87B cameras and two AXQ-2 TV camera in the aircraft in place of its weapons and radar equipment. 22 former Canadian aircraft were converted to the RF-101B role. These serves with the 192d Tactical Reconnaissance Squadron of the Nevada Air National Guard. In practice it was found that operating only 22 aircraft in this role was prohibitively expensive even for the USAF and they had a short service life. The Kit This is an extension of the original Voodoo kit from Kitty Hawk, and like that kit is modular in nature. Construction does not start with the cockpit but the intakes and engines. The intake trunking is built up with representable fan front and their handed intake bullets. Also built up at this time are the other end of the engines the exhausts. There is a rear part and on engine ring to insert. The intakes and exhausts are then placed in the lower half of the fuselage centre section. The heat shielded part of the rear fuselage is also added to the centre section at this time. The top of the centre fuselage section can then be added on. At the rear the large extending afterburner sections are built up ad added, along with the rudder, tailplanes, arrestor hook, and rear airbrakes. Construction then moves onto the wings. Into the top part of the wing is added the 4 part main gear & wheel along with the inner face of the wheel well. Once the gear is in the lower wing can be added along with the air brake which sits behind the gear. As the front part of the wing also forms the air intake the boundary layer splitter is added. The wings can then be added to the centre section fuselage along with the two part tail (split left/right). The flaps and main gear doors are then fitted For those missing it construction now moves to the cockpit. The four part seats are built up and PE belts are added. Instrument clusters are built up, and rudder pedals added. The housing for the Air-2-Air ID light must also be added at this time. Even if the modeller does not want to open the panels for the front avionics bay it must be built up at this time. The front gear, and gear bay must then be built up. The cockpit section then first on top of the gear bay with the avionics bay forming part of this module. To the rear of this module is fitted the bay for the rotating weapons pallet and to door is also fitted in at this time. The instructions would have you build the missiles at this time, but I'm sure these can be left until later. In the kit there are 2 IR Falcons, 2 SARH Falcons, and 2 Genies. The complete cockpit/gear bay/weapons pallet module is the put inside the front fuselage halves, The instrument panels and coamings are then added. To finish up the front and main fuselages are brought together. If making the F-101B then the flat panel is placed under the front fuselage section, and if doing the RF-101 then the camera system is placed here. The canopy is added. The panels for the avionics bays can be added in the open or closed positions. The drop tanks can the be added. Its worth noting that the profile for the RF-101B is wrong in that it shows the aircraft armed when in fact the weapons pallet was deleted. In addition there seems to be no replacement panel for the weapons pallet if making the RF-101. Decals The decals are sharp, i register and look colour dense. One US aircraft is shown though in Grey FS16440 and in Silver? I was on the understanding all Voodoos were ADC Grey? From the box you can build one from RF-101B, one CF-101B, and three F-101Bs. The 60th FIS is shown as FS16440 but these aircraft were ADC grey FS14673. There is also one NMF example which seems to be unusual? 60th FIS, USAF 136th FIS, USAF 437th FIS, USAF 17395 409 Sqn "Nighthawks" Royal Canadian Air Force. RF-101B 59-0434 192d Tactical Reconnaissance Squadron, Nevada Air National Guard. Conclusion The plastic looks great, and aside form a couple of issues with the RF version should build from the box into a great model. Highly recommended Review sample courtesy of Available soon from major hobby shops
-
Russian Yak-130 "Mitten" (KH80157) 1:48 Kitty Hawk The Mitten (that's a cute name!) is a small 2-seat advanced subsonic trainer that is able to haul around 3,000kg of munitions to perform its ancillary role of light fighter. It began development as a joint project with Italian company Aermacci, but creative differences led to a split after the unveiling of the prototypes in the mid-90s, following which each manufacturer went their own way, even though the majority of the design and airframe work was completed. The Italian version became the M-346 and they agreed to split the market roughly between NATO and independent states that were previously aligned with the Soviets, or had good relations and a track history of purchases. The Yak-130 won the competition to become the new Russian trainer in the early noughties, beating Mikoyan into second place, and securing a small pre-production order to begin with. It is a thoroughly modern trainer, and can mimic the controls of the majority of the current 4th and 4.5 generation aircraft in the Russian inventory, and also has the capability to replicate the controls of the new Su-57, formerly known as the Pak-Fa. This is accomplished by a fly-by-wire system plus a trio of large Multi-Function Displays (MFD) in the cockpit, which can be configured according to their training requirements, involving dogfighting, missile and weapons launch, self-defence and other systems in order to prepare the pilots for their eventual role. A side project to create the Yak-131, a light-attack aircraft was terminated due to insufficient safety of the pilots at low levels, leaving the Mitten as the only fork of the design in Russian service. The Kit This is a brand new tooling from Kitty Hawk of this diminutive trainer, and coincides with the release of the Aermacchi "version" from another vendor, which may or may not be a coincidence, who knows? With it being a small aircraft, it's surprising to see that it arrives in the same sized box as some of the larger aircraft from the KH line, but once you open the box you can see why. It's a box of Russian/Soviet weapons with a free Mitten for good measure! There are seven large sprues in the box, plus one clear sprue, a small fret of Photo-Etch (PE) brass, a container with two resin pilot figures inside, three decal sheets, one of which is tiny, and the instruction booklet with pull-out centre pages on glossy paper for the full-colour painting and decaling guides. Detail is nice, with lots of raised and engraved features, plus use of sliding moulds to give either additional detail, or reduce part count, which alongside the four weapons sprues makes for a well-rounded package. Parts breakdown is interesting, with the top fuselage and blended wings moulded as one part, plus a two-part lower fuselage and wing inserts completing the main airframe. The canopy has been moulded in a split-mould, so that the correct "bubble" of the part is obtained, but it behoves you sand down the seam and polish it back to clarity, which is a common theme of modern jets and their quest for situational awareness. Construction begins with the cockpit, making up the two NPO Zvezda K-36LT3.5 ejection seats, which share a common look with many modern Russian seats, and have separate cushions and PE seatbelts if you aren't using the supplied resin pilot figures, in which case you would leave off the rear seat's belts, as the front seat pilot is depicted climbing aboard. The cockpit tub is built from a stepped floorpan, onto which a combined rudder/control stick assembly is fitted, then the sidewalls are brought in, which hold up the instrument panels, both of which have decals for their MFDs. The rear IP has a coaming added, the rear bulkhead is installed, and the launch rails for both seats are affixed to the resulting bulkheads, with the seats fitting into their slots at this point. As with many smaller modern fighters, the nose gear bay is right under the cockpit floor, being built up from individual panels and glued in place straddling the step, and held in the correct location by a quartet of L-shaped guides. The nose gear leg has a two-part yoke that traps the wheel in place, and can be fitted now or later as you see fit, with a clear landing light attached to the oleo. The completed assembly is then dropped into the lower nose part, which needs a few holes drilling beforehand, after which it is set aside while the upper fuselage is prepared. The upper fuselage and wings are fitted out with an airbrake bay and a pair of inserts inside the root extensions, which once the lower nose and cockpit are installed, these parts will be partially seen under the extensions, so fit them nice and neatly, minimising any gaps, and filling those you can't disguise. The Mitten (I do like that name) is a twin-engined aircraft, and the intake trunks are built up as assemblies that are then installed above the main gear bay in the lower fuselage. You'll need to take a view on how much will be seen here before you go mad with filling seams, but as the tubular section is a single part and has an engine front attached to the end, only the U-shaped initial area will have a seam to fill. The gear bay is central and shared by both wheels, with bulkheads added before it can be slotted into the fuselage along with the APU exhaust on the starboard side. The rear of the engines are fitted to the exhaust trunks, which are split lengthways in half, so may need filling, and these are then attached to their troughs, with fairings added between and around them, leaving just a fraction of the lip exposed. This assembly can then be added to the upper fuselage and you have a fairly complete airframe that just needs lower wing panels, leading edge parts, then the flaps in the deployed position, ailerons, and finally the intake lips installing to complete the wings. The main gear legs have more clear lights added, and two-piece wheels fitted at the end of the cranked oleo, before they are glued along with the retraction mechanism on either side of the centre bulkhead, with doors and their jacks for all the wheels added later. Flipping the model over, the nose cone is affixed along with a forest of antennae and aerials around the front, plus the large HUD for the pilot, which has two clear lenses for added realism. The crew ladder is depicted deployed by default on the model, which is to take advantage of the resin crew figures, one of which is climbing into the front seat with his face masked and ready to go, while the instructor peruses a checklist. They're very nicely sculpted, and give a human dimension to this little aircraft. Two inserts are supplied for the holes in the root extensions, which I would rather have installed earlier in case they fall through into the interior, but there's nothing stopping you from doing this yourself if you wish. The auxiliary intake doors behind the cockpit are depicted closed, which is a bit of a shame from a detail point of view, but I would imagine that Eduard or someone will be all over that very soon now, as they're often seen open, especially in flight. The airbrake bay gets its door and jack, the windscreen is fitted around the now-complete coaming, and the rear canopy is bedecked with a set of PE rear-view mirrors and handle before it is installed in either the open or closed position. As it hinges sideways, you might want to do something to strengthen the bond early on, and a little research should result in a solution. You might also notice that there is a shallow blast shield between the cockpits, so grab a piece of spare acetate sheet and make your own if you're in the mood. The wingtips have pods on adapter rails fitted, with the chaff and flare dispensers moulded into the tops, with two pins holding each pod in the correct location, and a small clear wingtip light visible on the inside of the rail. Your poor little Mitten has lost his tail, or rather it's not been fitted yet, so a nicely slide-moulded fin part fits into a depression in the top of the fuselage, with two pins for good measure, while the elevators are moulded in one part each, with a central(ish) pin around which they rotate. Now for the stores and hard-points, which the Yak has seven of excluding the already occupied wingtip points. Three stations per wing are supplied, with the outermost one having PE shackle-points, and the centreline point has a twin-cannon pod fitted, in case things get down-and-dirty. There is a cornucopia of weaponry on those four sprues, some of which won't be carried in real-world scenarios, but it's surprising just how many it can carry, but with hindsight it has to carry pretty much everything that the frontline aircraft can or it won't be an adequate trainer. Here's a list of what's suggested as candidates for a load-out, but if you want accuracy, check your references for actual configurations. 2 x fuel tanks 2 x KAB-500KR TV-guided bomb 2 x KAB-500L or 500SE laser guided bomb 2 x KH-29T A2S missile with different seeker heads 2 x R-73 Archer short-range A2A missiles with APU-73 adapter rails 2 x R-77 Adder A2A missiles with adapter rail 2 x KH-25-ML or MT A2S missiles with adapter rail 2 x U-4 launch rails 2 x U-6 launch rails 4 x BD-3UMK adapter rails 4 x BD-4UMK adapter rails 2 x KH-58ME Kilter anti-radiation missiles 4 x R-60 Aphid A2A heat-seeking missiles with adapter rails 2 x KAB-1500-L, KR or SE laser guided bomb 2 x KH-31 Krypton supersonic A2S anti-shipping missiles 2 x R-27ER or ET Alamo long-range A2A missiles with APU-470 adapter rails 2 x R-27T Alamo medium-to-long range A2A missiles with APU-470 adapter rails There are also some rocket pods and iron bombs that aren't used, so if you wanted to play "spot the unused bombs" have fun with it! There's a diagram at the end of the instructions that shows which loads can be placed where, but again, if you're going for realism, there's no substitute for checking your references for real-world choices. Markings There are a lot of decals with this kit, and from the box you can build one of seven options. The second large sheet of decals is purely for the weapons, while the other sheet is destined for the airframe and the little sheet contains the MFD decals for the instrument panel and a couple of colourful decals that couldn't be included on the main sheet. The markings guide is stapled in the centre of the booklet, so as usual I have liberated them by unpicking and re-bending the stapes, leaving the last glossy page in situ as its reverse side contains some of the build instructions. Here are your decal options: Kitty Hawk are another of those companies that sometimes don't include any information about the location, unit or time period for their decal options, and this is one of those times. We know that you can make Russian machines in primer, grey, red or green, or a Bangladesh Air Force option, which they have accidentally referred to as "Bulgarian" on the side of the box, and that's your lot. The primer airframe is one of the prototypes, and the colourful ones are aircraft that have been on display, the red one bearing a resemblance to the Russian acrobatic team's red and white scheme. Decals aren't always the strongest part of KH kits, but this one seems to be ok, save for a slight offset on the white, which creates a little "shadow" on some of the decals that it has been used to underprint weaker colours. The instrument decals are really detailed, and could pass for real, but you would need to leave the canopy open to really appreciate them, so give that some thought during the build. The det-cord that shatters the canopy before ejection is supplied as a decal, which there are always divided options about, with two camps that prefer either moulded-in or decals, so there's no pleasing everyone. The carrier film should be easy to hide with some careful application of Klear/Future or similar gloss varnish however, so with a bit of care they can be made to look good. The decals for the weapons are good enough for the task, although my copy has a slight blemish in the black banding for the KH-59 missiles, but as those don't appear to be on the sprues, I'm not even worried. Conclusion Cute as a button, and a nice-looking aircraft that comes with a huge range of stores and some nice schemes. The lack of blow-in aux-intake doors and more information on the decal options are minor downsides on the whole, but who wouldn't want a Yak-130 in their stash (I know, some people won't, but you've got this far)? What's more, if you bought two, you could answer the question "What's in the bag?" from your Significant Other honestly, if a little misleadingly. "Oh, just a pair of mittens, darling". Highly recommended. Review sample courtesy of and available soon from major hobby shops
-
F-5F tiger II (KH32019) 1:32 Kitty Hawk The original F-5 design was lead at Northrop by Edgar Schmued who previously at North American had been the Chief designer of the P-51 and F-86. The F-5 was designed to reverse the trend of bigger and heavier fighters to produce a small, agile, high performance aircraft. It was also recognised that life cycle costs, and the ability to upgrade the design needed to be thought out at the beginning. Thus after winning the International Fighter Aircraft Competition in 1970 to provide a low cost effective fighter to America's allies Northrop introduced the F-5E or Tiger II. More than 3800 aircraft were built and served with the US Forces as well as their allies. Indeed the F-5F & N still serve in the adversary role today. The design of the F-5 would later go on to influence the YF-17 and F/A-18, as well as the late unsuccessful (is sales) F-20. The Kit This is a complete new tool from Kitty Hawk, The kit arrives on 6 spures of plastic with a small clear sprue, sheet of PE and four decal sheets. The resin exhaust nozzles of the F-5E are not included in this boxin. There are two resin crew figures; one seated and one climbing the crew ladder, the crew ladders are also included in this boxing. Construction starts as one would expect in the cockpit. The seats are first put together each from an impressive 20 parts. Next up the cockpit tub is built up from another 20 or so parts not including the instrument panels and coamings. Once together the canopy raising parts are also added behind the seats. Following this the complicated nose gear bay / gun bay is built up which goes on front of the cockpit. All the detail is there for the nose mounted 20mm cannon including its ammo box and feed chutes. Once built up this section and the cockpit can be added into the front fuselage halves after some PE detail is added to the sides first. The nose section can then be built up and added but the modeller will need to select the right nose for the airframe being modelled. The instructions are of no help here so you will have to check your references. If wanted the seated pilot figure can be added. The canopy is then added at this stage in the instructions though I suspect most will leave it until the end. The canopy retraction mechanism is only in the raised position so if you want the canopy down some surgery will be needed. There is then the option to display the gun bay panels open if you wish to show off all that detail. Moving on to the centre fuselage two complete engines are built and installed. This seems a bit strange as no intake trunking is supplied and they will just sit there inside the fuselage. The main gear wells are made up and installed before the top of the fuselage is added. There are some optional vent panels to be installed but again its a case of checking your references as the instructions are of no help. For the rear the modeller can choose to build up plastic exhausts or use the resin ones. The two fuselage sections can now be joined and at the front the intakes added. Next up the wings are constructed. The main gear bay walls are added to the inner parts and the outers then added over the top. The main gears are made up and added along with the leading edge and separate flaps. The wings, tail planes and vertical tail are then added to the fuselage. The tail has a separate rudder. To finish off the aircraft the underwing pylons are added, and a whole range of missiles and bombs are provided. These include AIM-9 & AIM-7 missiles, Cluster bombs, dumb bobs and fuel tanks. Decals The impressive large decal sheet (and smaller additional sheets) look to be well printed. There is minimal carrier film and the colours are sharp, everything looks colour dense. There is an impressive array of stencils present. There have been problems with the tail designs which have lead to some addendum sheets. In previous kits the instructions have been in colour these are only in black & white and they suffer from this. They also suffer from the fact you need to remove them from the centre of the book to use them, and that there appears to be no information what so ever on the decal options provided. From the box as far as I can tell you can build one of these aircraft F-5F Taiwanese Air Force - Tiger tail F-5F Islamic Republic of Iran Air Force F-5F USMC VMFT-401 "Snipers" Aggressors. F-5F Taiwanese Air Force - Aggressor tail F-5F Malaysian Air Force F-5F Republic Of Singapore Air Force F-5F Taiwanese Air Force - Sun Tail F-5F Republic Of Singapore Air Force - Tiger Tail F-5F Royal Thai Air Force - 30th Anv Tail F-5F USN VFC-111 Sundowners F-5F Swiss Air Force F-5F Republic Of Korea Air Force Conclusion The plastic looks great, and there is an impressive array of marking options available. The addition of PE and resin parts including good figures makes this an all round exciting package from Kitty Hawk. The kit is let down by the total lack of information on the decal options and poor instructions for the painting & decaling of the model. Recommended if you want a large scale F-5F to your collection. Review sample courtesy of Available soon from major hobby shops
-
KittyHawk is to release in 2014 its first three 1/72nd aircraft kits. The subject will be the Lockheed-Martin F-35A/B & C Lightning II - ref. KH16101, KH16102 & KH16103. Source: http://s406.photobucket.com/user/KAGNEW-71-73/library?view=recent#/user/KAGNEW-71-73/library/?view=recent&page=1&_suid=1389484782947017453412055238093 The 1/72nd Lightning II kits released or on approach... - F-35A : Italeri, Academy, Hasegawa, KittyHawk - F-35B : Fujimi, KittyHawk - F-35C : Orange Hobby, KittyHawk ------------------------------------------------------------------------------------------------------ KH16101 - LM F-35B Lightning II - Marine Corps short-take off and vertical-landing (STOVL) KH16102 - LM F-35A Lightning II - conventional take off and landing (CTOL) KH16103 - LM F-35C Lightning II - Navy Version carrier-based CATOBAR (CV) V.P.
- 18 replies
-
- 3
-
-
- 1/72
- Kitty Hawk
- (and 1 more)
-
F-5E tiger II (KH32018) 1:32 Kitty Hawk The original F-5 design was lead at Northrop by Edgar Schmued who previously at North American had been the Chief designer of the P-51 and F-86. The F-5 was designed to reverse the trend of bigger and heavier fighters to produce a small, agile, high performance aircraft. It was also recognised that life cycle costs, and the ability to upgrade the design needed to be thought out at the beginning. Thus after winning the International Fighter Aircraft Competition in 1970 to provide a low cost effective fighter to America's allies Northrop introduced the F-5E or Tiger II. More than 3800 aircraft were built and served with the US Forces as well as their allies. Indeed the F-5F & N still serve in the adversary role today. The design of the F-5 would later go on to influence the YF-17 and F/A-18, as well as the late unsuccessful (is sales) F-20. The Kit This is a complete new tool from Kitty Hawk, The kit arrives on 6 spures of plastic with a small clear sprue, sheet of PE and two decal sheets. There are in addition resin exhaust nozzles add two resin crew figures; one seated and one standing. Construction starts as one would expect in the cockpit. The seat is first put together from an impressive 20 parts. Next up the cockpit tub is built up from another 20 or so parts not including the instrument panel and coaming. Once together the canopy raising parts are also added behind the seat. Following this the complicated nose gear bay / gun bay is built up which goes on front of the cockpit. All the detail is there for the nose mounted 20mm cannons including their ammo boxes and feed chutes. Once built up this section and the cockpit can be added into the front fuselage halves after some PE detail is added to the sides first. The nose section can then be built up and added but the modeller will need to select the right nose for the airframe being modelled. The instructions are of no help here so you will have to check your references. If wanted the seated pilot figure can be added. The canopy is then added at this stage in the instructions though I suspect most will leave it until the end. The canopy retraction mechanism is only in the raised position so if you want the canopy down some surgery will be needed. There is then the option to display the gun bay panels open if you wish to show off all that detail. Moving on to the centre fuselage two complete engines are built and installed. This seems a bit strange as no intake trunking is supplied and they will just sit there inside the fuselage. The main gear wells are made up and installed before the top of the fuselage is added. There are some optional vent panels to be installed but again its a case of checking your references as the instructions are of no help. For the rear the modeller can choose to build up plastic exhausts or use the resin ones. The two fuselage sections can now be joined and at the front the intakes added. Next up the wings are constructed. The main gear bay walls are added to the inner parts and the outers then added over the top. The main gears are made up and added along with the leading edge and separate flaps. The wings, tail planes and vertical tail are then added to the fuselage. The tail has a separate rudder. To finish off the aircraft the underwing pylons are added, and a whole range of missiles and bombs are provided. These include AIM-9 & AIM-7 missiles, Cluster bombs, dumb bobs and fuel tanks. Decals The impressive large decal sheet (and smaller additional sheet) look to be well printed. There is minimal carrier film and the colours are sharp, everything looks colour dense. From the box you can build one of nine aircraft F-5E Brazilian Air Force. F-5N VFC-111 "Sundowners" US Navy (3 Greys scheme). F-5E VFC-111 "Sundowners" US Navy (3 Browns scheme). F-5E Republic of South Korea Air Force. F-5E Islamic Republic Of Iran Air Force. F-5E Mexican Air Force. F-5E Republic Of Singapore Air Force. F-5E USAF (Silver with Yellow fuselage Band) F-5E USAF (SEA Camo) Conclusion The plastic looks great, and there is an impressive array of marking options available. The addition of PE and resin parts including good figures makes this an all round exciting package from Kitty Hawk. Very highly recommended. Review sample courtesy of Available soon from major hobby shops
-
 Hello, here's my debut with a bit unusual topic (already existing in this forum in much better execution ☺️) - Flying Flapjack from Kitty Hawk. Though I've expected a lot from the kit at the end I'm a bit disappointed by the quality. Still it was an interesting journey. Constructive remarks more than welcomed! Have a nice look.
- 11 replies
-
- 22
-
-
- 1/48
- Kitty Hawk
- (and 1 more)
-
Hi, I have been posting on the aircraft modelling forum here for a little while, and have never before crossed over into figure modelling... Until now! Having recently moved flat, I now have a lot less space to work on models in. As a result I have a new resolution - which is compact projects only! I have always wanted to build a Little Bird, and when I saw the Kitty Hawk kit I thought it would be ideal for my new set up. And on top of that it comes with figures! If that's not a great combination of time consuming new techniques and small space requirements I don't know what is. I have watched some tutorials on YouTube about figure painting, and looked over threads on here. And today I plunged in. I will be posting WIP on the machine in the aircraft forum, but will be needing help with these figures... So with that said - here's my work after a day on one figure... and a few questions for those far more experienced! First off - a few pack / parts shots : My plan is to build the Bird with a mixed load out of fixed weapons and troops. I know this is (as far as I can tell) not something that is done in reality - but it will offer me the most from the build : the fun of building and painting mini guns and rocket pods, as well as tackling my first ever figure painting work... With that - I selected my first figure - my nerves allayed by knowing that if it went badly there were three more left! On that note - I should also add that I am not building this as a historic aircraft / specific unit. The figures will be roughly representing modern special forces - with a mixture of gear, some camo - anything that seems fun in order to try out new tricks. Please forgive me - I do know these sorts of builds can be torture for experts to look at! The first up was primed with Citadel white rattle can. As a total novice to figures my opinion is naturally of little use, but these seem nicely detailed. And coming as one piece removes the issue of join seams. There were a small amount of mould seams I removed (mostly) with a blade. Then I started on the head... I was quite happy with how it went all things considered. As recommended by almost every source I have seen, I started with a blanked dark skin tone, then lifted out the 't-zone' as spot creams call it, and went from there. I think I need to dilute the paint more...? Any tips welcome, but while I was quite happy, it's a bit blotchy looking. I assume this is from my paint drying / not being translucent enough in each stage? Torso and legs were next. I painted all of this figure after the primer with Vallejo brushed paints using a wet palette. Bas for clothes were two slightly different tones of beige. Then I stippled on an almost white beige before painting dark brown / green lines. The flak jacket was varying tones of mixed greens, with highlights and low-lights added. After some tidying up, and some darker tones in folds, I got round to the pads / helmets. These were the easiest for me as they were closest to doing aircraft parts and clearly avoid the issues of creases and patterns. They were painted Vallejo grey-black then dry brushed with paler shades before being lightly sponged with very pale grey for scuffs. So - day one, and figure one, down - at least nearly, some tidying + weapons yet! 6 more to go (including pilots) so lots of time to improve. I have 2 questions though: 1. To me this is looking far too vivid in terms of colours. Clearly I should have remedied that along the way, but is there a smart way to mute this all NOW? I was thinking a liberal dusting with some light pigments like sand / light dirt? 2. Would a thin oil wash of dark umber on the face settle into the smaller creases well, or might it destroy the acrylic paints? Same for oil / white spirit washes in general - are these a no go with Vallejo? Many thanks for any info, tips, suggestions or criticisms! Bruce
- 8 replies
-
- 7
-
-
- kitty Hawk
- little bird
- (and 1 more)
-
Hi Guys Please see the website for the latest new product, brass undercarriage for the 1/32 scale Kitty Hawk OV-10 A/c or D kits. http://aerocraftmodels.bigcartel.com/product/ov-10a-c-bronco-brass-undercarriage-set cheers Ali


.thumb.png.6e11fc11af5645499ae76cb59fcfb788.png)