Search the Community
Showing results for tags 'Jaguar'.
-
Well kids.... I started all over again... New thread because the old one was just devolving into a endless stream of do overs. THIS THREAD SHALL NOT BE WHAT CAME BEFORE...THIS ONE WILL BE A FINISHED PROTOTYPE MODEL!! So a few months back my good friend Paul Fisher lost his home and wonderful workshop to fire in Paradise, CA. I am so happy he and his family escaped and in that light the mention of what comes next seems so trivial. Paul was in possession of the masters I had completed at the time of the fire so an opportunity to build a better model arose. Considering the magnitude of the work I previously completed, I started thinking about how to speed up the build. As many of you know I have turned to CNC and SLA type 3d printing to augment the hand building of the model. Until recently I had eschewed the use of FDM type printers due to the inaccuracy of the prints, and significant post processing required after printing model parts. Cost also was a factor, nothing was worth the investment versus the risk of poor parts. Enter the Tiertime Cetus MKIII. This little printer was cheap, precise and worth a gamble. The main feature that attracted me to the printer was the linear guide rails and bearing blocks. These almost guarantee accurate movement of the axises of the printer. With a price in the $300 US range it was worth a try. With the printer in hand and after some tweaking with the assembly of the printer I managed to print dimensionally accurate parts. One inch cubes were printed and were measured by digital caliper only a few ten thousands of an inch from true, and square adjacent surfaces measured with a machinist's square. So I ordered up 7,000g of PLA filament and started a-printing. On a similar journey I ordered up an Anycubic Photon MSLA printer, though this journey was much longer because the Photon required much more significant modification to get true parts. Out of the box it made fantastic parts in terms of detail. However, they parts didn't fit with others, they were skewed in the Z or vertical axis. The modification was much too complex to detail in this post, suffice to say the machine was disassembled, parts were machined true, linear rails and bearing blocks added and a new parts were machined to make it all work. Parts that came out of the machine post modification were exceptional! Now that I have three machines working simultaneously part production has definitely accelerated the pace of this build. I have also made some design changes. Outside of getting another chance to improve the model's accuracy, simplifying and streamlining the build has been a chief consideration. So the model will still be "skinned" in aluminum sheet but only where there are removable panels, the remainder of panel detail will be scribed in to a layer of primer paint. PLA is a difficult material to sand and also hygroscopic and needed to be well sealed. I'm using 2 part automotive epoxy paint (paint and hardener) to fill and "glue" the PLA layers together. The result is a surface that is much easier to sand and finish. You can see a few of the PLA parts were the black primer has been applied and finishing has started. Lastly my machining skills have improved to the point where the acrylic parts now have machined in details, rivets and reinforcing layers etc. Here's a shot of the parts so far. These parts represent the main components of the fuselage from the nose to the engine faces. More detailed photos coming as assembly commences. This will be a prototype model, so I will be finishing this one as I go, so you can look forward to finished assemblies going forward. Thanks for checking in! Timmy!
-
Hi All, Does anyone know much about the SEPECAT Jaguar? I have the Airfix 1/48 GR.3 kit (Hence why I posted this in Modern not Cold War) and I'd like to backdate it to a pre-Gulf War GR.1 Asides from not fitting the over wing pylons/Sidewinders, does anyone know of any other majour visual changes between the two marks? Thanks for your help in advance! Stuart
-
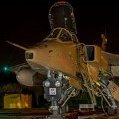
Finished this a couple of weeks ago. After a very loooooooong in building, The kit was built almost OOB. I cut away the solid plastic of the nose laser windows and replaced it with layers of '5 second UV Gel'. Main paint was Humbrol 250 Desert Sand. The decals are old ones from Xtradecal 'Gulf Special' which has a few schemes for Tornado, Jaguar, Buccaneer and a Hercules
- 12 replies
-
- 20
-

-
So I had a great trip to RAF Cosford last week and my photos which I took with modelers in mind have had a great response on Facebook. Someone asked me to share them here so here's a link. Backstage at RAF Cosford Admins if you need me to split this up so it's more specific I expect I can Enjoy I did Alan
-
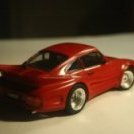
Howdy forumites, its been a long time since I rock'n'rolled, but never mind that now. Today, may I present for your consideration a carved wooden series 1 Jaguar E-Type at roughly 1/24 ish scale. Entirely scratch built out of panga panga and basswood, with a little bit of plastic and brass. Took about 6 weeks with numerous pauses while work kept me away from my toys. I Don't think I'll use panga panga again, it is a bit of a pig to carve as it is splintery, and the heavy grain overpowers smaller details. however, it turned out all right, and taught me some more about the joys of whittling. Until next time, keep your tools sharp and your fingers out of the way.
-
Jaguars at Nellis AFB for Red Flag 84-2, February 1984. XX746 17 Squadron XX750 14 Squadron XX962 17 Squadron XX975 17 Squadron XZ370 17 Squadron XZ383 14 Squadron XZ385 17 Squadron XZ388 14 Squadron Thanks for looking, Sven
-
Just finished this 1/72 Italeri jaguar GR3 for my grandson. Depicted as the final flight from Coningsby in 1990 (although Sgt Vernon's name on the side comes from the final taxi at Cosford I believe?), The kit is very straightforward but the decals are a bit 'challenging' so buckets of microsol were required! Pilot figure is an awful Sword (I think?) figure from the spares box, but all I had at short notice unfortunately.
-
Does anyone know where I can get some drop tank decals for an RAF Grey/Green cammo Jaguar 1/72? I have the Hasegawa kit with Pavla resin drop tanks. Can anything else be used from other types?
-
This was a fabulous kit to make, all the parts fitted really well and with good instructions, as well as a nice array of stores. My first 1/48 kit. I think I left the wing strakes a bit too long, and I haven't got the skill to fashion the three tiny canopy mirrors, plus she's a bit too satin not matt, but I hope she captures the essence of a Jag from the days when it was so much fun to hang out at the end of Coltishall's runway, or see them screaming low over Norfolk! All comments welcome ...
- 16 replies
-
- 30
-

-
This is my 1/72 Planet Models Grumman XF10F-1 Jaguar. The Jaguar was the first attempt to build a practical swing wing fighter and while it was a good first try, like most such things it was not a success. I used these 2 links, both members here, as inspiration http://tailhooktopics.blogspot.com/2012/06/xf10f-pictures.html and Including using the Obscureco F9F pather seat and cutting a hole in what would have been the wing butt joint and inserting the part of the wing that was to be cut off if the wings were to be mounted in the swept-forward position which is how I decided to display it. I would rate the Planet Models kit as above average for resin kits with nice molds, fit and very few pinholes. I also had the Anigrand kit, but compared to the drawing is the Ginter book it was way undersized so I didn't use it. The kit included 2 vacuformed canopies and since it usually takes my at least 2 tries to get a vac canopy right, that was a good thing. As it turned out I got it right on my first try. The decals were everything you could ask a decal to be. Very thin, but with enough body so the could be moved around and no silvering. So on to the pictures; This next pose strike me as very bird like Next up will be the Hobbycraft F2h-3 Banshee. Enjoy.
- 8 replies
-
- 20
-

-
- Planet Models
- XF10F
-
(and 1 more)
Tagged with:
-
I'm doing the Kitty Hawk Jaguar and wish to know whether to fit the chaff/flare dispensers underneath towards the rear. The instructions do not show them being fitted as a stage but later show them on so are not really useful, box art shows none painting guide has them fitted and googling is frustratingly inconclusive. Can anyone tell me the answer?
-
Latest kit from MFH - this will be another sleeper - got plenty on the go, but if anyone is interested on what is in the box of this latest 1/12 offering from MFH... New box design! Quite a few plastic parts Grrr - my pet MFH hate...delicate, thin parts, wrapped in tight cling film. Another minor point - MFH include templates for cutting out ali-foil, masks etc etc - but you have to cut them out yourself - which is no problem, except they are printed within the instruction booklet - ie: they have other stuff on the back - so you have to copy and print your own. No big deal if you have a printer etc, but be nicer for these to be supplied on a separate sheet of paper. Red circle shows a useful visual guide to all the similar pipe fittings you have to sort through... This will be fun! Decals... Lovely detailed PE parts... Detail parts... Big canopy to trim... Body is huge! Full size keyboard behind for scale... ....so, a very quick over view. I am sure someone will start this soon. I'll probably do my usual and start with the engine shortly.... cheers
-
RAF Jaguars at Red Flag exercise January 1983... XZ385, 14 sq XZ369, 14 Sq XZ356, 17 Sq XZ370, 17 Sq XZ374, 20 Sq XZ378, 20 Sq XZ394, 20 Sq XX968, 31 Sq Thanks for looking, Sven
- 11 replies
-
- 34
-

-

-
Hello, Here's my 1/72 Italeri Jaguar T.2. Nothing fancy, just the kit parts and decals. I did paint the tail stripe, because the decal provided was too short. This kit is not one of Italeri's best, imo, but in the end it looks like a Jaguar. I hope you like it. Thanks for looking, Pete
- 20 replies
-
- 64
-

-
After the 1/48th kits ( GR. link & A. link ). On LSM forums, the Kitty Hawk's rep, Glen "Kagnew" Coleman, confirms the company 1/32nd SEPECAT Jaguar family project. Of interest are also the words "1/32 French projects before we get into it". To be followed. Source: http://forum.largescaleplanes.com/index.php?showtopic=53067&p=617140 V.P.
- 17 replies
-
- 2
-

-
Another one that has sat on the shelf of doom for far too long. This really needs to be completed, along with... The Merc The 308 The Diablo The FIAT 500 and the Payhauler. They have not been completely forgotten. Anyway, having got that off my chest, here goes. The box top: It's a British classic. The body was primed using Halfords' red-oxide primer, then top coated with a mix of Tamiya gloss colours mixed as per the instructions. It gives a really good metallic maroon/red finish. I mixed up my own 'pink' primer for the interior as I have run out of the Halfords' primer a long time ago... The floor-pan. This kit has been a real pleasure to put together so far, more progress soon. All the best, Alan.
-
Adding another to my list of Matchbox kits needing built The pre-WW2 Jaguar SS-100 Here's a bit of trivia for you; Jaguar cars started out as Squire Sidecars, building motorcycle side cars, then building car bodies on to Austin 7 chassis, then Triumph chassis. As car builders they were SS Cars. The Jaguar series was built on a Triumph chassis, the number was indicative of the car's maximum speed. Post WW2 the letters SS were associated with an evil regime so William Lyons [the company founder] dropped the SS and took up the name of its most famous pre-WW2 sports car Most of that chrome will have to go. I'll do this as one of the 100s in my motorclub; one is very dark midnight blue and the other dark red.
-
Finally getting around to scanning some old slides. Here are the RAF Red Flag contingent at Nellis AFB in Jan-Feb 1981. XZ392 31 Squadron XZ387 31 Squadron XZ376 17 Squadron XZ356 17 Squadron XX972 31 Squadron XX969 31 Squadron XX968 31 Squadron XX827 17 Squadron. Unfortunately, XX827 was lost 12 February on the Nellis ranges in a controlled-flight-into-terrain crash killing the pilot. Sven Old Viper Tester
-
Hi everyone, this is a little bird i made some time ago, it's the Academy sepecat jaguar in 1/144 scale. It's only 10cm long! it was painted with humbrol enamels. I added: - New sidewinder rails -New sidewinder missiles -scratch built avionics pods -new pitot tube -new dorsal antena and light -Also i hand painted the roundels here are a few photos of the process and the final result: Boxart: not sure why they show this scheme because they add desert storm decals xD IMG_7262 by basco.br1, en Flickr These are the new rails IMG_7309 by basco.br1, en Flickr The new missiles: IMG_7345 by basco.br1, en Flickr Here is the final result (before the armament): IMG_7346 by basco.br1, en Flickr IMG_7349 by basco.br1, en Flickr IMG_7352 by basco.br1, en Flickr IMG_7355 by basco.br1, en Flickr my weird looking scratch bomb: IMG_7360 by basco.br1, en Flickr IMG_7361 by basco.br1, en Flickr IMG_7362 by basco.br1, en Flickr IMG_7365 by basco.br1, en Flickr IMG_7364 by basco.br1, en Flickr IMG_7366 by basco.br1, en Flickr IMG_7367 by basco.br1, en Flickr IMG_7369 by basco.br1, en Flickr IMG_7370 by basco.br1, en Flickr IMG_7371 by basco.br1, en Flickr IMG_7372 by basco.br1, en Flickr IMG_7373 by basco.br1, en Flickr IMG_7374 by basco.br1, en Flickr Hope you like it! greetings from Chile Bruno.-
-
Hi all, I'm new to the group, but have looked over some of the outstanding builds that have been posted previously, and in awe at the skill levels evident! This has partly been my inspiration to have a model commissioned, by a work colleague, of the first aircraft I ever worked on in the RAF once out of training, a 54 Sqn Jaguar. I have elected to go with the 1:48 Kittyhawk kit, despite the described flaws, simply because of the availability of extra detailing sets. I've already bought the aircraft tug, avionics bay, RAF diorama set and cockpit set, and looking to get the legs, wheels, undercarriage bays, pitot and Houchin. To help the modeller, I was up with 238 Sqn at RAF Cosford last week, and took a load of detail shots of Jaguar GR1 (mainly) and associated equipment, that I thought might be a useful resource for other modellers: Jaguar GR1 and Associated Equipment Images Finally, I am trying to find images of the engine transportation trolley that carried the mobile stand out to the squadron from the bay, and an engine change kit if possible, can anybody help? Thanks and regards, Kev.
-
Hello all, Well this is a bit of a return to old ways for me. It's been well over two years since I've found time in my life to even think about modelling...work and children will do that to you! The last time I tried to post a WIP on BM it was Italeri's 1/48 Tornado converted to a GR.4 which started in 2008 and didn't reach a conclusion in Ready for Inspection until 2012 so I don't have a good track record! However, in the hope that it may help spur me along a bit I figured why not post this on BM just to keep some pressure on myself! So my plan is to take the Airfix boxing of the Jaguar GR.3/ES in 1/48 scale (also recently re-released by Revell): Convert it to this aircraft which I was lucky enough to taxi a few times at Cosford a few years ago, using various bits and bobs plus plenty of scratch building: Then end up with something similar to this, as per the previously mentioned Tornado: Like the Tornado I have no plans to build it straight from the box. I hear on the grapevine that the newer Kittyhawk kit has its shape issues but stress I've not seen it in the flesh myself. Whatever the story there though, I've had this on the to-do list for a long time and, having built the Airfix Jag before, I know it's pretty good in terms of overall shape, if outdated in terms of surface detail. It's also cheap which makes it ideal for this sort of kit bashing and major surgery as if I screw it all up I'll not feel quite so bad! So this is going to be a full strip-down and rebuild to see what I can get out of a relatively old kit. See you at the other end...in 2019! Andy -------------------------------------------------------------------------------------------------------------------------- EDITED: Added on 8 Jan 2016 for anyone building a Jag at the same time as this one: JAGUAR REFERENCES Useful websites: SEPECAT Jaguar in Detail Prime Portal - Jaguar GR.3/3A Prime Portal - Jaguar GR.3/3A Britmodeller - Jaguar GR.3/3A Useful build threads: Deanflyer's Jaguar GR.1 (A very nice build of the Airfix kit) Neil's Jaguar T.4 (A beautiful full Paragon conversion - his own - of the Airfix kit) RMP2's Jaguar GR.1 (A very good dual build of a Phantom and the Kittyhawk Jag which contains some useful comparisons with the Airfix version) palacefan's Jaguar NS (The Airfix kit built as a Nigerian Jaguar International export, showing an alternative way to fit the Paragon flaps) Mike's Jaguar GR.1 (The Airfix kit built very well with some lovely modifications made where needed) Muzz's Jaguar GR.3 (A nice build of the ARTF snow scheme with some Paragon extras) Piero's Jaguar GR.3 (As always, Piero's build are a cut above with plenty of detail) Useful books: SEPECAT Jaguar GR.Mk.1 - Aeroguide 2 Jaguars 1973-2007 - Royal Air Force Jaguar A/B/GR.1/GR.3 - HT Model Jaguar Squadrons - AD HOC Jaguar - Aeroplane Illustrated SEPECAT Jaguar - Pen & Sword The RAF Jaguar - Patrick Watson Big Cat Diary - Wg Cdr John Sullivan After-market Accessories Having decided to make this a dual build, I am planning to use a fair number of accessories so list them here to help anyone else who may wonder what's out there... GR.3/3A NeOmega Resin 1/48 Jaguar GR.3 cockpit set - This will require further conversion to change the 12.5cm x 12.5cm (1:1) LCD Multi-Function Display of the Jaguar GR.3 (Jaguar 96) to the 15cm x 20cm Active Matrix Liquid Crystal Display (AMLCD) of the GR.3A (Jaguar 97) as it is the later type I am building in this case. Note, Aires also do some decent avionics and cannon bays for the Jaguar but I've elected to scratch-build these. Worth also being aware that there are differences in the avionics bay between all marks of Jaguar. The separate gun barrels set is, I believe, only useful for French Jaguars. T.4 Paragon Designs Jaguar T.2 conversion set (4895) - A resin replacement for the forward fuselage which is sadly out of production and hard to find now. Both Aires 1/48 Jaguar Wheel Bays (4595) - An excellent resin detail set which, along with the air brake interior set, is capable of fitting the Airfix kit quite nicely; despite being marketed as serving the Kittyhawk Jaguar. Aires 1/48 Jaguar Speed Brakes (4606) - Another top quality set which is designed for the Kittyhawk Jaguar but can be made to fit the Airfix kit very well too, even when used in conjunction with the resin undercarriage bays. Only one small snag in that the pressure refuelling receptacle in the starboard bay is moulded too small. Not a great drama if you're happy to live with it. Master 1/48 Jaguar Pitot Tube & Angle of Attack Probe (AM-48-057) - A high quality turned-brass reproduction of the Jaguar's pitot tube plus AoA vane. The pitot is a vast improvement over the chunky plastic or resin equivalents on the market. Quickboost 1/48 Jaguar A Correct Air Intakes (QB48 573) - An improvement set for the air conditioning pack atop the spine. Be aware that aerials for the Jaguar A are not necessarily suitable for the RAF models though. Scale Aircraft Conversions 1/48 Jaguar Undercarriage (48037) - A metal set of replacement oleos which are not only more detailed and crisp than the kit parts but, if you are adding a fair amount of resin and other details, will help support the weight.
- 182 replies
-
- 14
-

-
I would like to introduce you to a model that I ended two days ago. Jaguar is one of my favorite aircraft. Enjoy.
- 17 replies
-
- 34
-

-
- Jaguar
- Jaguar Gr.
-
(and 1 more)
Tagged with:
-
I recently picked up an Airfix 1/48 Jaguar GR3A/ES (Kit 07104) for a great price, as there were no decals. I have to decide which aftermarket decal set(s) to get. I read somewhere that the only Jaguar units to regularly use the recce pod were 2 Sqn & 41 Sqn, is that true? I want to make the kit as either a Gulf War bird that flew recce missions, and as such would have "camera" mission markings on the nose; or make it as one of the Jaguars that I downloaded film from, when I was stationed at Zweibrücken AB Germany (1980-1985). I was a Photo-Sensor Technician in the 26th Tac Recon Wing, and one of our jobs was to download the film from transient NATO recce aircraft (Cross Service Maintenance). A VERY interesting job on the Jaguar, lying on my back on the tarmac, so I could rotate the camera access door and download the film magazine. I am assuming that the Gulf War Jaguar would probably have been a GR3, while the NATO Jaguar in the '80-'85 time frame would probably have been a GR1, is that a correct assumption? Any suggestions as to mission load carried for either option, especially ECM pods and missiles? I see some decal options for the Gulf War jet at Hannants, but can't tell if there is anything for an 80s jet in NATO. I already have a Neomega cockpit set for it, but wonder if I need to get any aftermarket stores to replace the kit parts? I may attempt to scratch-build a ladder for it, based on the posts I have read. I have already seen the different WIPs and downloaded the pics & notes, to print out when I start on my model. Larry, in Florida
-
HI all, So am currently building a 1/72 Revell Jaguar GR1A (Desert Pink scheme) and want to replace the awful kit bombs that come with it. I found these in the stash and am wondering (a) what are they and (b) which of them if any are suitable as replacements? Any and all advice appreciated! Thanks in advance, Dermot

