Search the Community
Showing results for tags 'Hobbycraft'.
-
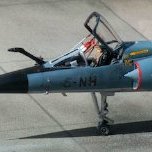
To accompany the Mexican P-47, my dad also builds a shiny Mexican Vampire, using the old Hobbycraft kit, decals partly will come from the kit (if they still work) and from Aztec. DSC_0010 by Reinhard Spreitzhofer, auf Flickr DSC_0011 by Reinhard Spreitzhofer, auf Flickr DSC_0012 by Reinhard Spreitzhofer, auf Flickr
-
Hi, The other day I was wondering why in the recent past I have had so much trouble obtaining a 1/72 kit of the venerable Caribou (which also, coincidentally, happens to be my favourite transport aircraft). As far as I'm aware only Hobbycraft from Canada has ever brought one out to relatively modern standards, but it seemingly disappeared years ago. Any thoughts among fellow Caribou enthusiasts on what the chances are of this kit returning to shop's shelves? Also, does anyone know what happened to the molds for this model kit? Jay Pic by Bidgee
- 18 replies
-
- 3
-

-
- Hobbycraft
- 1/72
-
(and 1 more)
Tagged with:
-
As a sort of practise for future kits, I've had a go at couple of long-term loft residents. Firstly a Fujimi Bf109G-6. Quite a nice little kit. I have no idea on its acuracy but it looks OK to me. Finished in Vallejo RLM 74, 75 and 76. I'm not sure that the contrast between the two upper surface colours is strong enough. My attempt at mottling is still a bit heavy handed. 1. 2. 3. 4. Next is a Hobbycraft Bf109G-14 finished in Vallejo RLM 76, 81 and 82 (or is it 83?). Another decent little kit that goes together quickly and easily. Again my mottling didn't turn out quite as I wanted but like Father Ted's car, the more I messed with it , the worse it got. 1. 2. 3. 4.
- 3 replies
-
- 11
-

-

-
- Fujimi
- Hobbycraft
-
(and 1 more)
Tagged with:
-
Hi folks. Here I present my last aircraft model of 2018, an F-86E Sabre 'RUTH I' No. 2 "Flying Cheetah" Squadron of the SAAF, Korea. The donor kit is from Hobbycraft and the wings back-dated to pre- 6-3 wing with the customary filling and sanding. Tank pylons moved inboard to the correct position. Humbrol Metalcote Enamel paints were used for the NMF, albeit something like Alclad might have been better but I had started with the Humbrol and for consistency, I stuck with Humbrol. The model was 'Kleared' before a mixture of the generic kit decals were applied followed by RUTH I decals from Micro Scale and recoated with Klear. The 'Trio from Korea' 5 of ??? Thanks for looking. Merry Christmas to you all. Stuart
-
One I finished a while back but never bothered posting, the Hobbycraft Bearcat in 1/48. I modified the cowling profile a little, added some detail to the wheel bay and used Microscale decals. Fun kit, so good I went and bought two more afterwards! 😀😀 Thanks for looking! Chris
-
Hi all. I've been given this old kit wich, needless to say, it's not up to today's standards. Anyway, there's something around those old Hobbycraft kits that make me like them, surely fond memories from long ago, when I used o get them at a local hobby shop, long gone now. I'd like to build it using the kit decals, but don't know nothing about their accuracy. Seen some colour profiles online, but as a matter of fact, I don't use to trust them, unless a picture confirms me they're OK.... According to my info, this was a Hurricane MkIIb, deployed with USSR 609IAP, and piloted by Lt Ivan Babanin. It was exRAF BM959, and sported these colours during April, 1942. So now the question... was it a standard Mk.IIb, with eight guns wing, or was it one of the russian modified subjects..???? TIA and best regards....
-
Despite being a very old (and not so accurate kit), I decided to give it a chance, after years collecting dust in my stash.....Just corrected some issues, but otherwise, mostly OOB, even down to the decals, wich, to my surprise, worked fine. Painted with Humbrol enamels, and slightly weathered with pastel chalks. Hope you'll like it. Please, fell free to leave any comment, advice, criticism, whatever..... IMGP0019 by Arturo Navarro, en Flickr IMGP0018 by Arturo Navarro, en Flickr IMGP0016 by Arturo Navarro, en Flickr IMGP0015 by Arturo Navarro, en Flickr
-
Here are some photos of what I consider the joy of my current collection, Hobbycraft´s A-4B Skyhawk. This is my only post-WW2 jet. It was an easy build, I almost ruin it because I trimmed the nose landing gear, not thinking about the nose up stand the aircraft should have. I also managed to lose the pitot tube while handling it, so I replaced it with a bent staple glued with CA. The model was brushpainted with Revell colours 46, 40 and 65.
-
Besides the Austrian S-65 my dad will start another rare sight in the modelling world, an Austrian Beaver. Six aircraft were in service from 1960 to 1976. Gonna use the one and only 1/48 Beaver kit there is from Hobbycraft together with once again decals from fellow Austrian modeller Daniel Brenter https://www.brent-air-decals.at/ DSC_0001 by Reinhard Spreitzhofer, auf Flickr
-
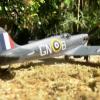
Hawker Sea Fury FB.11, 803 NAS, RCN 1948
airbus320 posted a topic in Ready for Inspection - Aircraft
Hi All! Given the excitement generated by the new Airfix Sea Fury I decided to drag my old Hobbycraft kit off the shelf and give it a bit of TLC. The original model used white metal gear and prop plus a vac canopy so these were reused for the rebuild. The fun part was reattaching the previously folded wings and rescribing the hinge lines... I used xtradecals and vallejo paints finished off with Winsor and Newton Satin varnish. I have attached a pic of the model as it was originally as a comparison. This should satisfy my Sea Fury cravings until I can build my Airfix and AMG kits. Hope you like it! Chris -
My first new-build model of the year is the Hobbycraft P-40F kit built as a P-40L the crashed during the Anzio invasion due to sabotage and is now displayed in the museum at Piana del Orme in Latina, Italy. These markings interested me due to the non-standard insignia, old code repaints and errors (see the right-side fin-flash). I used Eduard seatbelts, resin wheels, Squadron canopy, Vallejo paints and Sky Models decals to finish this model. Thanks for looking, Chris
-
The latest - and last addition to my collection of 1/72 scale F-89 Scorpions - the Hobbycraft kit of the F-89H..... I wanted to show the GAR-1 Falcon missiles both retracted and extended - so I did the port pod with them deployed ready for firing, and the starboard side all closed up. I know they wouldn't be like that in real life - they are deployed symetrically on each side - but I am claiming 'artistic licence' - it is on display at an airshow and the extending mechanism has be overridden by the display crew. The 'clean' starboard pod for comparison - note the apertures for the FFAR rockets in the nose of the pod. Closer view of the port pod - the Flacon missiles are dummies - hence the light blue colour. I could not get the US Star-and-bar to sit centrally inside the silver outline decal - either the star lined up - or the bars did - but not both! I had to cut the kit decals to go round the missile bays. Each pod could carry 3 X GAR-1 Falcon missiles - plus 21 X FFAR rockets. F-89H Scorpion of the 437th FIS, Presque Isle AFB circa 1958. Scorpion - ready to strike! My complete Scorpion collection. Ken
- 18 replies
-
- 36
-

-
The old Hobbycraft Avia makes into a decent model, even if it's starting to get a bit old. I added the SC 50 bomb rack with bombs out of another model as the kit gives you a drop tank, which is inaccurate. I also replaced the 20mm barrels with those from a Hasegawa Bf 109, as the kit supplied ones were far too thick. Decals came from Aeromaster, as I've had previous negative experiences with Hobbycraft decals, however, the fuselage band and the fin flash decals were not even close to fitting, so these were masked and painted. It really is time for a new mold 1/48 Avia.
-
Want to show some of my Vampire refurbishing project: This is an old Hobbycraft Vampire kit with all its know errors I never finished. Found it in the attic some time ago and decided not to throw it away (yet) so I tried to correct the dihedral/ anhedral issue, and hope to improve the front canopy- fuselage transition. some pics: the canopy itself will be a big challenge though...... Thanks for looking and any kind of comment!!
- 15 replies
-
- 1
-

-
- Hobbycraft
- 1/48
-
(and 1 more)
Tagged with:
-
This is my first build thread on Britmodeller and I will apologise in advance if the images don't show. This is not the first Do 17E from Hobbycraft I have built. The first was a failure, sloping engines, no undercarriage and paint that peeled. The second never got finished. I tried using vacuum canopies from Squadron. The resulting mess ended up being dumped in the bin. This is the third attempt and was started before I joined Britmodeller. The photos show progress to date. The fuselage has been straightened to cure the banana shape of the kit. There is an 8 swg steel spine fitted into my model making absolutely sure the fuselage is straight and in the photos you can see the 10 swg spar I fitted to make sure the wings are straight. (It's also a good way to straighten the droop on the Revell Ta 154) The later version of the kit had instructions stating the nacelles should be mounted 1" in from the root to the inner face of the nacelle. The early versions of the kit had no such instruction and left it to the builder. The nacelles are moulded to suit the 1" measurement. Unfortunately it's wrong. The instruction's figure should be 0.81", or 29.5mm to the nacelle centre line. The problem is that when nacelles are moved, they no longer fit and when the do fit on the wing the engines have a down thrust of 10°. The pictures therefore show the cutting and filling needed to get the nacelles to look something like. I have also cut out the lower wing to make a wheel well. The interior of the wells are fictitious.When they were done I did not have any images or drawings to show what it should be like. They were a pain to do so I am leaving them alone. The front fuselage was cut off so the I could get to the interior. I originally cut the front away, planning to use the Squadron vacuum ones. Again I found them ill fitting and too difficult. It is easier to cut and sand the kit ones to shape. Image showing upper fuselage with 6 swg wing straightener. Image showing nacelles fitted before the wing was cut out. At top is the front of the upper fuselage after being cut from the kit part. After the cut outs and the fictitious nacelle interior Image showing correct tail The kit nose glazing fitted ready for interior. Bottom was sanded down and new windows polished in. The show the kit canopy with the side window cut out and new clear parts glued in. These are needed because the kit canopy doesn't have enough depth. Once its dried I will put the framing back. That's it so far. Other kit on build is a Revell 1/32 Me 262B. This is another previous failure. This time the fuselage has had a 5mm insert fitted in the bottom of the fuselage and wing centre section which seems manages to put everything back in line.
- 9 replies
-
- 1
-

-
- Hobbycraft
- Dornier Do 17E
-
(and 2 more)
Tagged with:
-
Hi all, I finally gathered the courage and decided I'd join the group build. Common sense prevailed and I stuck with a project that would not take up too much space. Namely, I'm going to clean my stash of all remaining Hobbycraft I-16s. I made a few of these in my youth, unfortunately they were dumped in the bin by Mother dear after I left home . Only one survives and that's because it was being refurbished. Unnecessary bits from the Eduard and Ark kits ought to simplify things and improve accuracy. Unfortunately it seems I'm already off to a rocky start and today's work will be mostly undoing the damage I've done yesterday. The first specimen is meant to be a Type 5 and has had some work done on it, well below the 25% threshold I'd say: (In the background you can see the lone survivor, but it will not enter this GB). Reinforcements from the rear: the Eduard type 29 does not need these. I still need to raid the Ark kit for any piece it can shed. Now for my own embarrassment:undersurfaces from the other kit which I mean to build as a rocket-armed Type 24. I must have been modelling DUI because I thought at first that I could move the entire exhaust area to its correct location and only later I saw the folly of my actions. So I blanked the existing exhaustes and drilled holes in the new wrong position! I have plugged the holes with stretched sprue, now I'm left with the reinforcement and rescribing of the port side. In short I made a dog's meal of the piece. I'd like to say things can only improve from here, but I know myself...
- 14 replies
-
- 8
-

-
- Polikarpov
- I-16
-
(and 3 more)
Tagged with:
-
Academy has just re-boxed as limited edition the Hobbycraft 1/48th Polikarpov I-16 Type 24 kit - ref. 12314 Source: http://www.academy.co.kr/6q/board_news_main.asp?pMenuId=BOARD00012&pCode=9486 V.P.
- 5 replies
-
- 1
-

-
- 1/48
- Polikarpov
-
(and 4 more)
Tagged with:
-
I just ran out of time to complete this one within the Hurricane GB, so here's my take on the famous 242 Squadron Hurricane Mk.IIc that was based on Malta from late 1941 to early 1942. Usually this aircraft is modelled in Desert colours but I think that's a red herring. One or two early Hurricane Mk.I arrivals were in DE/MS and the aircraft flown out from Egypt by 229 Squadron in March 1942 were in full Desert trim. Apart from that, almost every Hurricane on the Island was in Temperate Land Scheme, including BE402. Here is the original aircraft after its famous nose-over moment in November 1941: And here's mine: The kit is the Hobbycraft 1/48 Mk.II, which is a mildly reworked Airfix (old tool) Mk.I. The reworking is so mild that the tail wheel provided is the same simple Mk.I affair, but CanadaMoe, who sold me the kit, added in a Hasegawa Mk.II tail wheel assembly that fits like a glove. Paint is all Tamiya acrylics applied with a brush, as I was feeling nostalgic when I started. From my youth I always remembered Tamiya paints being the best in the business but actually these were like trying to paint using the sort of white glue favoured by primary schools the length of the country. That doesn't excuse the handiwork, however. The spent case and link chutes were drawn on with a marker pen. The weathering is rather heavy but then it looks pretty grim under the wings of the real aircraft. My weathering was looking quite nice until I tried to add the light 100-octane smudges. They're a bit rough. The decals are Rafdecals. The code letters are slightly over-scale. Also they tended to shatter on contact with water, requiring a pair of very thick Airfix upper wing roundels, an Airfix central red dot on the starboard lower wing (slightly different size/shade) and some hand-painted repairs to the starboard 'S'. Anyway, after all that she's done: my fourth and (for now at least) final 1/48 Malta-based Hurricane. Here she is on my home-made patch of Takali scrub alongside the Airfix PR Mk.I conversion that I built for the 2012 Malta GB. Many, many thanks to CanadaMoe for all the help in getting the bits together some four years ago. Hope it was worth waiting for!
-
Greetings one and all again, Whilst pottering through my Fulmar and Wasp builds something special happened to my family and I. After many years of hard graft and jumping through hoops we finally became Citizens of that fine country of Canada. So to honour my adoptive country I thought I would have a go at various aspects of Aviation Canadiana. Going through my stash I dug out numerous kits that could have Canadian tendancies. As shown below: So first up was the Sea Fury. I had every intention of building it as an RN version as my collection of FAA aircraft is growing and this one would have filled an important gap. But I did fancy something different to the usual sky/EDSG (not that there is anything wrong with that scheme by the way!). Whilst researching what to do I found a few Canadian aircraft and took a shine to a grey/EDSG version. I quick trawl through Hannants gave me the decals so they were ordered and it was time to crack on! The kit is the basic but relatively accurate Hobby craft version I got this on the Evilbay many years ago and it came with a basic airwaves etch and some nice undercarriage So it has been gathering dust for many years!. My intention was to go straight OOB and do a nice finish which would hopefully disguise any flaws, but straight away I noticed a couple of things. First up was the exhausts. They looked rather flat so tried to open them up, but as I didn't have a drill small enough I trashed them so replaced them with some cut down brass tubing. Before Mid trash And my high developed jig type set up to align the exhausts After a wee bit of whittling and a test fit it looks a bit better. Typically I got carried away with the build and forgot to take a phot of the cockpit. I used the Airwaves set to embellish it but as can be seen below there isn't a lot that can be seen! Oh hey ho, at least I didn't spend $$$ on something that cant be see! . It was all sprayed with Model Master acrylic interior black and given a good old dry brush, as is my standard procedure I did leave the seat out as I wanted it to have the correct height so here is a shot again sprayed up and dry brushed. I have gone for all black! And then finally for today all buttoned up There is a lot to do with the old filler and I think I have lost a couple of tools in those panel lines so more work is afoot. Later! Bob PS For those waiting for the Fulmar, work is still going on and there will be an update very soon
-
Hi Guys, I will build the Hobbycraft Do-17Z with some different radial engines and will give it a coat of dutch paint. I started a conversion on the Hobbycraft kit a couple of years ago to make it into a Do-215. I was stuck with the engines and luckely ICM came to the rescue with a new kit. The Do-17 have just the engines removed and the rest is still to be done. The story behind it is : The Netherlands wanted to buy the Dornier Do-215 export model, but didn't liked the inline DB-601 engines. Because they wanted to have as much the same as the rest of their fleet to keep a easy maintenance they went for the P&W R1830 Twin Wasp engines with 1200 hp. This was the same engine as they wanted to put in the Douglas DB-8A-3N. That they wanted to purchase from the US. They purchased a 100 Dornier Do-17D's. 50 as a bomber version and 50 with a sollid nose with 1 20 mm cannon and 4 .50's as a heavy fighterbomber. The bombers were deliverd without the engines in the first months of 1939 and the fighter bombers in the spring of 1939. The engines were deliverd from the US also at the start of 1939 and placed on the planes by Fokker. The first bomber was ready in Juni 1939. Photo's will follow later. Cheers,
- 19 replies
-
- 6
-

-
- Do 17D
- Hobbycraft
-
(and 2 more)
Tagged with:
-
When I posted D-IALY and 6o30 a while ago, I completely forgot this Condor model Hobbycraft kit built longer ago, some changes to the nose to display a more correct (A)B model, 2.J/88 Eduard E-1 kit oob Trautloft´s plane, 2./JG77, at the dawn of WW2 in September 1939
- 6 replies
-
- 12
-

-
- older stuff
- Hobbycraft
-
(and 1 more)
Tagged with:
-
It is a well-known fact that I *never* finish anything, mainly because I'm waiting for the opportunity to use my airbrush, but the Hobbycraft Lavochkins have a particularly troubled history with me... the first one went straight into the bin because it would not look right. A couple of years later and with more reference (remember the days before the Internet?) the second one was made into a passable resemblance of Kozhedub's plane, only to mess up the finish. What's left to do but to try, try again? I started this project when the Hobbycraft kits were the only game in town in 1/48, not only for La-7, but for GPW Soviet fighters aircrafts in general! (Remember their I-16?) The weak points of the kit are well-known by now: tail fin, canopy, fuselage, gun bulges, Karman, wheel wells, surface detail in general. In the meanwhile the Gavia kit had become available, but their 3-gun version costs like a mortgage (for an extra bit of resin), so I converted mine since I was going to perform surgery on the cowling anyway. So nya-nya-nya-nyaaa-nyah to them. This is where I am now... Whoops. I made the reinforcement strips by eye and by memory, and they're too wide. The interior is not terrible, and the control stick is even right for this version, but the Legend set was so cheap... My first attempt was not so great, however. I ripped the parts off the fuselage (that's why the starboard one has a hairline crack), sanded them MUCH thinner, as in i-can-see-my-thumb-on-the-other-side thinner, put them back. Lots better. This is the point that's stalling the build... I've corrected the wheel well outline (see the white bits at the back?) but making the vanes has escaped me so far. (It's also the reason why the companion of this kit, a razorback La-5, is slowly decomposing in the loft). I've seen Milliput being used to make rather complex shapes, and I'm going to try that next. Bit of work done today... remedying the fuselage shape:
- 5 replies
-
- 2
-

-
- Hobbycraft
- La-7
-
(and 2 more)
Tagged with:
-
I picked this up pretty cheap second had and I'm glad I didn't pay much for it. The kit is devoid of detail and some of the fit is bad, the undercarriage in-particular. I also added some RP-3 rockets from the Airfix Seafire XVII that I did not use. If I'm to build another Sea Fury it'll be either the Trumpeter kit (despite it's problems) or the Fisher model. The decals used were from Blackbird Models; Latin American Air Wars Vol 1 - Bay of Pigs. They are very nice decals, thin, glossy and settle down well with Mr Mark softener. However, the colour scheme given for '541' is probably incorrect for the period and I suspect they were looking at pictures of the Sea Fury in the Cuban Air Force Museum, that is painted a touch haphazardly. They also missed the small '541' decal for the undercarriage main gear doors (I put this on with spare decals). On the colour scheme, '541' was painted in a two tone, wrap around striped camouflage of a lighter and darker colour. What these two colours were is anyone's guess. The decal sheet suggest a light green and an olive drab and I substituted the olive drab for an olive green. It's probably flown against the invasion in the Bay of Pigs and according to sources, shot down a rebel flown B-26. Sources say all Cuban Sea Fury's were repainted overall olive drab before the invasion, but pictures to show this aircraft armed with rockets with a pilot stepping into it, so without a date on the picture, who knows for sure?
- 5 replies
-
- 8
-

-
- Hobbycraft
- Bay of Pigs
-
(and 1 more)
Tagged with:
-
Hi Everyone, I have managed to squeeze 2 more builds into this year. I finished them a few days ago and have only just got the completed kit photos taken. Anyway onto the photos. Both B-2A F-117A Thanks for looking. Rick
-
- 3
-

-
- Hobbycraft
- 1/144
-
(and 2 more)
Tagged with:
-
Good afternoon After the 51 FIW Sabre I built for the Gb earlier I decided to build another Sabre and this time flown by the 4FIW , this one was flown by captain Clifford Jolley an ace with 7victoires serving with 335Fis .. I used a Pavla seat ,decals come from the "Wings over Korea" Eaglestrike decals sheet and I brushpainted with Humbrol Metalcote paints .. Patrice


