Search the Community
Showing results for tags 'Heller'.
-
#18/2020 And now for something completely different... Being usually an aircraft builder and doing from time to time some armour, this is my dad´s first car model since 30 years. The last one he built was this same Heller kit, now he gave it a new try. Built oob without any scratchbuilding or improving. The kit is not that bad, but some parts were warped, that´s why it doesn´t stand on all four. Had to cut away some parts of the engine to make other parts fit, therefore the hood is closed. Painted with an altered Tamiya Sky Blue. A pity there aren´t any modern kits of these classic race cars from the 30ies and 50ies. DSC_0001 by grimreaper110, auf Flickr DSC_0002 by grimreaper110, auf Flickr DSC_0003 by grimreaper110, auf Flickr DSC_0004 by grimreaper110, auf Flickr DSC_0005 by grimreaper110, auf Flickr DSC_0006 by grimreaper110, auf Flickr DSC_0007 by grimreaper110, auf Flickr DSC_0008 by grimreaper110, auf Flickr DSC_0009 by grimreaper110, auf Flickr DSC_0010 by grimreaper110, auf Flickr DSC_0001 by grimreaper110, auf Flickr DSC_0002 by grimreaper110, auf Flickr
- 11 replies
-
- 20
-

-
Hi folk's,my eternal quest to build another ship model continues.I had hope's of building Airfix's Gt Western but much as I washed,scrubbed and swore at it I could not get paint to stick to the plastic! I've had similar issues with their white plastic on some old aircraft kit's.Anyway I was about to give up when I saw this kit on e-bay for a tenner,the seller had a good set of photo's and identified a few bit's missing including a cannon and the sails were a write off. I quite like the look of sailing ships in port as it were without the sail's so took a punt,made a start last night.
-
Hello all, Here is my little Heller T-28D, finished as a Royal Thai AF trainer. Although an older kit, this is a pretty nicely detailed model, with delicate raised panel lines and rivets. The air intake on top of the cowling (correct for a French style Fennec but not for a D) was removed and the exhaust pipes drilled out. I also removed the hardwing pylons and added some aftermarket parts and scratched items: - Quickboost resin engine (some ignition wiring was added) - Armory resin wheels - Pavla resin cockpit (this particular aircraft was actually fitted with ejection seats, so I modified the Pavla seats to resemble this) - Scratchbuilt tail fin antenna using stretched sprue - Taurus vacform canopy - Whirlybits resin pylons, rocket launchers and gunpods - SUU-14 dispensers are taken from Academy’s A-37 kit - Bombs from the spares box SEA colours are Gunze paints. The sharkmouth is airbrushed, piece by piece - quite a tedious masking job, but worth the effort I think. Decals are a mixture of Siam Scale national markings, Techmod Black & White numbering, data stencils from the kit and my own artwork decal for the tail badge (actually bits and pieces from various decals puzzled together). Weathering is done by airbrush shading & highlights, followed by oil filters / streaks. I really enjoyed this build: the Heller kit allows for a pretty straightforward construction and is a welcome basis for some add-ons and detailing, I am quite happy how this one turned out. Hope you enjoy the pictures! Comments always welcome, all the best!! Patrick
- 15 replies
-
- 34
-

-

-
My first completed airliners in 2021. I started them somewhere last year and worked on them on and off between other projects. The main problem was to get decals for them as Heller airliners come in the odd scale of 1/125 and their 737 kit is long out of production. I found some nice liveries on f-dcal,which even arrived in an acceptable time. I have now 3 of Heller's Boeing 737,the first one was built in Lufthansa colors,mostly airbrushed and completed with decals from my spares box. Its a pity that Heller never reissued this kit as they did with most of their other airliners. Its a very nice model with good shape and the fit is, for its age, quite good. I always liked the old Luxair livery,and because I had been to Luxemburg a few times as a kid,I should have an aircraft of Luxair in my collection. I also have some old Heller Airbus A300 kits,one of which I also plan to build in these colors. The RAM 737s were frequent visitors to our swiss airports,together with their 727s. So when I saw this decal set available for rescale,the decision was easy. Paints are Gunze gloss white and for the engines and slats I used Super metallic Chrome from Gunze,with a gloss black base coat,and different metallic shades for the inlet and exhausts. Grey is Testors aircraft grey. Sealed again with Gunze Premium Gloss varnish. Sadly,I had to find out that Gunze stopped production of this great varnish for whatever reason😳😢,so I picked up all remaining stocks in my local hobbyshop☺...cost me a fortune,but its worth it. Enough text,on with the photos Alex And with one of my critics...he seemed to be in the mood again today😉
- 15 replies
-
- 24
-

-

-
- Boeing 737
- Heller
-
(and 1 more)
Tagged with:
-
Caudron - Renault C635 "Simoun" Another one from the current Heller Classic GB. If I had to pick one kit that would be instantly recognisable as Heller, this is the one I would choose. This particular aircraft is the C635 with which Doret and Micheletti attempted the Paris-Tokyo journey in January 1937 in less than 100 hours. This attempt came very close but ultimately failed due to difficult weather conditions. Historically the colour might not be correct, but this was the way Heller intended it so, that's good enough for me ! It definitely the loudest model I've ever made. Work in progress below Here it is finished, I hope you like it. Let me know what you think. cheers Pat
- 12 replies
-
- 21
-

-
The Heinkel He 112 is a German fighter aircraft designed by Walter and Siegfried Günter. It was one of four aircraft designed to compete for the 1933 fighter contract of the Luftwaffe, in which it came second behind the Messerschmitt Bf 109. Small numbers were used for a short time by the Luftwaffe. Interest was shown, but not fulfilled, by other countries. The final and perhaps most successful customer for the He 112B was Romania. The Forţã Aeronauticã Regalã Românã (Royal Romanian Air Force) ordered 24 aircraft in April 1939 and increased the order to 30 on 18 August. Deliveries started in June, with the last being delivered on 30 September. By this point, war had broken out, and with better models on the market – including Heinkel's own He 100 – no one else was interested in purchasing the design. The production line was closed after a total of only 98 aircraft, 85 of those being the B series models. B1 Romanian Air Force, Bessarabia 1942 Brush painted with Vallejo and Humbrol acrylics Falcon Clear-Vax canopy Tamiya tape seatbelts
-
Every so often I get the urge to build something different, or take on an older kit. I decided to tackle the old Heller kit of the French transport aeroplane the Noratlas. It is a typical old kit of it's time, raised panel lines, sparse interior, simplified detail. To be fair the surface detail is fine and restrained, no shipyard rivets, and their is enough of an interior to start with. I added some extra detail in the cockpit, most of which can't be seen! The exterior required some work, there are a number of aerials, intakes, vents and other bits & bobs that were added. The port hole transparencies were thick with a mould ejector mark in the centre. I replaced them by using clear decal film. Applied as normal decals, with clear gloss over the top. Got a reasonable effect. The model was painted with Xtracolor enamels. The decals were old and yellowed. I replaced the crosses with ones from the spares box as the kit ones were out of register. Thanks for looking Angelo.
- 26 replies
-
- 54
-

-

-
Hi Guys, I will be building the 1/48 Mirage IV. It is a re-box from the 90s. I have got a new resin cockpit, exhausts and wheels for it and also a few new decals. I will be put on some pictures later. I first need to finish the Heinkel He-111 STGB, before I can start this. Cheers,
-
Hi so this is a recent rebox (number 80717) of their original kit released under their 'Bobcat' label number 3201 from 1983. It's a pretty simple kit (a whopping 39 pieces) which is what originally attracted me to it, given a lot of more modern kits I've been doing with far too many fiddly bits. Even with the low parts count it has a rudimentary engine, opening doors, bonnet and rear hatch. It comes in a fairly sturdy flip-top box, most of the parts in a single poly bag, with the clears in a separate one. Here's the parts view... As I mentioned in the GB chat. it's part started (below the 25%) - some parts cut from the sprue and the 3 parts of the lower chassis / inner tub and dash glued together, also the 2 engine halves + fan belt attached together. Other than that the only thing I've done is remove a few bits from the sprues to dry fit and done some rather rough rudimentary initial painting on the engine parts and chassis. The instruction booklet is pretty nice, clear, multi-colour and stapled. The decals look like they might be somewhat on the thick side but that might be as well if the white parts have to go over the yellow coloured paint. In terms of the kit - so far I've noticed a few minor annoyances: I noticed the driver side B pillar seems a bit misshapen when I dry fitted the door, it seems may have got a bit squashed at some point rather than a mould issue, hopefully fixable but if not I'll just leave the door open. The pins to hold the various hinged parts and glass parts are a bit huge and out of scale, still probably better than having flimsy ones. There's not much rally specific detail (if any), they also do a road going version of the kit, and judging by the seats, etc. I imagine it's exactly the same kit with just some road decals. The seats are the part that annoy me the most - looking like sports ones and just roughly extruded from the inner tub part, annoying given the doors open! I've ordered some after-market bucket seats and may use them - if they seem in scale and I can fit them in, though cutting the originals out might involve a lot of swearing, if only I hadn't attached the tub already! I may also try scratch building some fire-extinguishers for the co-driver's side. I did find some reference material which although not the actual Tour de Corse (Corsia Rally) winning car from 1982 that the kit decals represent, was still driven by Jean Ragnotti the following year. Reference material here. Ideally I'd like to do the car from the Monte Carlo Rally Ragnotti/Andrie won with in 1981, from the photos I've seen the markings are pretty similar but the seats were unusual in that the drivers was red and co-drivers was blue (I'm guessing the works team just grabbed whatever they had in the parts bin). Maybe I'll just use these decals and do the funky seats colours if I get the aftermarket ones in.
-
I'll make a start on this when my current GB builds are a bit more advanced. John
-
My contribution to this group build and the first one at BM, there's a time for everything. It's the Mirage IV, not the only one in the field, in the most recent re box. The decals from the kit are nicely printed and in register, however they will not be used. Instead I will be using Syhart's decals from a 2005 special retirement livery. So, if someone needs a set, I can supply... The Kit is nicely molded with exception of the nuke (which I won't use) and the pilots. I am considering a wheels up version so I need to think what to do with the pilots (improve or replace). Details are not super refined as in the older kits but still it looks like a nice kit. Probably the spine will need some support but let's see. Pictures: 20201005_093921 by Robert Mooijaart, on Flickr 20201005_094024 by Robert Mooijaart, on Flickr http://20201005_094200 by Robert Mooijaart, on Flickr Well, it finally worked, although I am not happy with the link showing underneath. Anyone knows how to avoid that? Anyhow, there's been some progress, pictures tonight. Rob
-
Released as a new tooling in 1977, according to Scalemates, this crushed three man kit was found in the loft and as most of the initial builds in this GB look to be aviation based, I think I’ll buck the trend by pitching in with a 1/35 figure kit before I start my two Heller aviation kits. I think I’ll build this up as a vignette, maybe with just a hint of scenery and possibly only using two of the kit figures, but we’ll see how inspiration and creativity evolves. Much will depend on whether I can track down the Waffen SS books I’m looking for. Each figure comes on a separate sprue, which makes things nice and organised.
- 3 replies
-
- 4
-

-
- Heller
- 1/35 figure
-
(and 1 more)
Tagged with:
-
Build #1 - 1/72 MiG-21 Fishbed Original tool/boxing. I forget how I ended up with this one, but it is the oldest kit in the stash...both in terms of possession and outright age. The only kit I've had longer is the Academy F-8...which is currently next to the bench technically in work, therefore I don't consider it part of the stash. There has been a little painting started...however it's incorrect for the early F-13s so it will all need to be repainted anyways. I've got a couple little bits to dress it up, though I'm not certain on the decals yet. I'll have to size them up, as technically the set is for the MiG-15. I do have some Polish MiG-21 decals (from a MF) that I can rob from if need be. Intent is to build wheels up in flight...hence the addition of the pilot (hope they fit ).
-
Dear fellow Britmodellers, here's my 1/72 Heller Bf-108 Taifun in Winter Camo. Painted with Gunze/Mr Hobby arcylics, photographs by Wolfgang Rabel. The Heller kit was originally released in the late 60s/early 70s, so it's about my age. All parts are still sharply moulded and fit together reasonably well, although the level of detail is well below modern kits. I added some PART photo etch pieces (instrument panel, seatbealts, gear doors, etc), but you can't see much of the interior through the thick plastic canopy. Markings for a snow camouflaged aircraft were taken from the FLY Bf-108 kit. # # The patchy and worn winter scheme was created by painting the standard splinter camo first, then masking random spots with pieces of Tamiya tape and Vaseline creme, brushed along the edges, before overspraying the airframe with Gunze H451 White. Thank you for your interest, best greetings from Vienna! Roman
-
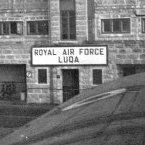
BAF Fouga Magister - 1:72 Heller 1980
AdriaN (MLT) posted a topic in Ready for Inspection - Aircraft
The Build: Notes OOB, Scratch built seatbelts, BAF decals - Airfix 1975, Re-scribed panel lines, Paints used: Revell enamels/luminescent & acrylics, mr surfacer 1500 primer, mr mark setter & softer, old humbrol enamel, Klear, W&N artists water colours+oil paints, vallejo wash, Alclad, Fading orange was done by first having an acrylic yellow base. Then removing the enamel orange by rubbing a brush with thinner over surface. The result.... 😎🥳- 25 replies
-
- 44
-

-
Hi folks, Like Heather, I will be building the Ju52/3m; likely with a fading winter whitewash finish from the Eastern Front. At least that is the plan. Heather has saved me the trouble of displaying sprues shots, but here is the artwork on the classic black box: Knowing next to nothing about the '52, I will be raiding Heather's build thread for ideas. However, my plan is to build this as close to oob as I can. I have made a start. The plastic is quite hard and clean up of pieces is fast. I'm hoping it's not too brittle, as one of my fuse sides is a bit bent. Hopefully the interior and glass work will correct this, more or less: You may be able to see a slight short shot notch out of the rudder trailing edge of the far piece. Hopefully, milliput should solve this. Here's the interior: No assembly problems thus far. Once that's set, it'll get a scoosh of primer, ready for the RLM02 interior. I build slow, and I've got a few more things on the workbench. However, I hope to have this complete before Christmas, as I've got a second build planned for this GB. . . More soonish. Rgds Martin
- 45 replies
-
- 13
-

-
I've thought long and hard about the Heller kits I've got in the stash and I've decided the lure is too strong to re-visit the bane of my childhood modelling- The Fieseler Storch. I've got the Smer boxing with "Super Decal " and "Hitech" PE which should only make it harder to do Obligatory box and sprue pics will follow when One Drive decides to load the previews allowing me to embed them here......
-
Been secretly working away at this 1980s kit. After building the 1975 Airfix Magister, I thought id try another Magister! Model was painfully & slowly re-scribed & sanded. Seat belts made form tape. Given a coating of mr hobby 1500 primer, thinned around 60% cellulose thinner (otherwise it would stick). Then 'polished' out before paint. Not happy with the result. I used revell acrylic silver. Fantastic paint. It almost as shiny as Alclad polished aluminum. BUT in my opinion it came out TOO shiny for a tiny 72nd model. Out of scale. Also every mistake, gap, scratch, orange peel, depression in plastic/filler came out magnified. I gave it another soft sanding/buffing session and am considering either... 1) use same silver and finish with a light matt coat to dull it down OR , 2) trying revell enamel silver (different to acrylic) OR , 3) Model master aluminum. Something not as shiny. These aircraft were not polished metal, but a dull silver. Model re-scribed and sanded a few times! Pretty good canopy. Raised details. Just needed a dipping in Klear. Masking was tough. Im sure the glass is all blade scratches. Primer on and polished. Way too shiny???
-
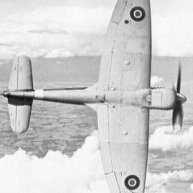
Hello Folks Ever since reading the Pierre Clostermann’s Big Show as a teenager I’ve had a thing about the Hawker Tempest Mk V. I think it is something about it’s elegant menace - think Lauren Bacall in a ball gown accessorized with bovver boots and a knuckleduster - that does it for me. This is the venerable Heller kit nearly ten years in the making as I gradually pick up model making again. I’ve used some Scale Resin aftermarket to replace the kit wheels (one of which was lost to the carpet monster) as well as the kit’s rudimentary exhaust stubs. I’ve also scratch built the gunsight, radiator cooling flap and the distinctive air intake dust filter as well. All paints are Vallejo Model Air. Decals are from the Almark C12 sheet celebrating Sgt. Mac Kennaugh. From this sheet the kit is finished as NV980 (US H) of 56 sqn. According to Chris Thomas’s Tempest Illustrated History for Eduard* this was delivered to 56 sqn in March 1945, damaged in action, repaired, returned to unit (as US J) and then lost due to enemy flak by 24 April. Barely a month and a half in theatre; a pervading theme of attrition also running through the later chapters of the Big Show. From the Chris’s book I have used the picture of it with US X (presumably soon after delivery) as a reference, I have kept the weathering light accordingly. * Yes. I do have the Eduard Royal Boxing for the Tempest Mk V. Given that it has taken 10 years for me to complete this small kit do not expect to see this showing up as a RFI any time soon!
-
Hello, this is my entry for the GB, a Heller Ecureuil (or Squirrel as it was more commonly known in the UK). The kit has been a long term (39 years!) resident of my stash, so this is the perfect opportunity to get it built at long last. Dave
-
My first (and hopefully not my last) entry will be the Heller 1/48 B/C kit converted to a D with the Red Roo conversion. Decals will come from the Caracal RAAF Mirage sheet. As I recall I have removed some parts of a sprue and attempted to start rescribing. I will dig the kit out and post some pictures shortly. From ADF Serials Website My photo
-
Hello Friends, Presenting the Sa315B of the Indian Army. The kit is from Heller and is of the SA313 in 1/48 size. This was modified into the Sa315B. The Model is 100% Brush Painted using locally available acrylics. Stretched Sprue was made using discarded pieces of the kit sprues and was used extensively for the detail and scratch-building. The rear fuselage skeleton was chucked away as it was too thick for this scale. This was made with stretched sprue. More detail was added to this using the same stretched sprue. Cockpit was bare with little detail thus this too was detailed using sprue. Seat belts were also added using masking tape. The whole engine was basic too and the grills were represented by clear parts. The hydraulic lines and the various pipes and tubing were represented by stretched sprue of varied thickness. Do Enjoy the build and looking forward for your inputs. Best Captain Adi
-
I started this model very long ago, so it's time to finish it. Every model is familiar, it's old, but I'm always cute old models. I did not want to correct any manufacturer errors, but I did it directly from the box. I did not even change the decals, which are green instead of white. I like it. Here's the picture, enjoy it.
- 13 replies
-
- 24
-

-
- Spitfire
- Spitfire Mk.XVI
-
(and 1 more)
Tagged with:
-
Hi all, here we go again with another Heller bike build, this was a commission build, to replicate the owners full size bike. He requested the seat to be painted in a dark blue colour, not found any reference pictures to confirm it was a factory option, but I mixed up a colour to blend with the pin striping on the bike. I have a few minor details to finish off but I am calling the build complete for the purpose of the pictures. I will have to see if the client wants the bike mounted on a base, it would finish off the model nicely I think. Hope you all like this 70's German classic. (Update) Client requested a base to display the bike, so here are the final pictures. Base was built from scrap materials and the badge was a spare the client had that should fit on the rear seat cowl. Front wheel was secured with some fibre optic strand epoxied into the base and the bikes centre stand is also glued to the base.
- 15 replies
-
- 16
-


