Search the Community
Showing results for tags 'Hawk'.
-
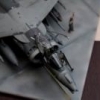
Valley Hawk T. 2 Well, it's time for me to delve into a WIP thread with a bit of 'proper' modelling. I bought a 1/72 Hawk and Tucano in the Airfix New Years' sale with the intention of doing a bit of a diorama including both of them. After seeing that my options for 1/72 extras for Tucs are limited, I thought I'd use the Tuc as a 'dress rehearsal' (test out the new airbrush & practice my filing and sanding techniques etc) and do something a bit more special with the Hawk. RFI Thread: http://www.britmodeller.com/forums/index.php?/topic/234977628-airfix-172-tucano-city-of-leeds/ The kit-list comprises of: Airfix BAE Hawk Eduard PE set (exterior and interior) https://www.hannants.co.uk/product/ED73354 Xtradecal decals for RAF Valley/Leeming T.1 http://www.hannants.co.uk/product/X72167 Flightpath access ladder https://www.hannants.co.uk/product/FHP72060L PJ Productions 1/72 Pilots (standing) Standard unbuilt pictures to follow when I get them uploaded. Plenty to be getting on with! Comments, questions and criticisms welcomed David
-
Had a great time last night... tiring, but good! The Tracker was a highlight, but I loved the Cessna from the Belgium Police! Anyway, onto the photos. Tracker F-ZBEY at the Northolt Nightshoot. by Totallyrad.co.uk, on Flickr Tracker F-ZBEY at the Northolt Nightshoot. by Totallyrad.co.uk, on Flickr Tracker F-ZBEY at the Northolt Nightshoot. by Totallyrad.co.uk, on Flickr Tracker F-ZBEY at the Northolt Nightshoot. by Totallyrad.co.uk, on Flickr Cessna 182Q Skylane G-01 Belgium Federal Police by Totallyrad.co.uk, on Flickr Cessna 182Q Skylane G-01 Belgium Federal Police by Totallyrad.co.uk, on Flickr Cessna 182Q Skylane G-01 Belgium Federal Police by Totallyrad.co.uk, on Flickr Cessna 182Q Skylane G-01 Belgium Federal Police by Totallyrad.co.uk, on Flickr ZD621 Royal Air Force British Aerospace HS-125 CC3 by Totallyrad.co.uk, on Flickr ZD621 Royal Air Force British Aerospace HS-125 CC3 by Totallyrad.co.uk, on Flickr ZE700 British Aerospace BAe-146 CC2 by Totallyrad.co.uk, on Flickr ZE700 British Aerospace BAe-146 CC2 by Totallyrad.co.uk, on Flickr RAF BAe 146 ZE707 by Totallyrad.co.uk, on Flickr RAF BAe 146 ZE707 by Totallyrad.co.uk, on Flickr Irish Air Corp PC-9 - 260 by Totallyrad.co.uk, on Flickr Irish Air Corp PC-9 - 260 by Totallyrad.co.uk, on Flickr XX337 by Totallyrad.co.uk, on Flickr Royal Navy ZA166 Westland Sea King HU.5 by Totallyrad.co.uk, on Flickr Royal Navy ZA166 Westland Sea King HU.5 by Totallyrad.co.uk, on Flickr
- 18 replies
-
- 13
-

-
 Hello. As a warm up before my target projects I wanted to finish started some time ago small Hawk. During the build I came up with an idea to do it as "What if?" Polish Jet Trainer. So I build it, painted and started to put on decals. And.. Well. I've lost polish markings from other model. Decided not to buy any additional decals, which is a shame actually. Anyways. As it suppose to be a training jet I wanted to give it a real shine like on the racing jets. Everything was ok until I decided to put final coat of Enamel Clear Laquer on. That ruined completely canopies I ended up having milky canopies and tears in my eyes (even is not the most ambitious build, still there was some work in). At this moment model was literally close to the bin, but I thought to myself that I'm not gonna give up! I took it off and started to sand the laquer down (not an easy task). Using higher grades every time and then I dipped it in Pledge and dried. I repeated this few times. It was working! So I took off front part of canopy and started the same. Unfortunately it cracked while sanding After couple not very nice words (polish of course) I came up with an idea of a flag on the nose and front canopy. I guess it looks quite all right Enjoy! Thanks for visiting! Bart
 -
RAF Red Arrows Hawk - 50th Display Season 1:48 Airfix - Gift Set When the RAF began the search for a new fast jet trainer to replace the Folland Gnat, it was originally intended that the role would be fulfilled by the SEPECAT Jaguar. However, the advanced capabilities demanded of the new Anglo-French aircraft meant that it became too complex for use as a trainer As a result, Hawker Siddley Aviation began work on a private venture known as the P.1182. The design team of Gordon Hudson, Gordon Hodson and Ralph Hooper produced a relatively simple, subsonic aircraft with a number of clever features. The fuselage is designed around a large, tandem cockpit, which features a significant difference in height between the seat for student in the front and that for the instructor in the back. This affords the instructor a much better view than in the Gnat. The wings featured double-slotted flaps which gives the Hawk excellent low-speed handling characteristics. The first of the 176 Hawks ordered by the RAF entered service in 1976, designated the Hawk T.1. 88 T.1s were modified to T.1A standard, which allowed them to carry two AIM-9 Sidewinder missiles for use in the emergency air defence role. The Hawks reputation as an excellent aeroplane has been confirmed by the considerable success it has enjoyed in the export market. Users include the air forces of Australia, Canada, Finland, Indonesia, Saudi Arabia and the United Arab Emirates amongst others. A highly modified carrier capable version is in service with the United States Navy, where it is known as the T-45 Goshawk. The most famous role occupied by the Hawk, however, is as the mount of the world-renowned Royal Air Force Aerobatic Team the Red Arrows. This particular version of Airfix's Hawk dates from 2005 with new parts for the Red Arrows boxed in 2010. The change is that in this kit decals are provided for the markings celebrating 50 years of the Red Arrows. These decals include the new tail design. It is noted the box now says that this is an officially licensed kit by the RAF, a sad indictment of the times we live in! The Kit The kit arrives on 5 sprues of light grey plastic with a clear sprue. There is no flash evident on any of the parts. Details are done with engraved panel lines. The detail is a little soft in places and could do with a little re-engraving by the modeller. The layout of the parts and construction is standard with two fuselage halves, a one part lower wing and two part uppers. Even though this is a Red Arrows boxing with the smoke pod, the normal gun pod and other stores are included if a non Red's Hawk is wanted. Construction starts shockingly enough with the cockpit. Pilot figures are provided for both seats though for display flying generally only one seat is occupied. If wishing to use the figures the modeller could always paint the Pilot in his red suit and the rear seater as one of the blue suited support team (after all with out the support team they don't fly!). If not using the figures then no seat belts are supplied. The ejection seats are a 5 part affair and don't look to basic in this scale. Once the seats are complete the figures can be added if needed. The seats, control columns and instrument panels are fitted to the cockpit tub. The instrument panels and side consoles feature raised and engraved details as appropriate. Once the cockpit tub is completed it can be glued into the fuselage along with the exhaust. The fuselage can then be closed up. Once the fuselage is closed up then the engine intakes can be assembled and added. The next stage of assembly is the wings. The lower wing is one piece with the two upper parts being attached. The flaps are moulded in the up position. However if the modeller wishes to model them down alternate parts are supplied. If this option is to be done then the moulded "up" flaps will be needed to be cut out. Wing fences and nav lights are added at this stage, though I suspect most will leave the nav light off until the end. The next stage is to finish the main fuselage. The upper insert with its intakes is added along with the tail planes. The panel between the pilots is added along with the canopies. The instructions would have the modeller add the pitot probe at this stage, though I suspect this is another detail which most will eave until last. Once the fuselage is complete the main wing assembly can be added. Next it is the choice of the modeller as to whether the under fuselage air-brake is open or closed. The landing gear parts are the next to be assembled. Flap actuators are then added, along with the lowered flaps if you are using this option. Remember to fit the parts inside the wing if you are using the dropped flaps! Final stages of assembly are then to add the landing gear doors, and the landing gear itself. Finally the smoke pod can then be added. Canopy The Canopy and clear parts come on their own sprue. The parts are fairly thick for this scale, some of that comes from moulding in the Det Cord which breaks the canopy up during the ejection sequence. This will be hard to paint and I cant help thinking a decal might have been a better choice. The canopy is fairly clear despite its thickness but there is one moulding flaw in the review sample. Decals The new decal sheet has the markings for the 50th Anv design tail, and the serial numbers to build any aircraft from the team. As is usual for Airfix they are produced by Cartograf and look excellent. The white markings look dense enough to use over bright red paint. Conclusions This is still a good kit by Airfix and with the addition of the new Red Arrows Decals should prove a winner. Overall recommended. Review sample courtesy of
-
Just received my IPMS Magazine and included is an excellent 24 paged illustrated history of all the colour schemes and marking variations of the Gnats and Hawks used since 1964. What a reference source!!
-
RAF Red Arrows Hawk - 50th Display Season 1:72 Airfix - Starter set My colleague Paul reviewed the new tooled Hawk back in July in this thread, the plastic for this kit is exactly the same. The change is that in this kit decals are provided for the markings celebrating 50 years of the Red Arrows. These decals include the new tail design. It is noted the box now says that this is an officially licenced kit by the RAF, a sad indictment of the times we live in! Decals The new decal sheet has the markings for the 50th Anv design tail, and the serial numbers to build any aircraft from the team. As is usual for Airfix they are produced by Cartograf and look excellent. The white markings look dense enough to use over bright red paint. Conclusion Its a RED ARROW of course we want it. The model will look good in these markings. Highly recommended. Review sample courtesy of
-
Hi, I've been working on this pair of Hawks for the last few days for a scene which I'm still planning in my head. A few bits and bobs to add, but getting close now. I've got a pair of freight dog smoke tanks to add to these - it seems strange that they have the smoke tanks on the picture on the box, but not inside. Thanks for looking Steve
-
 Source: http://www.silverwings.pl/132-curtiss-p-6e-hawk.html Silver Wings is to release a 1/32nd Curtiss P-6E Hawk resin kit. Release: fall 2013 Herebelow the artwork for the three planned colour schemes: - Curtiss P-6E Hawk 32-274, 17th Pursuit Squadron, 1st Pursuit Group, Selfridge Field, Michigan, 1932 - Curtiss P-6E Hawk 32-277, 94th Pursuit Squadron, Selfridge Field, Michigan, 1930 - Curtiss P-6E Hawk '22', 33rd Pursuit Squadron, 8th Pursuit Group, Virginia Beach Summer Camp, July 1934 V.P.
 -
**
-
Hi Everyone, Here is my biggest completed project of 2014 so far. This is completed build number 8 for 2014. This is a Revell Red Arrows Hawk T.1A painted using Humbrol Acrylic Signal Red paint. I enjoyed this build as it was one of the most challenging for a long time. Anyway onto the pictures. I have just realised whilst looking at these photos that I have left the fuselage serial numbers off, so will have to correct that. Anyway comments welcome. Thanks as always for looking. Rick
-
 This is another project which I will be starting as a fill in project when my 2 main projects are drying as this model will be painted using Revell Enamel paints which I have already got for a previous Red Arrow I bought but which was too small. Box Art Kit Sprues The kit comes on 3 or more sprues, all made from red plastic except from some clear parts. However they all seem quite large. More progress when I actually open the bags and start working on the kit.
- 62 replies
-
- 1
-
-
- Hawk
- Red Arrows
- (and 2 more)
-
Here are a few negative and slide scans from 20 years ago. These were taken on the 4th May during a large NATO Exercise 'Resolute Response'.
- 7 replies
-
- 4
-
-
- Tornado F3
- Canberra
- (and 4 more)
-
So I might have kinda FUBAR'd my 1:32 Hawks canopy (Kinetics hawk).Tried contacting Kinetic direct, got a reply back in chinese script (they could have been insulting my horribly for all I know), phoned UK supplier which is Hannants and another couple of stockists, they can't get hold of spare parts. So now I beg for help... Does ANYONE out there know how to get spare parts for a kinetic kit? Cheers guys, James.
-
BAe Hawk T.Mk.1 XX307 RAF Benevolent Fund, 208 Squadron ( R ) RAF Valley 2009 Build thread HERE
-
Having recently developed the lighting kit for the 1/32 scale Revell Hawk I've been asked to develop one for the 1/48 Airfix Hawk kit. This will have the same lights as the 1/32 kit, ie nose light, wing tip lights and strobes. This thread is to show the development of the lighting kit but I will use one of the Airfix kits to work out how it needs to go together. Firstly on the 1/32 kit the nose light is a small SMD LED which sits within the nose section, on the 1/48 Hawk kit there is not enough room to install a LED so the nose light will have to be a fibre guide. Having built up the cockpit sections a 2mm hole was drilled into the bottom of the rear bulkhead. To get the guide through to the nose a notch was cut in the front bulkhead. The guide secured to the underside of the cockpit. A quick test with the fuselage taped up and the LED on. Next up getting the fibre guides to the wing tips. Cheers, Warren
-
This thread will be about the Testors classic SNJ Texan, originally a kit from Hawk. The main reason I went for this kit is that it reminds me of my Top-Flite AT-6 Texan. My main hobby is R/C flying and so the plastic kit building is secondary and mostly a winter activity (not very often good flying conditions in Norway in the wintertime. Dark, cold, wet, windy. Sounds nice, hmm?) Pics of the inspiration: Here is the Testor kit: Onepiece wing, benches instead of seats, quite charming actually.The fit is not bad but i used some filler on the wing and tail + the holes for the landing gear. I will do it gear up. Progress so far:
-
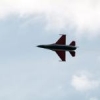
Here are a couple of my images from air displays. It's quite tricky to catch the right moment! The Blades Aerobatics Team And of course, the Red Arrows
- 17 replies
-
- 3
-
-
- Blades
- aerobatics
- (and 3 more)
-
Hello chaps, I'd like to make an RN Hawk in 1/48 but having done the airfix, and struggled with warped wing, who makes something better?? How does the Italeri compare? Dave
-
Hi all, I decided that it was time to start posting again, but thought I would try to pile on the pressure a bit. For a start I have signed up fot the obsolete kit build, but that should not divert me too much from this as I will be making in the same way I did when I was twelve, so two days building and a day slapping paint on it. So, "what is this going to be about?" you ask? well, last year at Telford, my son picked up a Revell 32nd scale Red Arrows Hawk with a decal set containing the ETPS scheme, as well as the 19 squadron dark green, dark earth scheme. I was impressed by the moulding, and accidentally fell in to The Works where I found to my amazement that they had the same kit on offer for a tenner, so who was I to argue? Actually, there were three on the shelf, and the other two looked so lonely when I took their friend that I had to comfort them into the same bag. Fortunately SWMBO was in the kitchen when I got back so was able to sneak them into the stash without her seeing. Also, fortunately, she pays little interest in my modelling, and even less on aircraft, so when she saw me working on these she assumed it was the same kit. But I get ahead of myself a little. The plan here is to knock together FOUR 32nd scale Hawks at the same time, with different colour schemes, and have them ready for shoving on the club stand at Telford. Those who saw my build last year will know the last decal was applied on the morning I set off! Hopefully I will be better this time. However, I do not have oodles of dosh, so will not be using much in the way of aftermarket. To be honest, I have never used resin before, but have picked up a set of seats and one exhaust. this means one will have a reasonable cockpit, and the other three will need a bit of plastic card throwing at them, we shall see. I have made a start by hacking apart the wings. Considering this is a well detailed kit, I cannot believe that Revell cocked up and didn't give us the option of dropped flaps, as this is the standard position at rest! added to which, they did not supply a pilot to stick in the office to pretend that the engine was running, or the thing was flying! they must have had an idea about this, as there is a score line on the inside of the wing indicating where to make the cut. This suggests that either this was going to be an option which was forgotten about / binned due to cost etc. or there was a plan to release a dropped flap set in the future. As I was not going to spend extra cash on this build, the flap dropping is going to be scratchall the way, so here is how I attacked it (so far) The first stage was to remove the flap from top and bottom sections. This was done with a sharp blade (11a) working firstly along the external hinge line, and then by extending the depth of the scoring before breaking away. This approach was done in case the score line was a little out and caused future problems down the line. Each section was marked port and starboard before being stuck together to avoid confusion. As the bottom of the flap is longer than the top, the gap was plugged with 20 thou card which was sanded to shape following the pics on the hawk walk around. the position of the six mounting bracket for the inner airfoil was marked out, and thin slots cut into the leading edge at the appropriate positions. Even taking this pic has not raised the suspicions of SWMBO that there is anything other than one kit on the go here. At the back, in the greatest tradition of Blue Peter is one I made earlier to test the theory of the project. Thin slivers of ten thou card were then added to the slots These were subsequently sanded level with the top, cut to about two mil from the leading edge and sanded to shape. For the inner airfoil, I took a two mil wide strip of ten thou card, and added a 1 mil strip of the same to the top and glued it together. This was then sanded to shape according to the photos and cut to length. the whole thing has then been set to one side whilst I decide what to do next. Also, I need to work out how to do the flap hinges and actuators as well. More to follow.
-
Hi, Here is my latest project. I have given the whole kit a spray coat of grey primer. I will be getting some photos later. This project is a simple build but has quite an interesting decal scheme. Progress later. Rick
-
My 5 year old son Harry and I had some great fun putting together this Airfix kit his Nana and Grandad bought for him. Harry wants to put it in the local model show coming up in 2 weeks which we will go to in our home town of Adelaide, South Australia. With kids it's all about participation. We made the kit together as well as we could. We tried our best and had heaps of fun being together and learning together. We'll put it in the model show and then we'll go to the show and see all the really amazing and wonderful models people have made and entered. Then my boy will see his model in the same show and for me it will help show him that in this life you get a lot more out of it when you put all you can into it and just......have a go. She's a long way from perfect our little black Hawk but please enjoy our best effort. Cheers Thanks for looking. Cheers.
-
 Does anyone do decals/masks or anything for this scheme in 1/32: http://www.airliners.net/photo/UK---Air/British-Aerospace-Hawk/1672660/L/&sid=2d721312e5e96b613f24da4eb4a75c41 I have looked in the obvious places, but can't find anything. Thanks, Andrew
 -
 Raytheon MIM-23 Hawk medium range surface-to-air missile, as used by the Royal Netherlands Military. Pic thanks to Alex,
 -
Went on a tour of RNAS Culdrose today (guess where I'm on holiday!) - it was great to be able to see behind the scenes at a live Naval Air Station, even if we were mostly confined to the coach. Although August is their quiet time, there was a fair amount of flying going on: Merlin Mk1 Sea King Mk7 Sea King SAR Mk5 King Air Avenger We saw into most hangers including one full of shiny black Hawk T1s! All lined up with engineers fiddling with stuff. Saw plenty of Sea Kings being serviced as well. Was nice to see a handful of retired Sea Harriers that they use for aircraft deck handling practice - they fire them up & taxi around as well as having the guys push & pull them with tractors. Tour guide was very knowledgable and we also had a more detailed tour of the base fire station including the kids having a go with the hoses on the tenders - one's remote controlled via a joystick in the cab and the other's a bl**dy great jet on the roof! Am staying between Truro & Falmouth and we see the grey & red SAR Sea Kings overhead a lot - one buzzed by overhead at breakfast time (my camera was inside unfortunately!) and I've just heard one now overhead (pitch black though). Haven't downloaded my photos from today yet but if I get any decent ones I'll post them. £30 for a family ticket - worth it IMO. For more info see http://www.fleetairarm.com/culdrose-air-station.aspx Cheers, Andrew p.s. can't believe they're privatising SAR soon :-(
-
BAE Systems Hawk 100/127/128/155 Kinetic Models 1:32 History The BAE Systems Hawk is a British single-engine, advanced jet trainer aircraft. It was first flown at Dunsfold, Surrey in 1974 as the Hawker Siddeley Hawk, and subsequently produced by its successor companies, British Aerospace and BAE Systems, respectively. It has been used in a training capacity and as a low-cost combat aircraft. Operators of the Hawk include the Royal Air Force (notably the Red Arrows aerial display team) as well a considerable number of foreign military operators. The Hawk is still in production in the UK and under license in India by Hindustan Aeronautics Limited (HAL) with over 900 Hawks sold to 18 customers around the world. The Hawk is an advanced trainer with a two-man tandem cockpit, a low-mounted cantilever wing and is powered by a single turbofan engine. Unlike many of the previous trainers in RAF service, the Hawk was specifically designed for training. Hawker had developed the aircraft to have a high level of serviceability, as well as lower purchasing and operating costs than previous trainers like the Jet Provost. The Hawk has been praised by pilots for its agility, in particular its roll and turn handling. The design of the fuselage included a height differential between the two seats of the cockpit; this provided generous levels of visibility for the instructor in the rear seat. Each cockpit is fitted with a Martin-Baker Mk 10B zero-zero rocket-assisted ejection seats. Air is fed to the aircraft's rear-mounted Rolls-Royce Turbomeca Adour engine via intakes on each of the forward wing roots. During the aircraft's development, Hawker had worked closely with Rolls-Royce to reduce the engine's fuel consumption and to ensure a high level of reliability. The Hawk was designed to be manoeuvrable and can reach Mach 0.88 in level flight and Mach 1.15 in a dive, thus allowing trainees to experience transonic flight before advancing to a supersonic trainer. The airframe is very durable and strong, stressed for +9 g, the normal limit in RAF service is +7.5/-4 g. A dual hydraulic system supplies power to operate systems such as the aircraft's flaps, airbrakes and landing gear, together with the flight controls. The Hawk is designed to carry a centreline gun pod, such as the 30 mm ADEN cannon, two under-wing pylons, and up to four hardpoints for fitting armaments and equipment. In RAF service, Hawks have been equipped to operate of Sidewinder air-to-air missiles. The Hawk 100 series, (the subject of this kit), was a larger exercise in modernising the production aircraft and continues the development of updating the avionics and systems with HOTAS and Multi Function displays, but also included a new wing design and a lengthened nose. A new, more powerful Rolls Royce Adour 871 turbofan engine was also installed. The new engine increases the maximum speed to around 585knots and a maximum altitude of 44,000ft. It also allows the carriage of around 6,600lbs of external stores should the customer require. The complete package of upgrades and redesign has created a better, more current environment for the student to learn how to handle and control a modern aircraft. There are several different types within the series, depending on which countries have taken up orders. The Model This kit was a bit of a surprise announcement from Kinetic seeing that it hasn’t been that long that Revell released their Hawk kits in the same scale. The difference with this kit is that it is of the more modern 100 series of aircraft. The kit comes in the standard attractive box with an artists representation of a Hawk in landing configuration, (although the flaps are up). Inside there are just five sprues of light grey styrene, one of clear styrene, a small sheet of etched brass and a large decal sheet. All parts appear to be cleanly moulded, with no sign of flash and only a few moulding pips. Detail looks pretty good with finely recessed panel lines, screw heads and a very rivet strewn, (whilst prominent, they are not overly done, and will look good under a coat or two of paint), back end of the fuselage. Some of the details in the cockpit and undercarriage bays do look a little soft and could do with some extra adding to bring them to life. Either that or the areas will need some very careful detail painting and weathering. As with other Kinetic kits the styrene is on the soft side so take care when sanding down the parts. Whilst the styrene is smooth it feels and looks like there is some texture, particularly on the larger parts, just enough for any paint or primer to key onto. There is evidence of release agent on some of the parts so will need a good wash in soapy water. A good practice to do anyway, but this kit will definitely need it. There are several sub-assemblies to be put together before the main build can start. These include the front and rear coamings and instrument panels. The front coaming is also fitted with a PE HUD frame, and clear parts for the lens and reflector glass. The canopy is fitted out with the clear inter-cockpit screen, for which it might be an idea to colour the glue, (particularly good if you’re using GS Hypo or similar), to represent the colour of the join. Two rear view mirrors are added to the front framework. The ejector seats are also assembled, out of the seat squab/PSP complete with backrest, head box top and seat ejection handle. A full set of straps and belts are provided on the etched brass sheet. The completed seats are then fitted into the cockpit tubs along with the rudder pedals, joysticks and throttle stick. The intake ducts, each made up of inner and outer parts are assembled and the engine rotor disc glued to one duct. When the ducts are fitted to the fuselage they align just before the disc, thus giving a full depth intake. The problem will be trying to get rid of any visible seams, although there have been some imaginative solutions to this problem on other models by the good members of BM. Engine nozzle is also in two halves, onto which the exhaust disc, with moulded in EGT spiders web is attached. The spine aft of the cockpit is also separate and consists of the spine section onto which two auxiliary air intakes, anti-collision light and aerial are fitted. The completed intake ducts are now fitted to each half of the fuselage. Each duct sits in the fuselage intake and a large slot at the rear and are left unglued for the time being. Meanwhile the external intakes are fitted to each fuselage half. Before the fuselage is closed up the nosewheel and nosewheel bay needs to be assembled. The nosewheel comes as a single piece oleo with one half of the wheel yoke, to this the three piece wheel, (hub and two tyre parts) is fitted along with the other half of the yoke and below the oleo/yoke joint the nosewheel steering motor is attached. The completed nosewheel is then fitted into the single piece nosewheel bay along with the three bay doors, (these can obviously be left off until after the rest of the aircraft has been built and painted). At this stage in the instructions the centreline fuel tank and two Sidewinder AAMs are also to be assembled. With all the sub-assemblies completed the nosewheel bay, exhaust nozzle and cockpit can be fixed into their respective positions in one half of the fuselage. The fuselage can then be closed up and the intake ducts positioned correctly and glued together and to the fuselage. On the outside of the fuselage the strakes just forward of the horizontal tailplanes are attached as is the emergency brake chute panel at the rear of the aircraft just above the exhaust nozzle and the navigation lights either side of the fuselage on the intakes. Next up the horizontal tailplanes are attached to their fishplates, (which look a touch on the thick side and may have been better in etched brass), and fitted to the fuselage. The opening on the fuselage for the fishplates allows them to be posed as per the modellers’ wishes. Underneath the rear fuselage the airbrake bay is fitted and whilst the airbrake is shown in the closed position with no option of having it open there is in fact an actuator on the sprues that gives you that option even though it’s not shown on the instructions. Also around the airbrake bay the lower anti-collision light, fuel dump pipe and tail bumper are fitted. On the underside of the forward fuselage a number of aerials are fitted. Right on the nose there are two PE parts fitted which are presumed to be the FLIR panel and nose light. With the fuselage pretty much complete, it’s on to the wings. The quite large single piece lower wing is fitted out with the main undercarriage bays made up of individual side, front and rear parts and the central bay roof. The outer bay roof of each main bay is part of the two upper wing sections which are now attached to the lower wing. What is nice about this kit is that Kinetic have given the option of having the flaps posed either up or down using different actuator fairing and flap parts. No more having to cut and scratch these areas unlike the Revell kits. Now again, according to the instructions the main landing gear is to be assembled and fitted to the main bays. These are probably best left off until the wing has been attached to the fuselage in case of breakage when carrying out any filling and sanding that may be required. Each main gear is made up of a three piece wheel, similar to the nosewheel construction, a single piece oleo and the two outer doors and lower door strut. When fitted in place the main bays are completed with the inner door and their respective actuators. With the wing and fuselage joined the upper spine assembly is then fitted along with the upper IFF aerial, pitot probe, windscreen and the two wing fences per wing, on the underside the centreline fuel tank can be fitted it required. On the wing tips there is an option of having either standard tips or the Sidewinder launcher rails, and just inboard of the tips a two piece PE wing fence is to be fitted. To complete the build the canopy complete with release handle and hinge, (for the open option), is attached. To the port side just under the cockpit the emergency canopy release handle, footstep and AOA sensor are fitted. Etch The single small etch sheet is very nicely produced in relief etched brass. It is already quite thin and pliable, so porbably won't need anealing before use. Most of the parts are for the seat straps and belts, plus back pad and central five point buckle. There are also the outer wing fences, fuselage louvres, FLIR and nose light panels. All in all a useful little sheet. Decals The huge decal sheet, which takes up almost the whole bottom of the box, has a complete stencil set for one aircraft, plus national insignia, aircraft identifications and squadron colours for the following:- • Hawk 115/CT-115, No15 Wing, NATO Flying Training Center, Royal Canadian Air Force, Moose Jaw, Canada, 2003 • Hawk 128, BAE Systems, Wharton, Lancashire, England 2008 • Hawk 120D, BAE Systems Demonstrator, Wharton, Lancashire, England 2008 • Hawk 127, No76 Squadrons special scheme, Royal Australian Air Force, Williamtown, New South Wales, 2003 • Hawk 127, No76 Squadron, Royal Australian Air Force, Williamtown, New South Wales, 2011 The decals have been printed by Cartograph, designed by Crossdelta/Leading Edge Decals, and are superb, nice and thin with minimal film except for the large No76 Squadron special scheme tail emblem, which may be better being cut down a little. They are quite glossy, in good register and nicely opaque. Conclusion This is a great looking kit, although again slightly lacking in detail in some areas, or least they could be better defined, particularly in the cockpit and undercarriage bays. The instructions could be better detailed, as whilst they are clear and well drawn, there are some areas that could be a little clearer. Nonetheless it should build into a nice looking model and not too large to have a few on the display shelves in the different schemes provided. Being exported to several other countries I’m sure there will be aftermarket decals and details out soon to be able to make even more. It's a bit of a shame that the kit doesn't come with additional pylons or stores, but that could be an option for a different release. Highly recommended. In association with