Search the Community
Showing results for tags 'Griffon'.
Found 22 results
-
 I'm up to number 20 in by 1/48 Spitfire / Seafire / Spiteful / Seafang / Attacker collection and I thought this worth presenting. The unusual and uncommon variants are always of interest and last year I built the Mk.III prototype. My first 1/48 Spitfire after restarting modelling was the Special Hobby Mk.XII which I completed as DP845 in its late form that was very close to a production Mk..XII. However, I had an itch to model DP845 as built as it looked subtly different to its later appearance because, like most prototypes you have to ask 'when' as well as 'what'. Here are my two reference photos: I believe they were taken in late 1941 when DP845 first emerged from Supermarine's factory at Worthy Down on 27th November and it is notable that the aircraft had an unarmed 'A' wing and a standard fin and rudder. Note also the broad chord propeller blades. By May 1942 DP845 has acquired a mock-up of a six-cannon armament although whether it flew like that is unclear. Note the narrower chord propeller blades. Either later in 1942 or possibly in early 1943, DP845 gained a 'C' wing, and enlarged, pointed rudder and updated roundels. Finally, in the spring of 1943, DP845 received a Griffon IV and then Griffon VI engine and I suspect that was when the spinner was changed to that of the Mk.XII and also non-standard clipped wings. I decided that having modelled DP845 in its late condition that I would go for the 'as first built' configuration and this would involve the cross-kitting of an Airfix Mk.XII fuselage and Eduard Mk.I wings and control surfaces. My original plan was to use the Eduard Mk.I for the majority of the model, grafting the Airfix nose onto the Eduard fuselage. However, I decided that was just too risky: there was a real risk that the graft would be messy with consequent damage to surface finish, especially as I suspected the profile change between the fuel tank and cowlings would be difficult to achieve, especially as DP845 had an angled firewall that led to a break that was not the same as the Mk.I or indeed the production Mk.XII. DP845 also had a retractable tailwheel but that would be a minor modification. An additional feature to consider was the spinner and propeller blades. As built, DP845 used broad chord blades and a unique spinner that looks similar to one used on Merlin variants but had a much greater diameter. It so happened in building a Special Hobby Mk.XII a few weeks before, I had used the Airfix spinner and blades as they were closer to the real thing, so I had a set of broad chord blades but the spinner was a problem. Therefore, I decided to stretch the boundaries of my skills and design in CAD a custom spinner and have it 3D printed. This was a complete first for me and I took advice from my son who routinely produces components that way. I used a basic online CAD package called TinkerCAD (https://www.tinkercad.com/), spent about an hour practicing the online tutorials and then used the out-of-the-box tools to create a 3D model. It is not perfect: it is too rounded at the tip owing to the limitations of such a simple package, but I was still pleased with the end result: I emailed the CAD file to my son and he printed it for me. The end result was created in ABS and all I needed to do was to drill through the hoes to accept the blades and then sand it down to remove the ridges that are a byproduct of the 3D printing process. It's not perfect but it's not at all bad. I did end up doing a lot of filling and rescribing of the fuselage. The fin needed to be reduced in height to take the Eduard rudder but this meant that the panel lines were in the wrong position. Similarly, the nose area needed rescribing to carry the angled firewall and remove certain other features not found on DP845, while I used Mr. Dissolved Putty to fare-in the rocker covers: as they are added to the fuselage, they can tend to look 'stuck on'. Other modifications included finding a pair of metal ailerons to replace the fabric ones on the Eduard Mk.I and faring-in a gap where the Airfix enlarged carburettor air intake onto the space used for the Eduard Mk.1 intake. The final modification I had to consider was the flap actuators. DP845 as first built had Fowler (sliding) flaps and these used very prominent but rather difficult to see actuators beneath the wing. This was all I had to work with: Therefore, I had to produce these from plastic card and I used my Dremel to mill slots into the wing undersurface to accept the components. And here is the end result. I used MRP paints and the top surface grey is 'Mixed grey' (7 parts Sea Grey, Medium, 1 part Night) as by November 1941, Dark Earth was no longer used for fighter aircraft and Ocean Grey was not specified until April 1942. The yellow undersurfaces livened the model considerably and I finished the model with a coat of thinned Galeria gloss varnish for the application of decals and then Xtracolour Matt varnish (which isn't really) to give a semi-matt finish which I thought appropriate for a hand-finished prototype. I hope you find these of interest: a full collection of images can be found here: https://www.flickr.com/photos/26690797@N02/albums/72177720310020844 Best wishes, Neil
 -
Supermarine Spitfire Mk.XII 1:48 Airfix A05117A The Spitfire hardly needs an introduction, an iconic war machine and graceful lines satisfying the technical theory that ‘If it looks right, it flies right’! With around 6000 aircraft produced across the various sites. The Spitfire XII was essentially a Mk. VC airframe modified to take a Griffon MK.III engine, thus becoming the first Griffon Spitfire. The Griffon was actually developed pre war tat the request of the Royal Navy who were looking for a new engine for amongst other aircraft the Firefly. It was decided early on it could be developed for the Spitfire, but work was stopped to concentrate on the Merlin. The engine was only slightly larger in size than the Merlin but features a 37 Litre capacity over the Merlins 27. Then engine was made smaller in length and more reliable, and efficent by incorporating the camshaft and magneto drives into the propeller reduction gears at the front of the engine, rather than using a separate system of gears driven from the back end of the crankshaft. As the aircraft was designed to be a high performance low altitude fighter it was designed with clipped wings to improve manoeuvrability. The V wing with two cannon and four machine guns was fitted. While initial aircraft used the V airframe, letter ones would use the VIII, all models would use the VIII rudder. The Kit This is a re-boxing of Airfix's kit which was a new tool back in 2011. The kit arrives on two sprues of grey plastic and a clear sprue. The panel lines are recessed and seem finer to a degree than other kits, the plastic also seems better in that it is not as soft as previous new releases. Construction starts with the cockpit. The gunsight and compass parts mount to the instrument panel bulkhead. Next the control column is attached to it's frame and the rudder pedals go on the as well, these then fit to the instrument panel bulkhead. The seat and armour are assembled and added to the rear cockpit bulkhead, behind this is fitted a frame to which a bottle is added, A further rear frame attaches to this part. Before attaching the cockpits parts to the right fuselage side some work needs to be done to the fuselage halves. Cut outs need to be made in the rear for the retractable tail wheel of the MK.XII. If the modeller wishes to build the model with cockpit canopy and cockpit door in the open position then parts the door and other parts need to be removed from the left side. Once this is done the front cockpit parts are added to the right side, and the rear parts to the left side. A couple of smaller parts are then fitted in also. If the modeller want the prop to turn then its now assembled and fitted in before the fuselage is closed up. Next up we move to the wings. There is a single part lower wing with left and right uppers. If fitting the slipper tank then holes must be drilled in the centre part of the lower wing. The wings can then be assembled with the cannon barrels and wingtips being added. The fuselage can then be joined to the wings. The exhausts go one each side along with the distinctive blisters for the Griffon Engine. Under the nose the chin part is added. At the rear the tail surfaces and rudder are added. The moveable parts here can be set at an angle as required. To finish at the rear the tail wheel and doors are added. Returning to the main wings the ailerons are added followed by the flaps. These can be positioned up or down. The carb intake, radiator and oil cooler can then be added as well. If you drilled the holes for the slipper tank, this now goes on as well. Next up the undercarriage is added. Airfix as seems to be normal for them now offer separate parts for retracted and lowered undercarriage. If lowering this then scissor links are added to the main gear legs, the hubs are added to the wheels and they then go on followed by the outer doors. If raising the gear, half a wheel goes into the well, followed by the gear leg and the doors. A pilot is supplied if the modeller wants to use him. Otherwise to finish up the mast is added along with the canopies. Two style of main canopy are provided. The thicker one for the open style as it simulates the main canopy over the rear glazing. Decals The decal sheet is from Cartograf so should post no issues, it has two options; MB837 - No.595 Sqn RAF, Aberporth Summer 1945 MB854 - No.41 Sqn RAF, Tangmere June 1944 (invasion stripes provided as decals) Conclusion It is good to see this kit re-released. Recommended. Review sample courtesy of
-
Good morning. I am slightly embarrassed having to ask this question as I thought I would be able to answer it through my own resources. However, as is usual with such things, digging in to the detail tends to open-up rabbit holes. I wish to model a Seafire XV in the FAA temperate sea scheme and without any far east markings, i.e. allowing an easy side-by-side comparison with (say) a Spitfire XII in ocean grey and green. I have found the perfect specimen to model (see below) but I cannot answer this simple question: Would the spinner be Sky or white? Every source I have is completely contradictory and I feel it necessary to ask the combined knowledge of Britmodeller. (source: https://www.worldwarphotos.info/gallery/uk/raf/seafire/seafire-xv-5h-o-806/) All assistance gratefully received. Kind regards, Neil
-
Hello, is there a drawing of the contra-rotating propeller used in late Mark Spitfires/Seafires? Overall the spinner assembly seems longer than the four/five blade units of the previous Griffons, and I can't find any data about it. Thanks for any help Stefano
-
I'm planning to build both varieties of Mark XII at some point - the main difference being the tailwheels. And one from each squadron too. Which leads me to this query about the markings. DL-K EN625 – is there any evidence for the signwritten “Nigeria” on the port cowling? Airfix include it in their 1/48 kit decals but not Brigade in their 1/72 ones for the Mk.XII, neither do Sword for a later Mk.XIV DL-K. There is a nice photo of 91sqn on parade with shiny brand new Vbs showing nicely signwritten cowlings – maybe that was the only time it appeared? Seems feasible that a special effort was made just for that photo publicity session. Also close up it seems beneath each swirly Nigeria it dedicates each aircraft to a different province of the country . I have only found the one photo for the Mk.XII DL-K which shows the starboard side. There is a photo of the portside of a crashed 91Sqn Twelve, but it doesn’t really show signwriting (or the bloke in the foreground is in the way). None of the photos of 91 Sqn XIVs I ‘ve seen show “Nigeria”. NB - Anyone offering a profile as “evidence” will be fined 5/- or a round in the mess. Cheers Will
-
 Decided to join this GB with (hopefully) a simple build to start with, Sword's 1/72nd Seafire Mk.XV. Just one sprue of grey plastic parts with one small clear and PUR exhausts and cannons. Going to do the NAS 806 Aussie Tour version, everything out the box as they say.
 -
 Hi, All In January 2017 I decided to restart old Revell's Spitfire Mk. 22/24 kit, which I started around a year earlier, but gave up temporarily due to its poor fit and lack of detail - and the most important, lack of idea, how to paint it. This time however it was most of all to be an exercise in rescribing, scratch-building and riveting (using RB tool and must say it was fun) - did this all for the very first time in such a large scale, so didn't want to spoil any better or more expensive kit... Therefore added here some more details: upgraded wheel wells and new landing gear covers, SAC gear legs, resin wheels, formation lights, Eduard's seat belts and dashboard, CMK's resin gunsight. This is really a vintage kit and it shows. The workshop thread is here: I was hoping to get a result, which would look nice in the second row on my shelf, in Southern Rhodesian markings. Have I won? Well, she's not perfect, please judge yourself - I hope you like it Best regards Hubert (The prop'n'spinner are "bluetacked" only and moved a bit during the photo session... sorry for that).
- 20 replies
-
- 43
-

-
Hello, I have a simple question regarding exhaust pipes (both fish-tail and round), on long-nose Merlin spits (VII/VIII/IX/XVI). Were exhaust pipes from these "Long-nose Merlins" identical to Mk.XII, Mk.XIV, or maybe even both of these Griffon variants? Aleksandar
-
Bit late in starting but as i dont take long on models It will be finished well before the deadline. Griffon HT1 of the helicopter school using the Italeri kit with no aftermarket (except MAYBE the decals) I will use Revell decals for the most partput anything up on the site and had nearly finishe So on with the show. I suddenly realised that I had not put up anything on the forum and had fished the cabin. Those who have seen my builds before know that I do tend to get on with it and am not too fusy about the accuracy of the kit unless it is glaring I leave it as it came in the box. First pic is picture of the box (duh) There is enough of the basic 2 blader being build so the spure only shows the Griffon bits Decals x2 will be using bits from both Sorry no cabin being built pics but got carried away. I used a modeldecal wessex instrument panal cut down for the instruments I think it looks better and under the glass its very hard to see properly anyway. From another angle Rodders
- 18 replies
-
- 4
-
-
- helicopter
- training
- (and 3 more)
-
 Morning all, WR963 was finished at 1.30AM on Saturday 7th November, with just a few hours to spare before the Telford show. I awoke at half six in the morning to scratch build some new bomb bay jacks and create a packing case ready for the show. Horrible weather in traffic ensued, but we made it with the Shackleton safe and sound to display her on the Coastal command table, with thanks to Tom W. My apologies for the RFI being a week late, but it's taken a week to get decent enough light for the final photos. Thanks for looking, I hope some of you got the chance to see her at Telford. I may have her at Cosford and hopefully Telford alongside an RAF B-24 next year. With thanks to the guys and gals who look after the real WR963 for providing the info on where to cut the bomb doors, without out further ado; Cheers, WV908
- 18 replies
-
- 29
-
-
- avro
- shackleton
- (and 4 more)
-
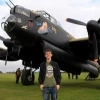
Evening all, The Avro Shackleton has long been one of my favourite airframes; WR960 being the first four engined British 'heavy' to stare down on me. At that time, I knew of Lancasters, but had never seen one. This was before I grasped hold of the internet, so had no idea where to see one either. My parents didn't know anything about the Shackleton when we saw it in Manchester all those years ago, and I was intrigued. Is this a Lancaster? I asked the man who was polishing her. From that resulting answer came my love of all things Shackleton, and a little bit of a deviation of interest from the amazing Lancaster. Afterall, '960 is credited with a depth charge hit on a submarine. I did the rounds of seeing three Shackletons and a Halifax before I would see the BBMF's pre-internet elusive Lancaster, flying over my hometown. It wouldn't be until 2013 that I revisited the Museum of Science and Industry, Manchester, now with a significant amount of Lancaster knowledge under my belt and having almost forgotten about old '960. It was only on the off chance that me and my friend were cheeky enough to ask to have a look inside that we found ourselves sat in the fully lit cockpit, grinning and both filling our camera cards with the internals of this cold war beast. By this point, I had learned of WR963, having visited the cockpit of VP293 which had been at that year's Cosford air show. In the time during which I've followed the progress on WR963, she has changed dramatically. Why the want to build this Shackleton as WR963 and not WR960? Two reasons really. Although I have the full aeroclub AEW.2 set in my stash, my late grandfather was in the Merchant Navy through the years the Shackletons were in service. On the occasions that we visited Newark Air Museum, he'd always mention about how he used to see Shackletons on a daily basis and was fond of the type (before wandering off to try and get into Vulcan B.2A XM594, which he eventually did). I wish we'd asked him, but we have no idea where he went during his time in the MN, but then again, we never knew where he was on his work trips with various railway companies abroad. It is because of this that, thanks to the bomb bay names scheme, when WR963 becomes airworthy, she will carry his name wherever she goes. The other is that Airfix is clearly planning to to release the AEW.2 in the near future and that I have already received some assistance with this model from the brilliant guys at Coventry, so it's only right that I build it as 'their' aircraft. Now then, down to business. This build will be as quick as I can make it as i'd like to get it polished off before the AEW.2 arrives as i'm itching to build WR960 (rubber mats included). This is the starting point; Airfix kit, my own AEW.2 interior photos and the sought-after Aeroclub goodies (and the kitchen worktop because this kit is huge... and my workench is full of class 47 parts - the joy of running two hobbies!). WR963, being presently an MR.2 with a number of AEW.2 parts still fitted, makes this model interesting, in that the bomb bay doors supplied in the kit are for an MR.2, and Airfix would have you build it that way. Lovely. Using photo references and info from the guys at Coventry, I've figured out where the cuts need to be made, and if I decide to do it, where that lovely Aeroclub radome sits. Playing around with the aeroclub canopy, which still makes the grade even now; Progress so far is just seats and the deck really, as i've been doing more research. The kit is a bit iffy for flash and there's some serious mould depressions on top of the starboard fuselage half, but at least nothing on mine is short shot... so far. The question for me though, is what condition? I hate painting anything white. White paint just does not like me, hence why my Concorde has been lingering for nigh on a decade *cough*. I'd like to do her current condition, but i'm erring to her post AEW.2 conditon, just to be different from the kit scheme. What do you guys and girls think? Cheers, WV908
-

Mikes Jagdpanzer IV L/70(V) Dragon 1:35 Mitt extras
Mike posted a topic in Work in Progress - Armour
I've grown out of the habit of building an armour subject alongside an aviation subject of late, and I've been dabbling with Sci-Fi too, thanks to Bandai, the internet and that pesky Madmonk, who tempted me to re-build my Millennium Falcon with added lighting Anyway - I was helping Caz's mum scan a photo of a relative sat on a tank in Germany in 1945, which turned out to be one of these beasts. It wasn't wearing anything fancy like Zimmerit, but it got me thinking about the one I have in the stash. That in turn got me thinking about the ET Model sets I had for it, and from there on it was just a matter of time before I was looking in the box and wondering what else I'd need. After some research (after a fashion), I decided I'd be better off with a metal barrel, and once I'd studied the track links, which were of the Magic Tracks individual link variety, I was tempted to pick up some metal tracks to save me from having to cut off two ejector pin marks from each link, which was already irritating me (as well as not going that well) within four links of the test. There's also the fact that if I'd used the plastic tracks I'd have to paint them to mimic dirty metal, when I could just have dirty metal if I used some of the Ultimate Track Burnishing fluid. I've pinched a figure from somewhere, so will probably have the commander poking his head out of the hatch to add a little interest, and to use up all the fancy PE and springs provided for the hatch covers. This is the final list of guff: Dragon kit 6589 ET Model Basic Set E35-122 ET Model Fenders E35-067 Griffon Barrel with bonus PE ammo box & decals Friul tracks RB Models Kwk 42 75mm turned shells Quite a list, and I should add that although the ET Model sets are for the Dragon kit, they're patterned to the earlier 6397 issue, which shares a lot of parts save for the newer tooled ZImmerit coated external panels. I've already come across one or two bits that are slightly different, but not so much that they'll render the set useless. At worst I foresee a few bits left on the fret at the end. It'll be my first time doing a fender set, so wish me luck! Work started with the wheels, which had to have their seams sanded off to make the rubber tyres smooth. No sooner had I done that, than I took to them with a triangular file, wrecking all that cleaned-up "rubber". I sanded the roughness off with a sanding sponge to give some of it a worn damaged look, and also took a few chunks out of the tubular idler wheels, just to simulate a few dings. The return rollers are supplied in a batch of six, next to each other in the sprues, with two pieces per wheel. Guess what though - there are eight stand-offs for the idlers, so I'm two short. If anyone has some spare in their parts bin, I'd be grateful of a couple, or I'm going to have to use some of a different design & pretend they were battle damaged. Have I been thick & misunderstood, or did Dragon really supply two less return rollers than I need? Can I have two more of these return rollers please Mr Dragon? I substituted the kit jack-block with a piece of obeche, cut to shape. Meh The exhaust was built up, had the moulded-in straps removed and a coating of stippled Mr Surfacer applied to give it a rougher texture. I also reamed out the exit, which was horrifically thick. The PE parts were added, and it's been put in place using friction to hold it there, so I can get at it later to paint it. The rear deck was built up with little in the way of drama, but I've left off most of the PE for now, as there's quite a lot that might be damaged during construction, especially those delicate little tie-downs for the pioneer tools. There are two PE baffles under the deck vents, but you'd never know they were there unless they catch the light. Gun straight with the roof off, exposing the breech detail & sighting gubbins (technical term). With roof, and the gun traversed to the right as the gunner would see it. Note the position of the periscope. not where the hole in the cover is! With the new barrel having arrived yesterday, I built up the gun breech, which is included in its entirety (as far as that goes) although the rest of the hull is empty apart from a few roof mounted bits and a radio pack on the rear bulkhead. Some careful painting should show off the top-most edges without too much effort, as I'm going to leave the top hatches open for the commander, and a glimpse into the dark interior. I've not attached the roof yet for that reason, that and because there is a lot of work to do on it to install all the PE for the hinges, which I'll do on another day when I'm not feeling quite so clumsy. Same goes for the fenders. The breech & barrel were mated with some CA, then the Saukopf was slid down the barrel and attached to the end of the breech with liquid glue, and is currently being held centrally in the shroud by some small slips of fine grade wet'n'dry. The mantlet is in two parts, and clips together over the end of the breech before getting glued to the glacis. There's a stereoscopic driver's vision port to the left, and a faired over coax MG mount to the right, the reason for which I did know once, but have since forgotten. The clear gunsight periscope sticks out the top of the roof in a long curved slot, which is covered up by a sliding armoured panel so it can keep the exposure of the crew to a minimum when the hatches are down and the lead is flying. Dragon didn't think to replicate this in the kit, so if you're going to traverse the barrel off-centre, you will need to fabricate a new cover with a repositioned hole to match the position of the periscope top. There's still plenty to do, and I haven't even given the colour scheme a moment's thought yet. it's not my strongest point with AFVs, and I've never yet modelled a specific vehicle. I'd have liked to replicate the one in the pic, but for the fact I don't have the correct kit, couldn't see much of the thing for the sheer weight of Tommies on the top of it, and I'd have had to wreck it by simulating a shell penetration at fender height on the bulkhead between the engine & crew compartment. It's difficult to tell conclusively, but there looks to have been a fire. Why haven't I posted a copy of the pic here? Because I've been asked not to, as it's part of a private collection that I'm going to have to see more of after this -
Hi all, Been a while since I built my last Spitfire XIV MV260 EB-P, I spent a lot of time and money on extras for that model as it was the main piece in a diorama last XIV I would build in a while due to exams and going to uni. After building it in February I imposed an abstinence on building any more Spitfires (XIV in particular), which didn't last all too long, as I built an XIX and a V. Anyway, after 9 months I finally cracked and got myself another Fujimi XIV to be done up in this guise; Recently, I have gained a soft spot for Austin's and Morris's from the late 30's/early 40's - Part of my grand vision of owning an Auster or (even better) a Tiger Moth and being able to roll to the airfield in a 30's/40's classic. Why am I telling you this, I hear you ask... Well, I was at the LMS and saw this, I couldn't resist! Please don't remind me of the price. More to follow! Ben
-
 Hey all, Well, I'm a few weeks into my first semester at Uni and yesterday I decided to take a trip home to pick up my modelling stuff. I'm fortunate as I'm living in uni accommodation, but off campus, so it isn't busy here at all and there are only 3 people (myself included) in my flat Anyway, enough of that; I decided to get hold of Special Hobby's 1/72 Spitfire 24 "The Last of The Best". I'm doing it in wrap around camo with C type roundels. My thanks to TonyOT who kindly supplied me with some reference images for this build (and possible future Spitfire XIV builds ) This airframe served with 80sqn BAFO until 80sqn became the last Spitfire squadron to leave Germany in the late 40's. The Spitfire F24 doesn't really have any significant achievements to it's name (unlike the previous wartime marks), in fact, the F24 was only ordered to prevent a sudden collapse of the British aerospace industry during the austerity post war. Jet technology was only just developing and the tried and tested Spitfire was used as a stop gap until the performance of jets was significantly better. That said, the F.24 did have the honour of being the last combat Spitfire in Germany (the XIX may have been there longer...). This kit also finishes my Griffon Spitfire collection, the previous being my Spitfire XIV 41 sqn diorama and the Spitfire XIX "Spy in The Sky". I'm actually already half way through the build as I wanted to get stuck in without worrying about being sucked into the abyss by you lot! I'll be quiet now and show how far I have got. The cockpit detail is really nice, the sidewalls look appropriately busy, I added some Tamiya Tape belts and I will soon add a bit of clear plastic for the funsight. As I said in the title, I'm back! Ben
 -
 Griffon 2000TDX Landing Craft Air Cushion (Hovercraft) as used by The Royal Marines, pics thanks to Ruari.
 -
Spitfire XIVe Fujimi+Armycast 1/72 MV260
wellsprop posted a topic in Ready for Inspection - Aircraft
Good evening, Long term project that I just brought to an end. Fujimi's XIV with Armycast resin Engine and cockpit. One hell of a frustrating build that has turned out ok (although the consensus seems to be that it's better than ok ) Spitfire XIVe EB-P/MV260 Flt Lt Peter Cowell 41 Sqn B118 Celle, Germany, April 1945 IMG_6716_zpsee26b073 by Ben Standen, on Flickr IMG_6717_zps82857e25 by Ben Standen, on Flickr IMG_6719_zps735c8b24 by Ben Standen, on Flickr IMG_6720_zps5f96f8fc by Ben Standen, on Flickr IMG_6721_zps9e8d63bf by Ben Standen, on Flickr This is the last Spitfire I'll be making for a while and CERTAINLY the last ETO XIV, having just built three in a row! Thanks for looking! Ben- 20 replies
-
- 12
-
-
Hi all, Been wanting to do this a while... Got hold of the Fujimi XIX to convert to a low back XIV with resin kits and all. Thanks to Steven for the low back spine " rel="nofollow" target="_blank">http://s1282.photobucket.com/user/Ben2BS/media/Mobile%20Uploads/20140127_214806_zpstifsgjfs.jpg.html][/url] This isn't going to be easy as its the first time I've ever built a model with so much resin. The engine will be the hard part... The upgrades I have are; Armycast Engine and cockpit set, Squadron clear canopy and the Master E Wing armament. Ben
-
Hi there, I've posted all of these previously, however, here are a few of them all together. Thanks for looking Ben
-
Nothing special, just an in between build whilst waiting for paint to dry on the Skyraider. But a finished build is a finished build.. Subtly weathered with paynes grey oil, flory models dark dirt and black wash and some shades of mig pigment for the exhaust streaking..
-
Supermarine Spitfire Mk.XII 1:48 Special Hobby The Griffon engine Spitfire can trace its lineage back as far back as 1939 when it was decided that a second-line of engines would be a good plan to develop the Spitfire's performance further in the long run after the Merlin ran out of development potential. The XII was the first Griffon engine Spit to see service in 1942, with clipped wings becoming standard for the low level duties that the single-stage Griffon was suited for. The Luftwaffe were wary of the Spitfire at lower altitudes, so the high speed XIIs rarely got the opportunity to "mix it up" with 109s and 190s where they would have been at a distinct advantage, having a much higher top speed and an improved rate of roll due to the clipped wings. It did have a lot of luck with V1 Doodlebugs, where its speed and twin 20mm cannon would catch and destroy them with impunity. The Kit This is a new tool from Special Hobby, and it arrives in their small blue and white box with a painting of an XII banking to show off its clipped wings. Inside are three full-sized sprues and one small sprue in mid-grey styrene, a clear sprue, a small fret of Photo-Etch (PE) brass, decal sheet and of course a small (read compact) instruction booklet with painting and decaling instructions in greyscale on the rear pages. The initial impression is of a good quality kit, with plenty of detail present on the sprues, no flash and some interesting overlapping panels on the fuselage parts. A full cockpit is included, which extends to ribbing that is moulded into the top of the fuselage interior, and an insert that provides the lower detail. The frame behind the pilot's seat is included, and has recessed lightening holes that can be drilled through if you wish. The seat with its back armour is installed on this frame on a bracket, and a full set of seatbelts are supplied in PE. The head armour and headrest pad are installed to the same frame, with only sidewall detail present aft of this frame, which includes the two large tanks on the port side. The instrument panel is moulded into the frame is sits on, but this raised detail can be removed and replaced by a sandwich of printed acetate film and PE parts to give a more realistic appearance. The firewall visible through the footwell is supplied to finish off the cockpit, and a set of detailed rudders sit within the well, which have PE straps, and sit on the busy floor that is so typical of the Spit. The control stick with its linkage is added to the floor, and a separate circular grip is installed at the top at any angle that suits you. The clear gunsight is glued to its mount on the top of the instrument panel, and the rearmost frame behind the seat is depicted as a small section that fixes to the rear of the cockpit opening, and is joined to the back of the seat by the tensioning reel of the harness. Once all of this is complete, the fuselage can be closed up with the addition of the filler-cap forward of the windscreen. The wings are traditional in construction, having a full-width lower with boxed in landing gear bays added before installing the two upper halves, which have drop-in sections of skin that contain the cannon bulges appropriate to this mark. Other larger bulges are also found on the sprue, which are for other projects & surplus in this boxing. The ailerons are separate, so can be posed, and cleverly, the wingtips are supplied as completely clear, so that there is no awkward gap between the tip and the tip-lights A small insert is added at the chin area and the fuselage, with moulded in fillets, can be inserted into the gap, remembering to paint the lower central section interior green beforehand, in case any of it can still be seen in the cockpit opening. The tail has a separate rudder with the small trim-tab also separate, to give options for offsetting it, while the elevators are moulded into the horizontal tails. A small rudder actuator is added under the port elevator, which has some confusing (to me at least) instructions regarding removal of the moulded in fairings beforehand. The large Griffon engine required some structural modifications to the Spitfire fuselage, and even then, a pair of power-bulges above the intakes were needed to streamline the large engine block. A further teardrop fairing sits at the top of the cowling just aft of the four-bladed prop, and all of these parts are supplied as add-ons to the basic nose shape. The prop itself is made up from a central rear part with keyed blades and spinner added to the base. The short peg on the rear then fits into a receiving hole in the nose, although you'll need to trim a pair of ejector pin marks off the back-plate before it will sit snug against the fuselage. Under the wings are the usual intakes for the oil cooler and radiator, plus the chin intake that has a PE debris guard. All of these are fitted to pre-defined points, and the radiator has a pair of mesh surface parts, the detail of which will disappear under all but the most careful painting. In the centre, the modeller has a choice of three conformal extra fuel tanks of varying capacities to improve the painfully short range of the Mark 12, and a scrap diagram shows their correct location points of these against the underside. Moving aft, you have a choice of a fuselage insert and fixed tail wheel for early airframes, or a pair of doors and retractable tail-wheel for later models. The main gear is simple, and the gear legs have the retraction struts moulded in, with the four spoked Dunlop wheels and tyres made up from a complete back, and separate parts for the hub and tyre at the front. Sometimes a blank hub cover was added, and this is supplied for use as you see fit, or your references dictate. The gear leg covers are attached along their deeply dished recesses that run down the inside leg of the cover, but the cover itself is flat. An optional quartet of hooks sit to the rear of the fuel tanks, although I'm not personally clear on their purpose. The IFF aerial is of the later type without the T-shaped top that was seen on earlier Spitfires. The cockpit is finished off by adding the three-part glazing, which is clear and commendably thin, and choosing either the open or closed access door on the port side. A PE grab-handle is fitted to the inside of the sliding hood, and a rear-view mirror is set on the peak of the windscreen, with the familiar aerial base just aft of the canopy. The inboard cannon stations receive the long fairings that helped prevent icing, and the outer ones are blanked off with a small hemispherical fairing as is appropriate. The engine exhausts are added from the outside to simplify painting, and although they are well moulded, the ports are solid, so either some aftermarket hollow exhausts or a little drill-work is on the cards if this bothers you. Markings A generous four aircraft can be modelled using the kit decals, and a number of stencils are included on the second sheet, which is handled on a separate page of the painting guide to avoid confusing lines going everywhere. From the box you can build one of the following aircraft: MB854, No.41 Squadron, Aug 1944-Jan 1945 - Dark Green/Ocean Grey over Medium Sea Grey with D-Day stripes on the undersides. MB882No.41 Squadron, F/o Donald H Smith (RAAF), Friston, Apr 1944 - Dark Green/Ocean Grey over Medium Sea Grey, sky spinner & tail band. MB840, No.41 Squadron, Friston, Apr 1944 - Dark Green/Ocean Grey over Medium Sea Grey, sky spinner & tail band. MB832 No.91 Squadron, Hawkinge, May 1943 - Dark Green/Ocean Grey over Medium Sea Grey, sky spinner & tail band. Decals are printed by AVIPrint in the Czech Republic, and are in good register apart from the black, which has drifted off a little. This only shows on the tiny roundel red circles that have black text on them, and the single white "100 Octane" stencil decal. All the rest of the black is in isolation from the other colours, so it doesn't ruin the sheet. Carrier film is minimal and colour density seems good on the sheet. Conclusion This is a nice kit of a less well known mark, if any mark of the Spit can be considered thus? There is plenty of detail in the box, and some interesting spare fuel tanks and wheel hubs for the inveterate Spitfire builder. Special Hobby have tried to depict some of the lapped panels on the fuselage, which has turned out quite well, and adds a little realism to the finished product. Panel lines are refined and not over-large, and should look good under a coat of primer, paint and varnish. Highly recommended. Review sample courtesy of
-
 Hi all - just wondered if anyones had a chance to see if the Hasegawa Mk IX wings or the ICM/Revell Mk XVI wings fit onto the new kit, or perhaps even the Airfix Seafire XVII ones. Just contemplating a build..... Cheers Jonners
 -
 Kit was delayed by snowfall. Now it's arrived: This will be a straight-from-the-box build. None of your fancy Dan extras here, thank you please. Only two squadrons ever operated the Mk.XII - 41 and 91 - and both are included in the markings provided. I shall be attempting to make a passable job of the 41 Squadron markings, partly because it was commanded by my big hero Tom Neil at the time, and also because I have the very smart half-pint mug featuring the box art with this model. Anyway, as you were... history to follow. And maybe some building.